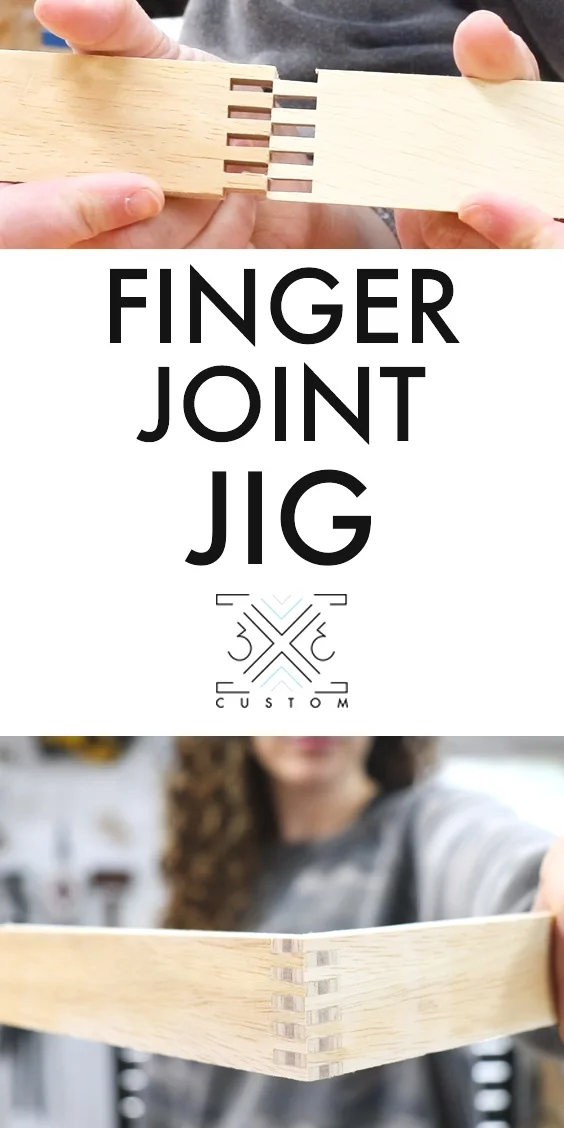
How to Make Finger Joints
I’m going to be making some small drawers out of 1/2” plywood for my next project and I figured finger joints were a really strong way to join them.
This technique might seem intimidating at first, but the jig to create this joint is so simple, anyone can do it!
Check out the full video below!
Links below are affiliate links, clicking on them helps me keep this site going at no extra cost to you :)
Before we begin, the type of blade you use for this type of joinery matters. I typically use a combo blade on my saw, but the teeth on that blade have whats called “Alternate Top Bevel” teeth, or ATB teeth. That would not be a good option for this joint.
What you want to use is a ripping blade or a blade that has Flat Top teeth, also knows as FT teeth.
If you use a blade where the top of the teeth have an alternating bevel (ATB), the joint will not be flat on the top. Your finger joints will look more like dog-ear joints…
Here’s a link to the blade I use —> Amana Ripping Blade
Another FT blade option —> Freud Ripping Blade

Now that you chose the right blade for this type of joint, you need to measure how wide the blade actually is. I am going to be making a “pin” for the jig that is this width.
I did this by making a small cut into a scrap of plywood, then turned off the saw mid cut as not to cut all the way through the piece.
(Note: I am only going to be using a single blade to make these joints, but the same method would apply to a dado stack.)

Then I measured how wide that cut (kerf) made by the blade was with my calipers.
This is way easier and more accurate than trying to actually measure the teeth of your blade.

Now we’re going to make the “pin’ for the jig.
I took the measurement from the calipers to my thin ripping jig and set the correct width between it and the blade.
If you don’t have a thin ripping jig you can just keep making test cuts until you get the perfect width.

Since I don’t have a zero clearance insert, I placed a piece of tape next to the blade to close up the gap. This way the thin strip I will cut wont fall in the gap in the throat plate. Safety first!

Then I cut the thin strip and it was a perfect width after the first cut. Love that thin ripping jig…

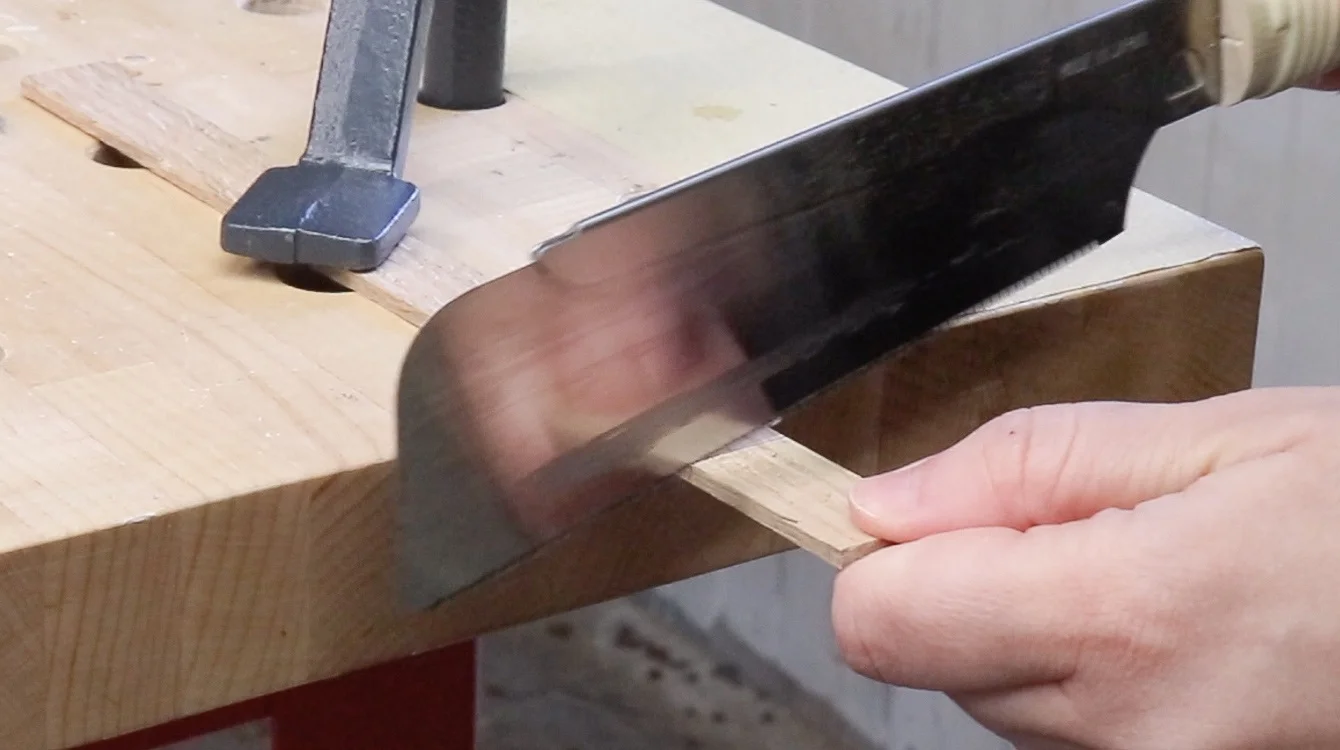
I cut it to size using a handsaw, and the “pin” is ready.
Then I ripped a piece of plywood that’s going to be the main part of the jig. I ripped it so that it was as tall as the fence on my my cross-cut sled.
(Note: If you don’t have a cross-cut sled you can do the same jig with your miter gauge.)

I then placed my cross-cut sled on the table saw and placed the material I want to make the finger joints on next to the blade to get the perfect height for the joint.
You want the blade to be slightly higher than the material. It is always better to cut the joints a little longer and sand away the excess than not cutting them long enough.

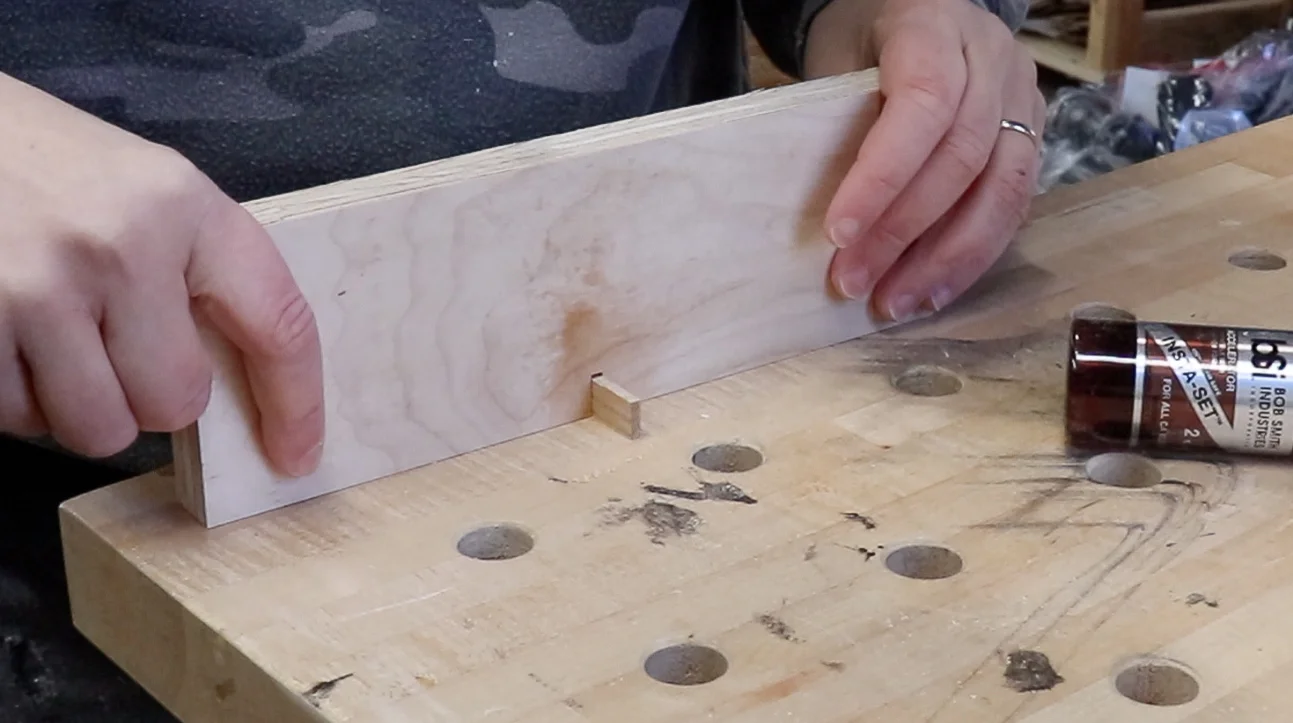
I placed the plywood up against the cross cut sled and made the first cut.
This cut will hold the “pin” for the jig that was cut earlier.

I used CA glue with accelerator spray to attach the pin to the jig.
Now, this is the tricky part…. lining up the jig with the blade so you get the perfect sized joint.
The pin is the same width as the blade, and you want the space between the pin and the blade to be roughly the same as well for a good fitting joint
To get this perfect distance I used the scrap left over from when I made the pin and placed it between the blade and the pin. Then clamped it to my fence.
Once clamped you can begin your test cuts! It’s really important to test on scrap to dial in the fit.
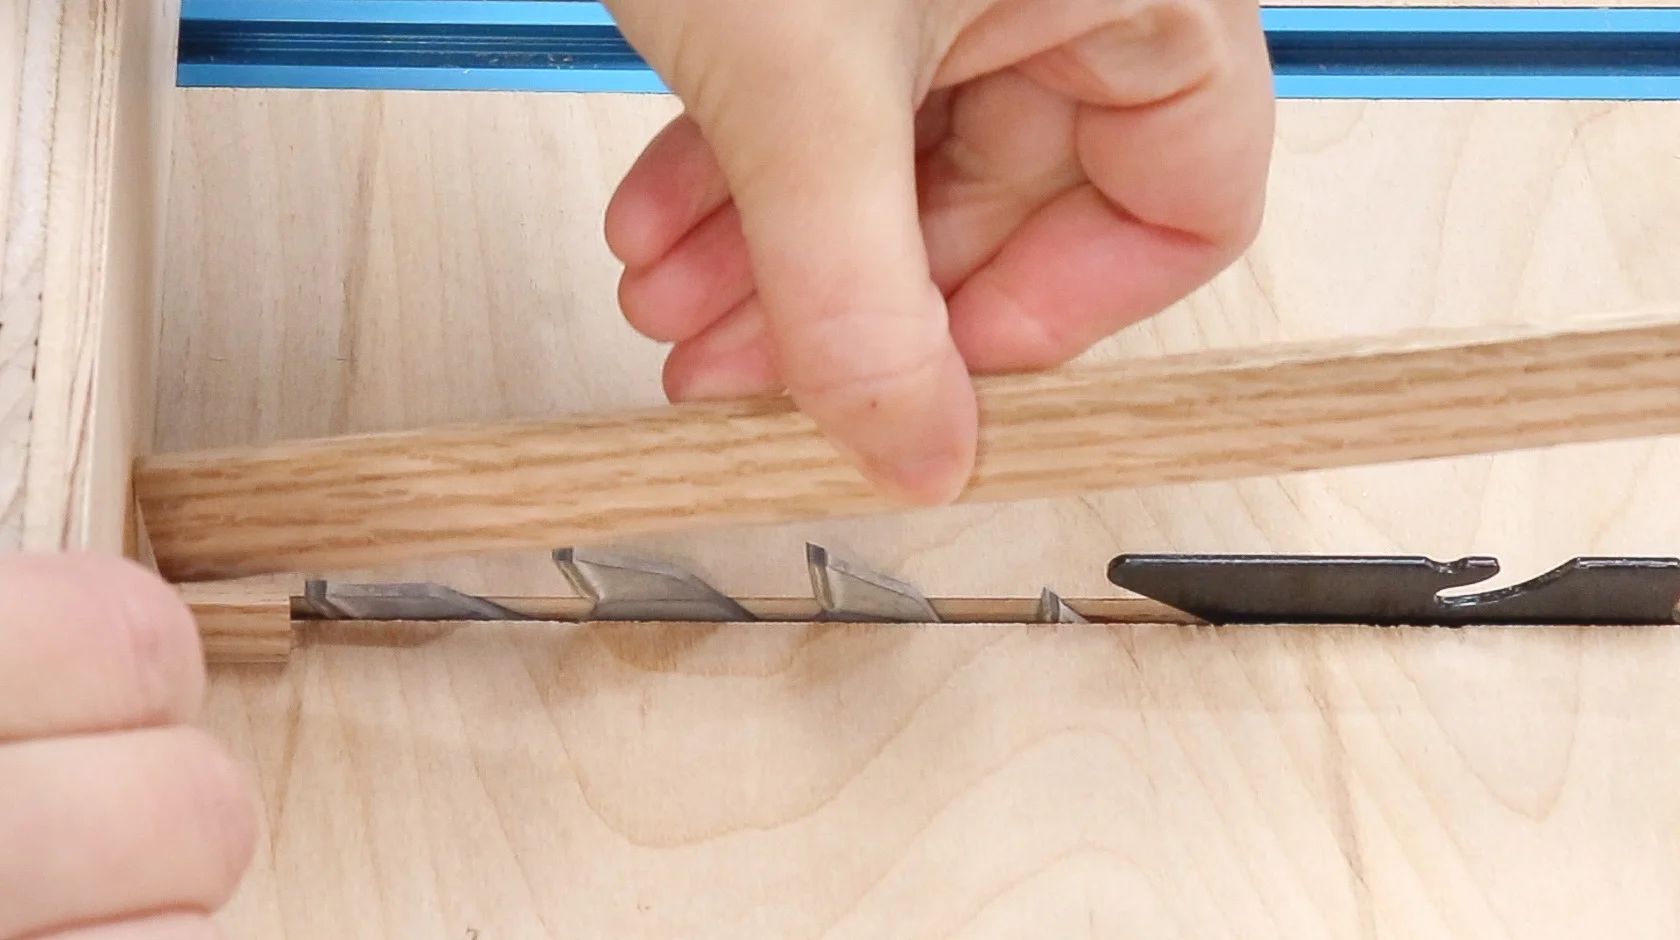
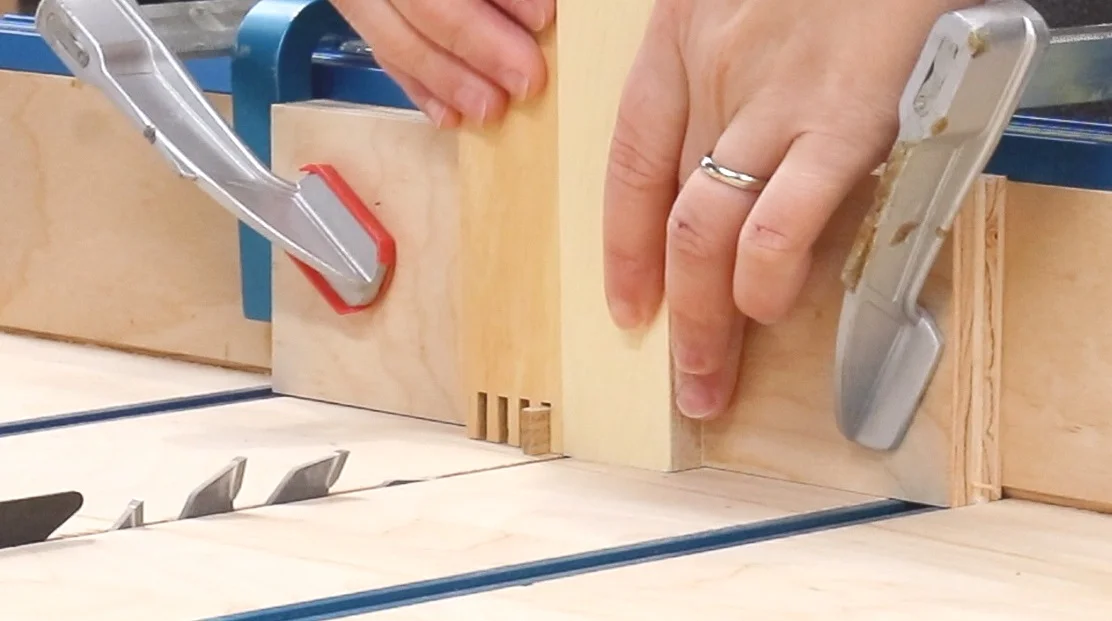
To use the jig, place one edge against the pin to make the first cut.

After each cut you move your piece over and place it on the pin to make the next cut.

In order for the joints to fit together, they need to be opposites of each other, Like a puzzle. To do this you need to take the first piece you cut and flip it around so the side that was facing out (towards the blade) when you cut it, is now facing in (towards the fence).
Now that the piece is flipped you need to place it on the pin of the jig by the first cut you made. Then butt the second piece next to the first piece to make the cut.
(To understand this a little better, the pattern of the first piece is pin-gap-pin-gap etc. the matching piece needs to be gap-pin-gap-pin in order to fit together. The first piece is used as a spacer so the first cut in the mating piece will be a gap instead of a pin.)
After you make the first cut by using the first piece as a spacer, it is no longer needed and you can continue cutting the rest of the joints by placing each cut you make on the pin until there is nothing left to cut.
Also note, when making these cuts you should mark the top side of all your pieces, that way you can always reference that mark to make sure the top side is always against the pin for the first cut.

This is why we do test cuts….
I placed the pin of the jig too far away from the blade so the pins are too big to fit in the gaps.
If the joint is too tight (like this one) you should move the pin on the jig closer to the blade.
If the joint is too loose, move the pin on the jig further away from the blade.
But don’t move it too much, move it just a hair every time you do a test cut to get the perfect fit.
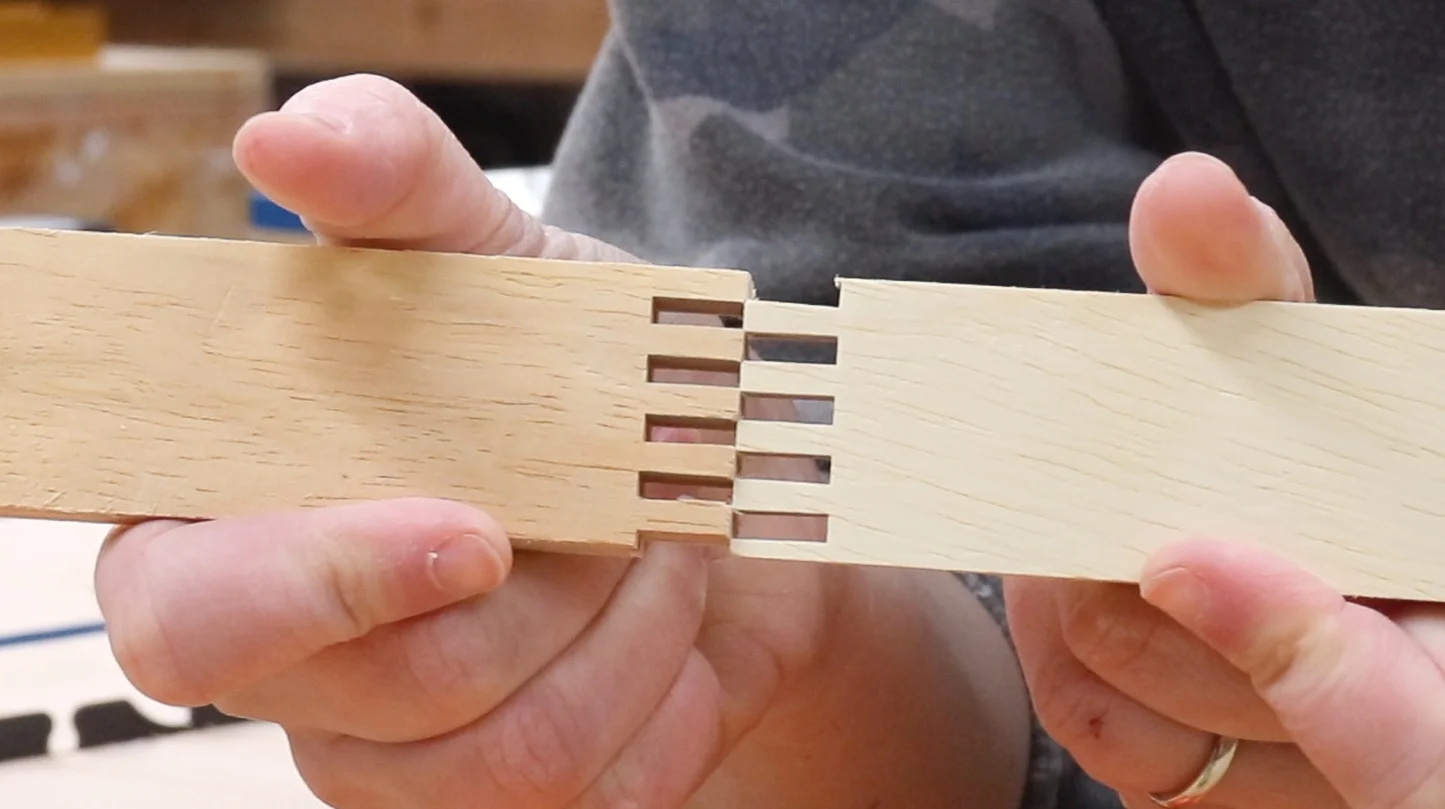
On my second try, the fit was perfect.
You want the joint to easily come together, you shouldn’t have to use much force to get the pieces to fit nicely.
The joint should also not be too loose, when you let go of one of the pieces, it shouldn’t fall apart.
After glueing, you can easily sand down the excess material thats hanging over the pieces to get a really nice looking joint.
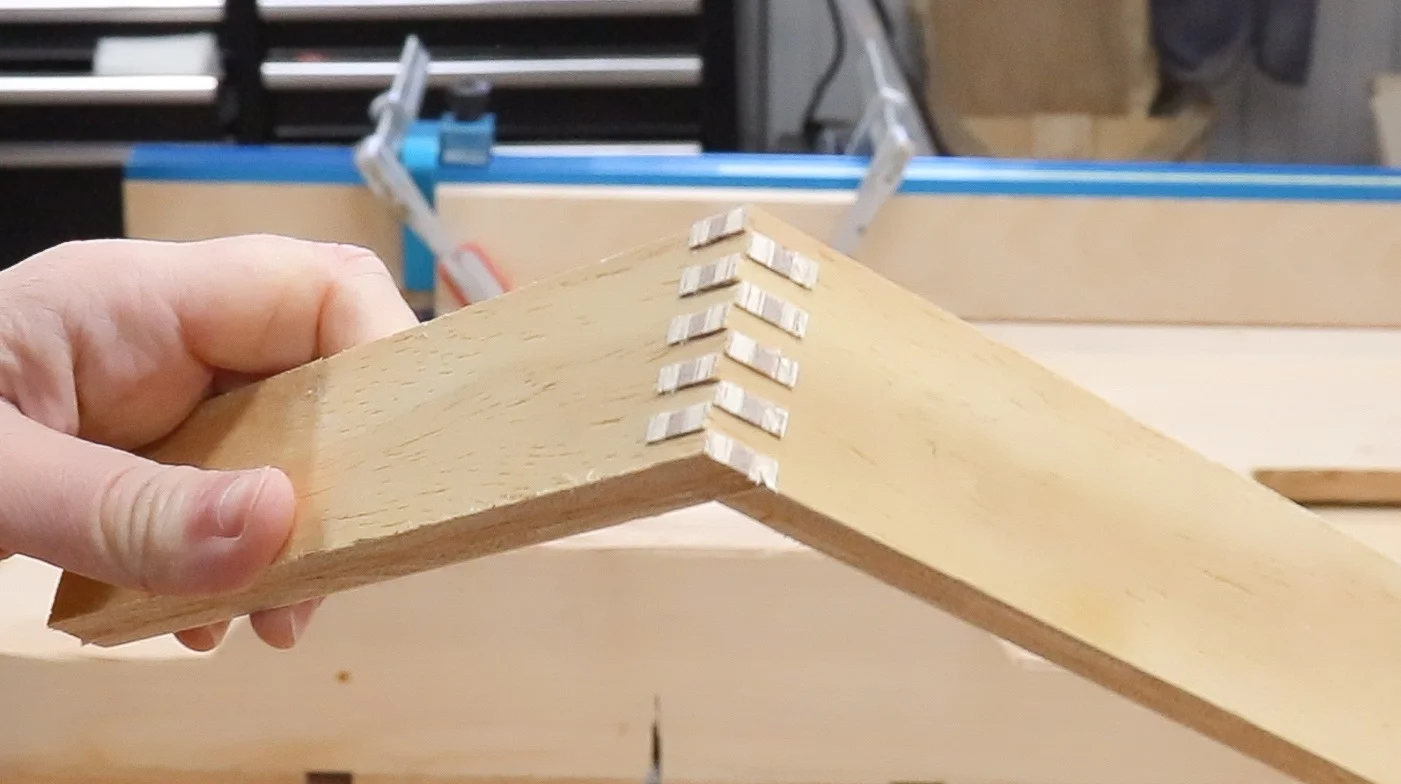
That was super easy, now I have to go finish up this project!