
Dining Table with Built In Storage
* This post is sponsored by The Home Depot
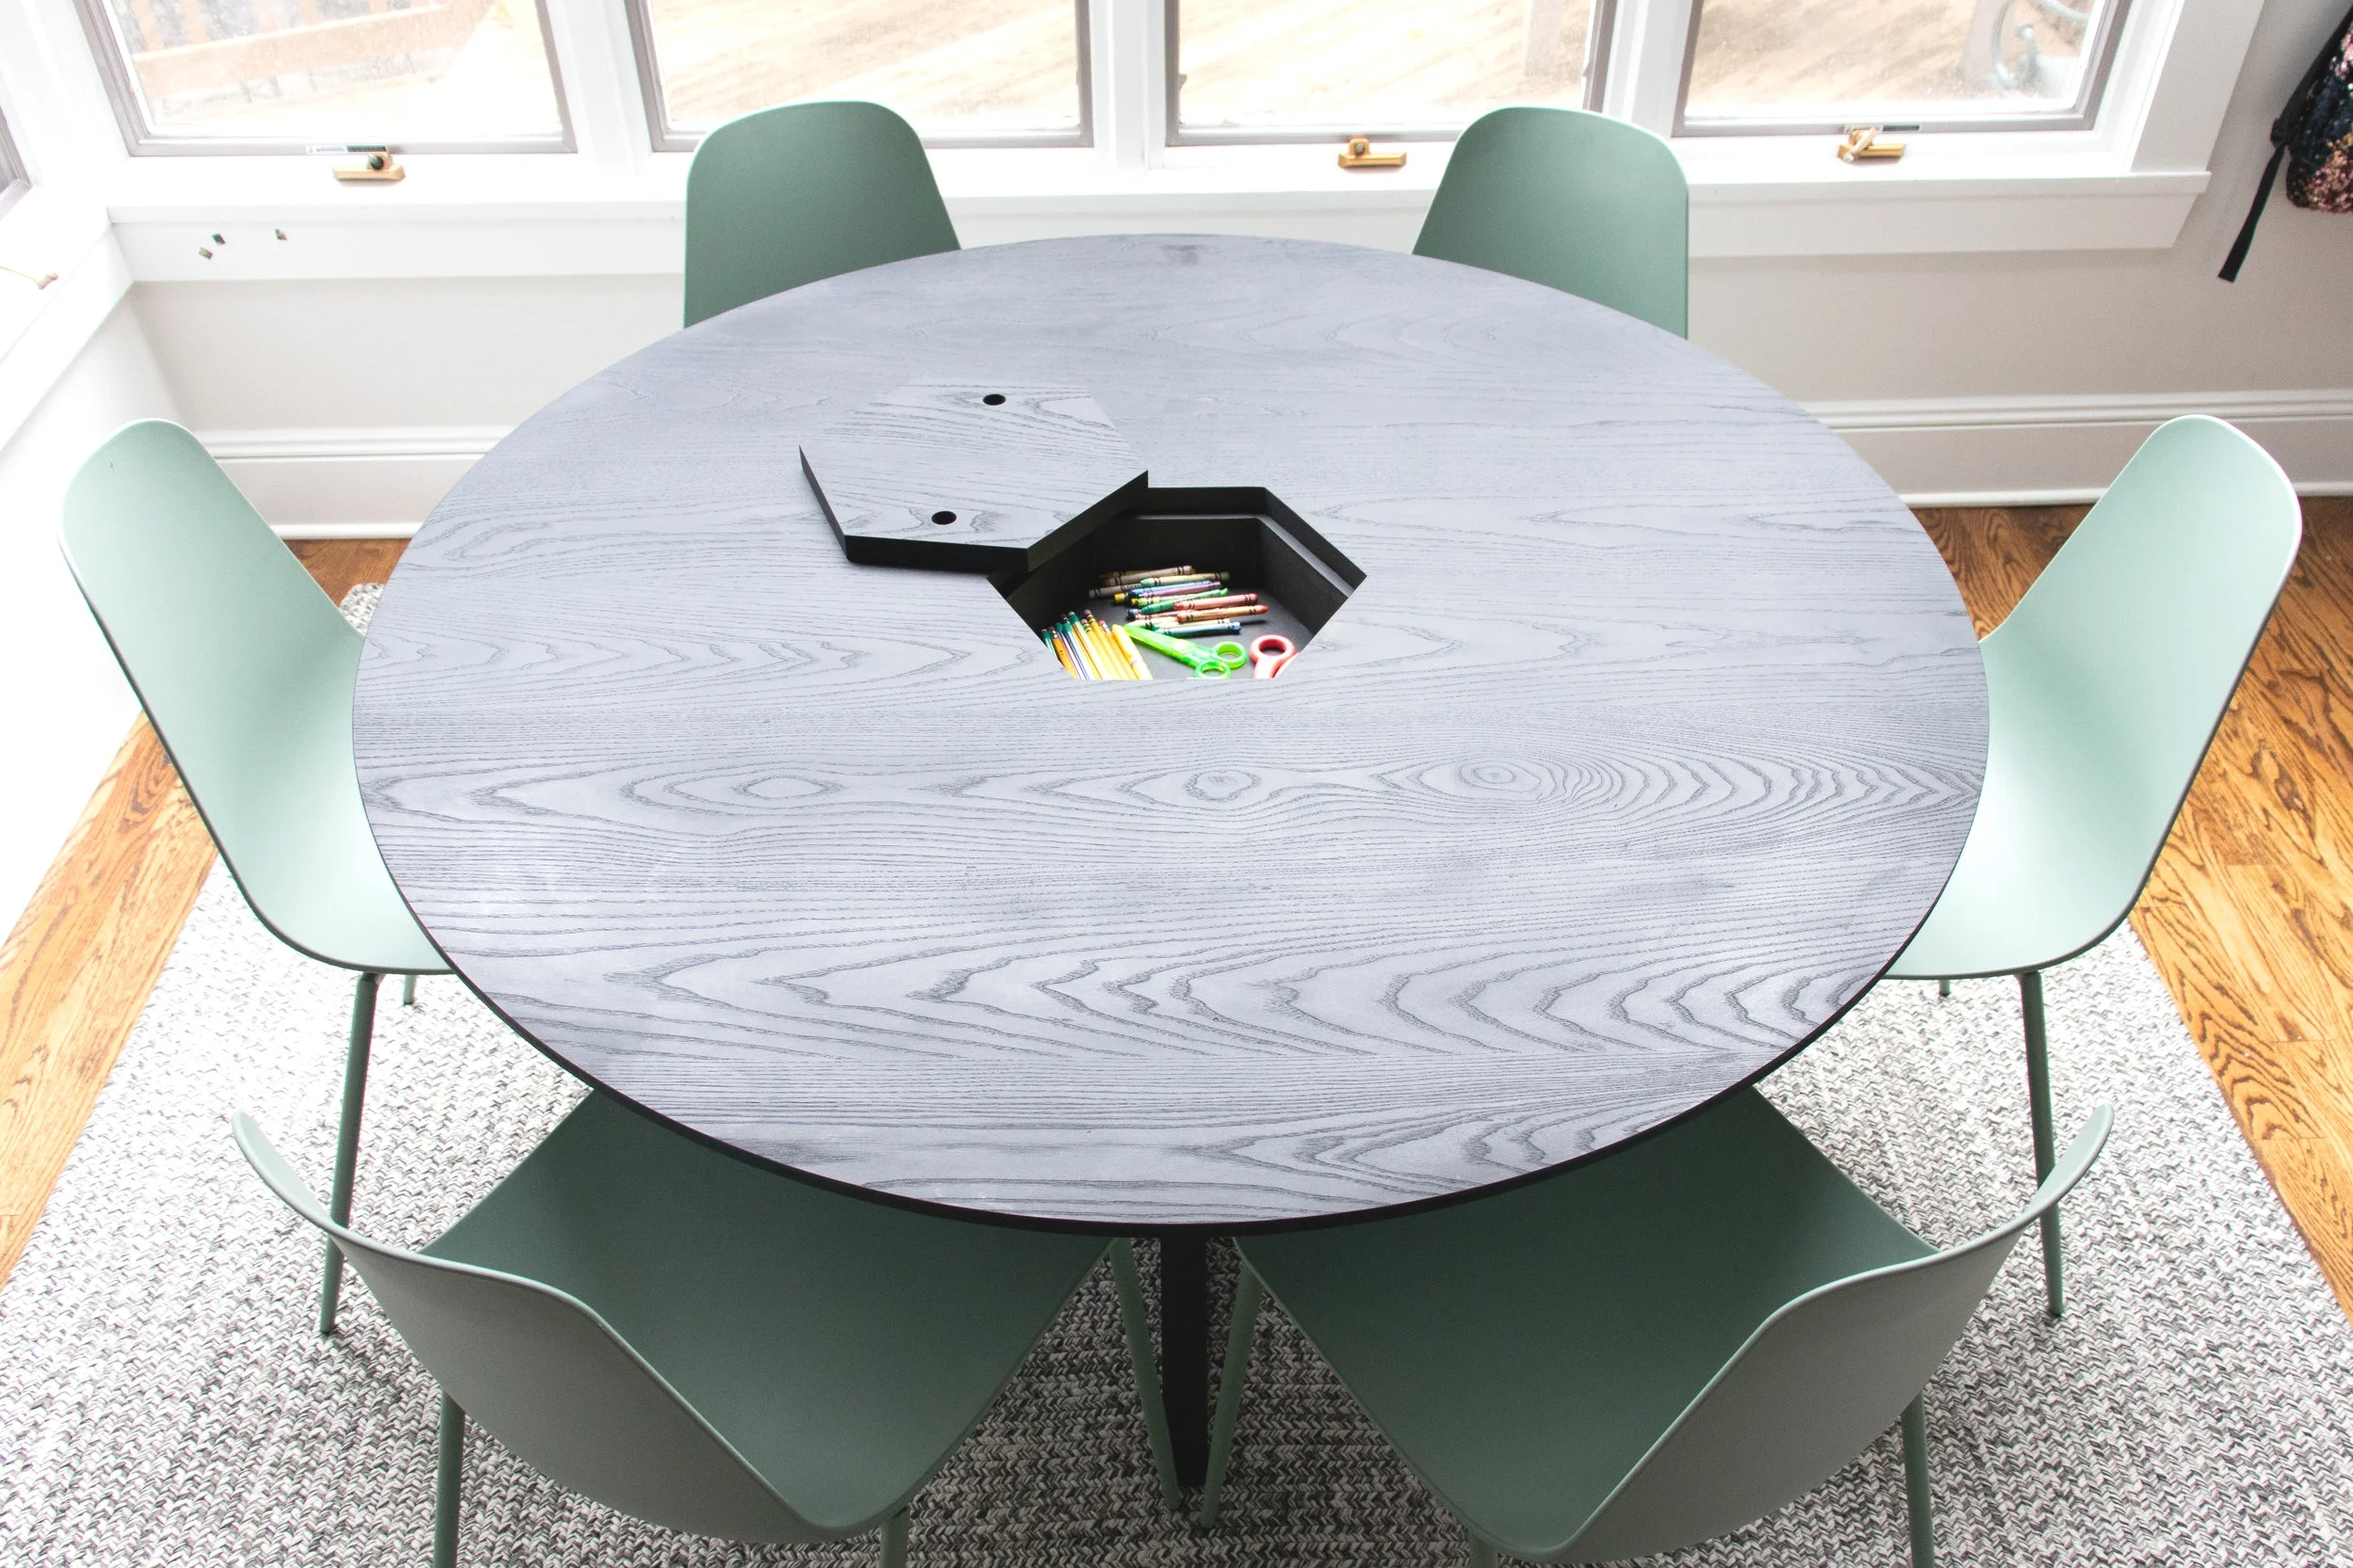
I had a problem, my kids homework supplies were stored in a bucket on our kitchen table and it always looked messy, so I decided to come up with a solution! A kitchen table that will have a hidden compartment where they can store all their supplies.
While i was going to experiment with the storage, I also decided to experiment with some other design features and techniques.
Watch the full video below for all the detai!s!
Links below are affiliate links, clicking on them helps me keep this site going at no extra cost to you ;)
I started this build off with the base.
I milled up a bunch of 8/4 ash to be about 1-3/4” square.

Then I used my miter sled to cut all the pieces to size with a 30 degree angle on all the ends.

I was building this off of a template I made and printed out. (I didn’t draw up plans for this, but if you’re interested, let me know!) This really came in handy to line up the cuts and make sure I was cutting them to the right size.

Then I got to work on the joinery. I decided to go with a bridle joint to join all the angles since it is one of the strongest joints out there. I wrote a whole separate post on how I cut the angled bridle joints here - How to Cut Angled Bridle Joints.
Basically I used a tenoning jig set at an angle to hog out the mortise on one piece.
For the mating Tenon piece, I used the tenoning jig to establish the cut lines.
(I recently made a DIY version of an adjustable tenoning jig that would function the same as this WoodRiver one, you can check out that post here - Adjustable Tenoning Jig)

Then finished up the joint on the miter sled with the fence set to 30 degrees.
This joint it super east to do and it is super strong.

After cutting all the joinery I only glued up the middle section pieces first. There’s some more work that needs to be done to the top and bottom pieces….

The 6 bottom pieces are all going to meet at a 30 degree angle to each other. In order for this to happen, the ends need to two cuts at 60 degrees that will meet at the tip of the board.

I cut those 60 degree angles on my miter sled making a point at the end. Now all the pieces are flush and meet at 30 degrees to each other.
The only problem, this would not be strong at all if I just glued it up like this. All the edges that are toughing each other are end grain, so I decided to join them together with a spline.

To make the slots for the spline, I used the tenoning jig again with the back fence set to 90 degrees and cleared out a space for the 1/2” plywood spline I was going to use.

To make the spline I cut a hexagon out of 1/2” plywood on my miter sled.
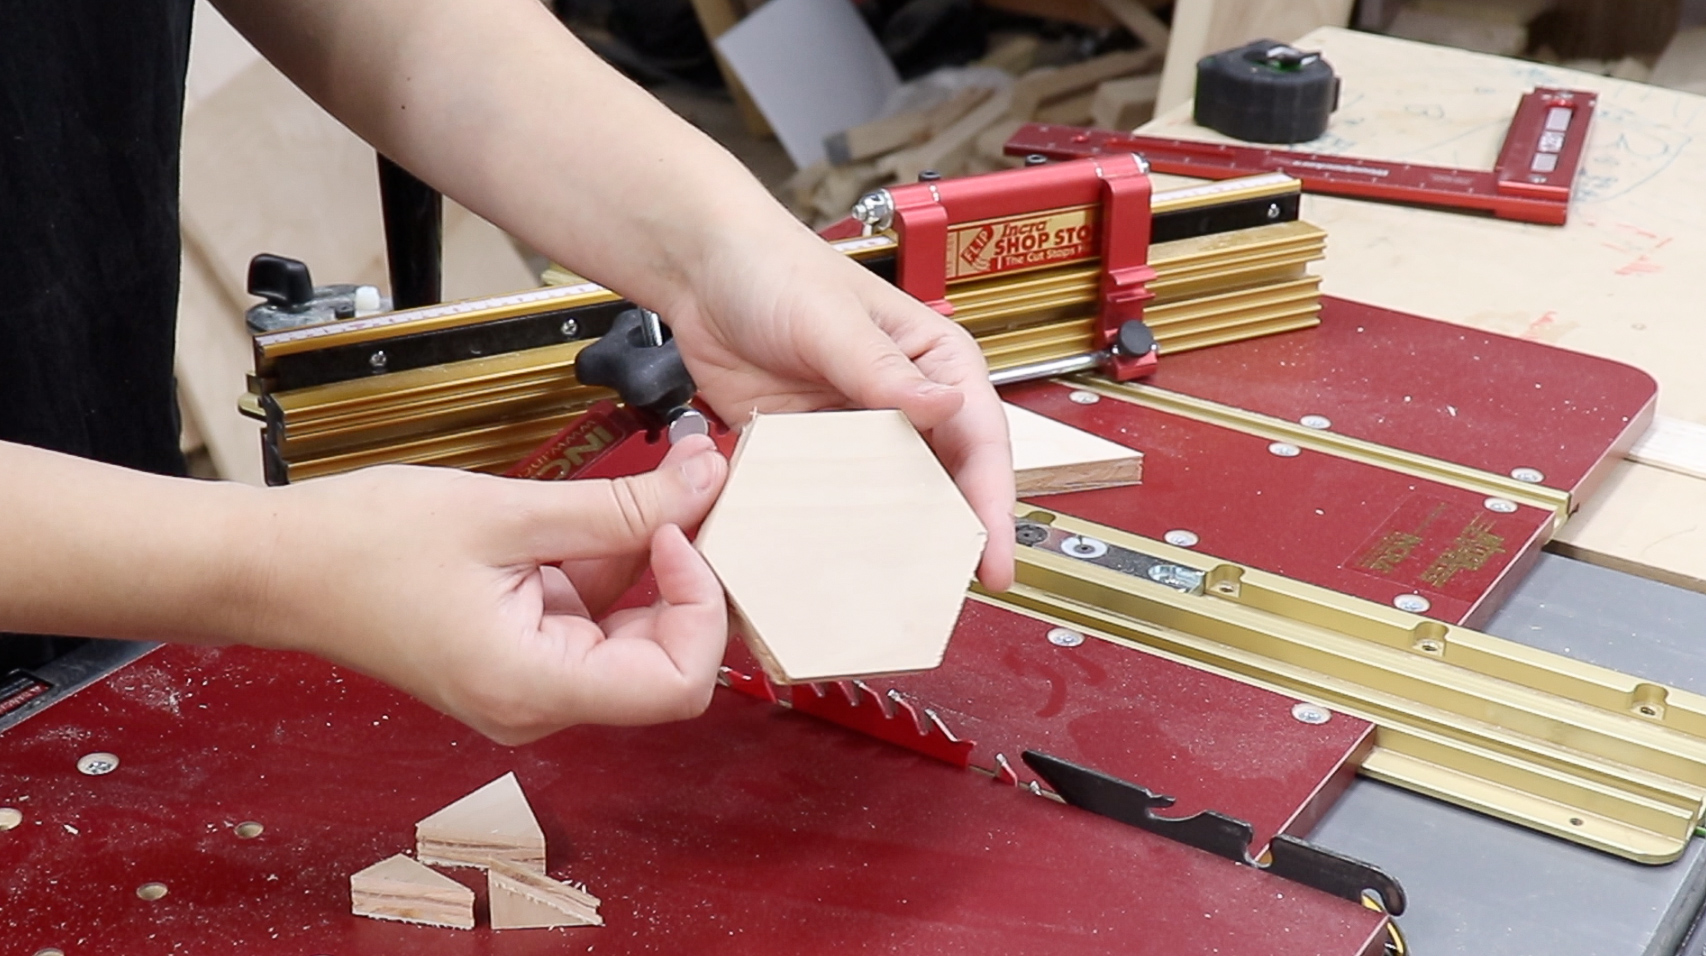
Then I glued and clamped it all up!
The spline reinforcement really makes this crazy situation stable, ha!

After the whole bottom was all glued up I could then move on to attaching the middle sections I glued up earlier.
The base was really starting to take shape now! Moving on to the storage!

I cut six pieces of 3/4” plywood with 30 degrees on their ends at the miter saw to create a hexagon box.
Then I placed it down on a 1/4” piece of plywood I will use for the bottom, and traced out the inside of the box.

Then I made some marks about 3/8” outside of that initial hexagon line to create a slightly larger hexagon.
It is slightly larger because the bottom of the box will sit in a groove in the plywood.

Then I cut out the plywood hexagon at the bandsaw.

Before assembling the box I made a groove in the bottom of all the pieces that will hold that hexagon plywood I just cut out.

Also before assembling the box I prepared the sides so that they can easily attach to the rest of the base.
I decided to attach the box to the base using a sliding dovetail. This will be really strong and ensure the box will never come loose from the base.
To cut the sliding dovetail in the center of the sides of the plywood pieces, I needed to make this quick jig so I can safely pass the pieces on the router table with the short edge against the fence.
I clamped the pieces down to the sled and first used a straight bit just to hog out the majority of the material before moving on the the dovetail bit.

Then I swapped out the straight bit for a dovetail bit to finish off the cut.
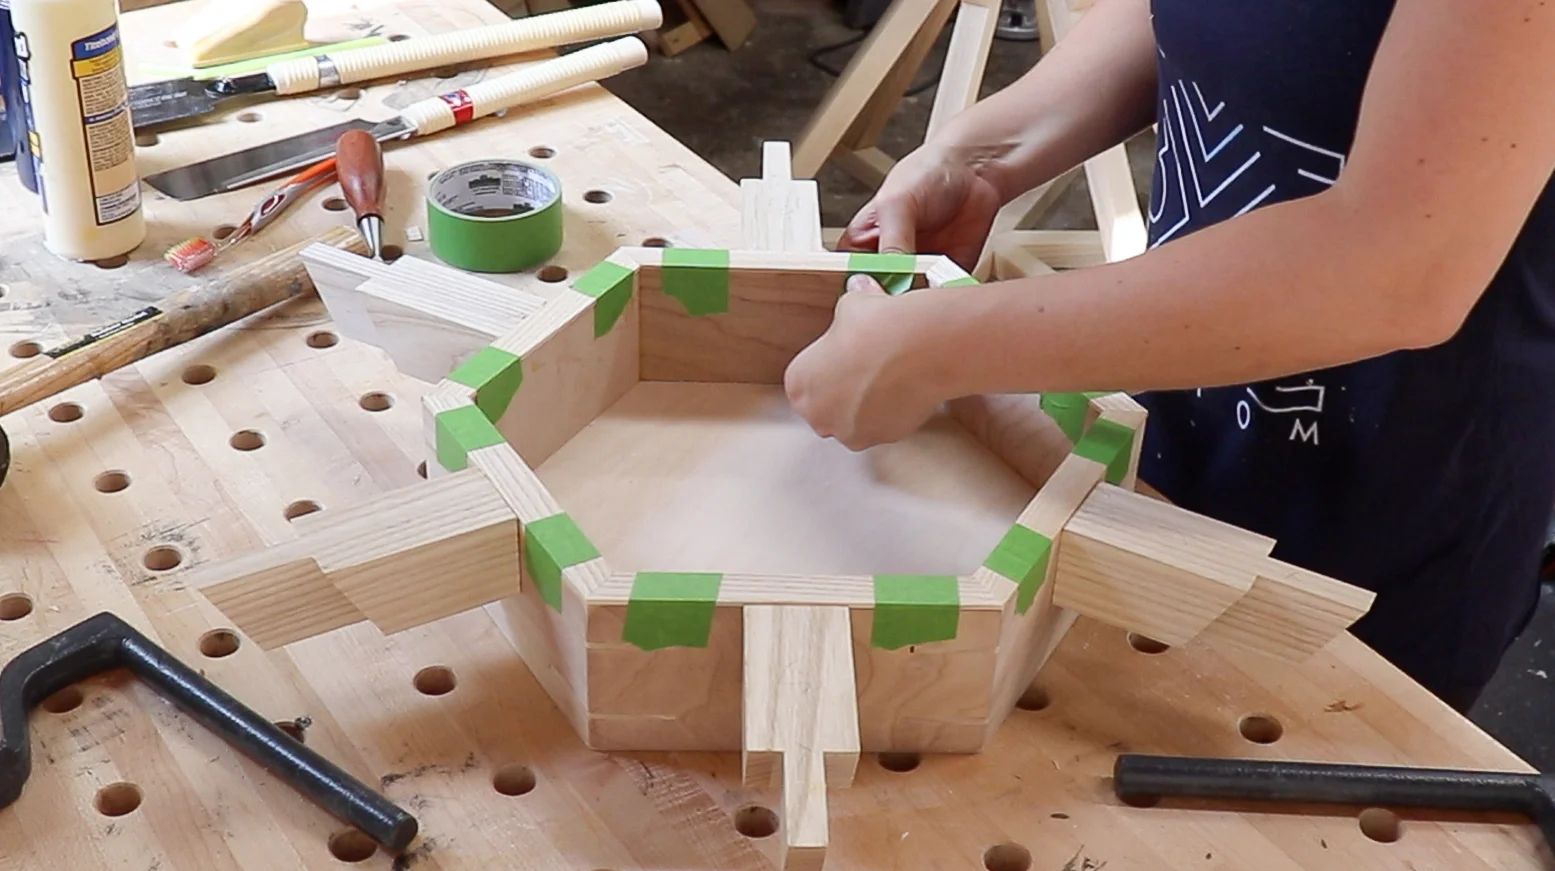
We’ll get to the mating pieces in a bit… I wanted to use referential measurements to make sure I was cutting the mating pieces to the correct length, so I decided to glue up the box first.

I inserted and glued the hexagon plywood bottom into the grooves I made earlier

Then clamped it up using a band clamp.

I didn’t think glue was strong enough for those miter joints, so I used my adjustable tenoning jig as a spline jig to create some slots for splines that will reinforce the joint.

I cut the splines using my thin ripping jig at the table saw, glued them in place, then cut them flush.

Now that the box is assembled, I could work on the mating pieces for the sliding dovetail.
I figured out how long to cut them by lining up the box in the center of the base I already assembled.
Then brought the pieces over to the router table and used the same dovetail router bit as before to make the dovetail on the ends of the boards.
I did some test cuts to make sure the bit was at the right height, then I slowly hogged away at the material. I took really shallow passes and kept testing to see when I got the perfect fit.

The slot I made for the sliding dovetail was a stop cut because the box is longer then the 1-3/4” base pieces.
Because of this, the bottom of the slot was rounded. So I used a chisel and a rasp on the bottom of the dovetail to match the same radius as the end of the slot.

Then I glued the top pieces into the slots on the sides of the box!

I didn’t want the exposed plywood edges to be seen when opening the storage compartment so I decided to cover it with some edge banding.
In order to make room for the edge banding I cut away at the small little ends of the dovetails that were sticking up.

Then I cut some thin strips of ash at the table saw to use as the edge banding. I cut the ends at 30 degrees then glued and taped them to the top of the box.
Finally the storage compartment could be installed to finish up the base!

I glued all the bridle joints and clamped them all down, the base is now done!
On to the top…

The top is a 54” circle, so I cut all my pieces accordingly at the miter saw, then made a trammel of sorts to just mark out the circle to make sure it will work out.
I also marked out the circle now because I am going to use biscuits to help with the alignment during glue up, and I wanted to make sure I didn’t place a biscuit where I would be cutting.

I don’t have a biscuit joiner, so I used a slot cutting bit at the router table to make the slots for the biscuits.

Biscuits don’t really add any strength, they are just really helpful in making sure the boards stay aligned during the glue up.
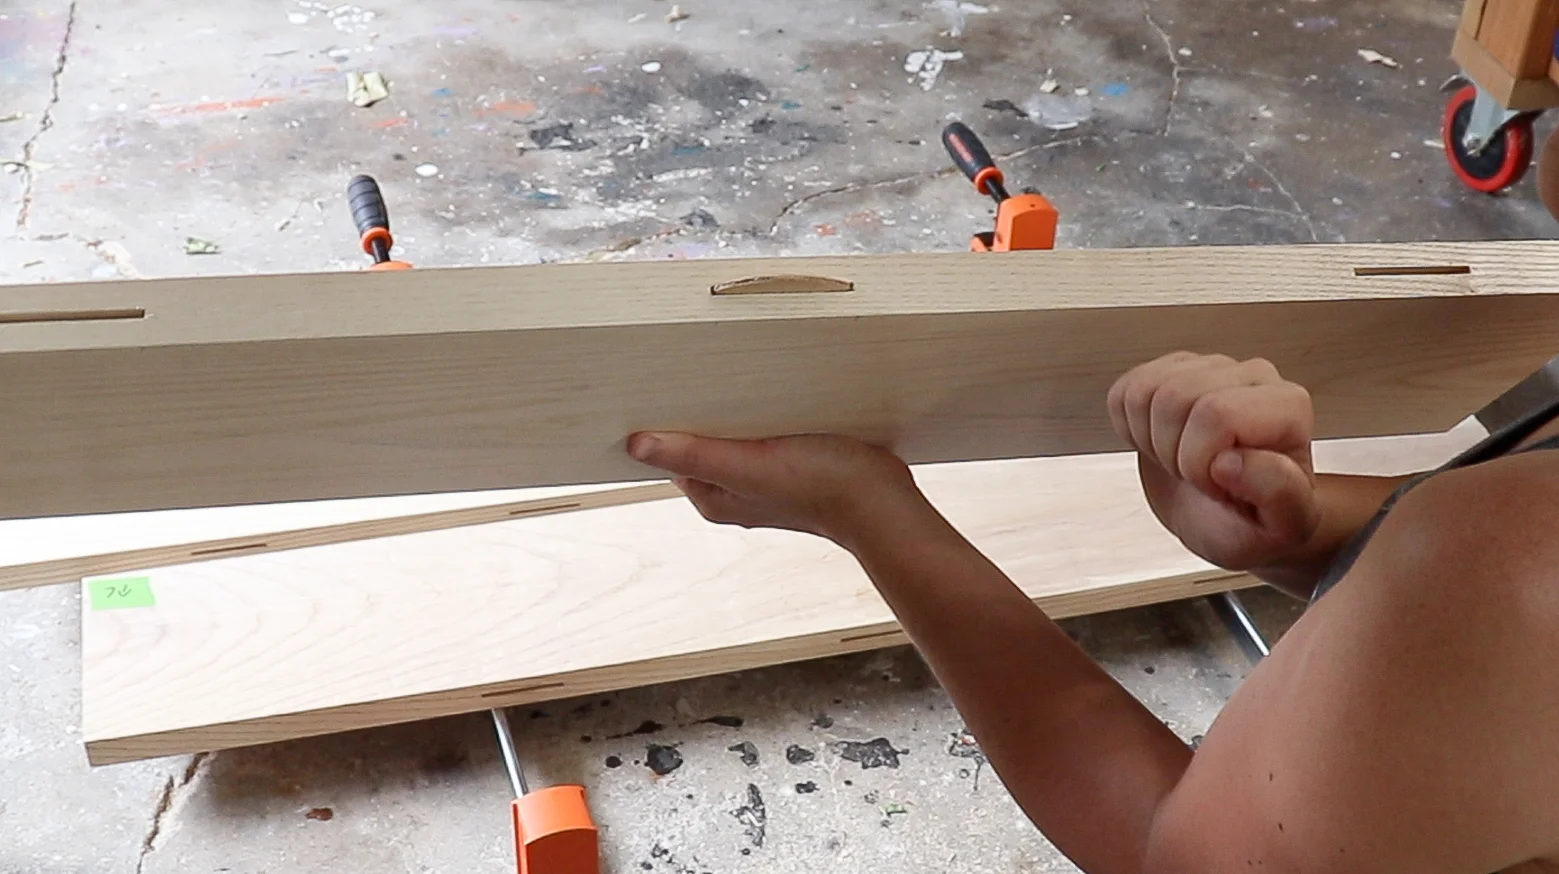
I clamped the boards up into 3 sections so that it would be easier to manage.

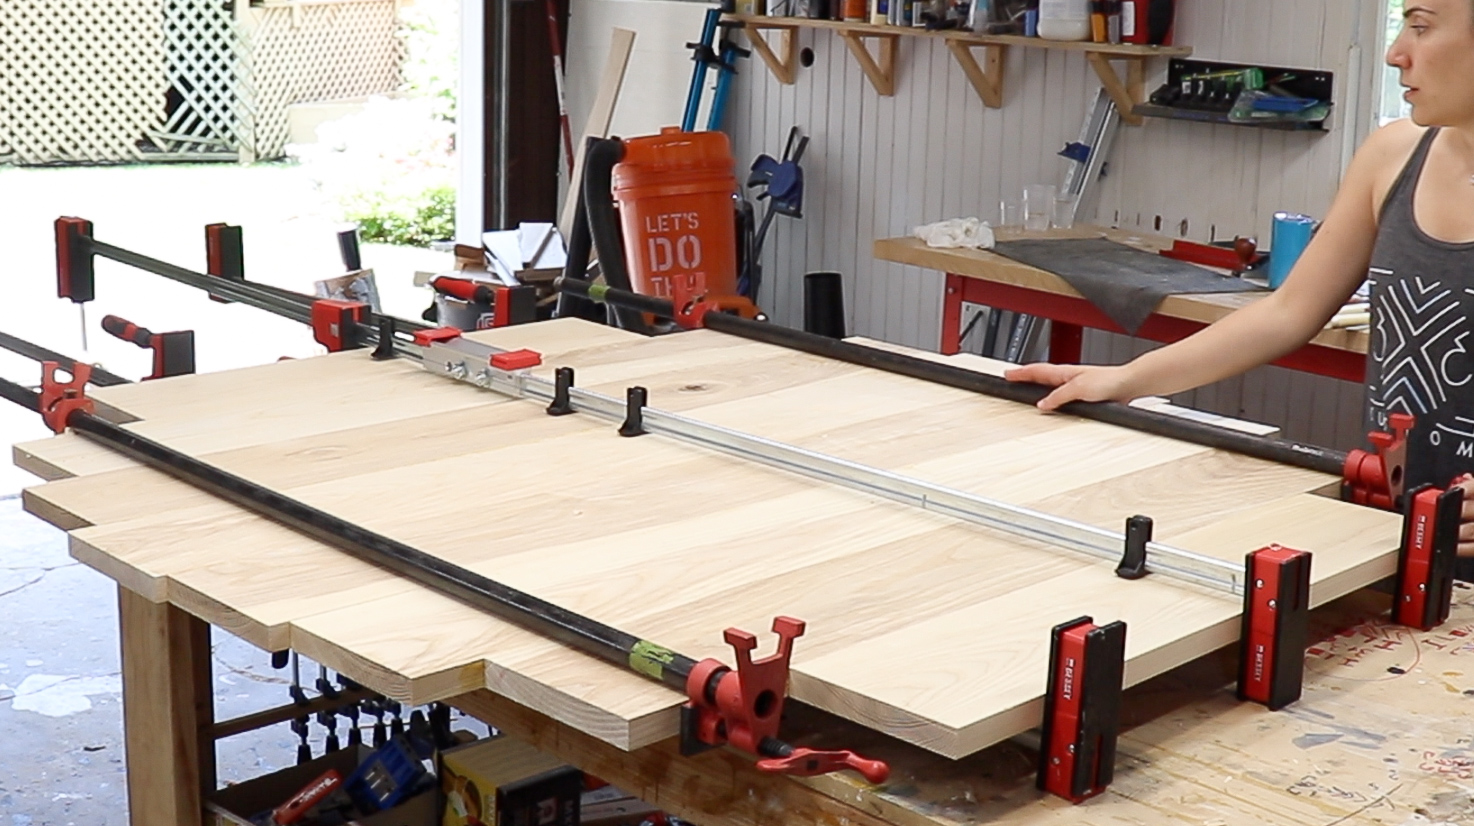
After the three sections dried, I then glued them all up to make this monster table top.
It was at this moment that I started to rethink this whole project…. How was I going to move this thing….
To cut out the circle, I made a circle cutting jig that I could attach to my router and kept taking shallow passes until the bit couldn’t reach any further.
In retrospect I should have made this jig from 1/2” material, not 3/4”, that way I would have been able to plunge all the way through.

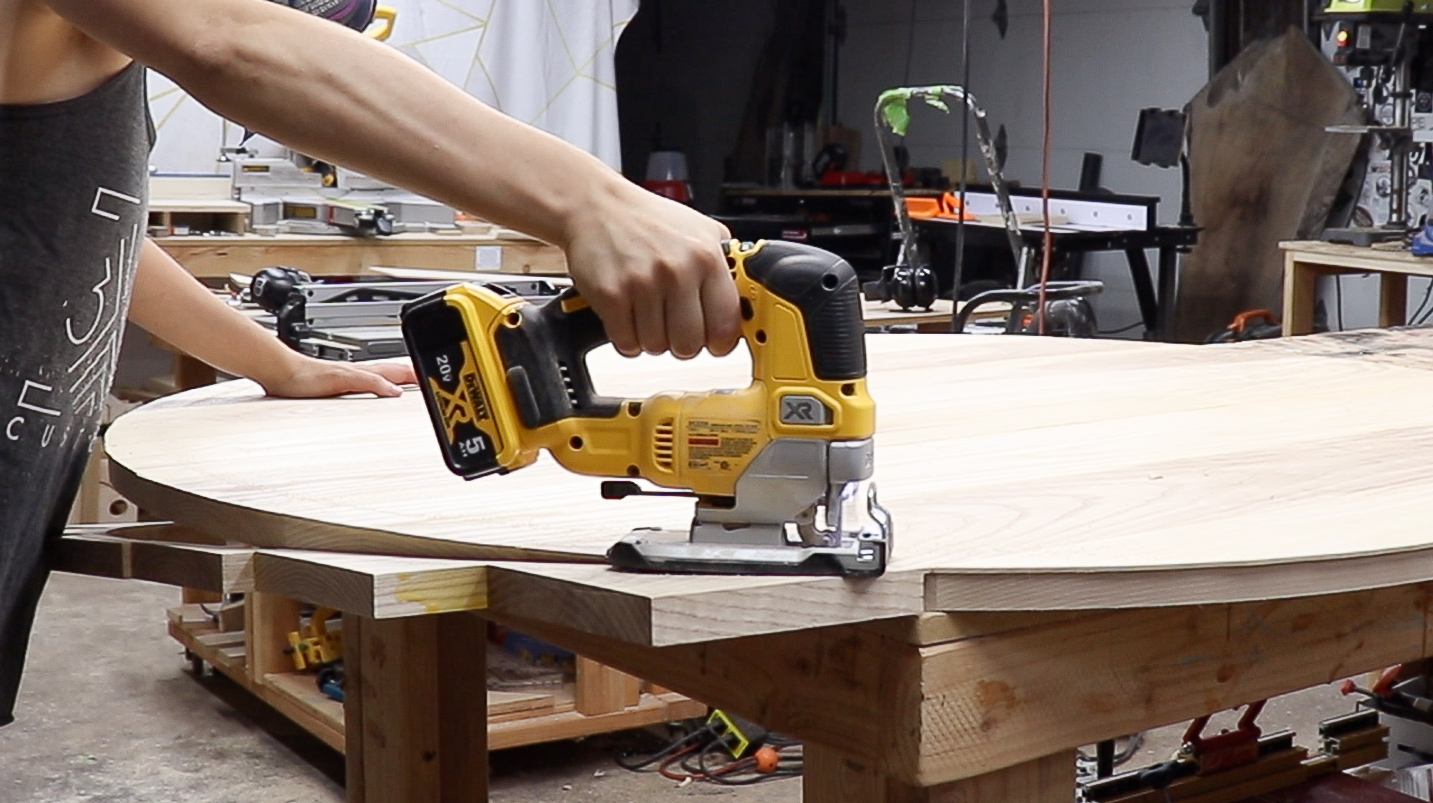
To finish the cut I used a jigsaw.
Then cleaned up the jigsaw cut with the a flush cut trim bit in my trim router.

Now that the circle is cut, I could work on cutting out the hole for the storage compartment.
I placed the base on the underside of the table and traced out the outside of the hexagon box.

Then I made some marks about 3/8” in towards the center of the hexagon to make a slightly smaller hexagon.
The cut out will be slightly smaller than the box so the lid will have a lip to rest on.

This was one of the scariest moments I have had in my woodworking career…. So much time and effort went into making a perfect circle, then I had to cut it up… But this DeWalt Atomic Mini Circular Saw was totally the right tool for the job.
Because of its compact size (it has a 4-1/2” blade) I felt like I had full control as I was plunging it into the top. Even though it’s really compact, it’s brushless motor is super powerful and I was able to slice through this 5/4 ash with ease.
To make these cuts, I clamped down a fence then slowly plunged the saw into the top making sure to stop before the line meets the corner.

Because the blade on the circular saw is round I had to finish up the cuts with a hand saw.

After the hexagon top was cut out, I sanded up the edges and got to working on the finger pulls.
I used a really large forstner bit, about 2” to just make a recess in the underside of the hexagon.

Then I used a smaller forstner bit to drill all the way through to act as a finger hole.

Below you can see why I made the larger recess around the through hole.
It is just more comfortable to pick up with your finger when the wood is thinner.

Moving on to finish!
I decided to stain this table black to match my kitchen decor.
To do this I used Rubio Monocoat Precolor Easy in Intense Black.

The stain was really easy to apply. I have used India Ink in the past to ebonize wood and the results are similar.
The only difference is that the India Ink raises the grain and the Rubio Monocoat does not. So that eliminates the waterpop step.

As a topcoat I went with Rubio Monocoat Oil Plus 2C.
This is a two part hardening wax finish.

Simply spread it around and buff it out with a non abrasive pad. I found it easy to attach the pad to my sander set on low to help buff it out.

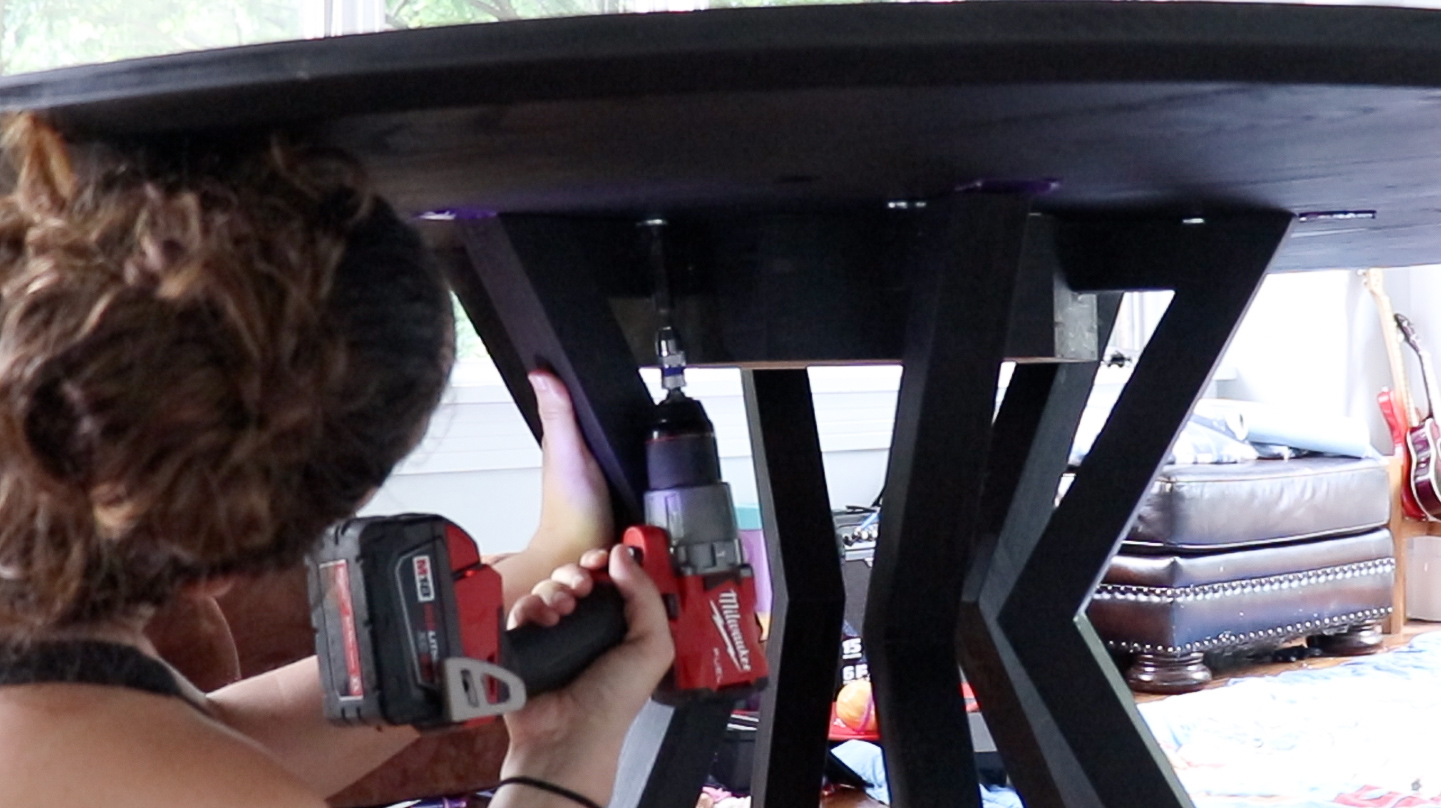
To attach the top to the base, I used figure 8 table top fasteners. These are great because they still allow for wood movement in the top…
And they are so easy to install. Just drill out a shallow hole using a forstner bit.

Then pre-drill all the holes and lock down the fasteners with screws.

Next I muscled the top onto the base, predrilled and drove in some screws to lock it all down.
And it’s done!
The table comfortably seats 6 and fits perfectly in my breakfast room.
I’m so happy there will no longer be a mess of crayons on top of my kitchen table! Well, that’s if my kids clean up after themselves… Ha!

I acknowledge that The Home Depot is partnering with me to participate in the ProSpective 2018 Campaign. As a part of the Program, I am receiving compensation in the form of products and services, for the purpose of promoting The Home Depot. All expressed opinions and experiences are my own words. My post complies with the Worth of Mouth Marketing Association (WOMMA) Ethics code and applicable Federal Trade Commission guidelines.