
Making a Walnut Keyboard Stand
*This post is sponsored by The Home Depot
I was sick of looking at the ugly metal keyboard stand we have, so I decided to build a one that looks like a beautiful of furniture.
This build is very simple and I used pretty easy joinery methods. There are just a few small details that really impact the design. The tapered legs and curved sides really make this look like a high end piece of furniture, both of which were super simple to do.
Check out the full build video and free plans below!
(Links below are affiliate links, clicking on them helps me keep this site going at no extra cost to you ;)
Supplies
Check out the free printable plans for the build ———> Keyboard Stand Plans
(or click on the CUT LIST below)
I built this to fit my particular keyboard. Please measure yours before building!
For reference, here is a link to my keyboard ———> Yamaha Keyboard

I started off by breaking down all the rough walnut with a circular saw.
(You can make this project without milling your own lumber. The plans are based off of dimensional lumber. If using dimensional lumber, just scroll down a bit to skip the milling process….)
I recently posted about how much I love the dust collection port on this Milwaukee saw. I love it even more when it’s attached to the Dust Stopper!

The Ridgid 16 Gal. 6.5-Peak HP Vac is better than any other vac I have used and I am really liking this set up I have going on here. The Dust Stopper collects 99% of all the dust so I don’t have to clean the filter and it’s easier to toss all the dust in the trash…. because the RIDGID vac has large rear wheels, it’s east to roll this set up around the shop.
Collecting the dust at the source is the way to go!
This new vac also has locking connections everywhere, which is an awesome feature.

I’m pretty new to the hand plane world, but I managed to get my boards pretty flat using my new WoodRiver planes from Woodcraft.
I did this because I don’t have a jointer. In order to send the boards through the planer I needed one flat face and my planer sled wasn’t long enough for some of the boards.
After getting one face flat enough, I could send the other face through the planer. Then I cleaned up one edge on the router table and finally, the other edge on the table saw.

Then I cut everything to size on the table saw!

After everything was cut to final length and width, it was time to mark out all the details.
The first detail is the tapered leg.
I put all the pieces on my workbench upside down, then put some spacers under the front apron and legs to bring them up to the appropriate height.
I marked with a pencil where the bottom of the apron pieces met the legs.
Then I made another mark about an inch below that. That is where the taper is going to start.

The leg tapers to about half its width, so I made a halfway mark on the bottom of the leg and then set my jig.
I didn’t make a video on this jig but my friend Marie from DIY Montreal did…. Taper Jig Video

After cutting the taper on one side of the leg, I taped the cut off back on to the leg and rotated it to an adjacent side so make another cut.
So these legs have 2 tapers on them that will be facing the inside of the table.

The next detail to work on was the curved sides.
I rough cut the curve on the bandsaw, then used double sided tape to put the two sides together before refining the shape on the bench top sander.

Now the pieces were ready for some joinery.
I am going to use plywood for the bottom, so I made a groove that was the same thickness as the plywood on both side pieces and the front apron.
This groove will hold the plywood securely.

After cutting the grooves on all the pieces I was able to measure how big I actually needed to cut the plywood bottom. Then cut away! (Using my whole dust collection set up… awesome.)

I had a choice here. I could notch out the legs to accommodate the plywood or the opposite.
I chose to notch out the plywood. I placed the pieces in position and marked where I needed to make the cuts.

The Dremel Multi-Max is not a tool I use everyday. This one is pretty powerful and there are so many things you can do with it. You can cut wood, metal, drywall, carpet, old paint, tile adhesives, you name it…
There are so many different accessories you can attach onto this oscillating tool, and so many different kits you can purchase, like their multiple wood, metal and drywall kits.
I used a wood cutting blade from their 5 piece accessory kit to cut this plywood.

This Multi-max happens to come with 28 accessories, so you will be good to go!
I was happy to have it to cut these notches in the plywood.
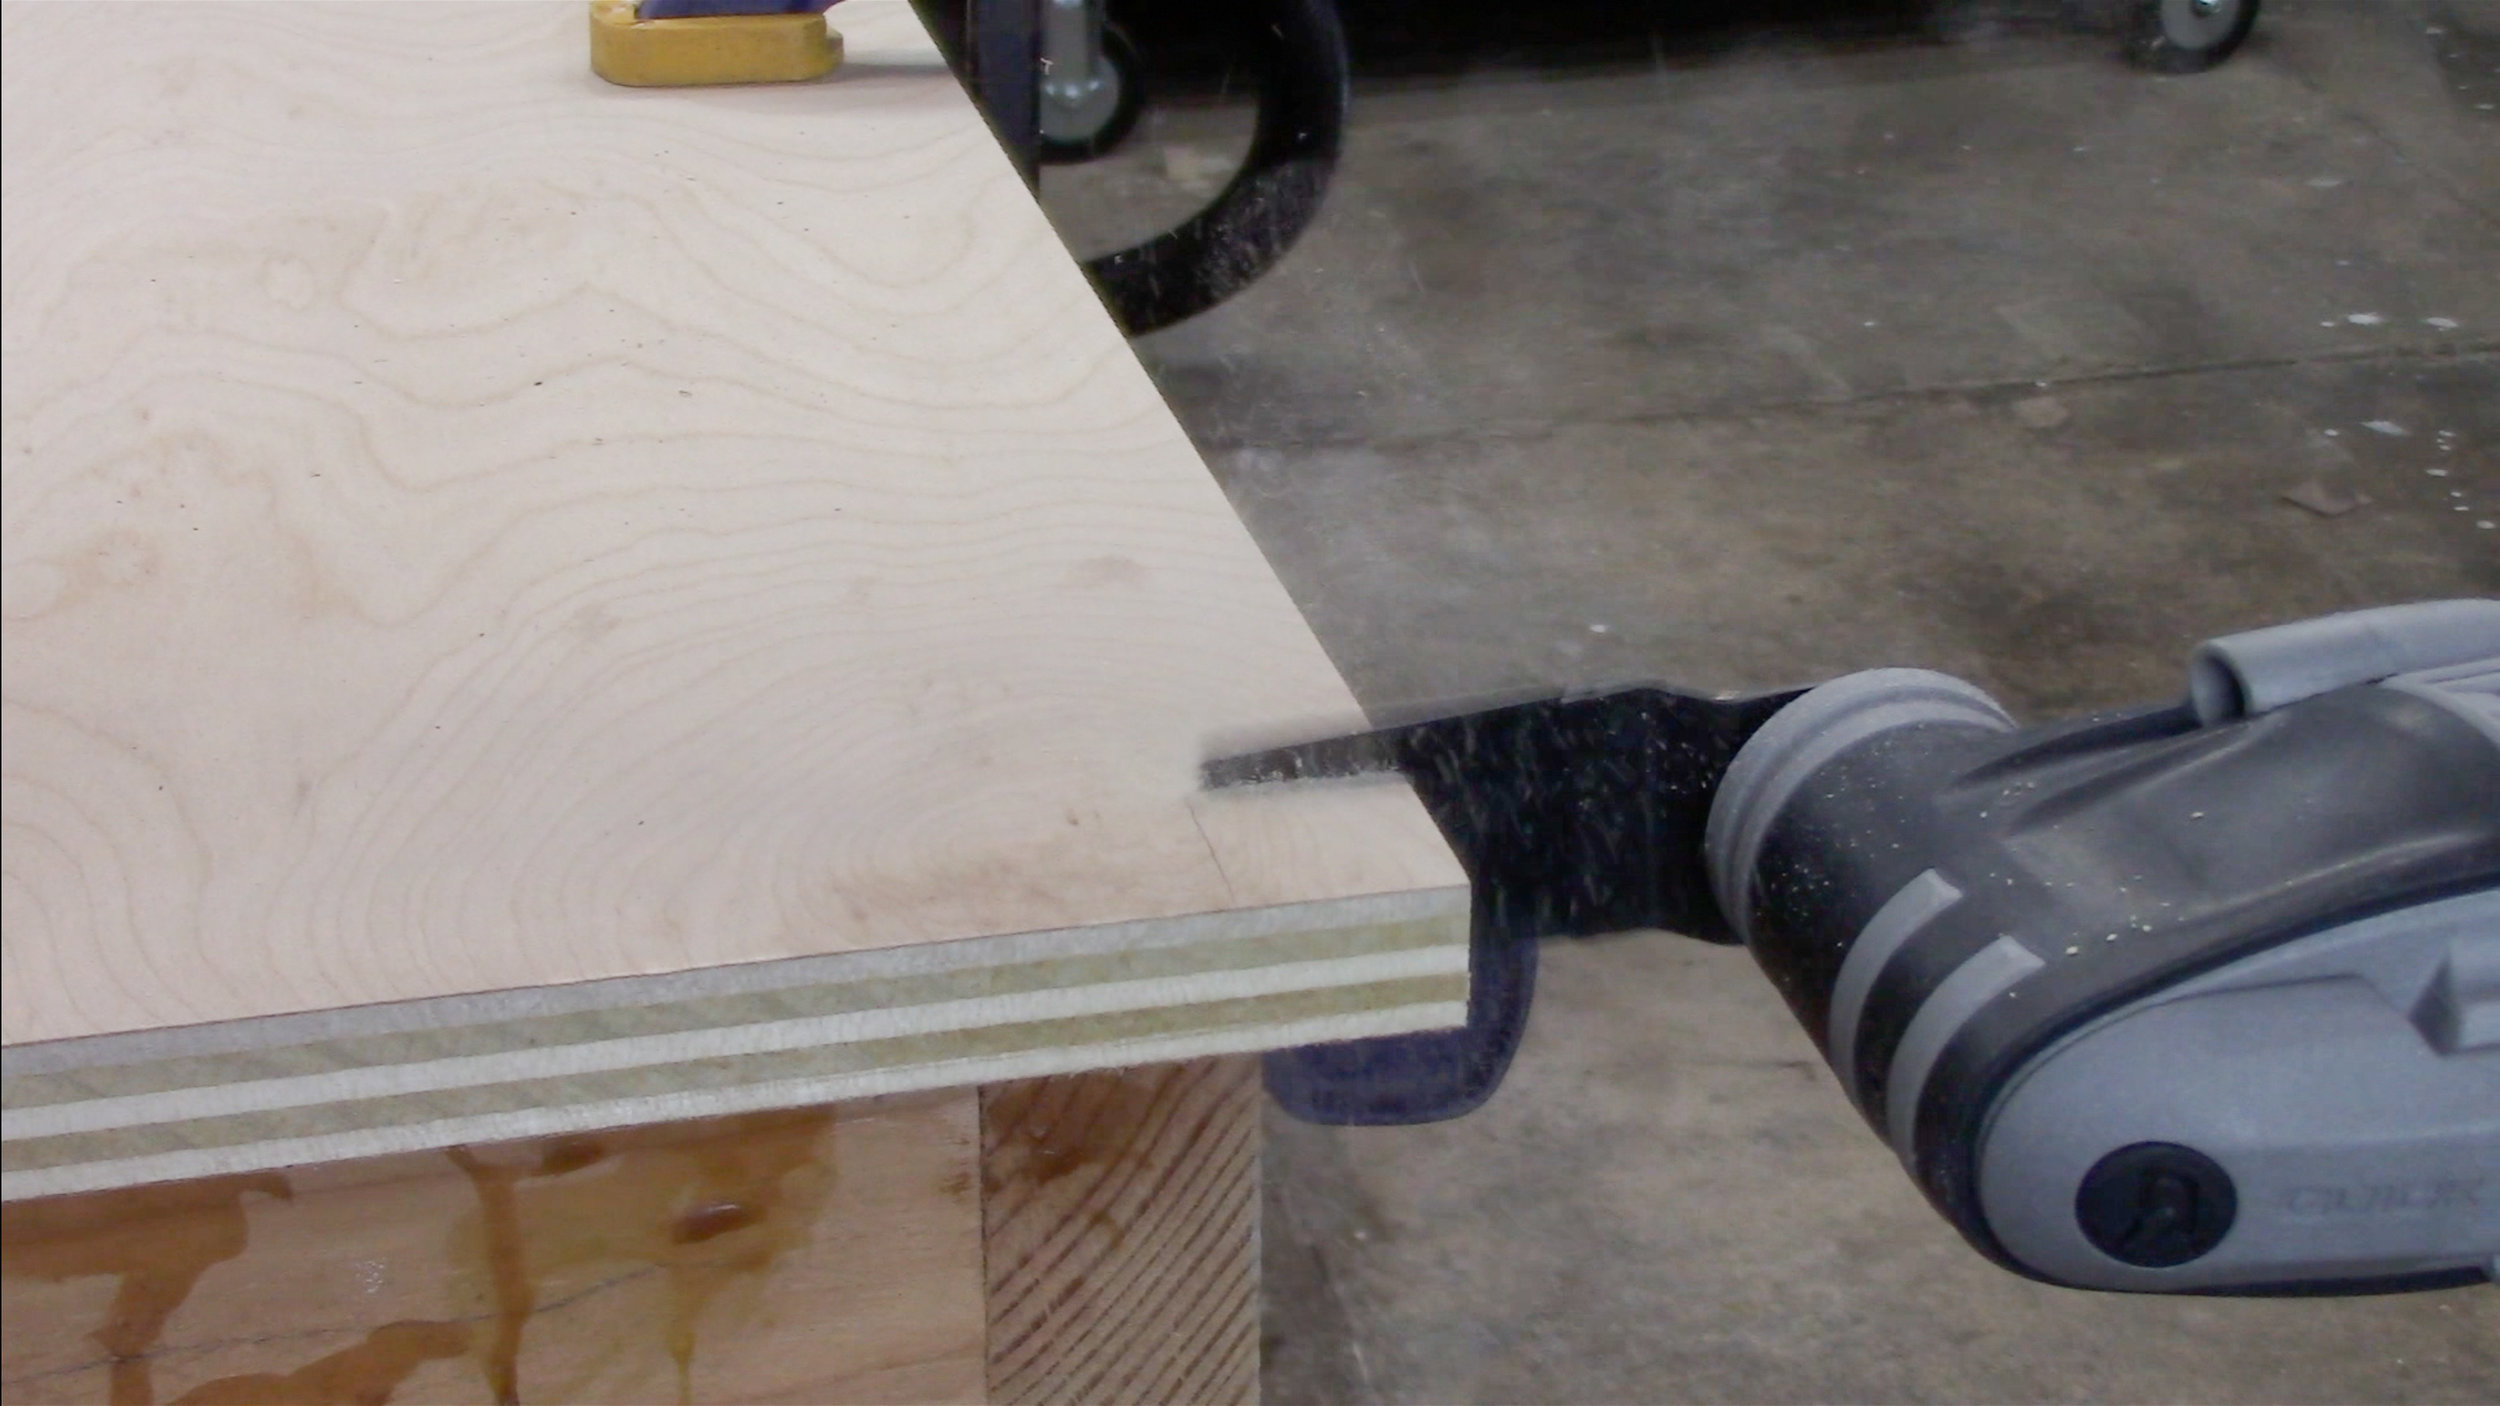
My keyboard has speakers on the bottom, so I didn’t want the plywood to block any of the sound. You can cut the hole with a jig saw, but I decided use a 5” hole saw with the Right Angle Drill attachment on the MEGAmax brushless base.
This particular hole saw has a 7/16” mandrel shank, which is too large to fit in my regular drill/drivers. Previously, If I had to make a 5” hole I would make a template on the drill press using this hole saw. Then, I would rough cut with a jig saw and finally clean up the cut using the template with a flush cut trim bit in my router.
No more!
The heavy duty 1/2” chuck on this thing means I can make large holes wherever I want! Just be careful because this thing has a TON of torque and power. You can even rotate the head in 4 different directions, so it’s really versatile for a lot of applications.
Speaking of versatility, the MEGAmax is like the transformer of tools. Finished making holes and you need to cut some wood? the head twists off and you can attach a reciprocating saw head! This is a great set to have for someone who is constantly traveling from one job site to another.
Pair the MEGAmax with a 6AH OCTANE battery and your good go all day long. These batteries last 4x longer than standard lithium ion batteries.
The only complaint I have with the MEGAmax base is the power button. It’s longer than other buttons I am used to so I kept pressing it by accident when trying to set the tool down. Just something to get used to.

I used dowels to join the legs to the sides and front apron. In the past I have used dowel points with success, but I always thought it would be easier if I made a template that I could move around to all the pieces. So, that’s what I did!
I wanted a really small reveal between the apron and the leg (scroll to the bottom finished pics to see what I mean…) so I drilled a few holes in a scrap block that were perfectly spaced away from the edge, so it would give me that small reveal on the leg.
There are two important things to note about this jig.
1) It is important to know where the top is. So I marked an “up” arrow on both sides.
2) I brought the center line of the holes down onto the edge of the jig. This is going to be important for drilling the holes in the correct locations on the sides and apron pieces.

I didn’t want to widen the holes of the jig, so I only used it to mark the hole locations.
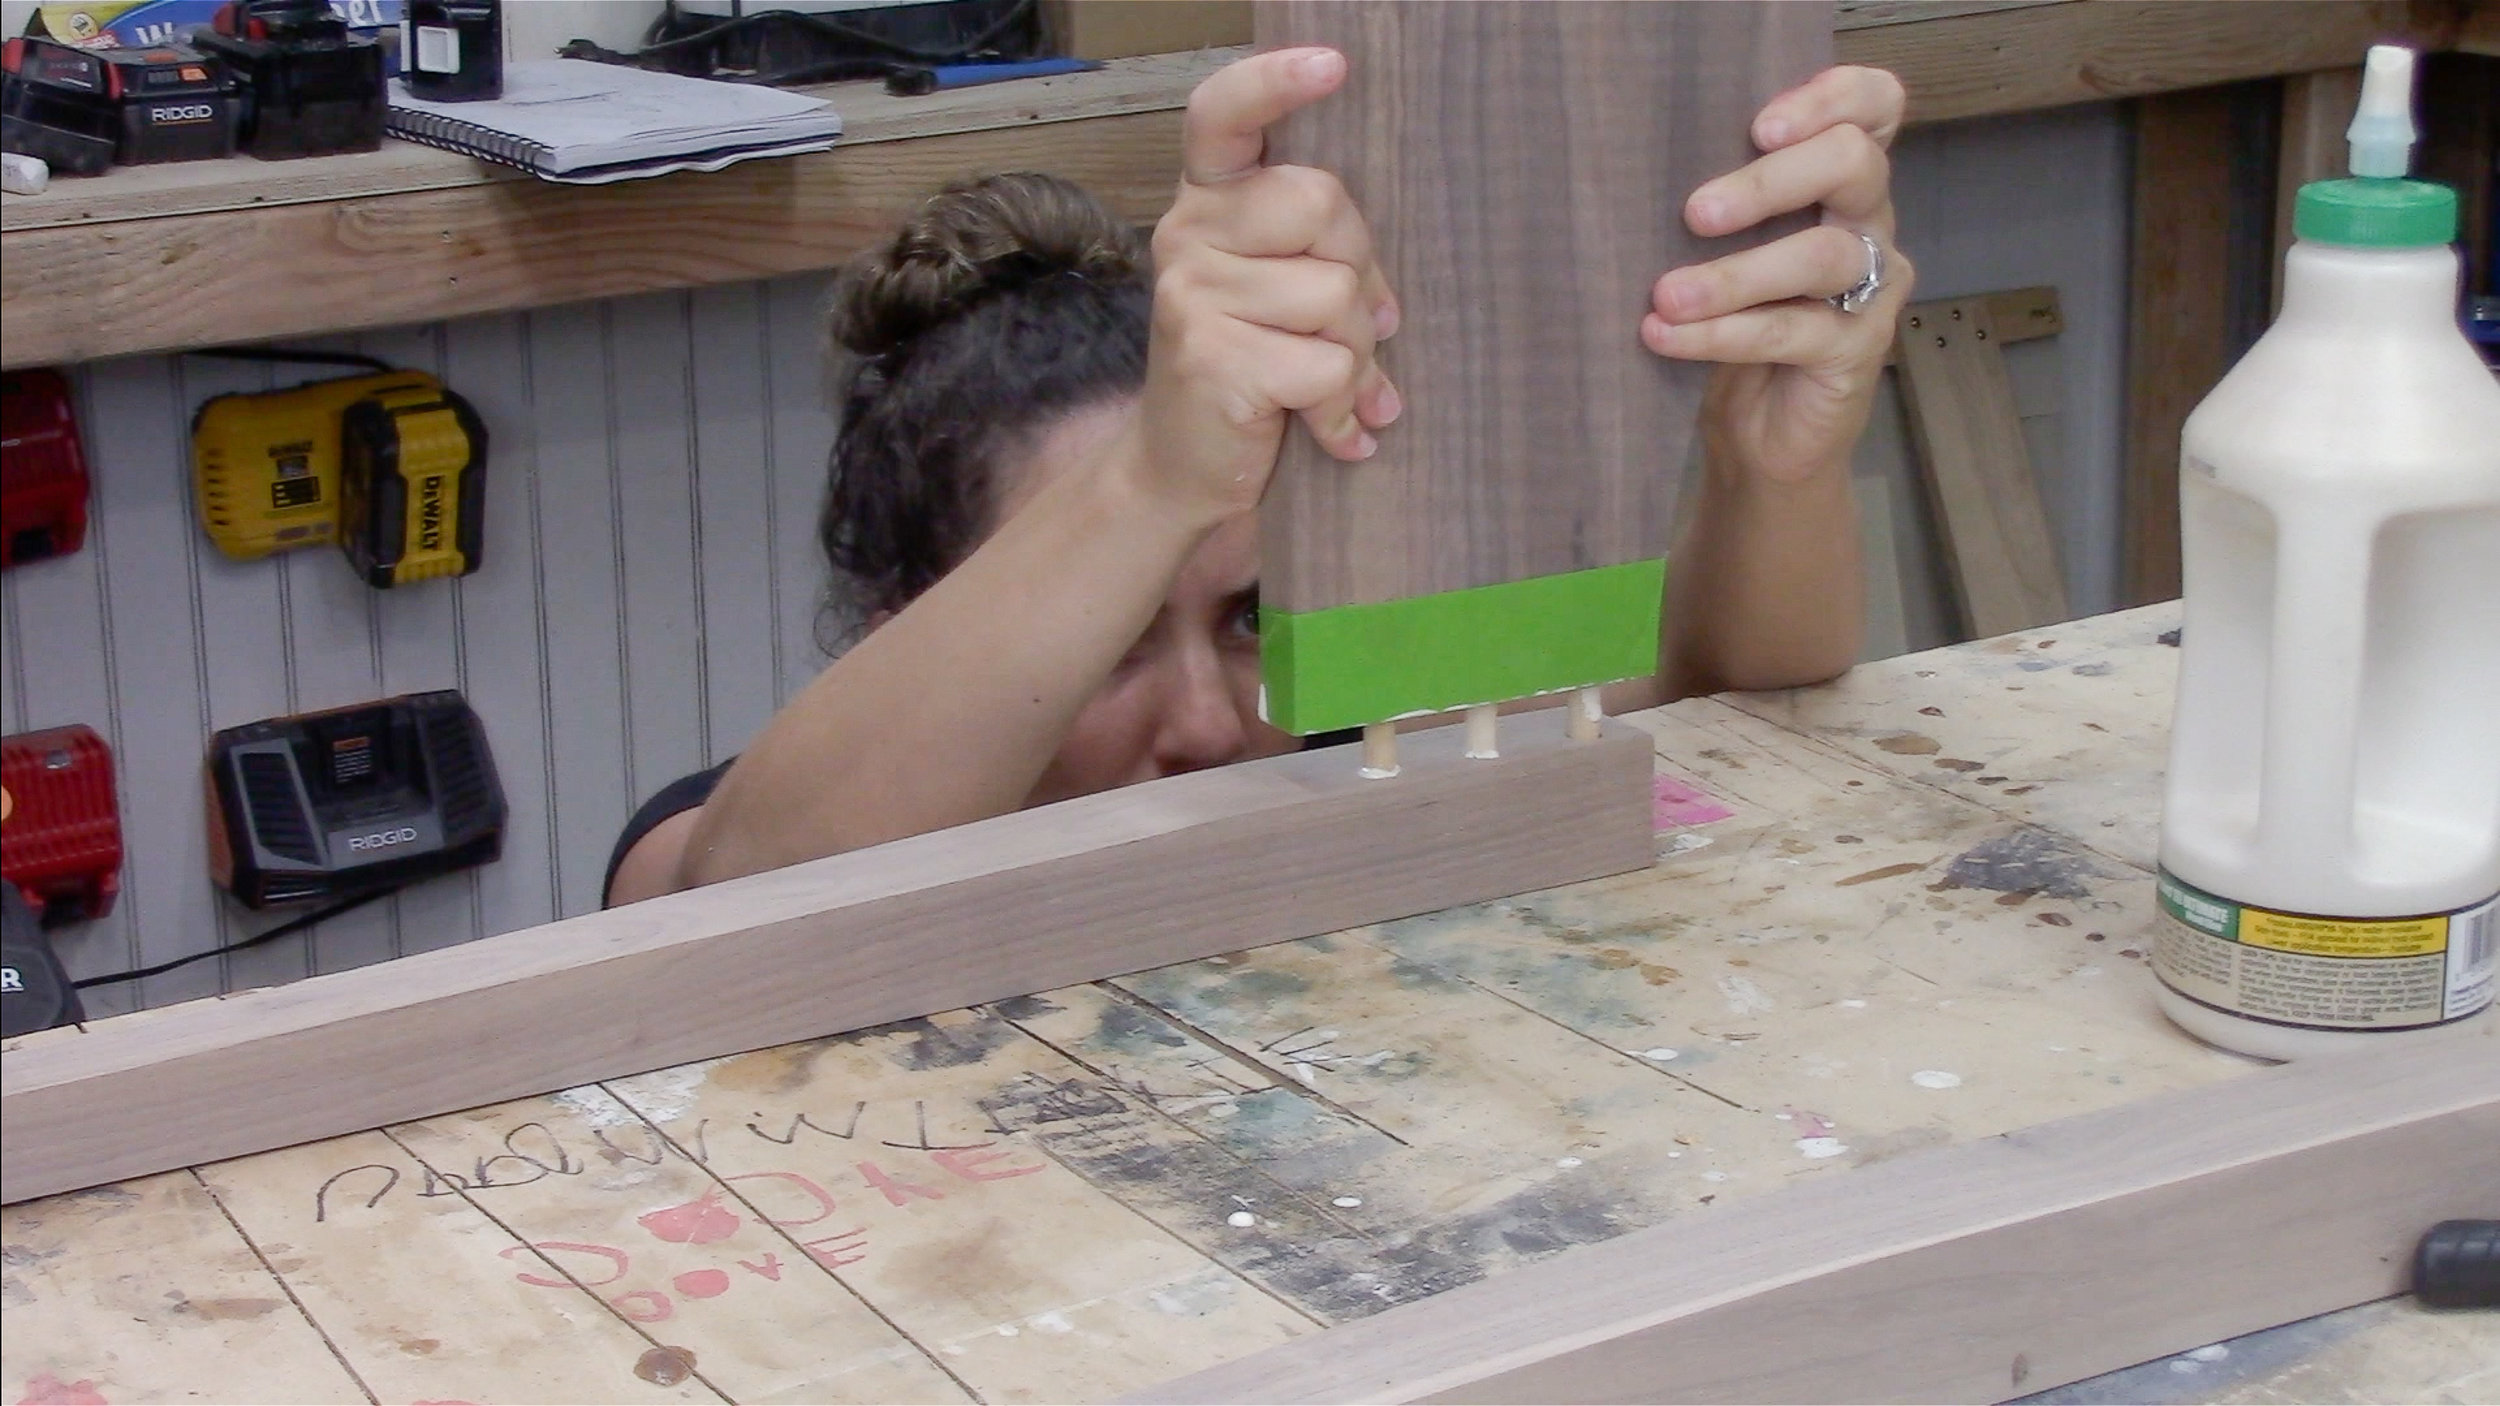
I lined the jig up on the leg, making sure the arrow was up and making sure it was flush to the top and sides.
Then I placed a brad point bit in the holes and tapped it in with a mallet to mark a center hole.

Once the holes were marked, I could take the legs to the drill press and drill away! I set the depth so be slightly longer than half of the dowel.

Here is where it was important to bring the center line down the edge of the jig.
To mark for the holes in the side pieces and front apron I placed the jig on top, making sure the arrow was facing up, while also making sure it was flush with the top and side. I then brought those center lines down from the jig only the workpieces using a square.

Then used my center finding jig to drill the holes on those marks.
This method worked out perfectly!

Before gluing it up its important to use a counter sink bit in the holes.
I’ve heard two schools of thought here:
1) Using the countersink bit creates a small gap for the glue squeeze out to go into.
2) The water in the glue causes the wood to swell, so the edge of the hole might swell and push your joint apart if you don’t do this.
Either way, it’s quick and painless, so I do it.

I put glue in all the holes and on the dowels and glued up the two short sides of the table.
Because the back leg was jutting out I couldn’t just slide the plywood in after gluing on the front apron, I had to glue it in place before attaching the two sides to the apron.

While the glue was drying, I worked on the back.
I used another piece of 3/4 plywood cut to size. I drilled a hole using this1-1/4” spade bit from Bosch so I could feed the power cables out the back of the table.
These spade bits are pretty awesome, They have a threaded tip so it bores through material super quick and easy. These are by far the best spade bits I have ever used and they left a really clean cut.

I had some more time to fill while the glue dried, so I worked on the hinges.
I marked the hinge locations with a knife.

Then cleared away most of the material with my trim router that was set to the height of the hinge.

I stayed close to my knife lines, but didn’t go all the way up to them. I used a chisel to slowly pare away until the hinge fit perfectly.

I really wanted to add a brass accent to this table, but didn’t know where it would work.
I decided to use a 1/8” thick brass rod to add a small decorative detail on the table top.
I’ve used a lot of tools to cut brass and these Ryobi shears were definitely the most fun.
These shears are really made for cutting sheet metal, and when paired with the Ryobi ONE 6AH battery they can cut over 1,000 feet of it. You can also use these shears to cut vinyl siding, linoleum, asphalt roofing material, plastic and chicken wire.
I figured I would give this a shot since it has offset shears and it actually worked!
A tool like this is not necessary to cut thin rods of brass, but if you’re cutting a lot of it, it is definitely way easier than regular ol’ snips.

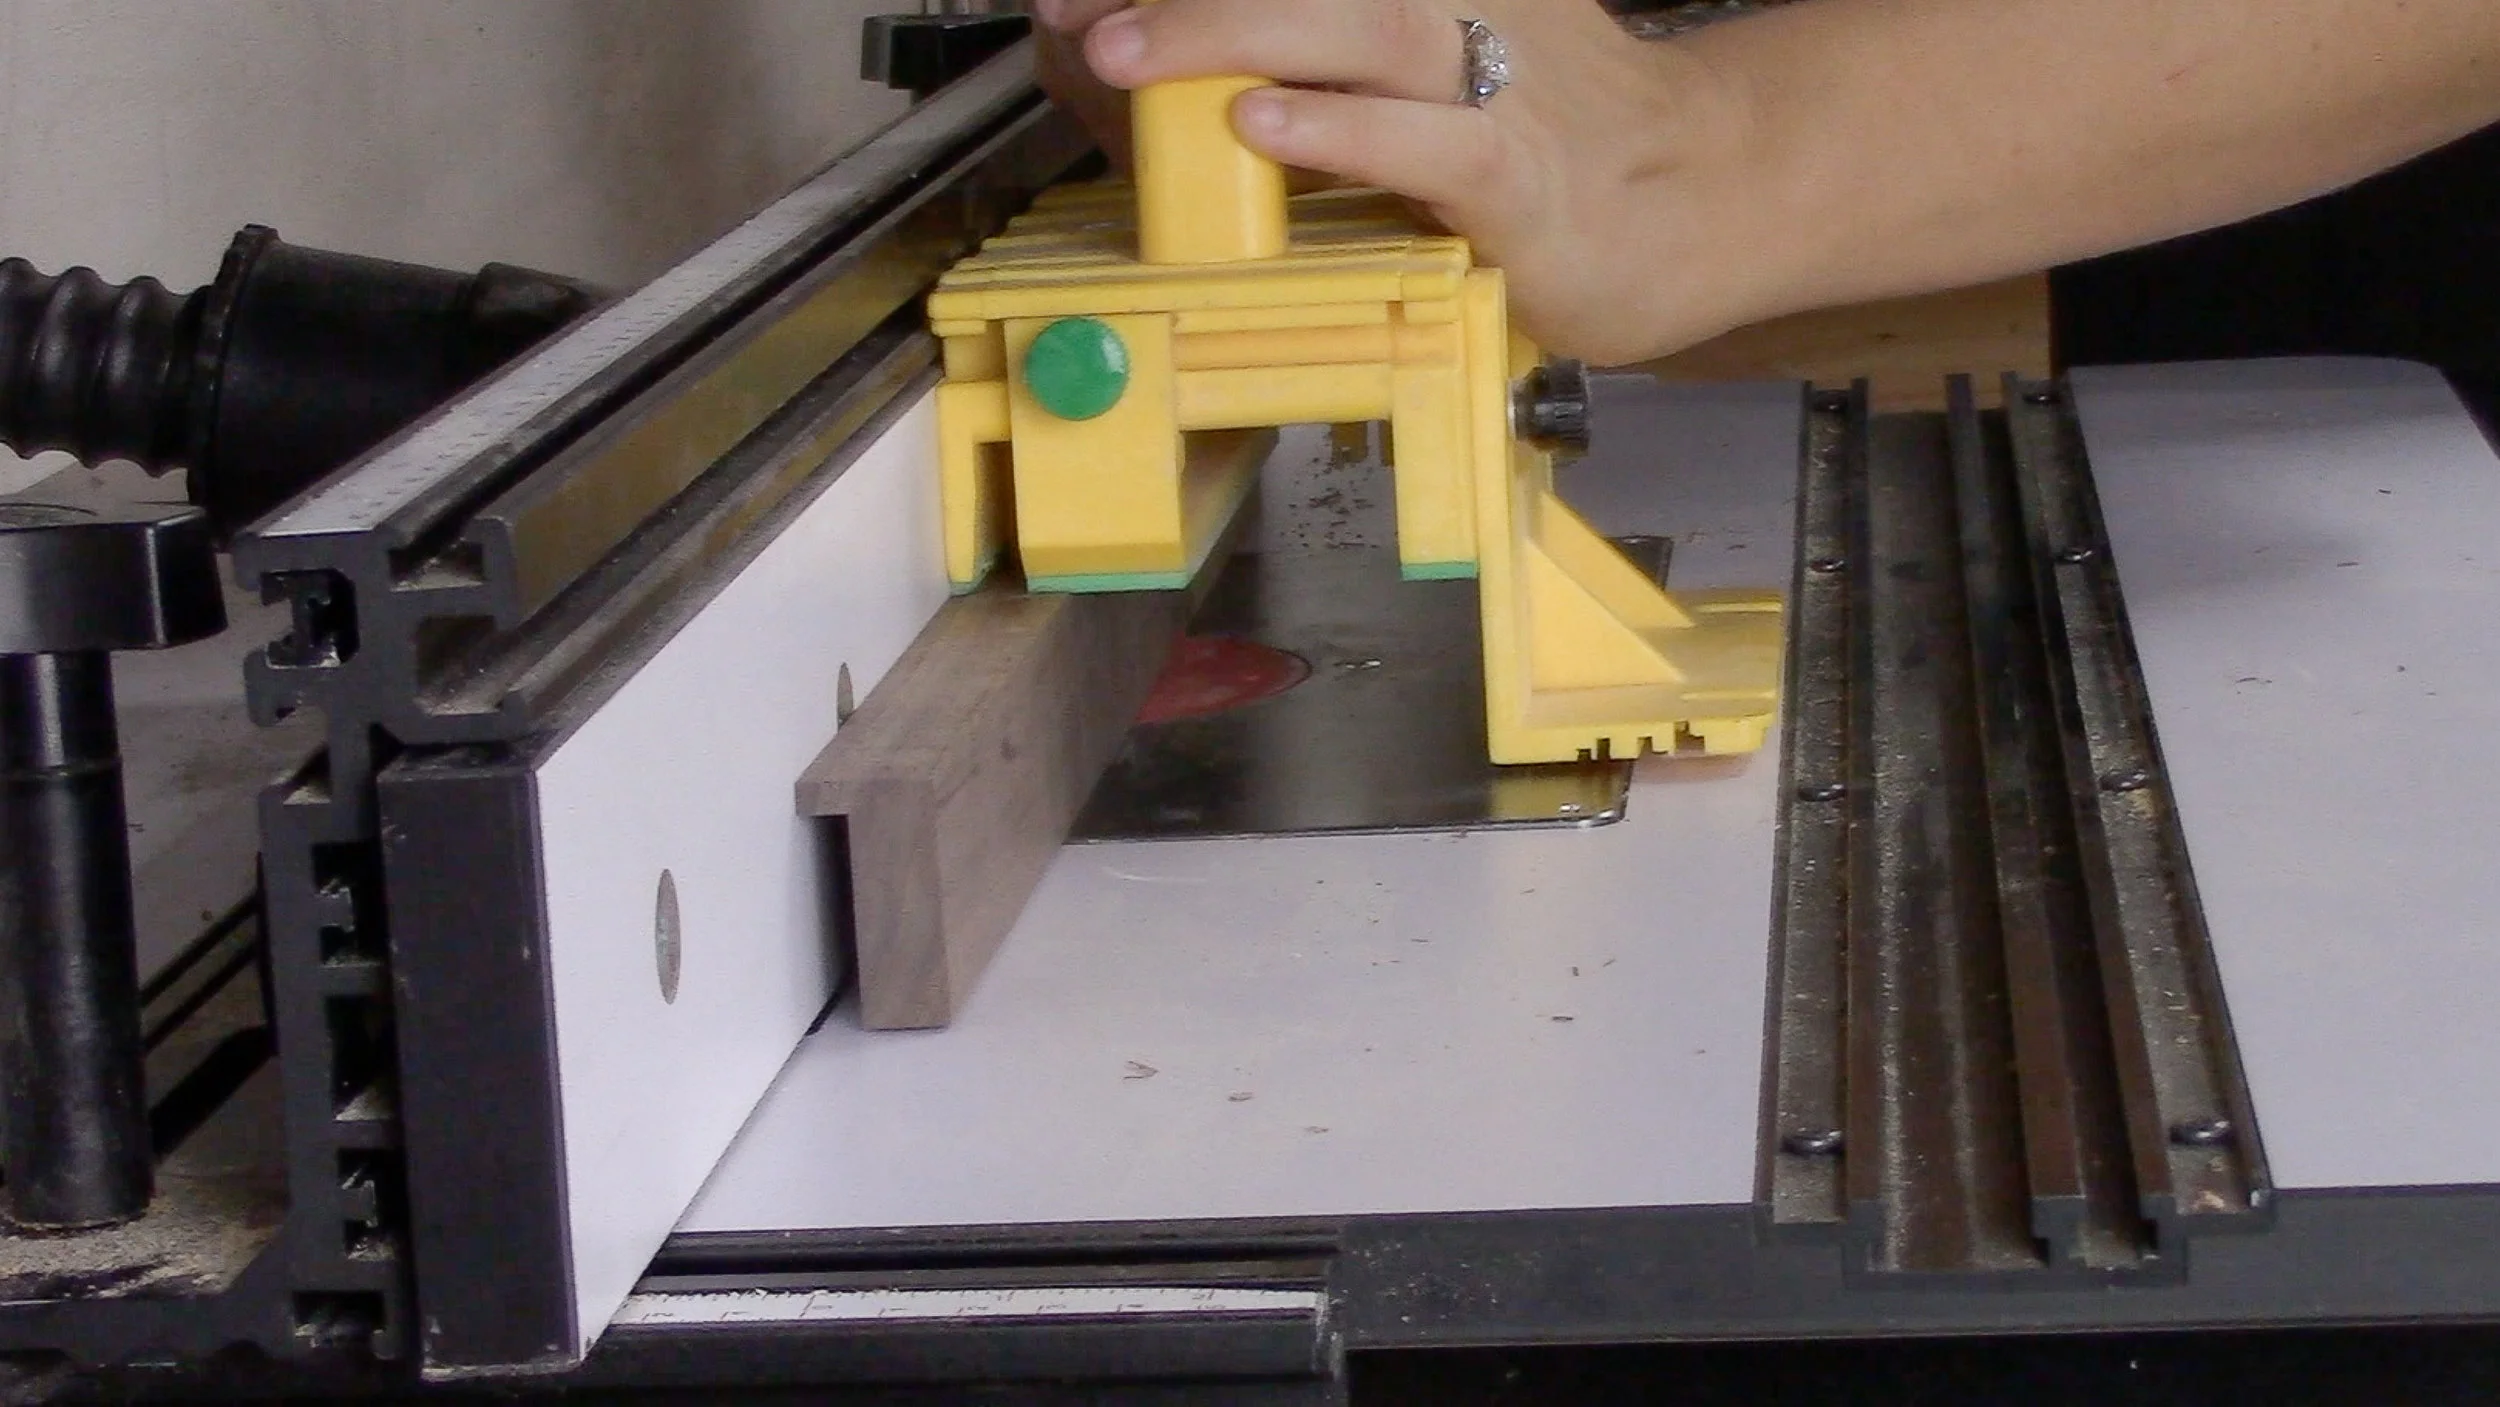
The last thing I had I had to make was the ledge that will hold the music books.
I did this by taking a scrap piece and running it along a straight bit at the router table.
I marked the center of the music book ledge and the center of the top.
Then added more pieces of tape a a straight line reference and glued it on!
I only used glue and clamps here, I think it will be plenty strong, if not, I can always add some more reinforcement if needed.

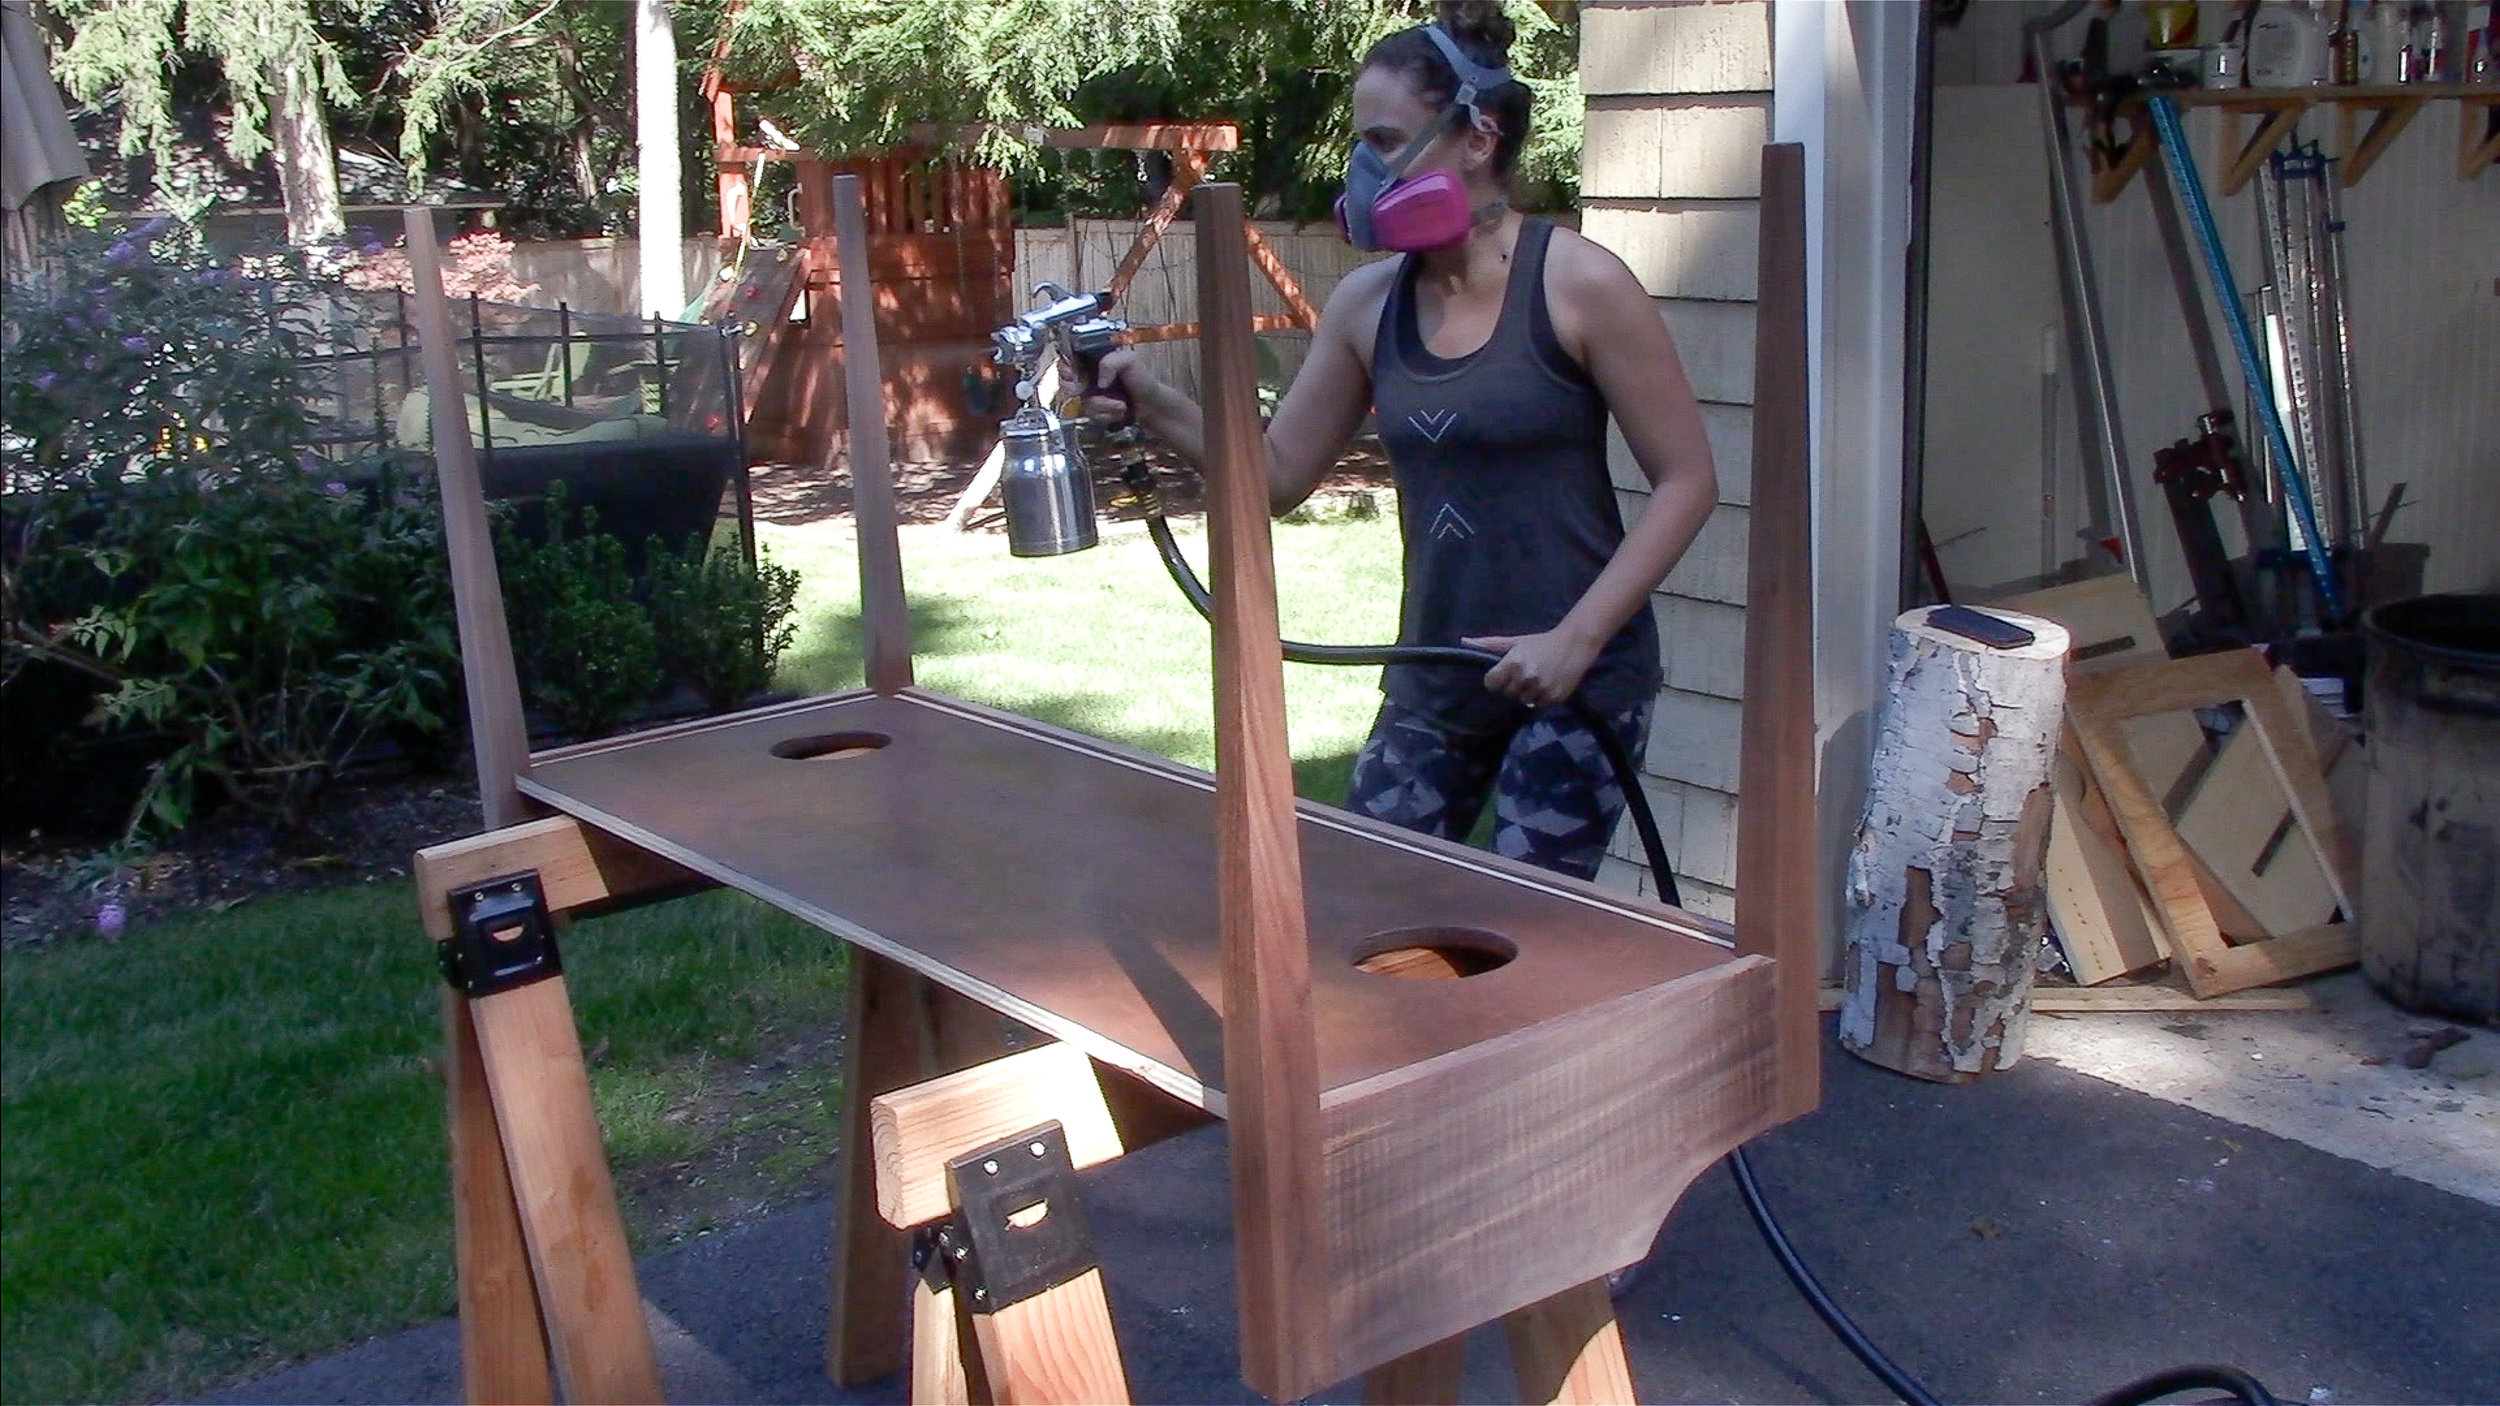
I sprayed 4 coats of Aqua Coat Aquathane sanding with 320 in between each coat.
This table is for my kids, and I know how hard wearing and mar resistant this finish is.
I used “figure 8” table top clips to attach the back of the top to the sides.
These keep the top secured, but also allow for the wood to move a bit with the seasons.
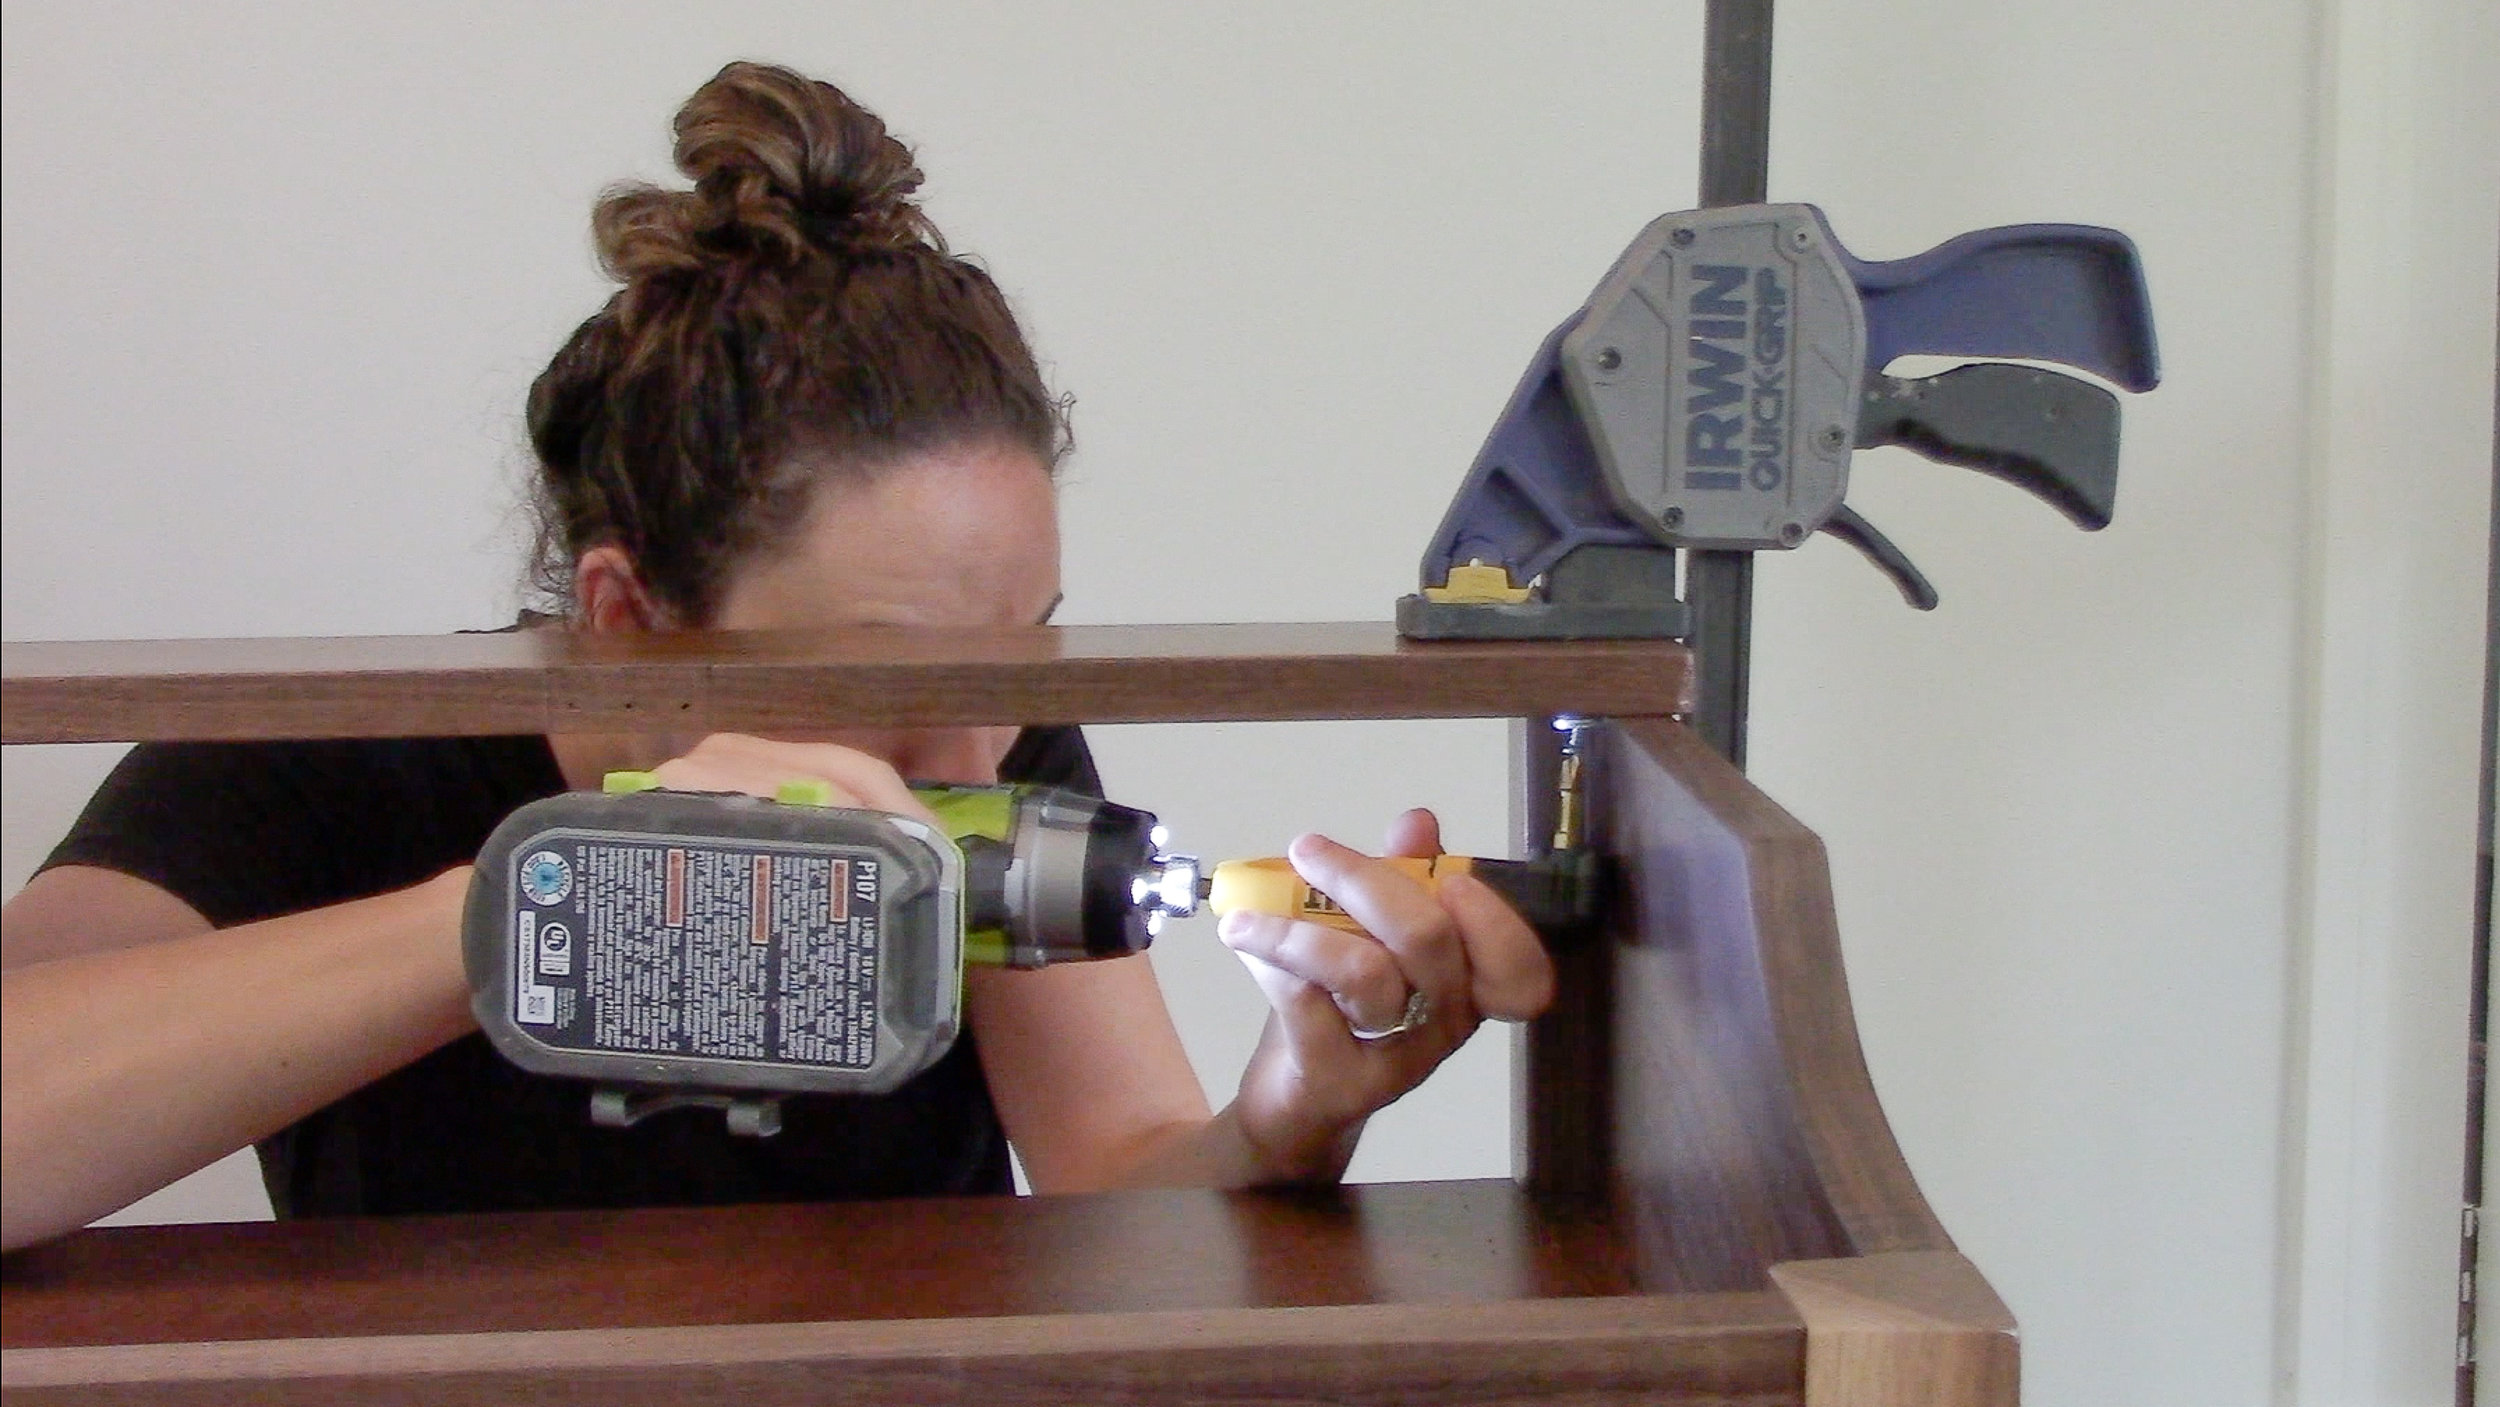
Then I attached the back using pocket holes and screws.

I screwed on the hinges, making sure to use wax on the brass screws since they are prone to breaking.

And finally I installed the soft close stay.
The instructions on this thing were in gibberish, so I just crossed my fingers, hoped for the best and it actually worked!
The soft close action on these hinges are so satisfying to watch!

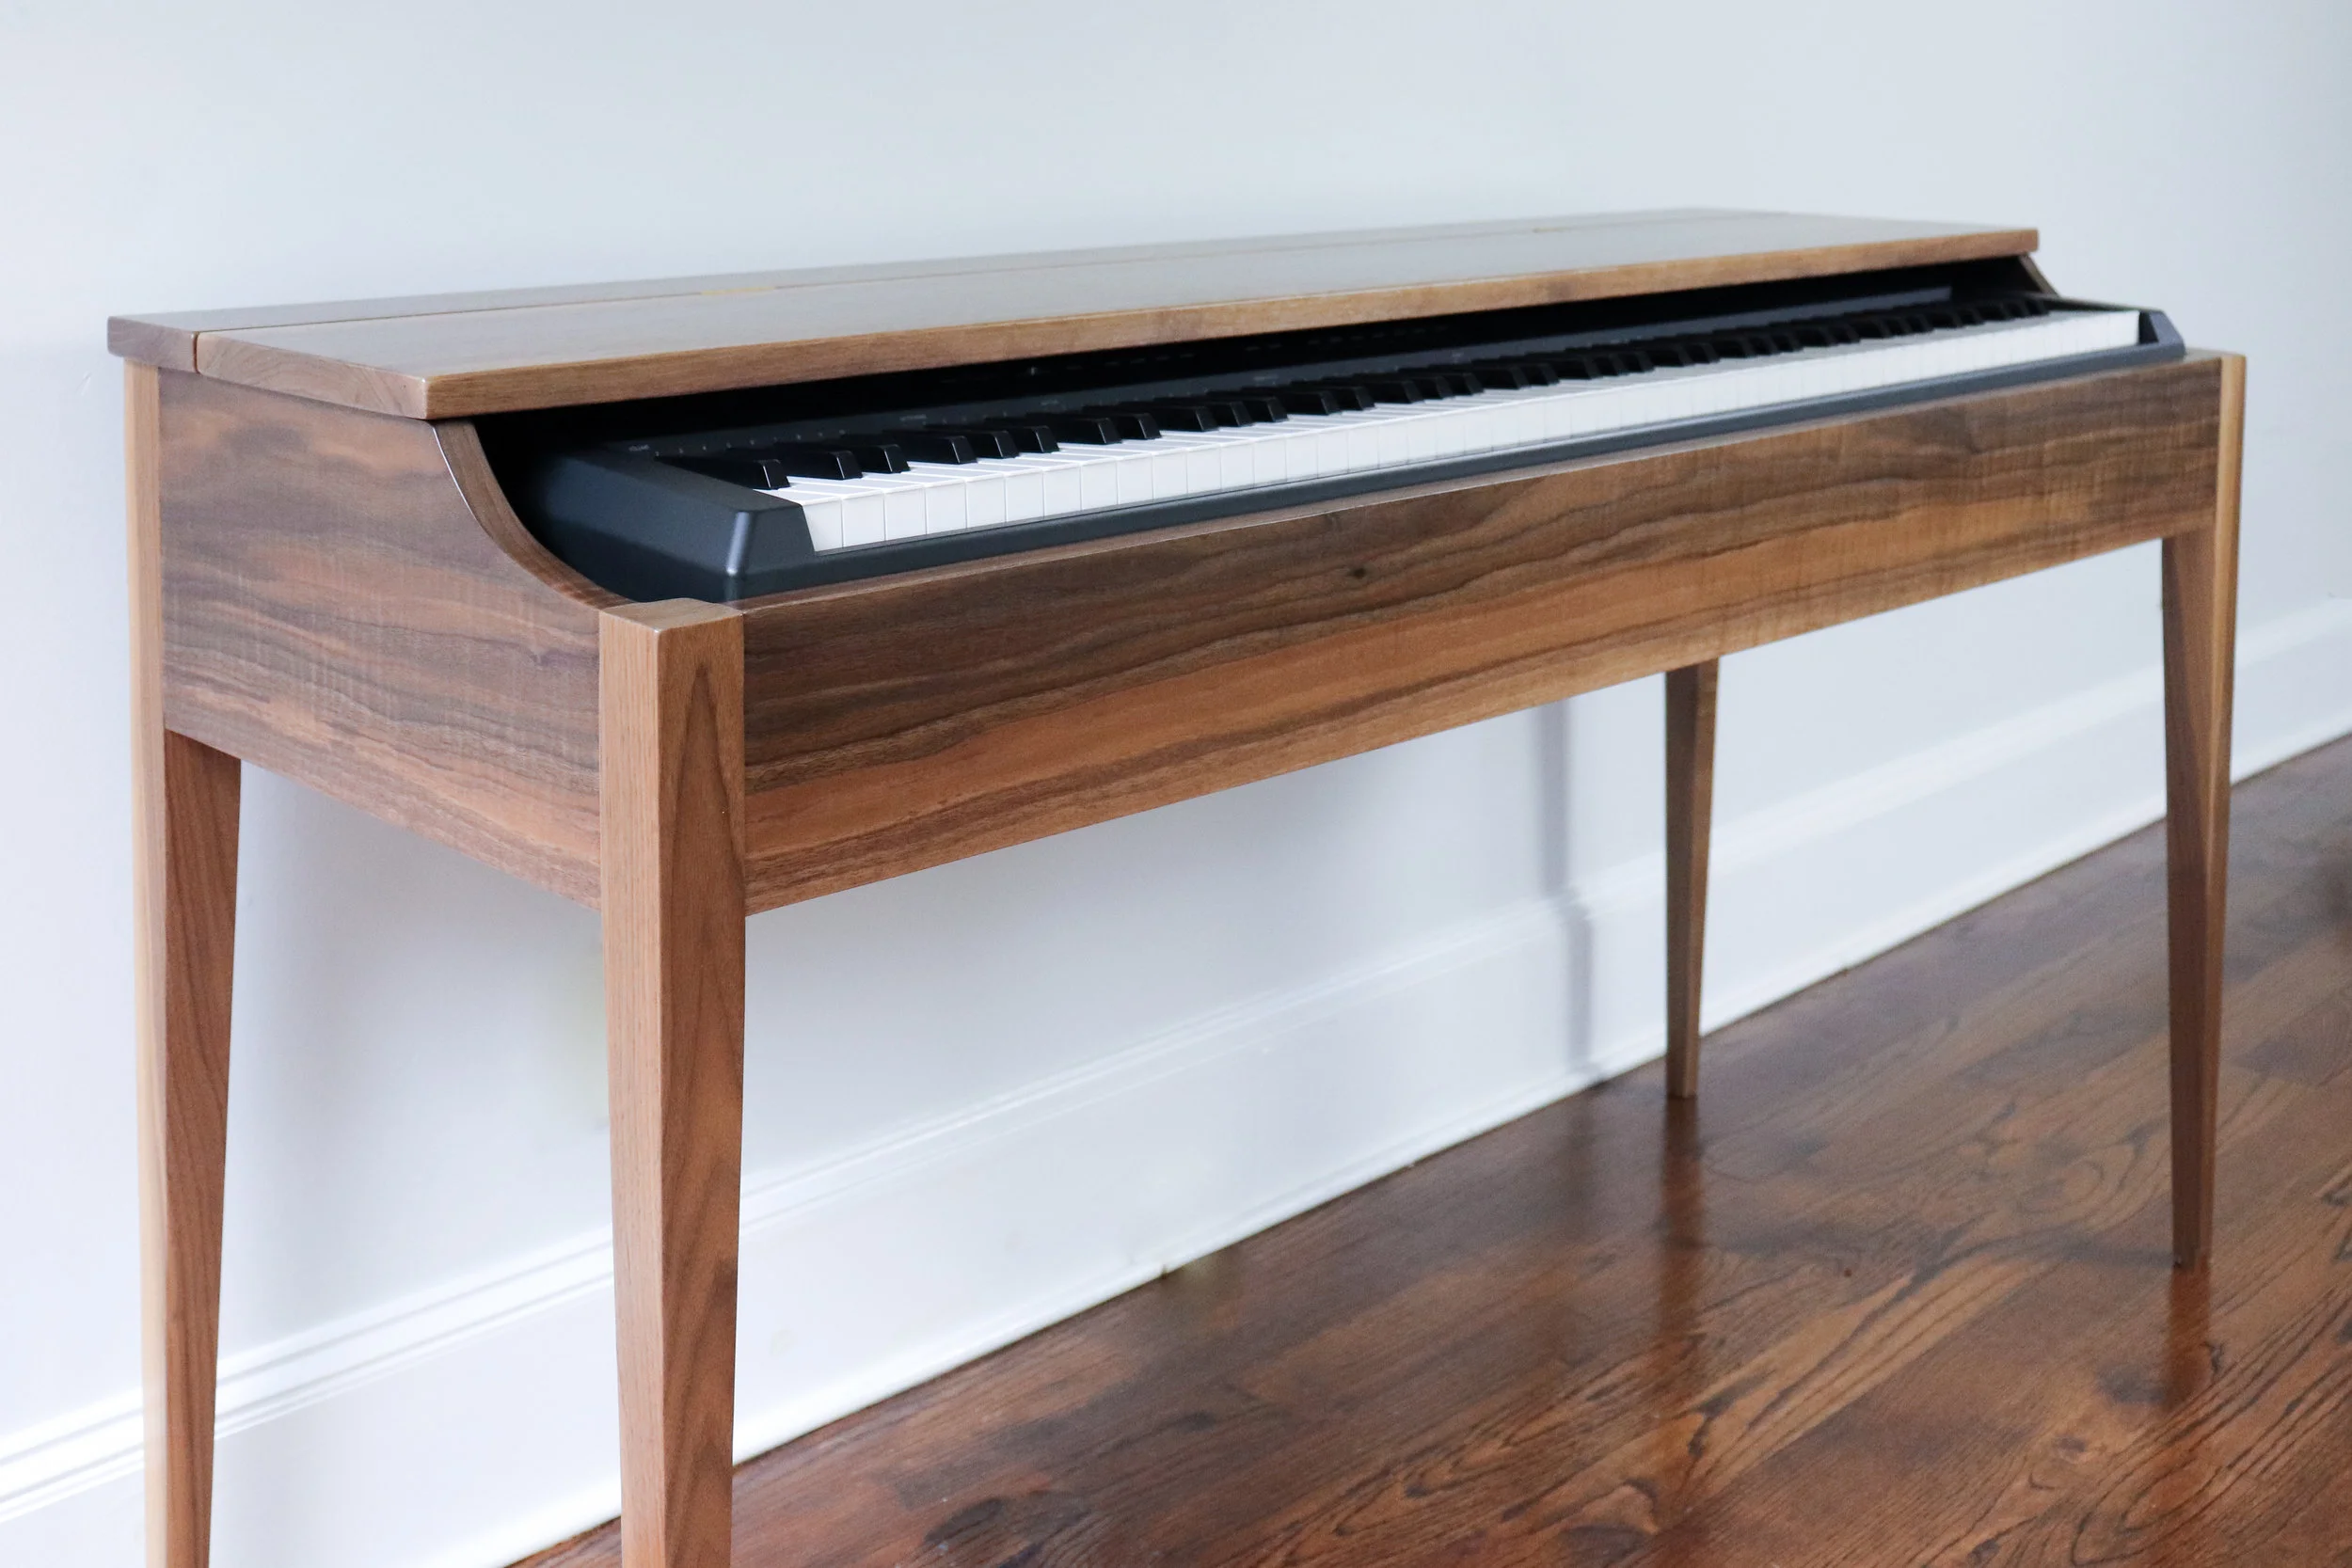
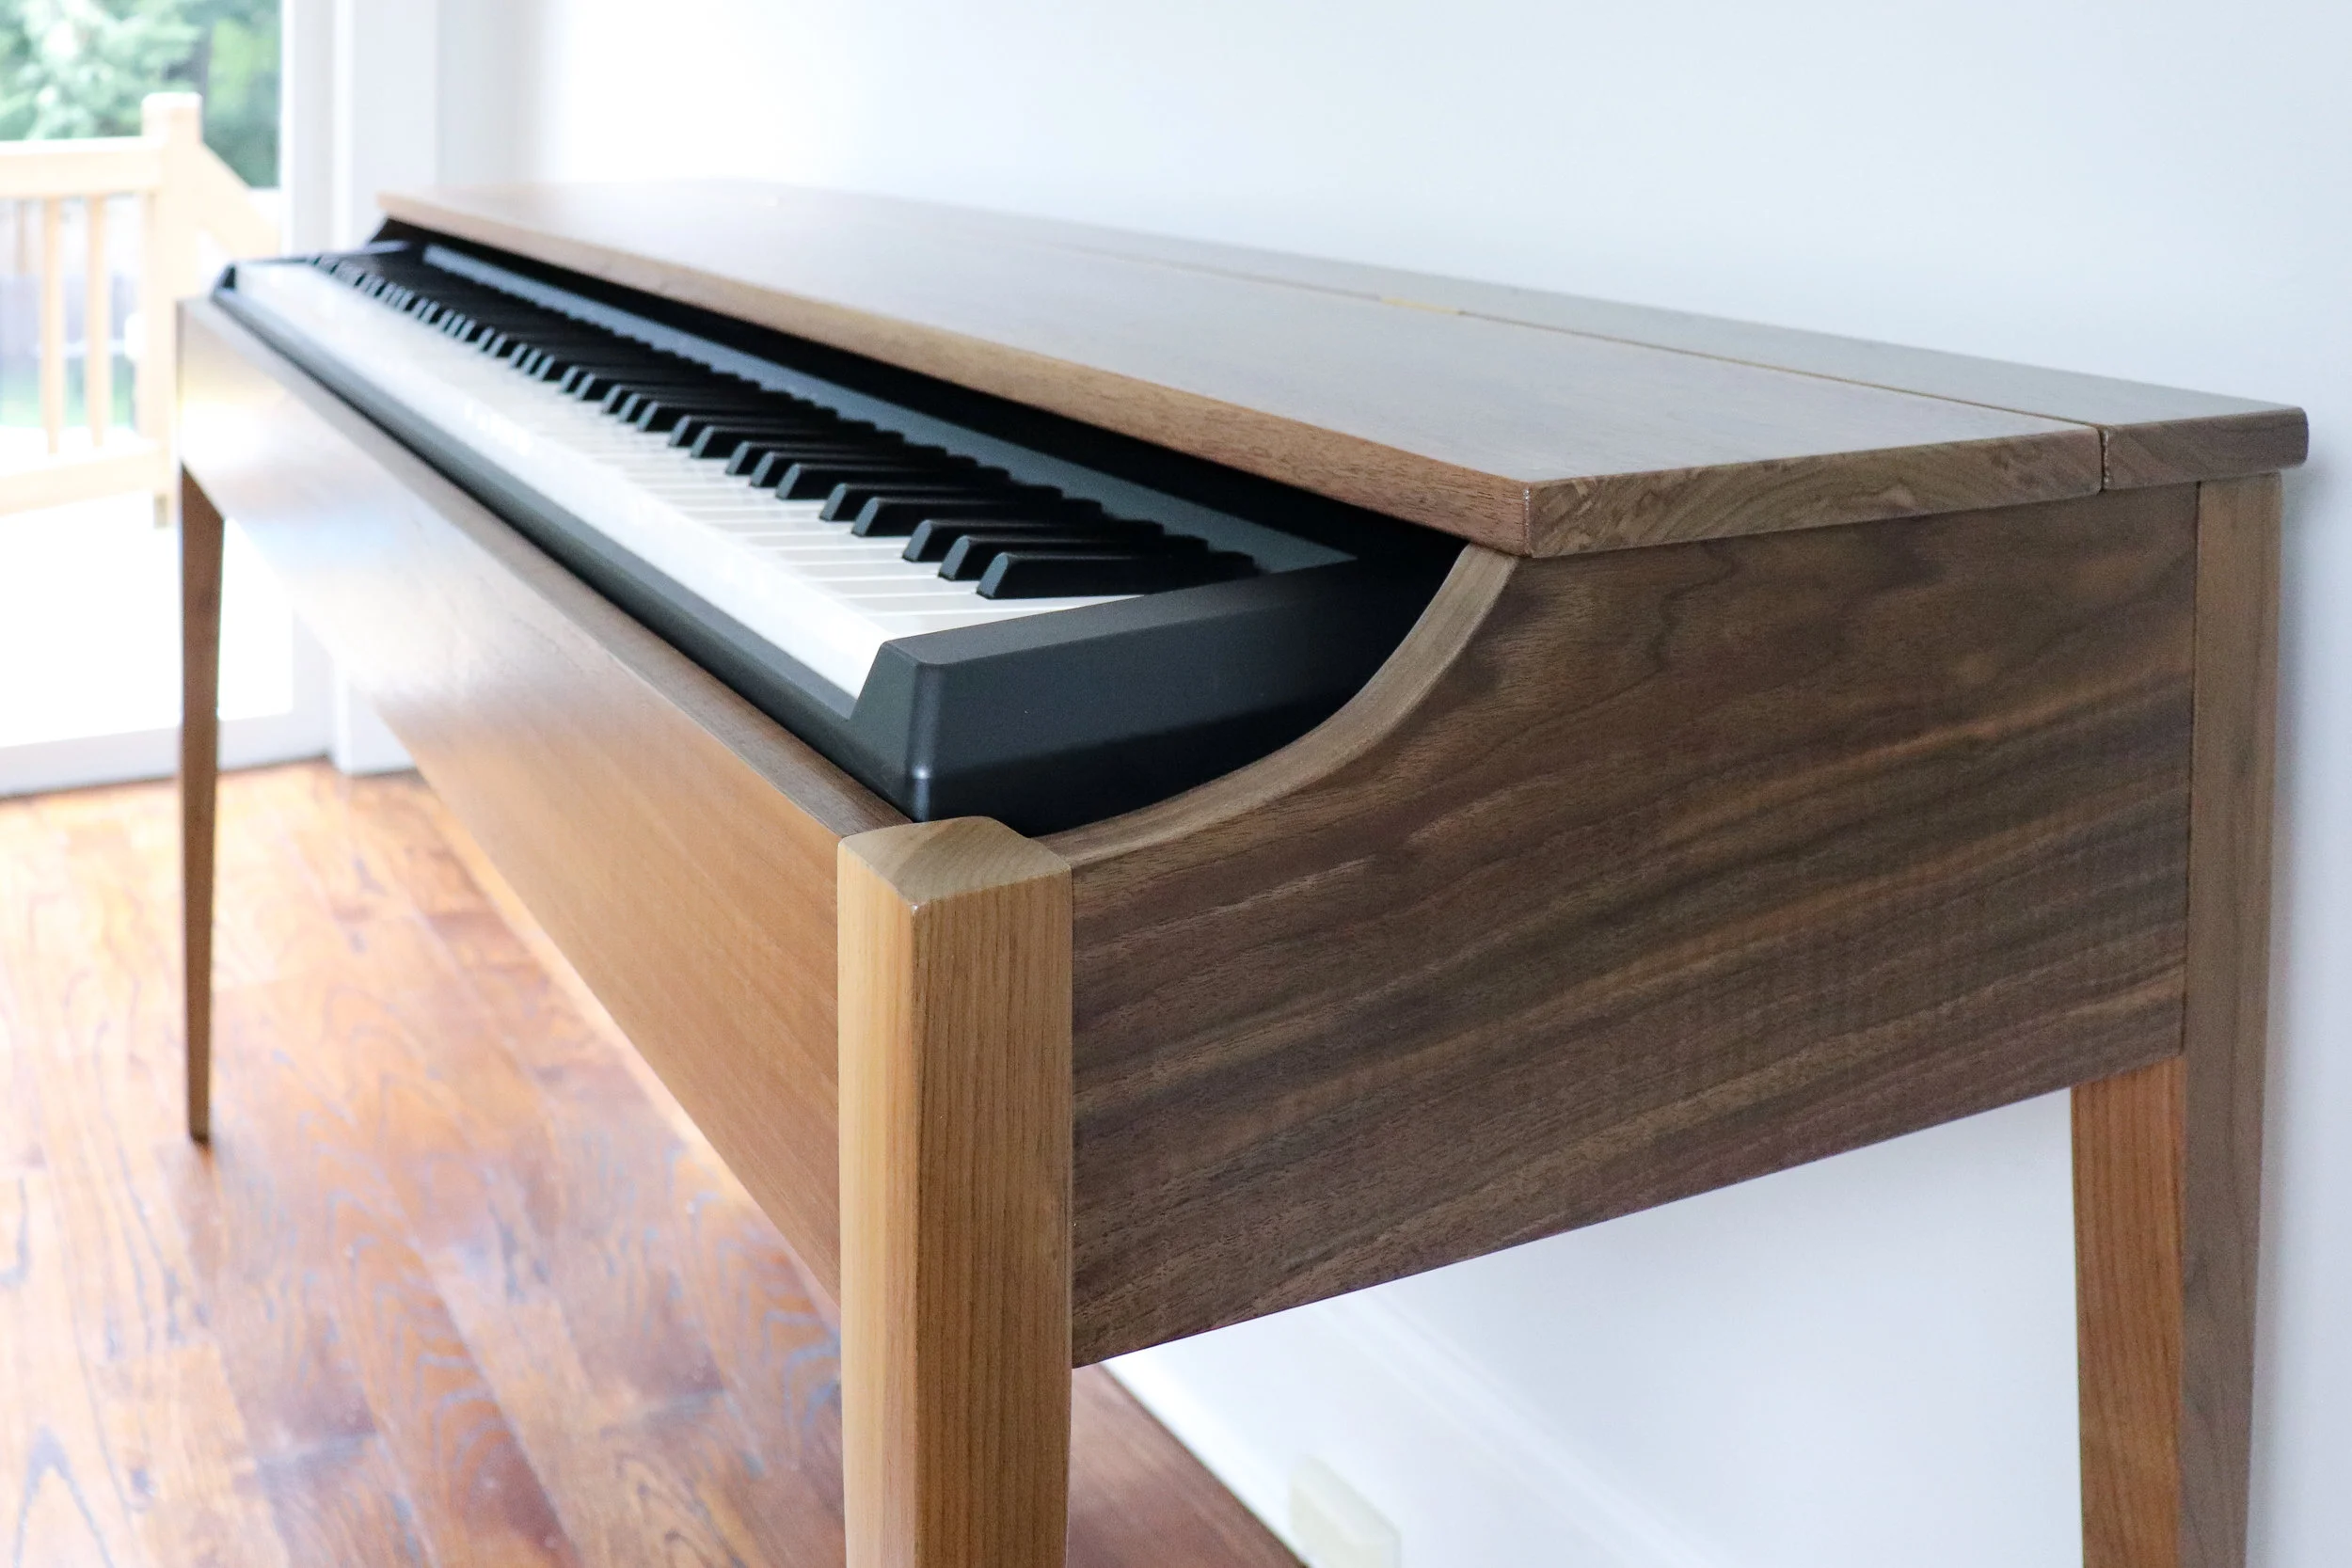
And it’s complete!
I LOVE how this turned out, I think it really looks like a high end piano!
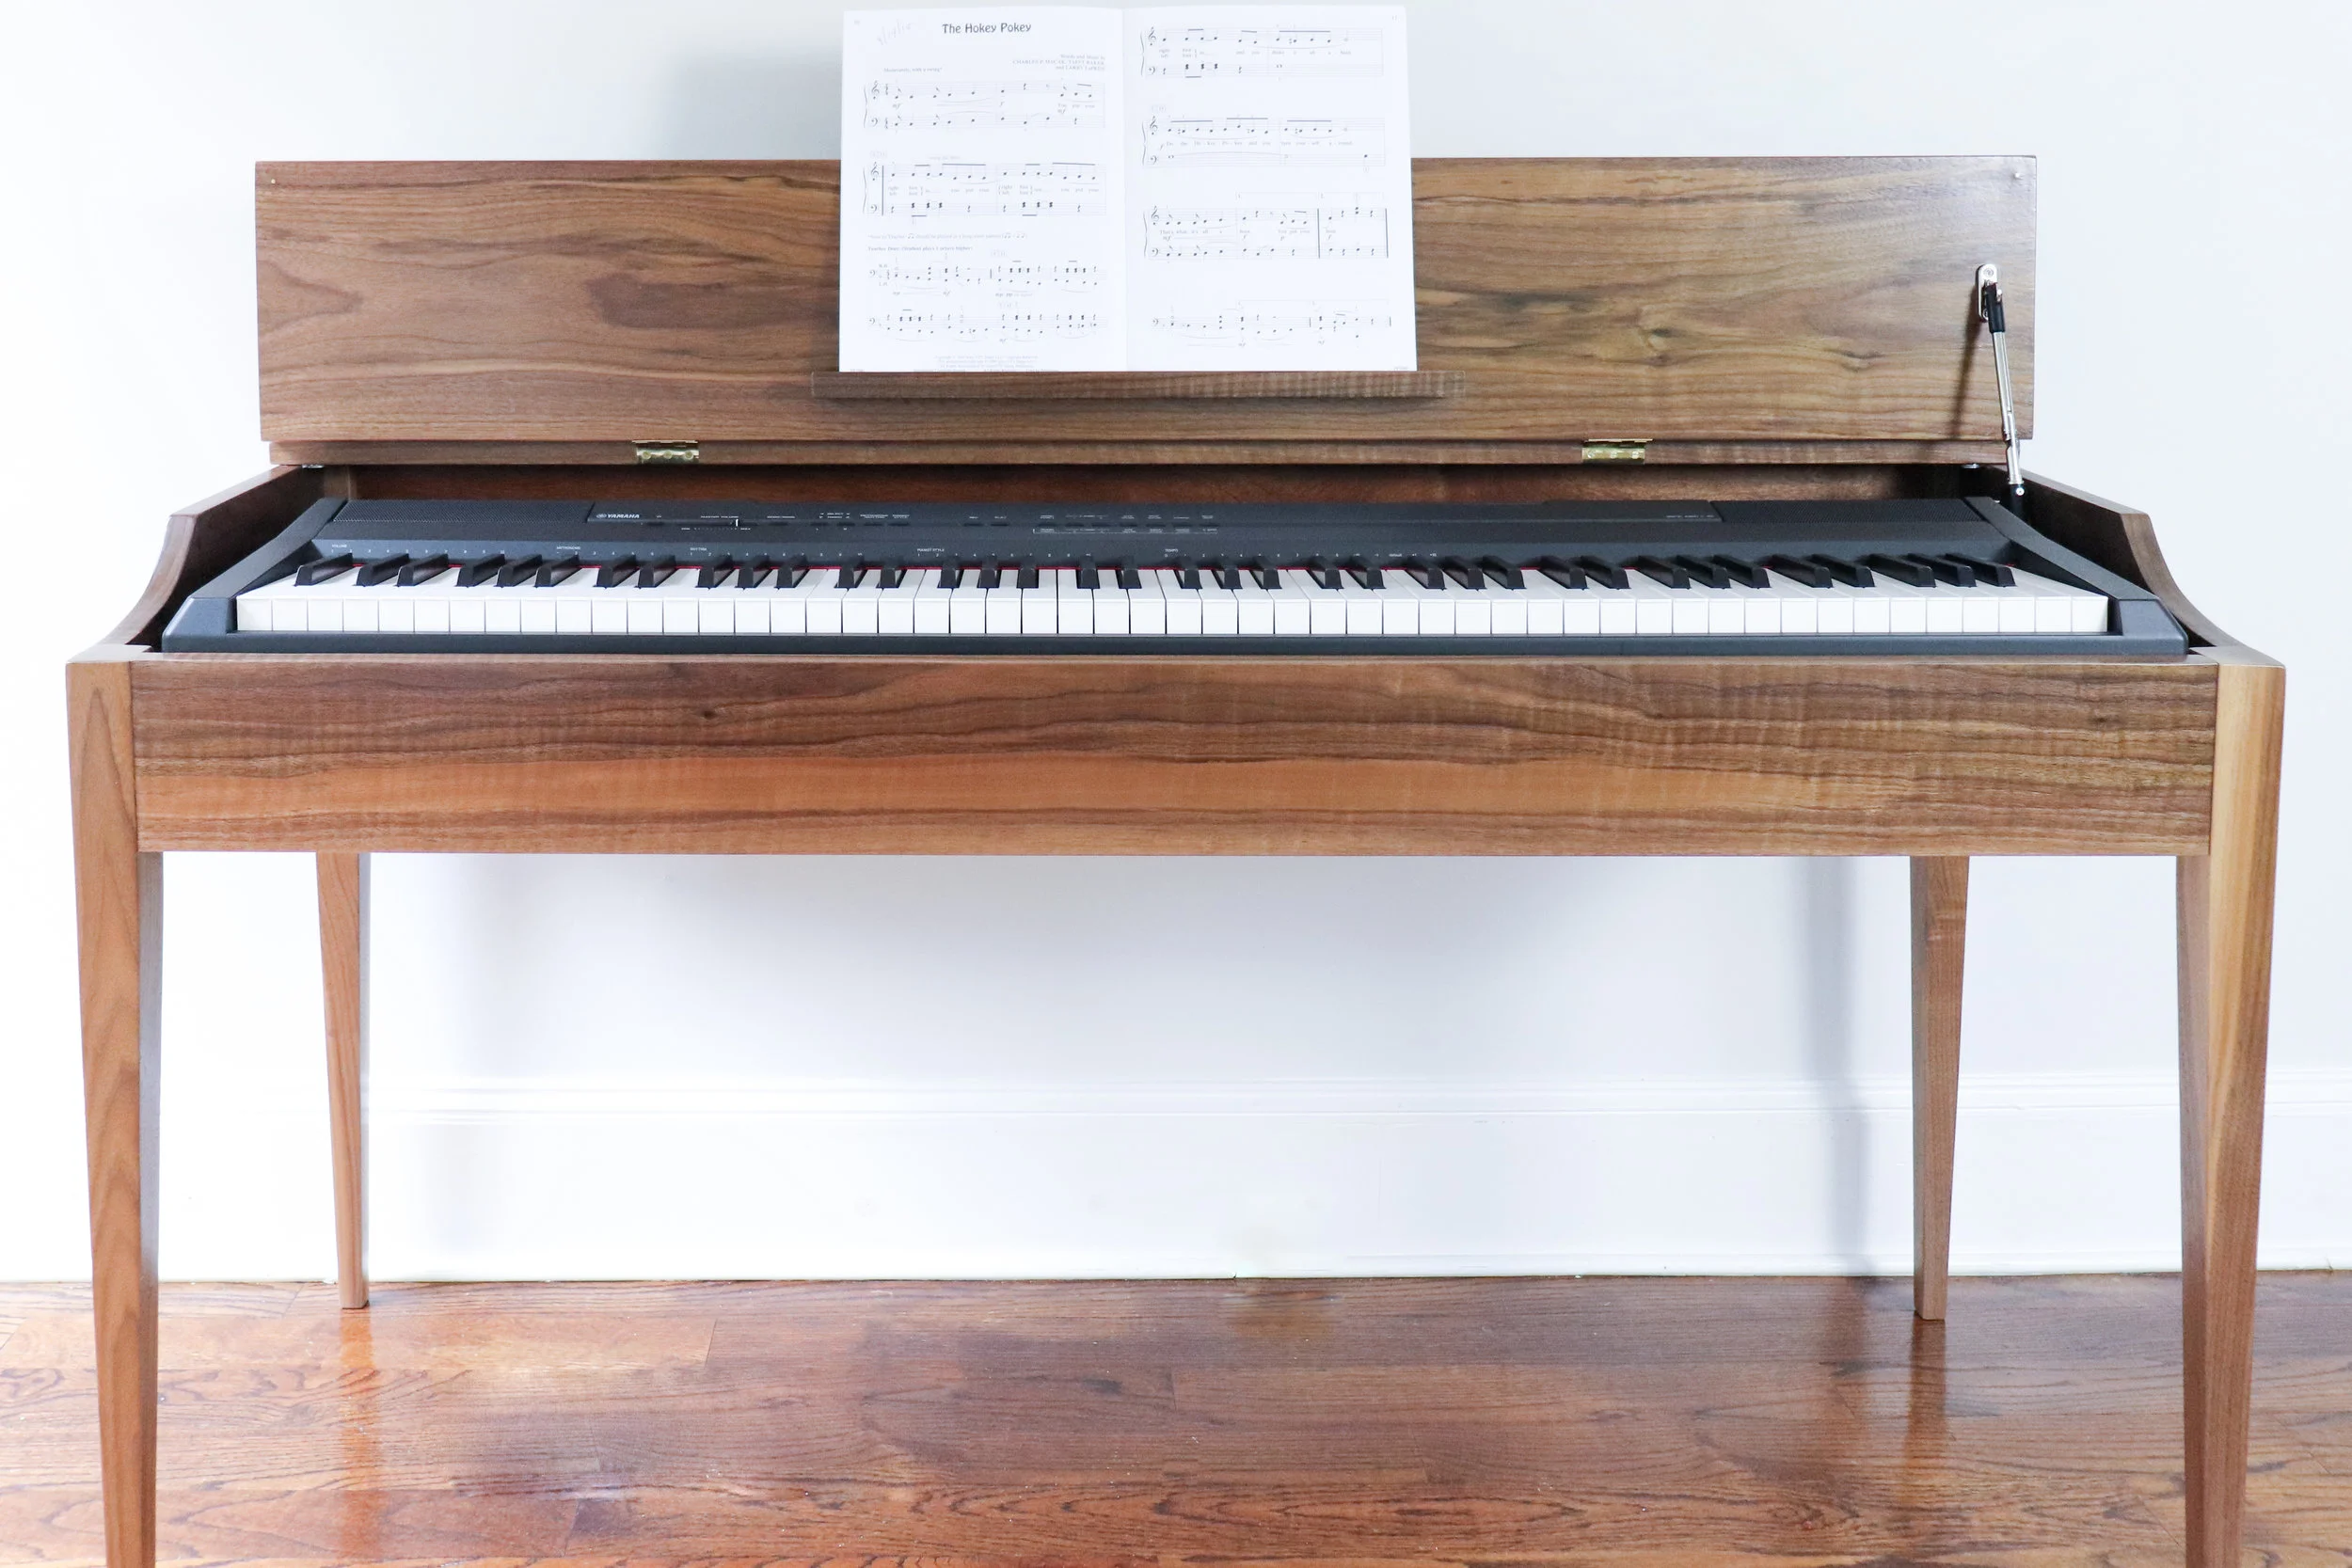
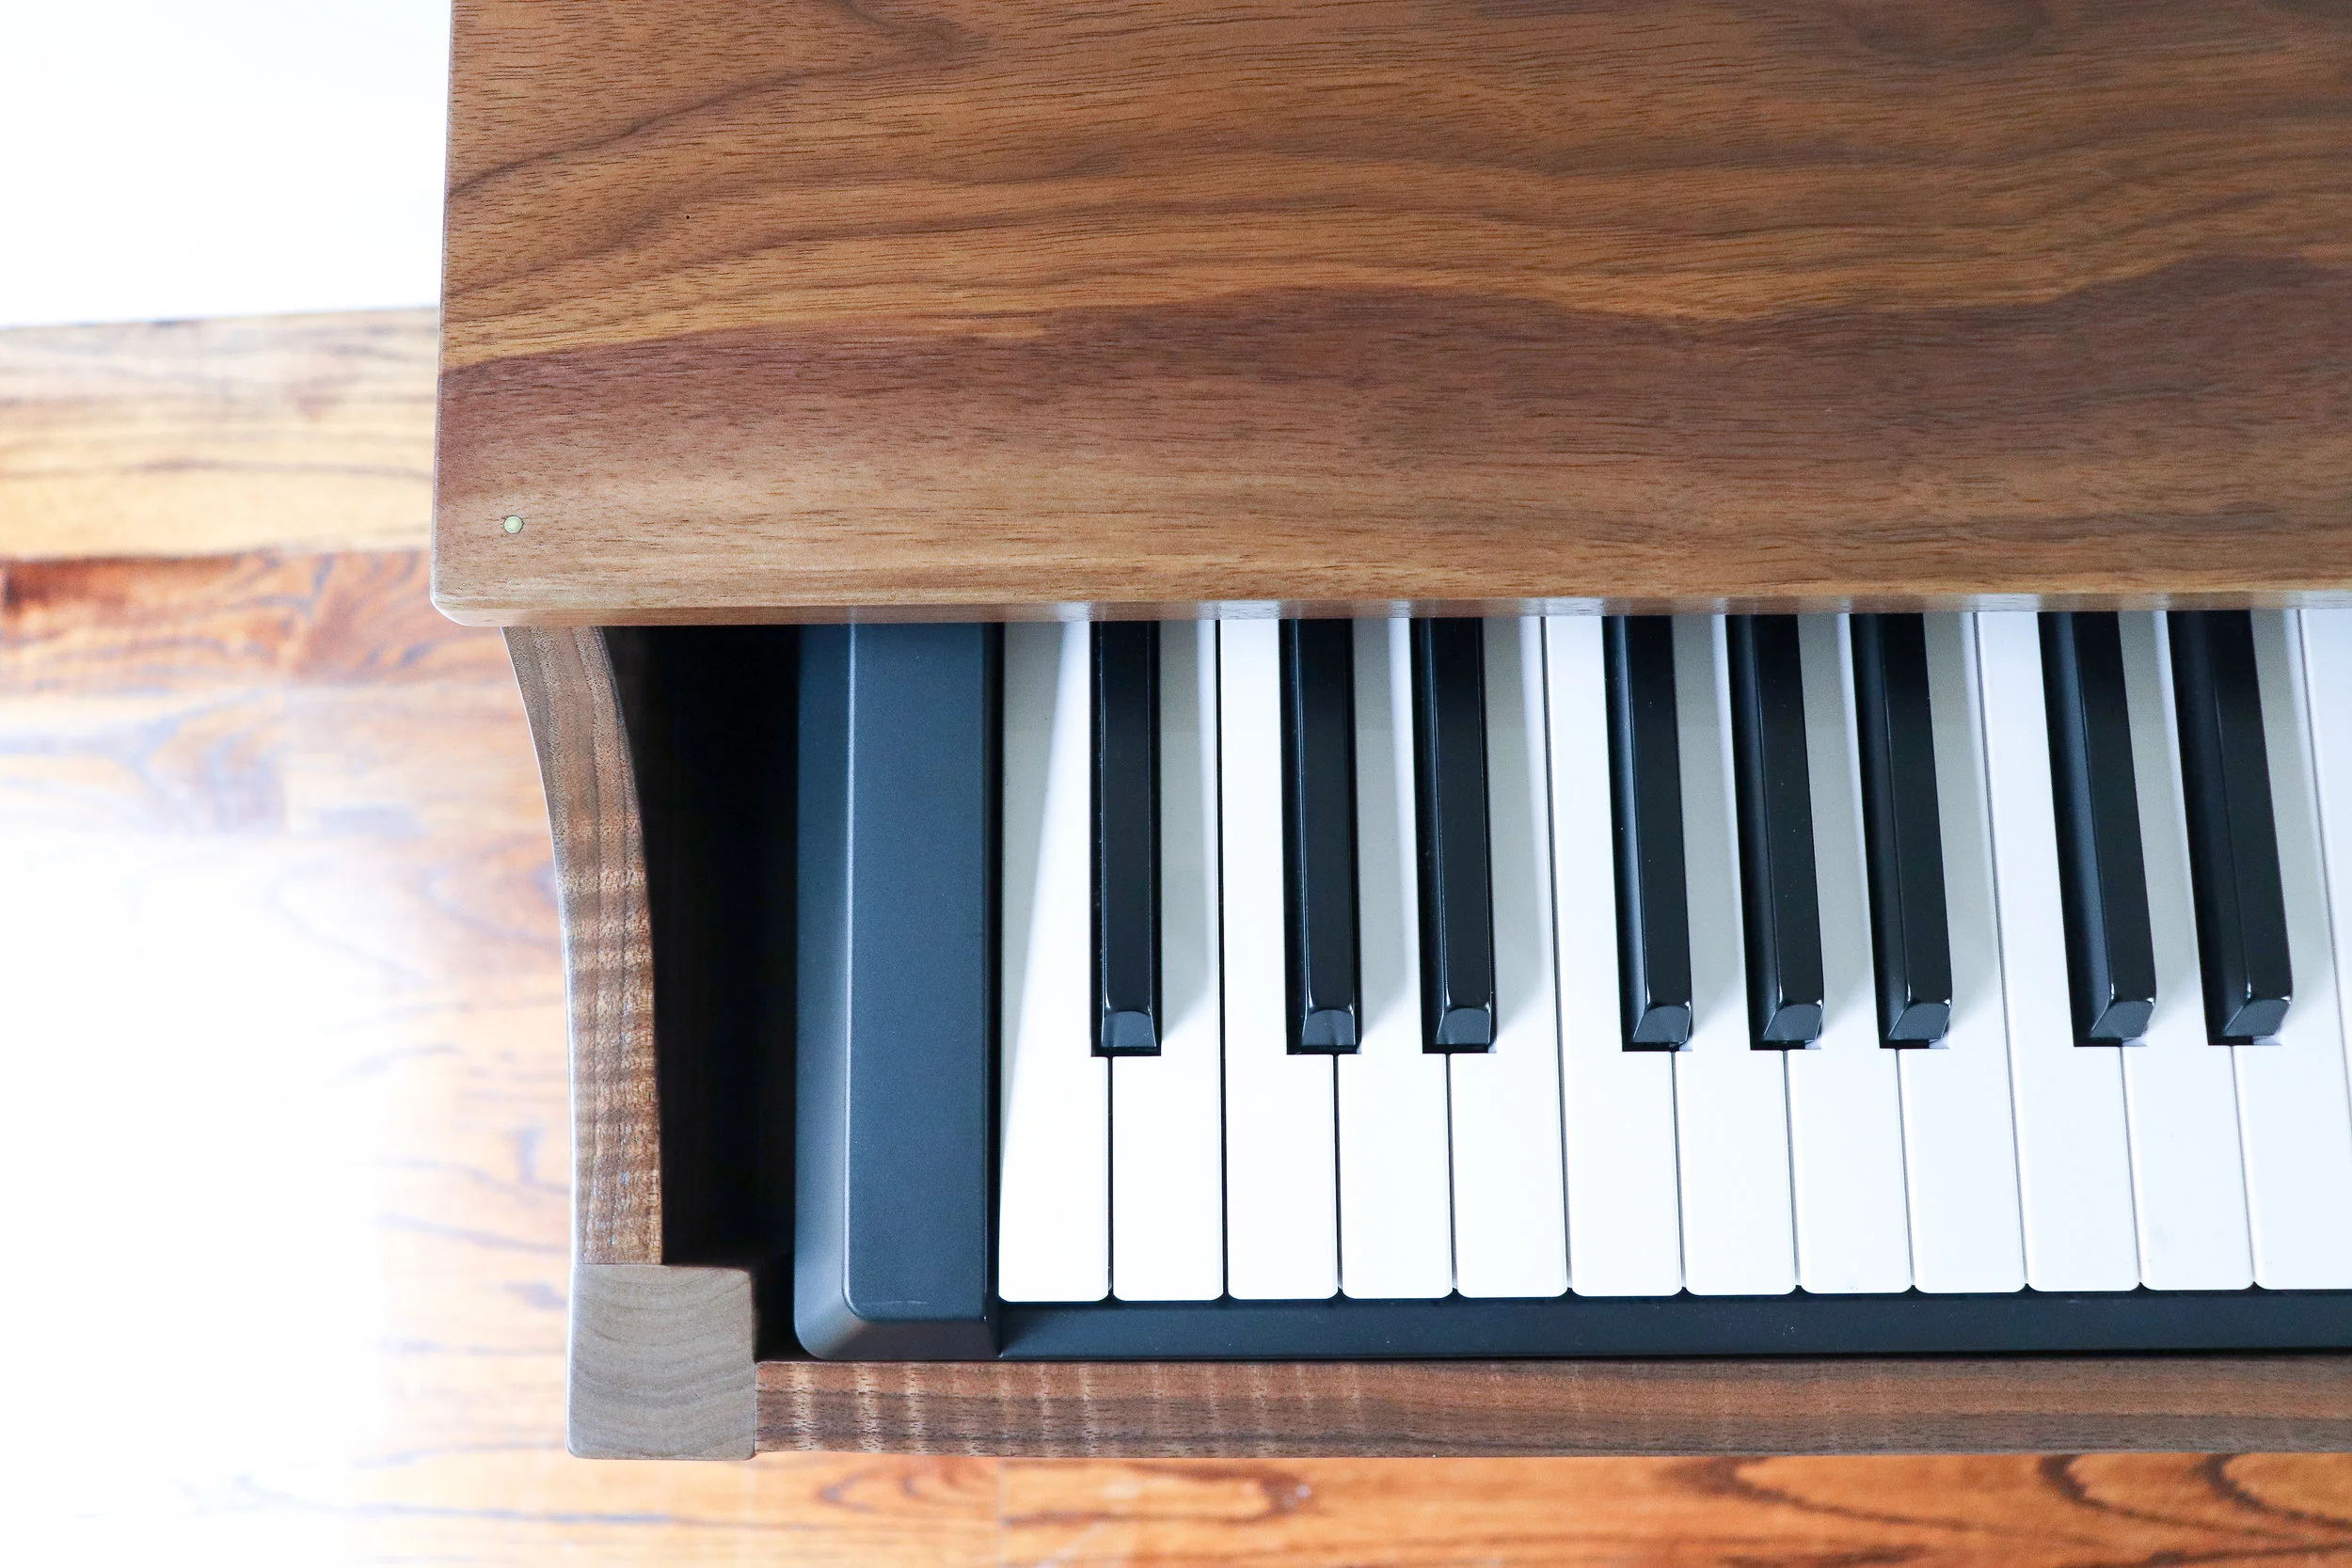
I love how small details can make such a huge impact on design, like the little brass dot.
Or the music book ledge.

And my favorite little detail, the small reveal from the leg to the apron.

I can’t wait to hear all the beautiful music my kids will make on this!

I acknowledge that The Home Depot is partnering with me to participate in the ProSpective 2018 Campaign. As a part of the Program, I am receiving compensation in the form of products and services, for the purpose of promoting The Home Depot. All expressed opinions and experiences are my own words. My post complies with the Worth of Mouth Marketing Association (WOMMA) Ethics code and applicable Federal Trade Commission guidelines.