
Making a Three String Guitar
*This post is sponsored by The Home Depot
I have been wanting to make a Cigar Box Guitar for a while, but I couldn't get a hold of any empty cigar boxes... So, I decided to make my own "box" for the guitar body. Since I was making the body from scratch, I realized I didn't have to make a square box, I could make any shape I wanted! I thought about a few different shapes until I settled on this modern design that is based off St. Vincent's Ernie Ball Music Man.
Making this Cigar Box style guitar was so much easier than I thought it would be, If you are interested in building guitars, I think its a great place to start. After building this, I totally have the confidence that I could build a full size guitar now.
You can download the free template for the guitar body and the template for the frets down below!
Watch the full video below to see how I made it!
Links below are affiliate links, clicking on them helps me keep this site going at no extra cost to you :)
TOOLS
PARTS FOR THE GUITAR
TEMPLATES
I started by making the "box" or body of the guitar. If you are going to be using a Cigar Box or any other box you can skip this step and go straight to the neck.
I glued up a few scraps of 4x4 that I had lying around. I wanted the body to be as deep as possible, thats why I went with the thicker wood.

I printed out the template and glued it to a pieces of hardboard.
Then I cut it out on a bandsaw, staying outside the lines. To bring it to its final shape I cleaned it up on the bench top sander.
The template below is for the outside of the guitar body. I also made one that was slightly smaller which is for the inside of the body. (To print the smaller one for the inside, just change the printer settings to print it at a slightly smaller scale, about 95%)

I transferred the lines of both templates onto the blank I glued up earlier and started hogging out the middle at the drill press. I set the depth stop on the drill so the bottom would be even.
I started out with a larger forstner bit, but since you have to go slower with larger bits, I felt like it was taking longer. So I swapped it out with a smaller forstner bit and the process went a bit quicker.
This step did take a really long time...
I'm not sure if it was the best way to create the "box" but it worked.

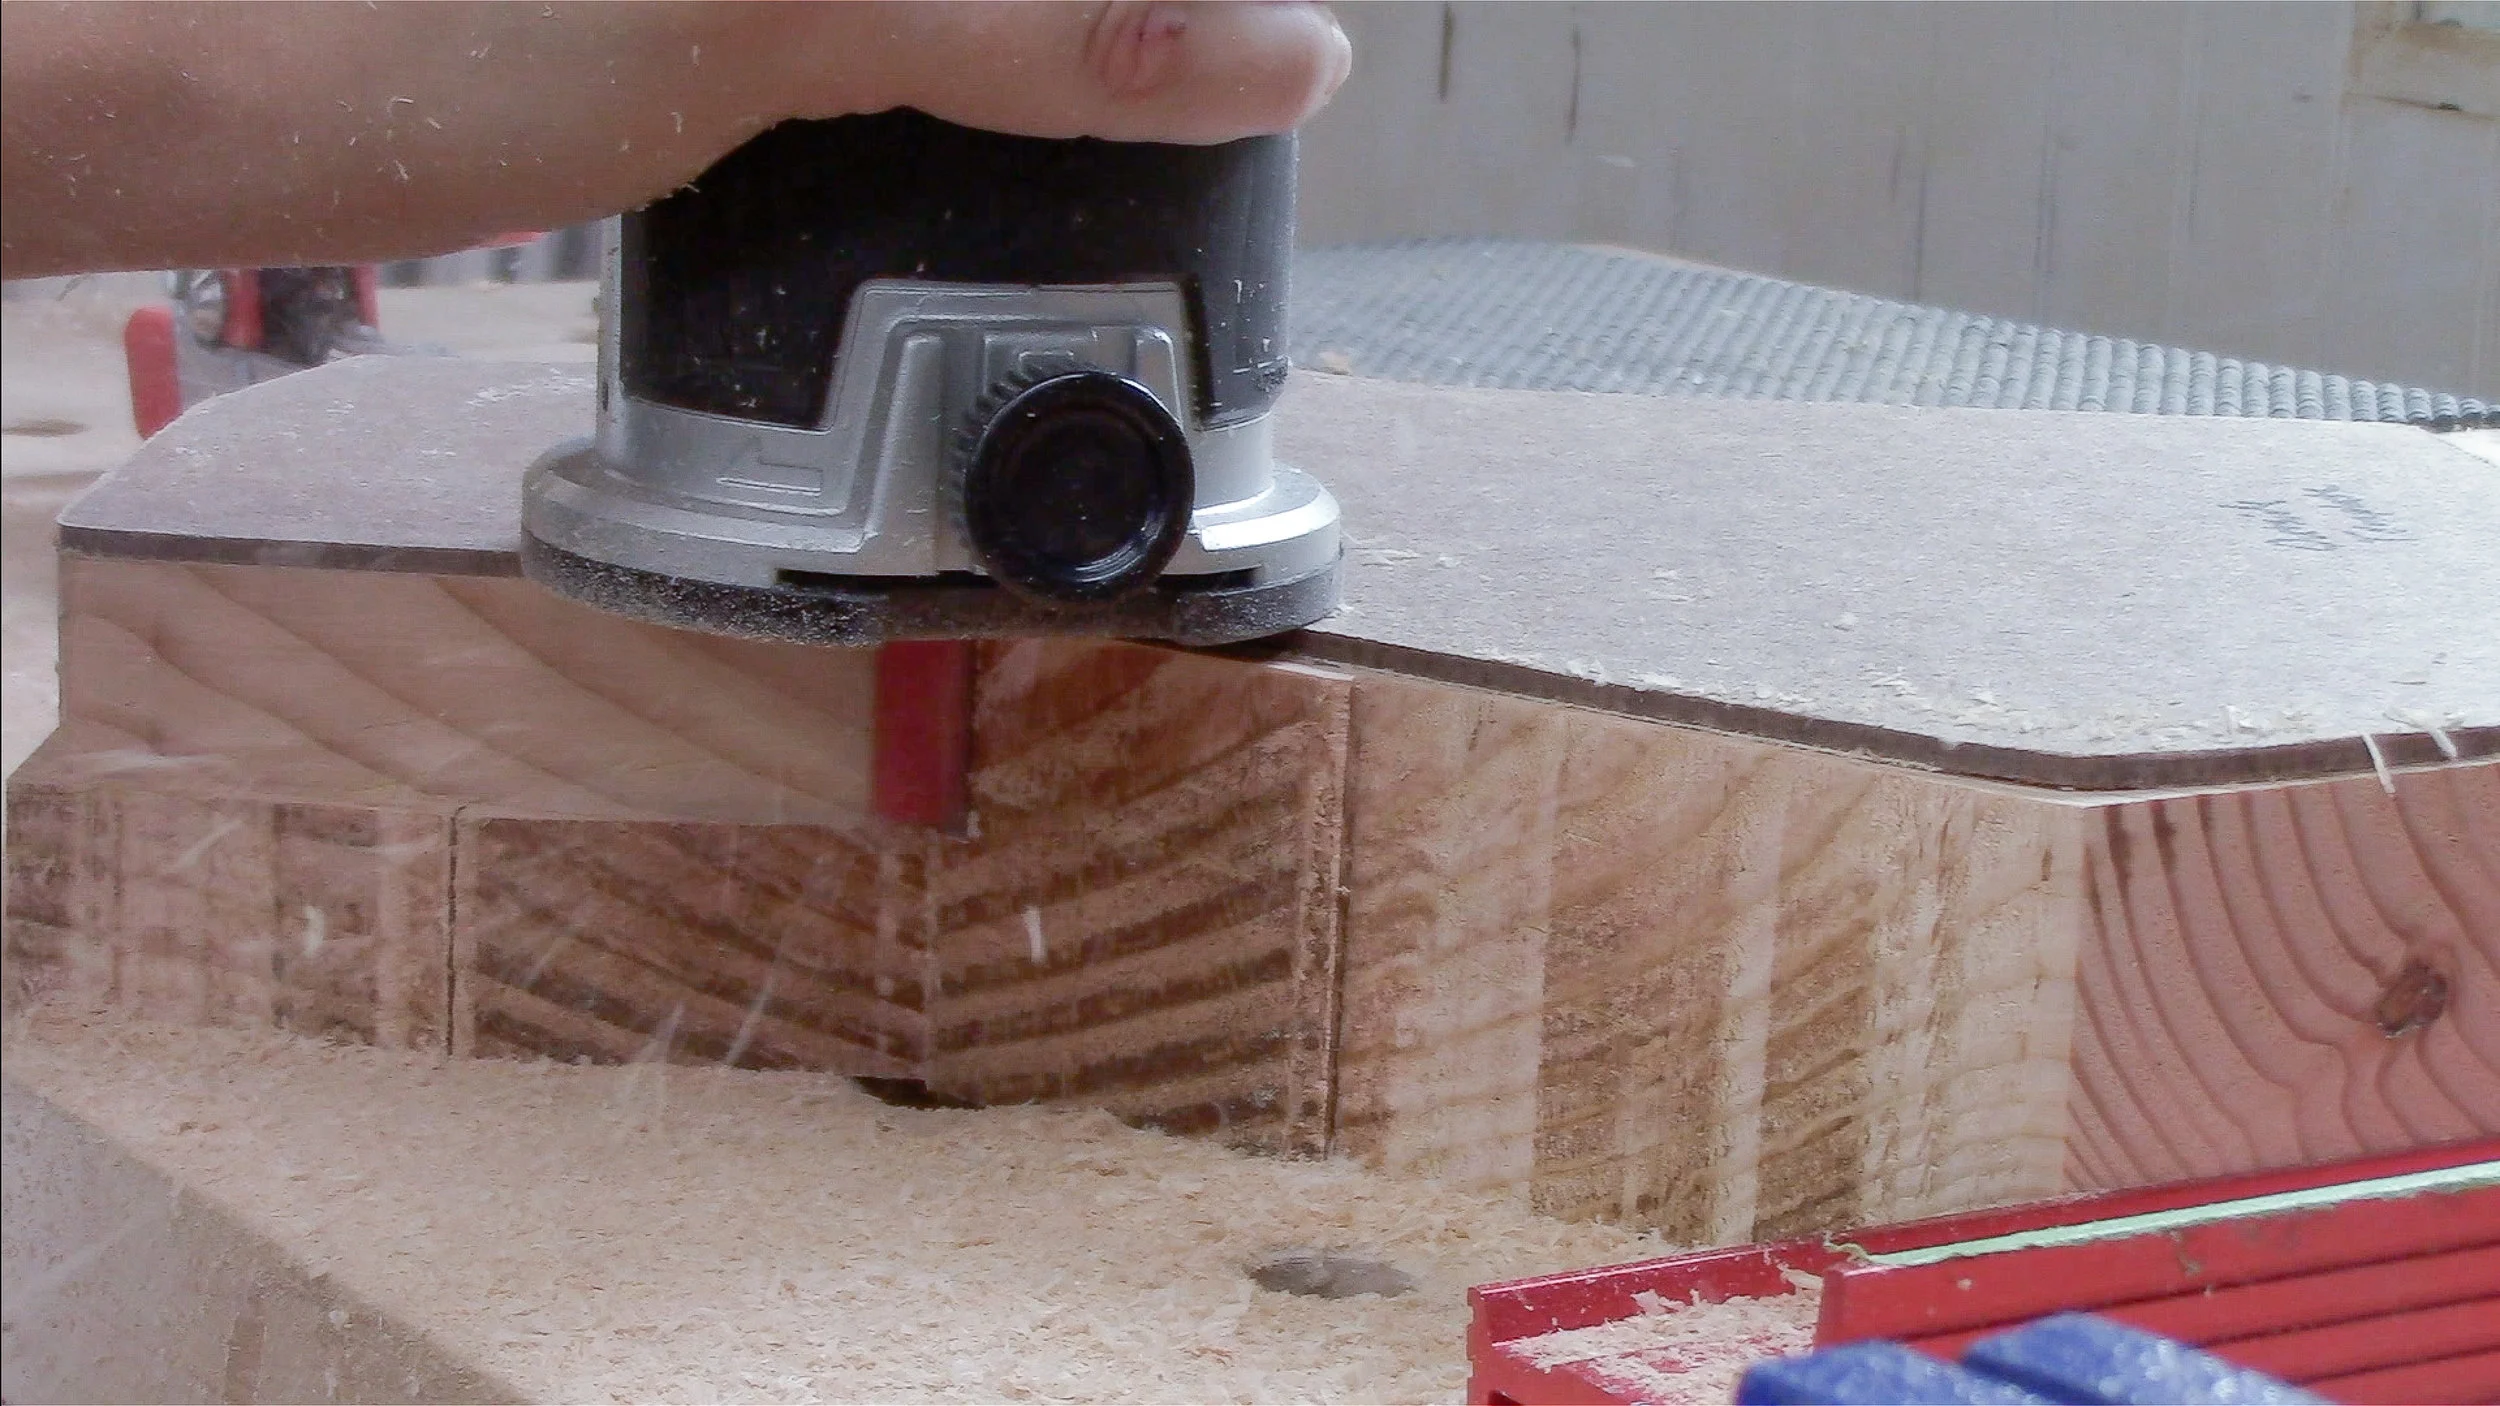
I got really close to the lines I drew but made sure not to go over them. After hogging out the middle I refined the shape with a router and the template I made earlier.
The Makita 18V Cordless Router comes with a pattern attachment. This is awesome. In the past when using templates, I used a regular pattern bit that is 1" long, which is fine for most cases. But in this case, I wanted to be really careful with how much material I was removing. Having a pattern bit attachment meant I was able to start the bit really short and slowly make it longer using the depth adjustment to remove small amounts of material at a time.
This felt a lot safer to me than using a regular pattern bit that starts off at 1" long.

This was my first time using a cordless router and I am sold. I used to fumble with the cords on my other trim routers. No more!
Another great feature I love about this router is the smooth Rack-and-pinion fine depth adjustment system. It's really smooth.... I used to use another router that would hurt my thumbs to dial in fine adjustments. This router adjusts so easily which makes for more precise cutting.
This project didn't really require precision in the depth setting, but I can see how that is going to be helpful for future projects.
The brushless motor also aids in accuracy and makes for quick work!
I'm really happy to have this little guy in my shop.

I am really excited about having some Makita tools in my shop. The router did not come with a battery, so I got a separate 4AH battery pack with charger kit. I've used this router for two projects and the battery isn't even close to being dead. Even when I will need to charge it, it's a rapid charger, so It will be ready to use fairly quickly. The charger is also protected against overloading, over-discharging and overheating.
I am really excited about having some Makita tools in my shop. The router did not come with a battery, so I got a separate 4AH battery pack with charger kit . I've used this router for two projects and the battery isn't even close to being dead. Even when I will need to charge it, it's a rapid charger, so It will be ready to use fairly quickly. The charger is also protected against overloading, over-discharging and overheating.
Its a pretty smart little charger that actually communicates with battery to optimize battery life and it works with all the Makita STAR Protection tools. I'm looking forward to getting more Makita in my shop!
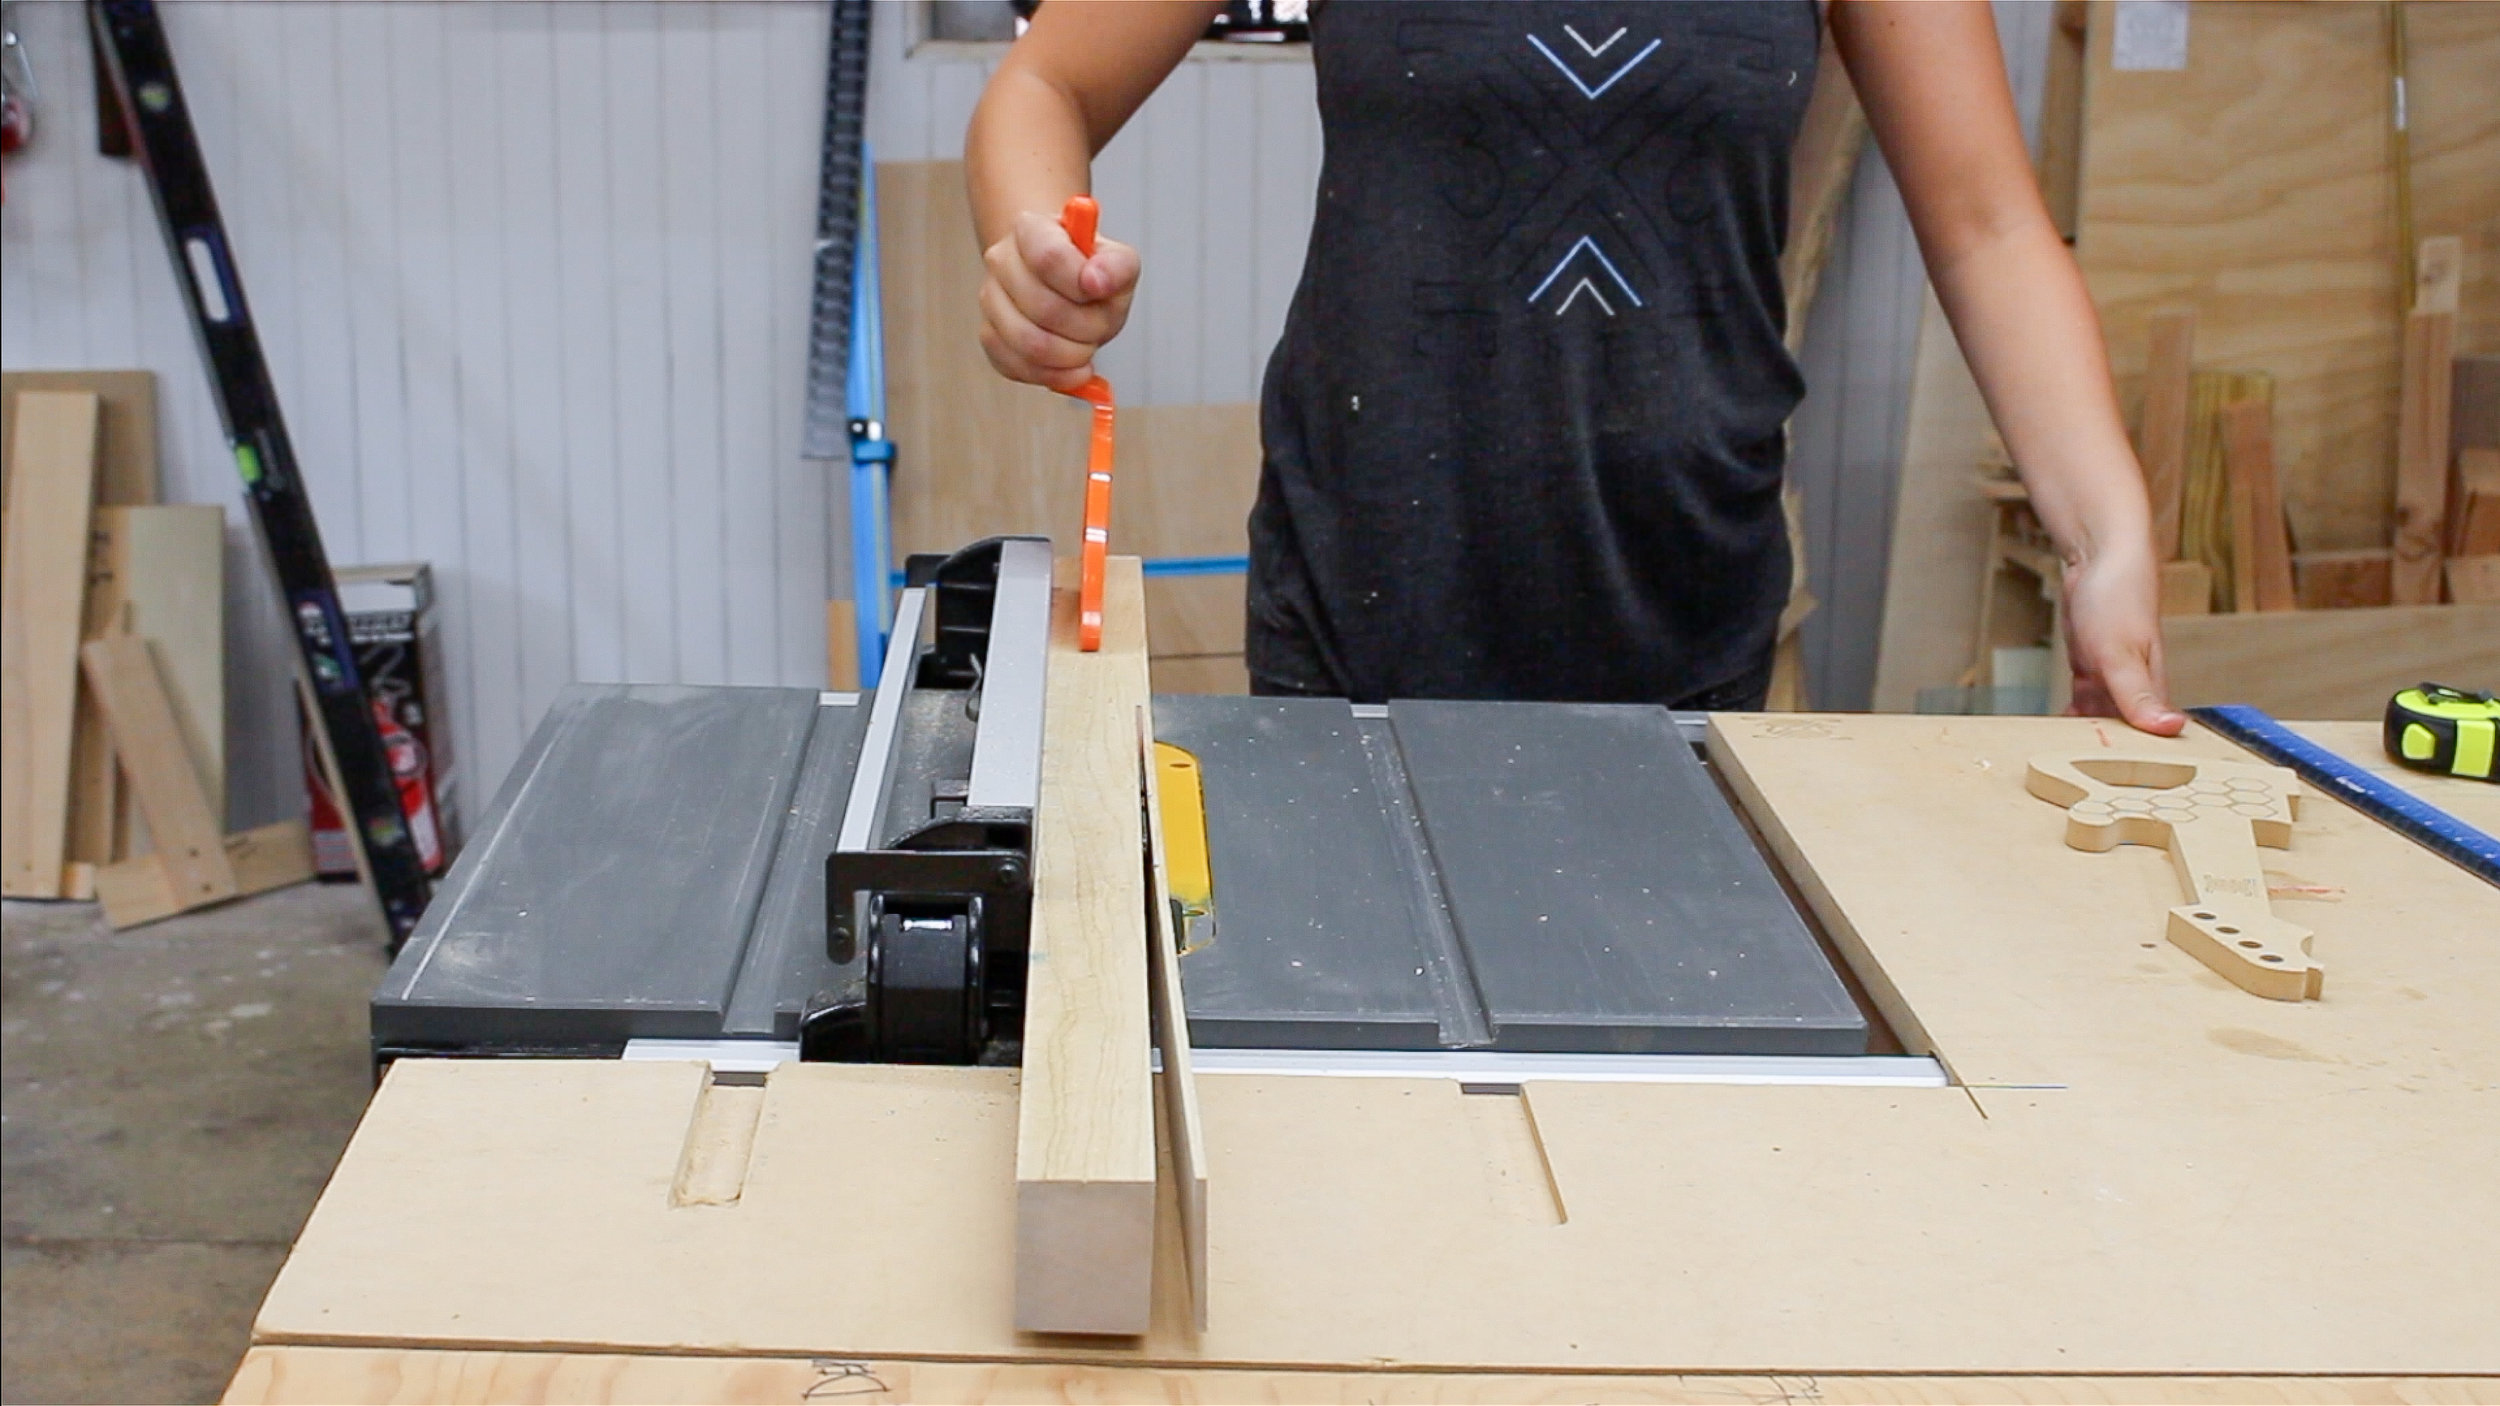
After I cleaned up the inside as far as I could get with the router I cut the outside to rough shape using my cross cut sled on the table saw.
I cut the angled pieces the table saw couldn't reach on the bandsaw.

Then I used double sided tape on the outside template and cleaned it up with the pattern bit again.
I was really nervous about the grain direction here, especially because the material was so thin (about 3/16") and I had a reason to be. While I was routing a piece broke off...
I fixed it was some CA glue and moved on, but I realized I needed to do a climb cut on the parts where the grain was running in a different direction. Climb cuts can be dangerous so you have to read the grain and knew when it is appropriate to do them.
It's important that your workpiece is clamped really well and you take shallow passes.
I got as far as I could go with the trim router and trimmed up the rest on the router table.
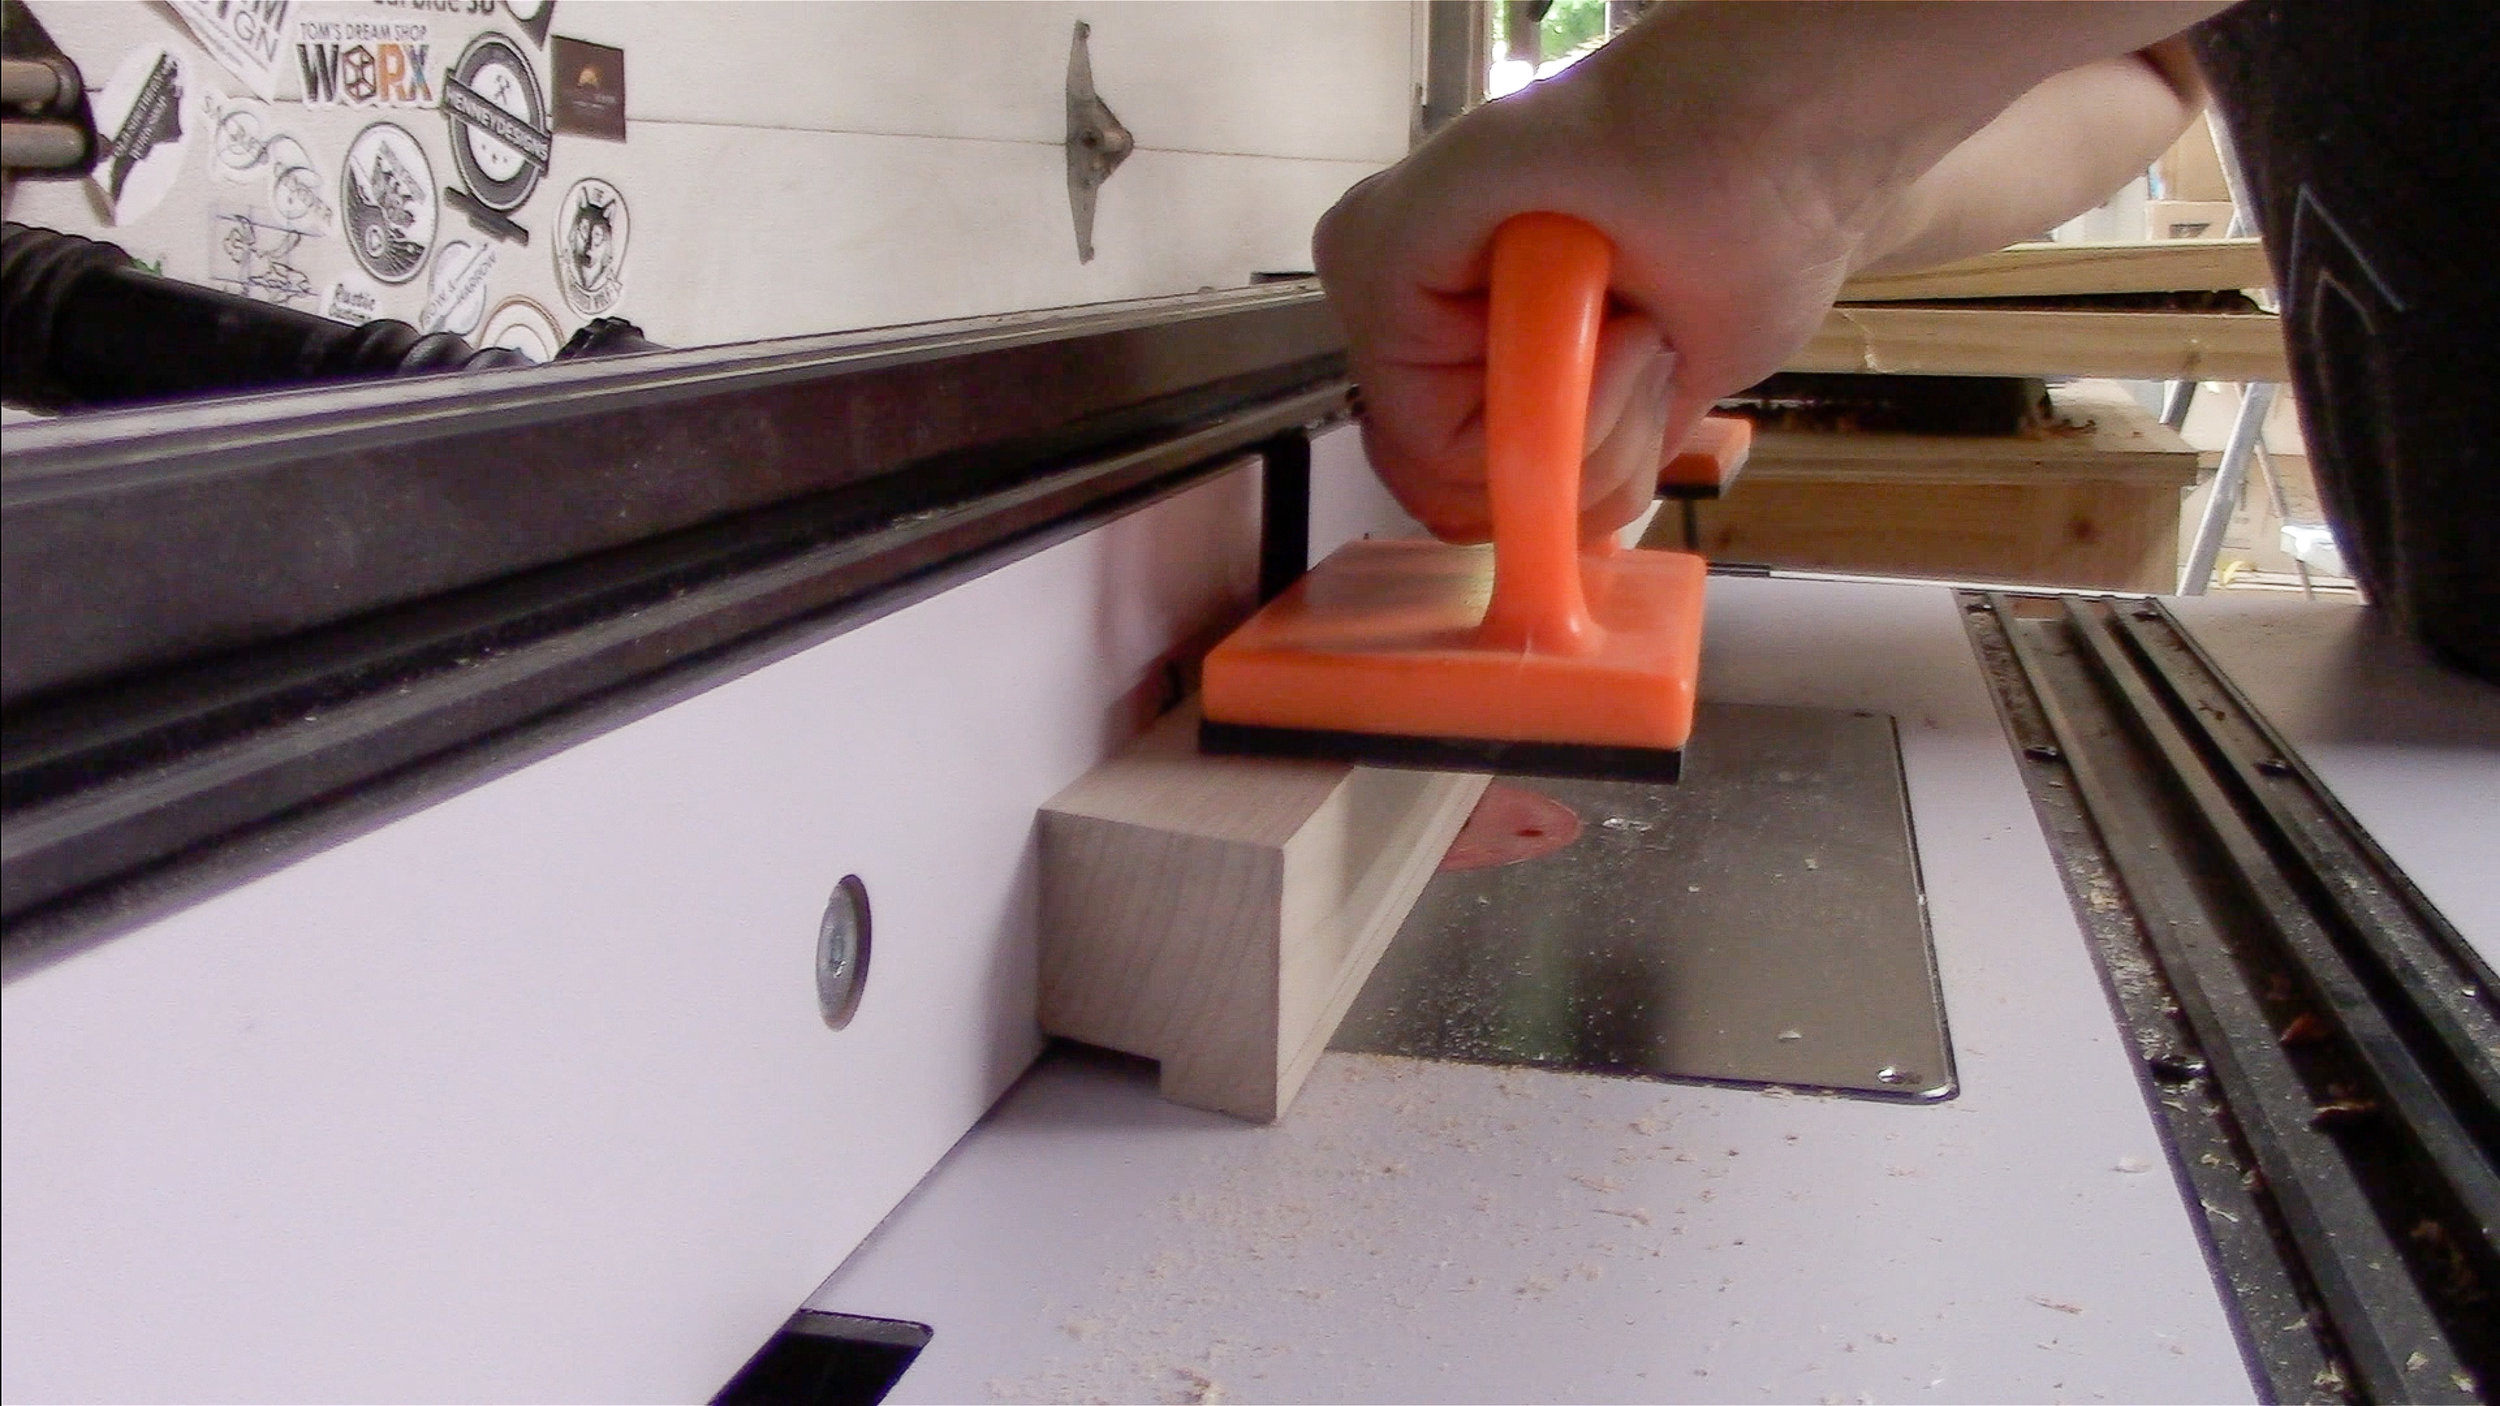
This time I was really careful to do a climb cut where the grain was running up. And I was also really careful and used push blocks since I was doing a climb cut on some sections.

After the box was ready I worked on making the top.
I used this big chunk of Spalted Maple I got in the scrap bin of my local hardwood dealer. I cleaned it up a bit on the table saw then I had to resaw it to get a piece that was about 3/16 thick.
Resawing it was not easy since my bandsaw is not big enough.
I did whatever I could on the table saw and finished it off by hand with a Japanese Ryoba Saw. It was a good workout.

After getting it to the thickness that I wanted, I cut it to shape using the template.
I rough cut it on the bandsaw and flushed it up with the router.

Now that the box is complete it was time to move on to the neck.
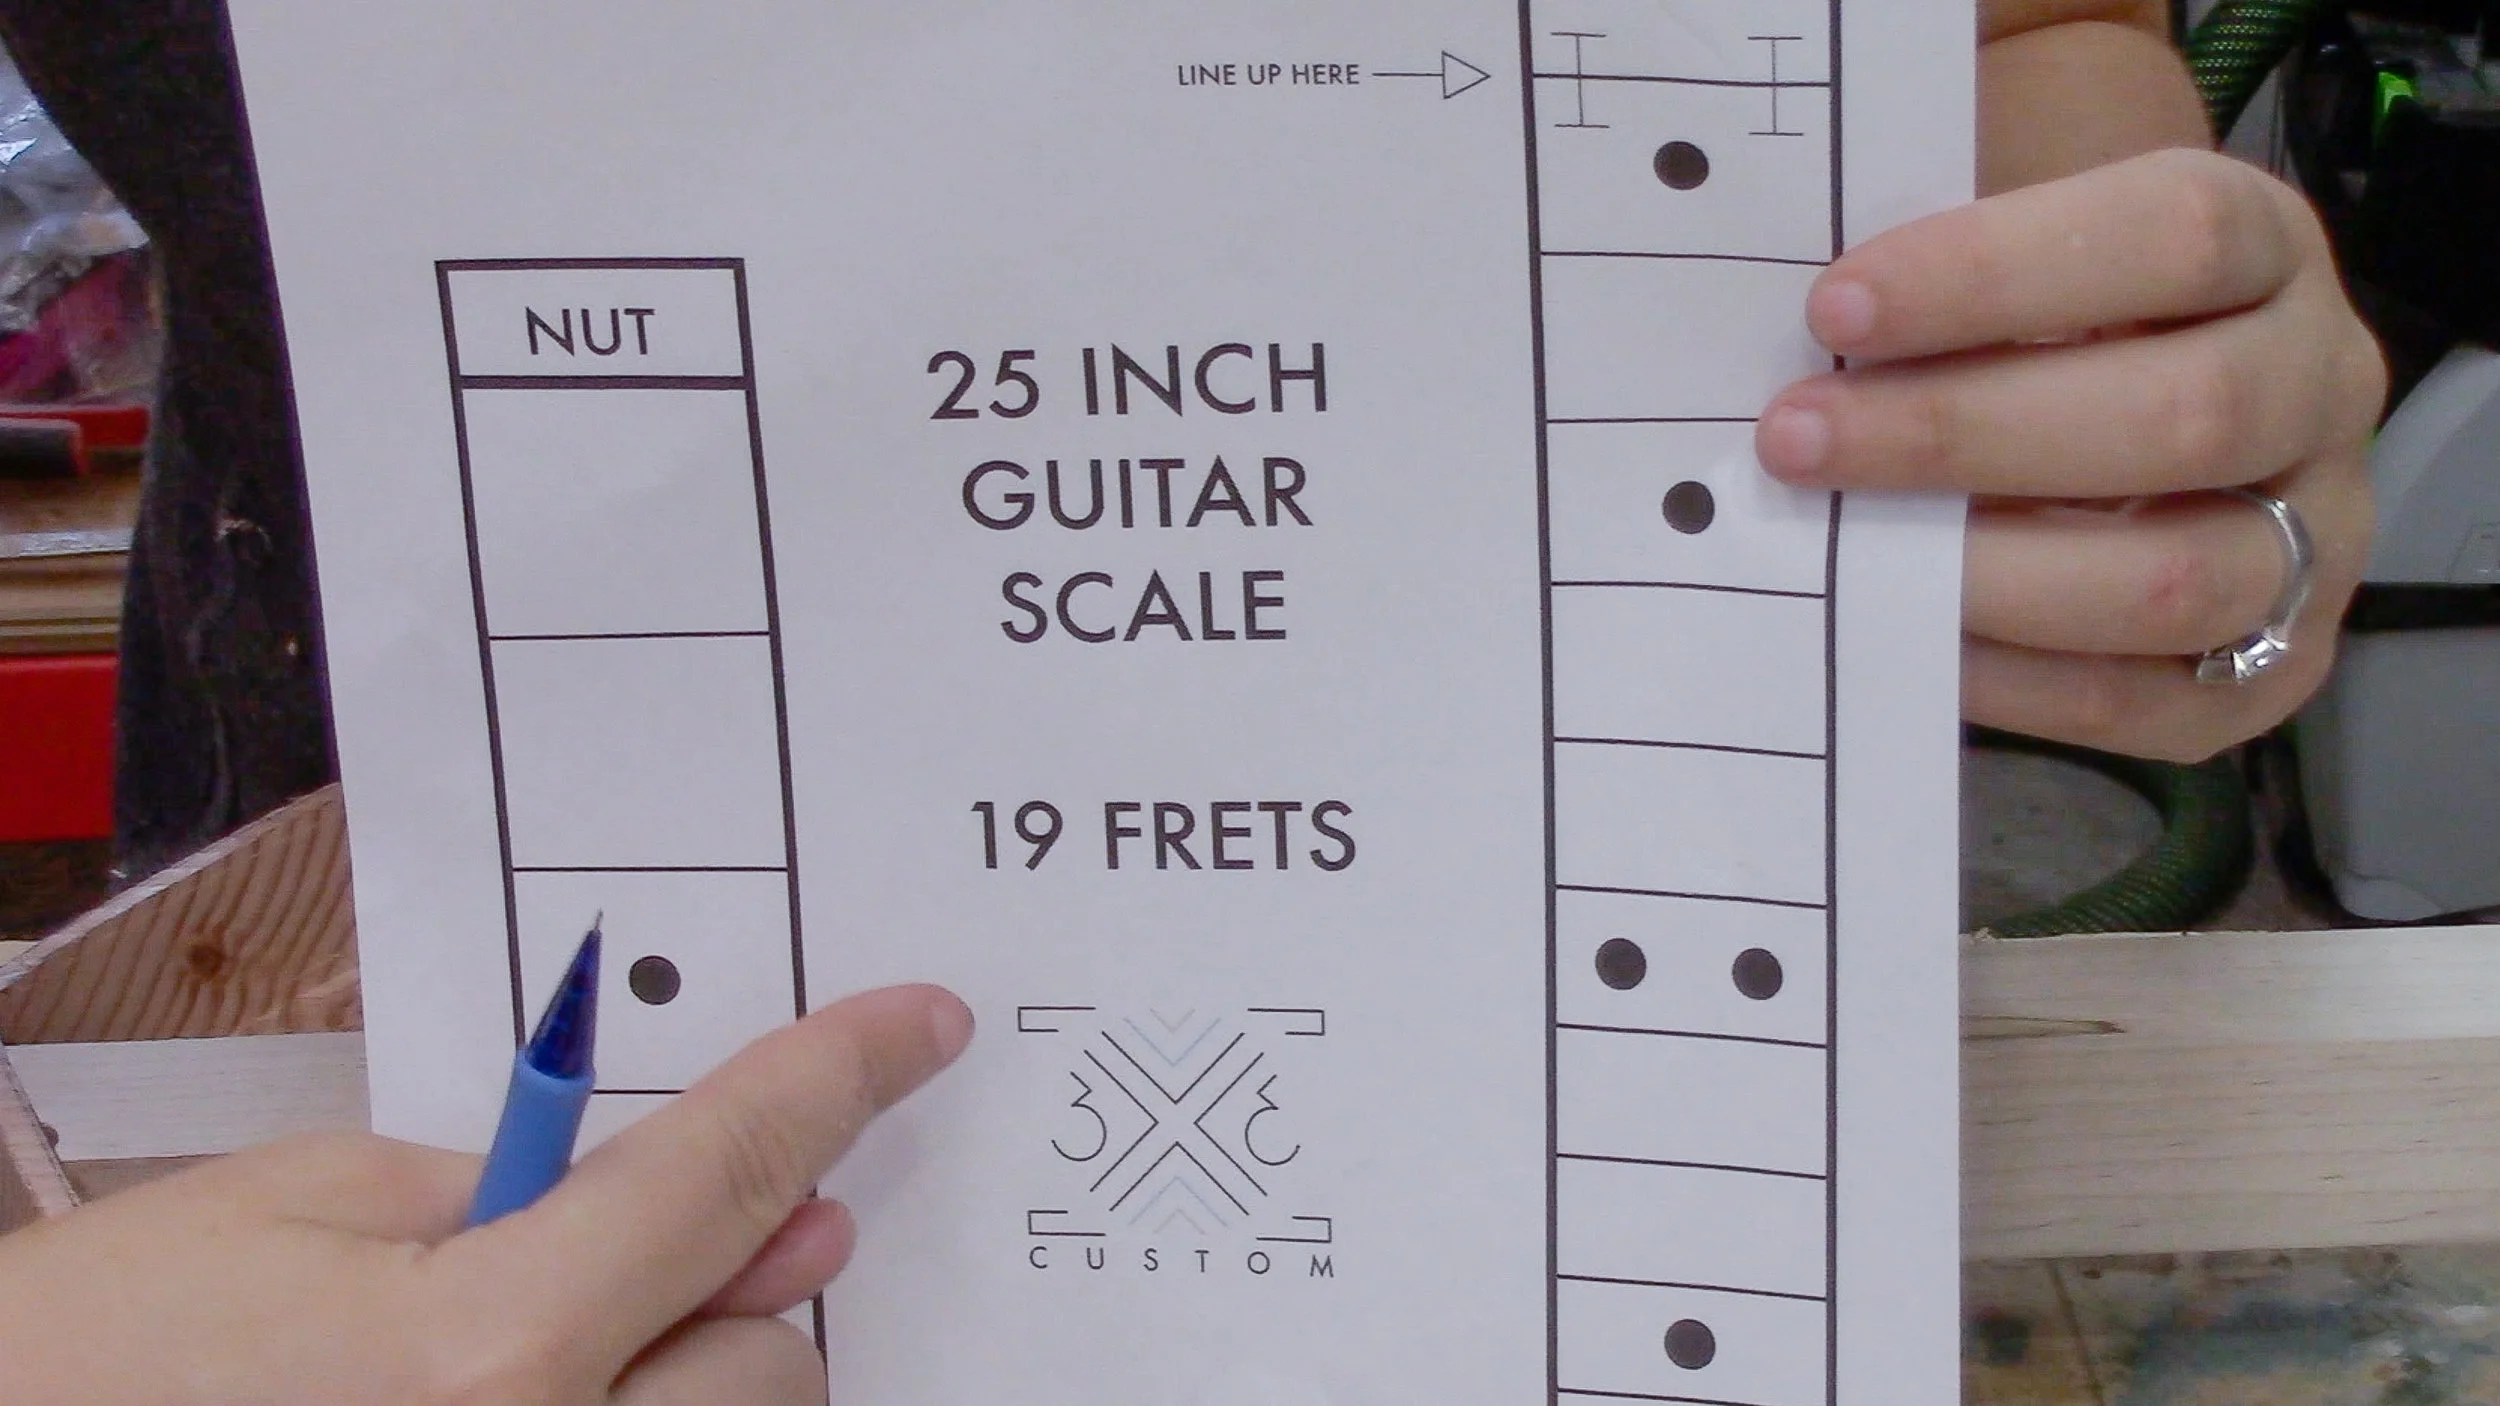
I made this template for a 25" guitar scale. That means there is 25" from the nut to the bridge.
If you already have a box that you are making your guitar out of, this is where you should start.
I took a scrap piece of maple that would be long enough and placed the body template and fret template on top of it.
Then I added 4" for the headstock and cut it to length at the miter saw.

Then I cut it to an 1-1/2" square at the table saw.
I cut one side then flipped it to the other side to make it square.
Finally it was time to cut the box to accept the neck.
I used a pull saw to cut straight down and a coping saw to cut across the bottom to make a notch.

Then I used a file to get the perfect fit.

Now that the neck fit into the box, I needed to notch out the neck so the cover would fit. I did this on the router table but I have seen videos of people using a handsaw.
The cover fits on the box now and it would be flush with the neck, but the cover needs to have room to vibrate in order for good sound to come out.
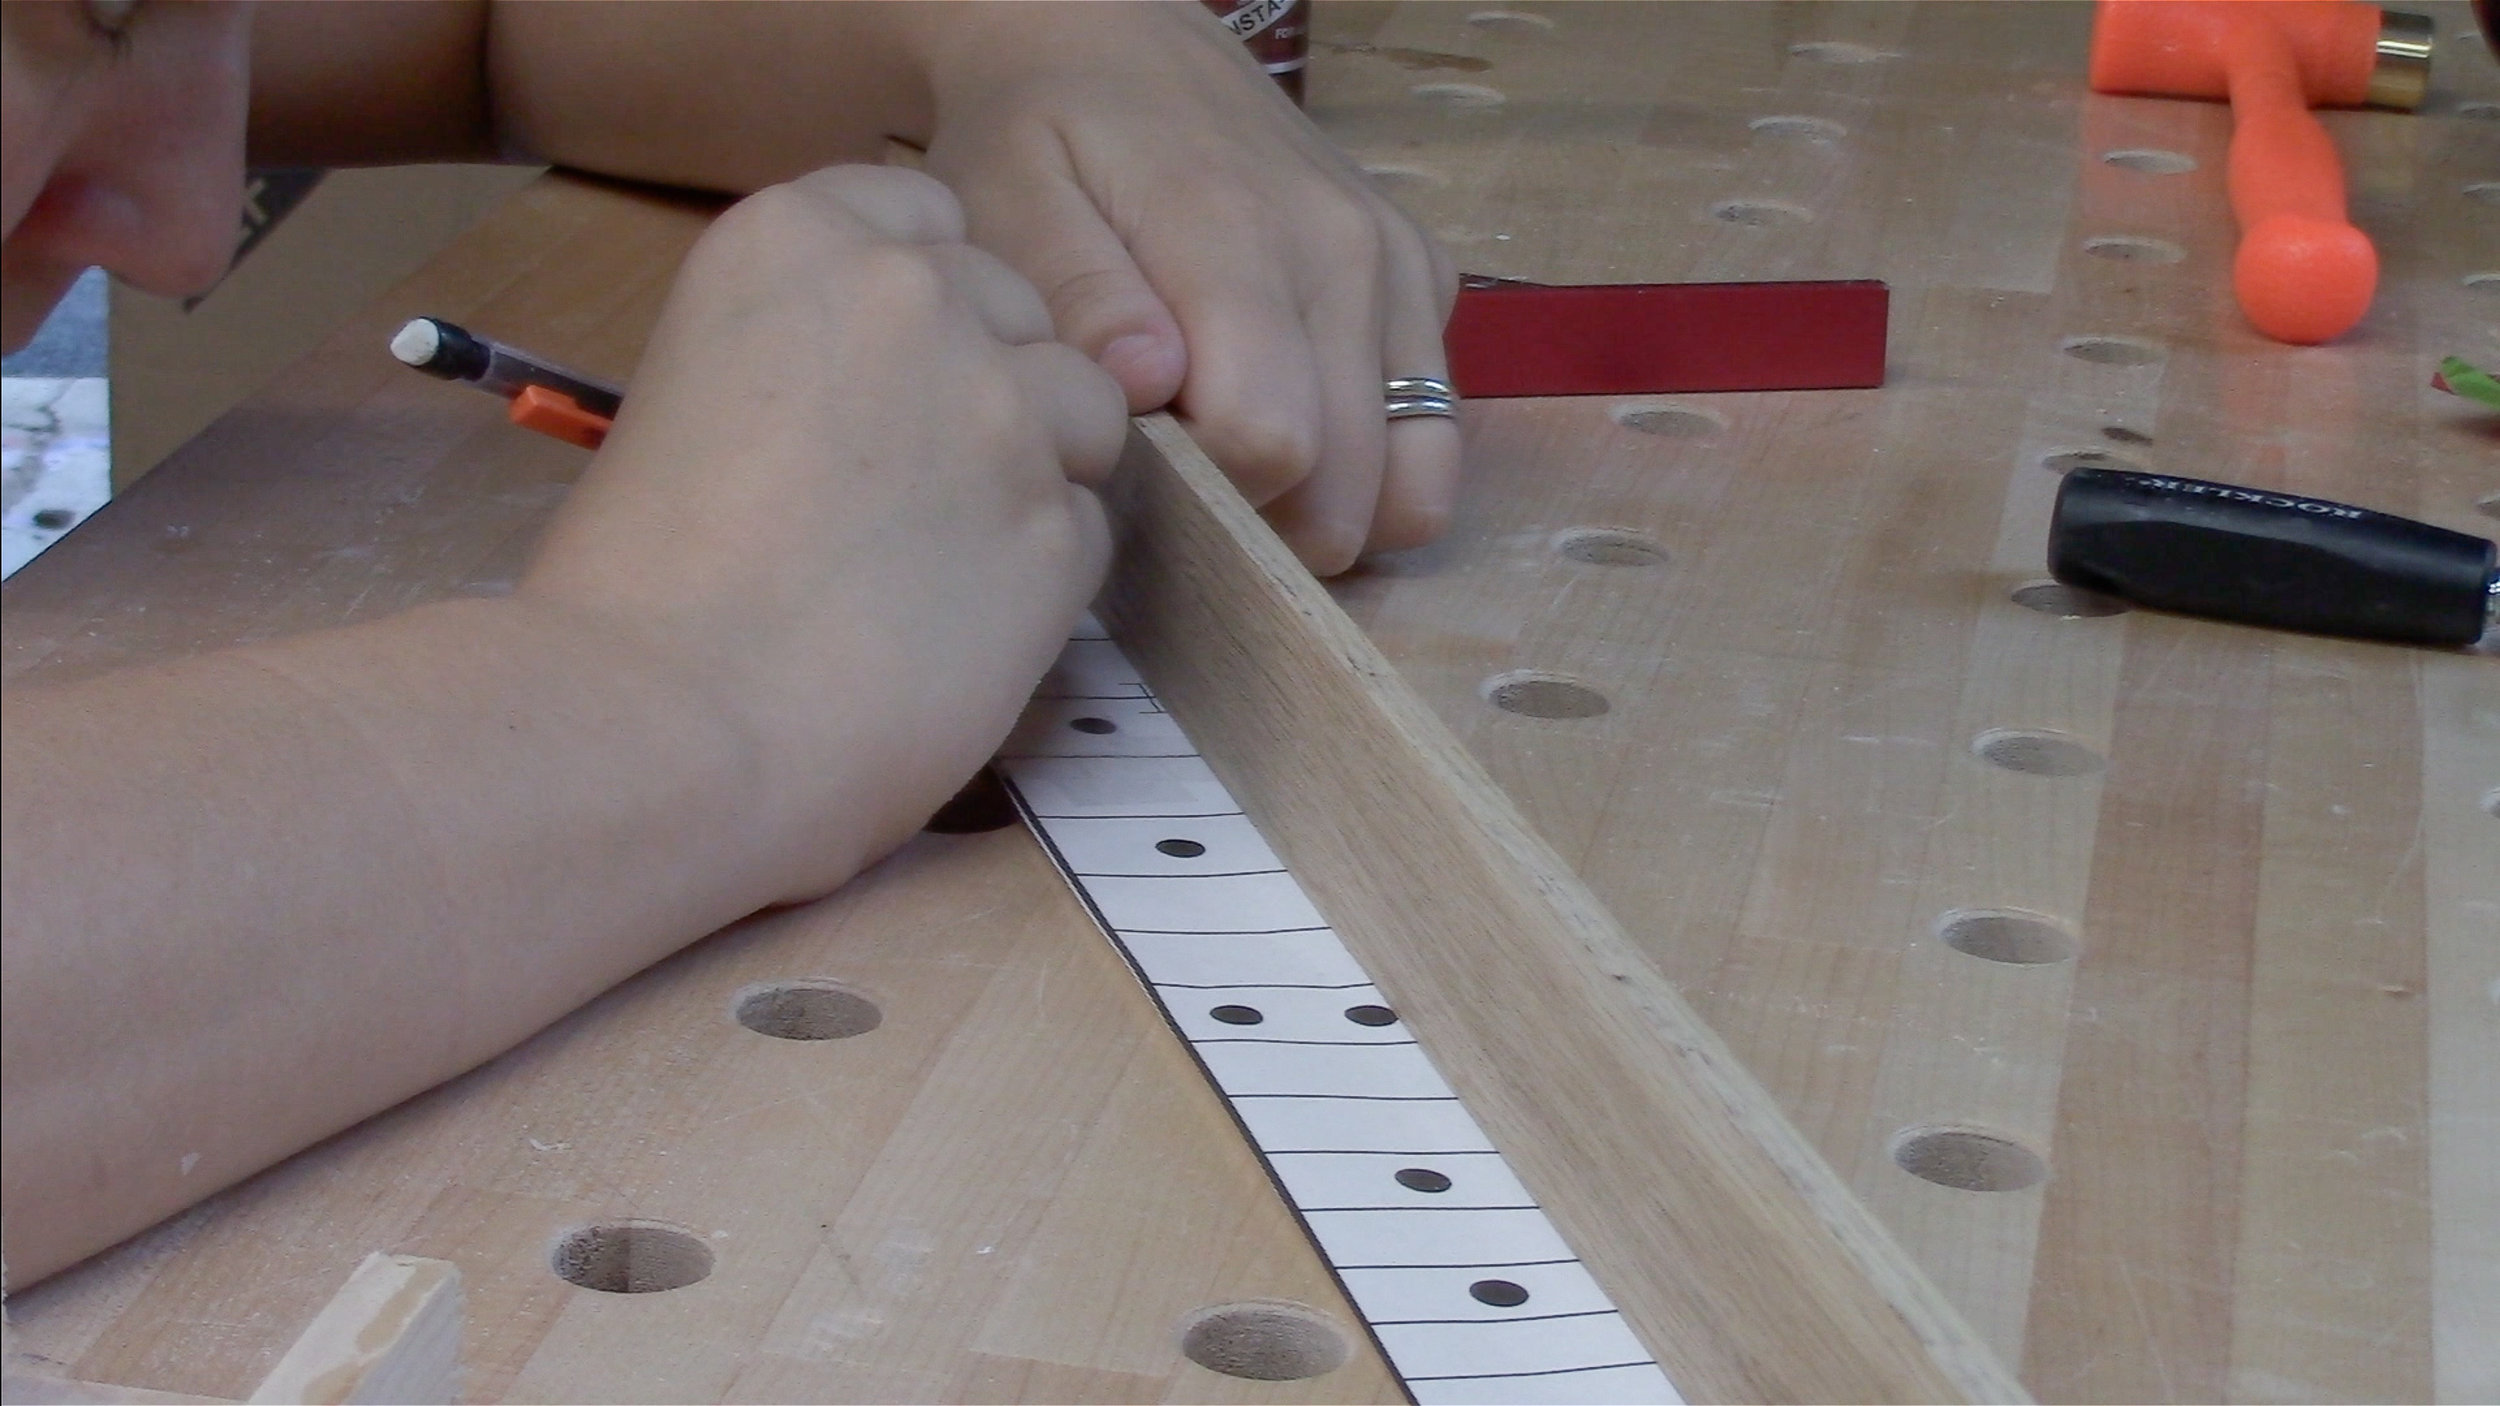
I marked 25" from the nut, because I am using a 25" scale (the blue dot on the picture below)
Then from that 25" mark I marked a 1/2" up the neck and 2" down to the bottom of the neck.
I also marked 1" down from where the neck meets the body.
The material that needs to be removed is between the two reds dots on the right and from the red dot on the left all the way to the bottom of the neck.
The part where the bridge is (blue dot) will touch the guitar top, and I left two extra inches because I am going to put the strings through the body.

the notch on the end was easy to cut out with a handsaw. It was only about 1/8" that needed to be removed.

The section in the middle was a bit more difficult to figure out, I have seen people just use files, but I decided to use the depth stop on my miter saw and this worked perfectly.

After all the notches were cut I started to shape the back of the neck and the headstock. I did this at the bandsaw.

I cleaned up the bandsaw lines with a Japanese Shinto rasp. I LOVE using this tool. It makes quick work of removing material.

Once it was flat, I used a 1/2" round-over bit at the router table to help start the shaping process and finished the rest using files and sandpaper.

The neck was all ready and it was time to work on the fretboard.
I took a scrap piece of white oak and cut it to be 1/4" thick and an 1-1/2" wide.

Starting from the bottom line of the nut on the template I marked all the fret locations onto the fretboard.
Then I cut for the frets!
To make it easier, I made this little jig out of 3 pieces of scrap. This helped to hold the wood down and also ensured I was cutting perfectly square and in the right spot.
If I were to make another one of these I would put a depth stop on the saw somehow.

After cutting the frets I stained the fretboard black. I thought this would save me time to do it before, but I had to touch it up so many times that I am not sure it was nessasary to do it before assembly.

I put tape on the neck and the fretboard to avoid having to clean up the glue squeeze out.
Then I glued and clamped it up!

After getting the neck out of clamps it was time to do the fret work.
This isn't hard to do at all. It's just tedious. It took me a long time to get the frets to be flat and smooth.

After banging them into place I snipped them as close to the fretboard as I could get.

This is where I realized I should have sanded the fretboard flat before putting the frets in. There were probably inconsistencies in the glue up that caused a couple of frets to be higher than others.
I had to sand the frets flat by using sticky back sandpaper on a straight edge.
This is really annoying because after sanding the frets flat you have to make them round again..... I wish I sanded the fretboard BEFORE putting the frets in.

After a few hours of fretwork it was time to drill for the fret markers and side dots.
I used painters tape to mark the hole locations and used an awl to start the holes off.

Then using the depth stop on my drill press I drilled for the fret markers on the top.

And using a drill with some tape as a depth stop I pre-drilled for the side dots.

I used these small wire nails for the side dots and I think they look super cool.

For the Fret markers I used abalone inlay dots. Also super cool, but you could use dowels, nails, screws or anything else.

I used a hole saw at the drill press to make the sound hole on the sound board top.

My kids like to put things in the sound holes of my guitars, so I wanted to prevent that....
I took a scrap pieces of window screen and hot glued it to the inside of the soundboard.
Not only does this prevent legos getting stuck in the guitar, but it also makes the sound hole look like a speaker. Very happy about this.

All the pieces are ready for assembly now!
I made some riser blocks from the scrap maple I cut off the neck and epoxied them into the box.

Then I pre-drilled and counter sunk holes in the neck.

And glued and screwed it to the riser blocks in the body.

I notched out a hole for the piezo pick up using a forstner bit and chisel, then I hot glued it into place.

After drilling holes for the audio jack and volume knobs it was time to glue the top soundboard to the body!

After the glue dried I marked 3 holes for where the strings will go through the body.

I drilled as for as I could go on the drill press but it couldn't go all the way through.
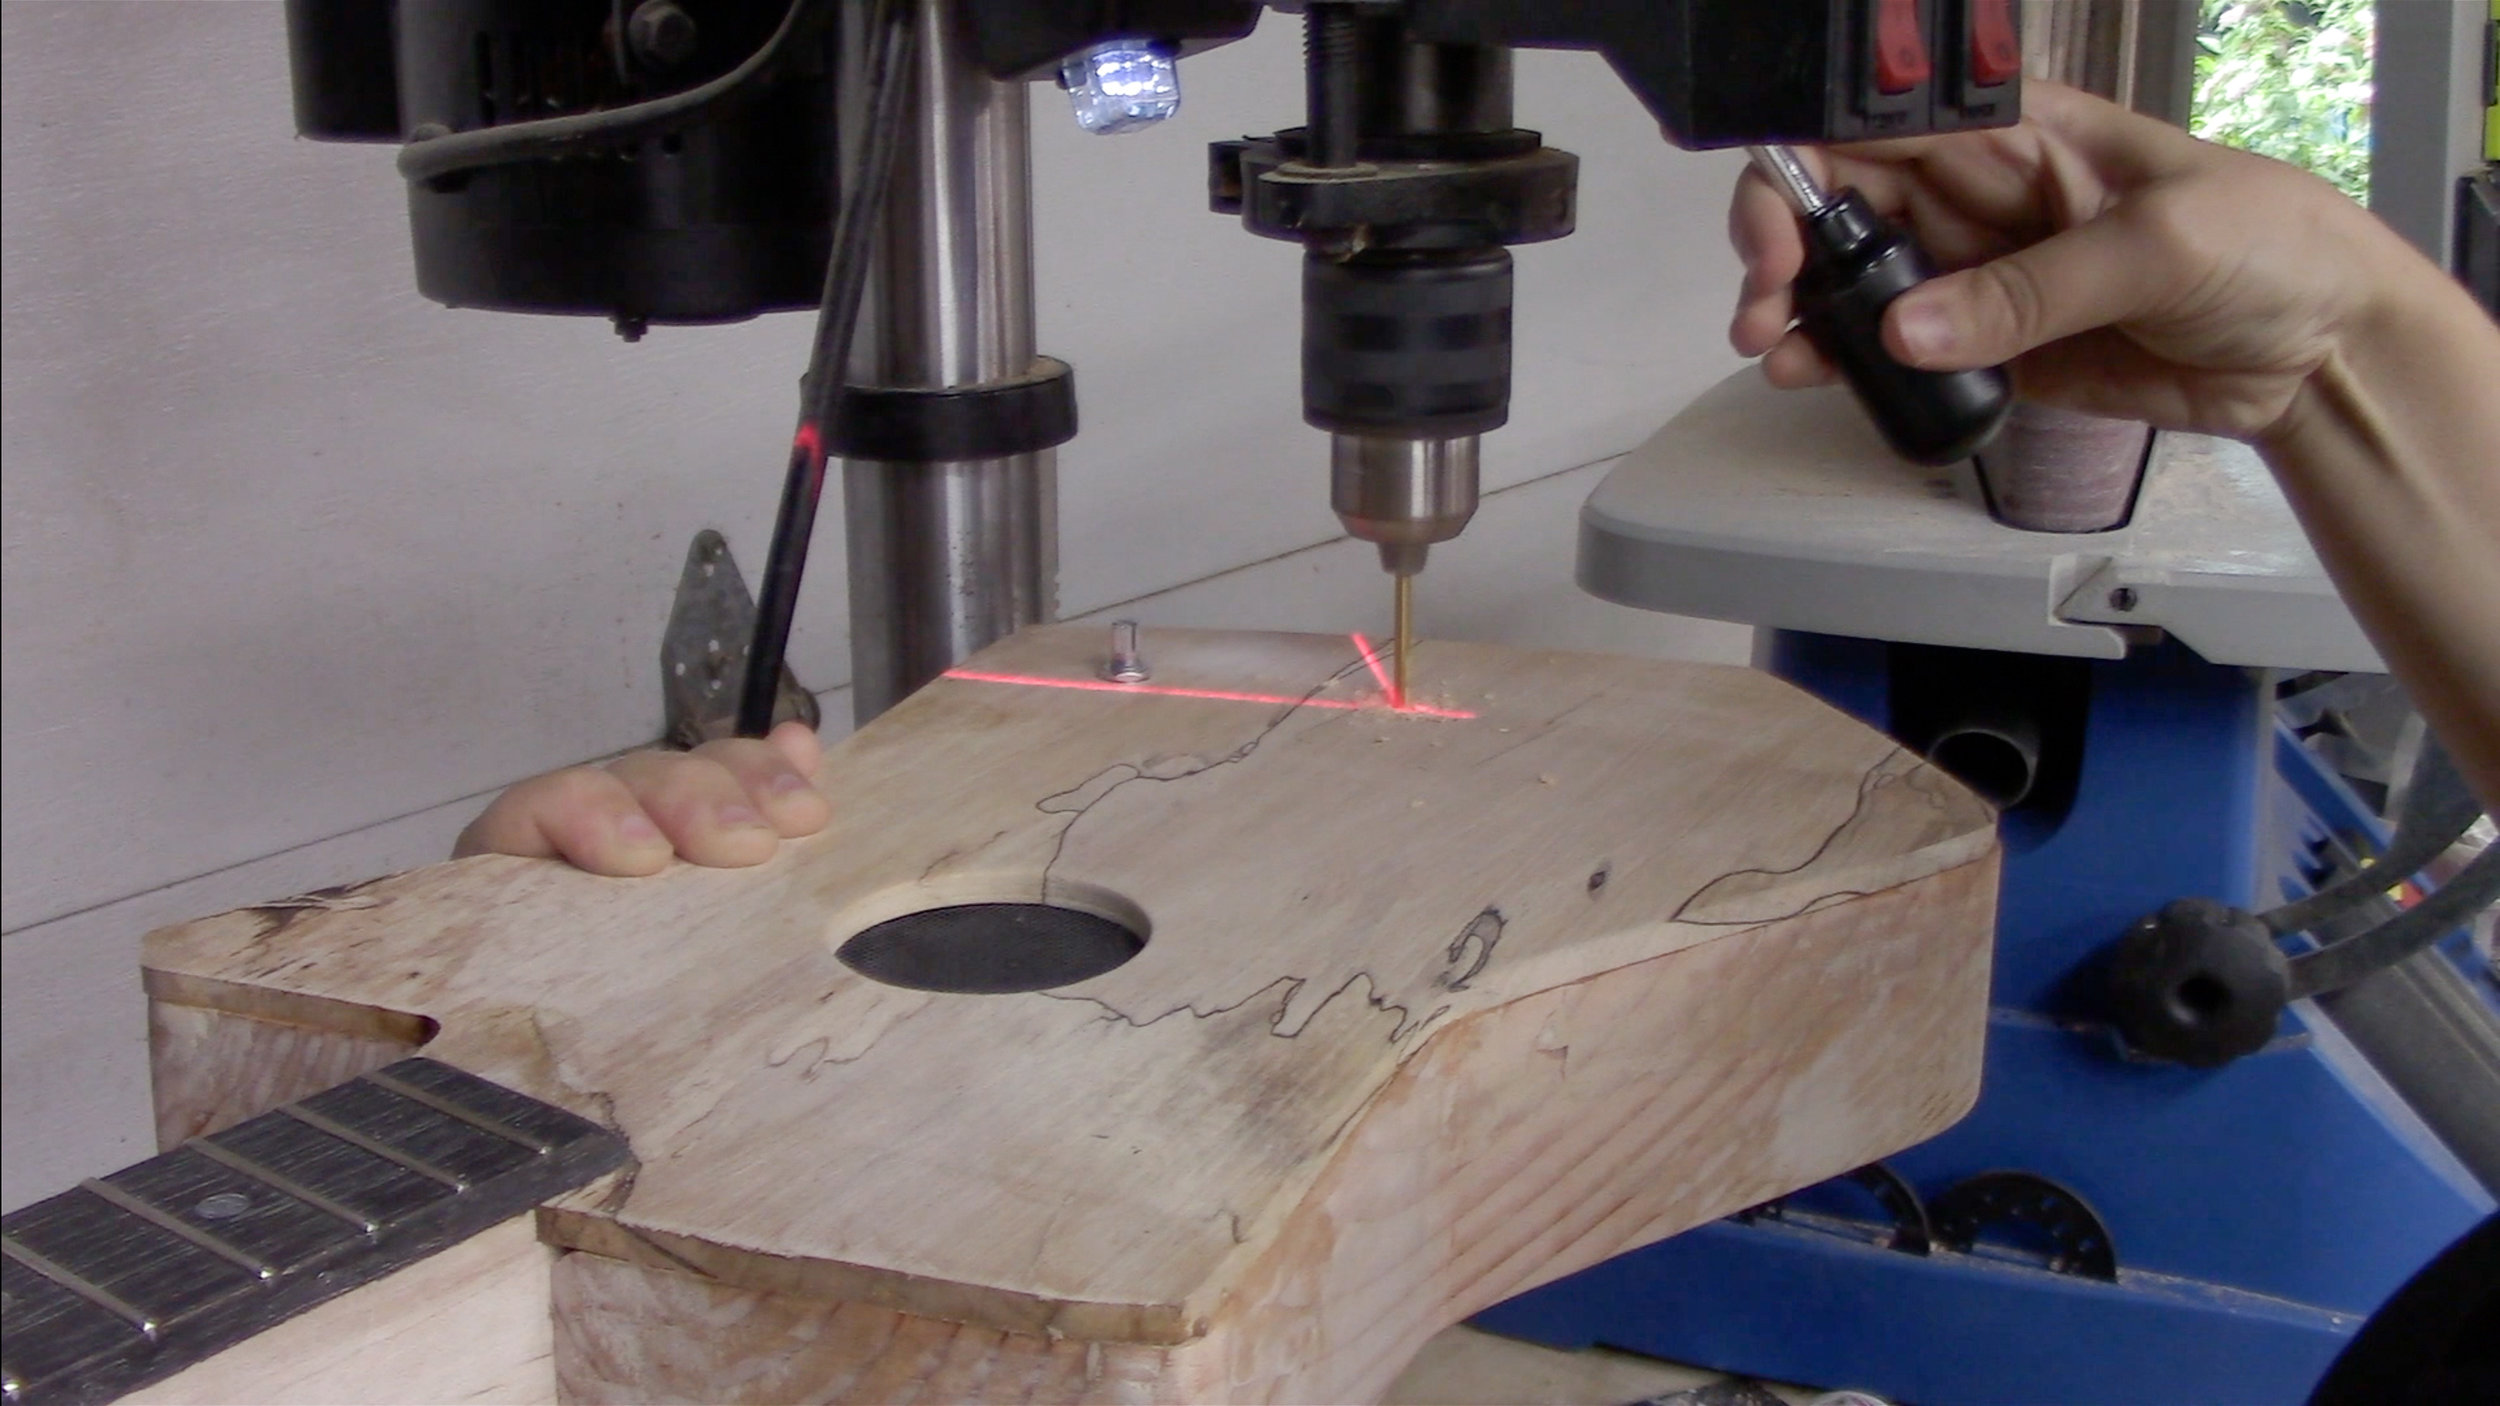
In order to make sure I was drilling in the same place on the other side of the guitar I created a locator pin. I did this by putting a drill bit in a scrap piece of MDF that was the same size as the drill bit that was in the drill press.

I could then line up the locator pin with the drill bit and clamp it to the table.

Then I put the guitar on the locator pin using the holes I drilled out on the front. And drilled down to connect the holes!
I'm excited to use this method for other projects.

The last thing to make was the floating bridge.
I placed a quarter on the frets and then put a straight edge on the nut.
I measured the gap that was left over at the bridge and cut a piece of scrap to that size.

I cut a notch in the bridge to accept a fret and then sanded it to shape and stained it black.

I made a jack plate from a scrap pieces of maple and assembled it all together!
I put on the volume knob and banged in the ferrules that would hold the strings.

Screwed in the tuning pegs.

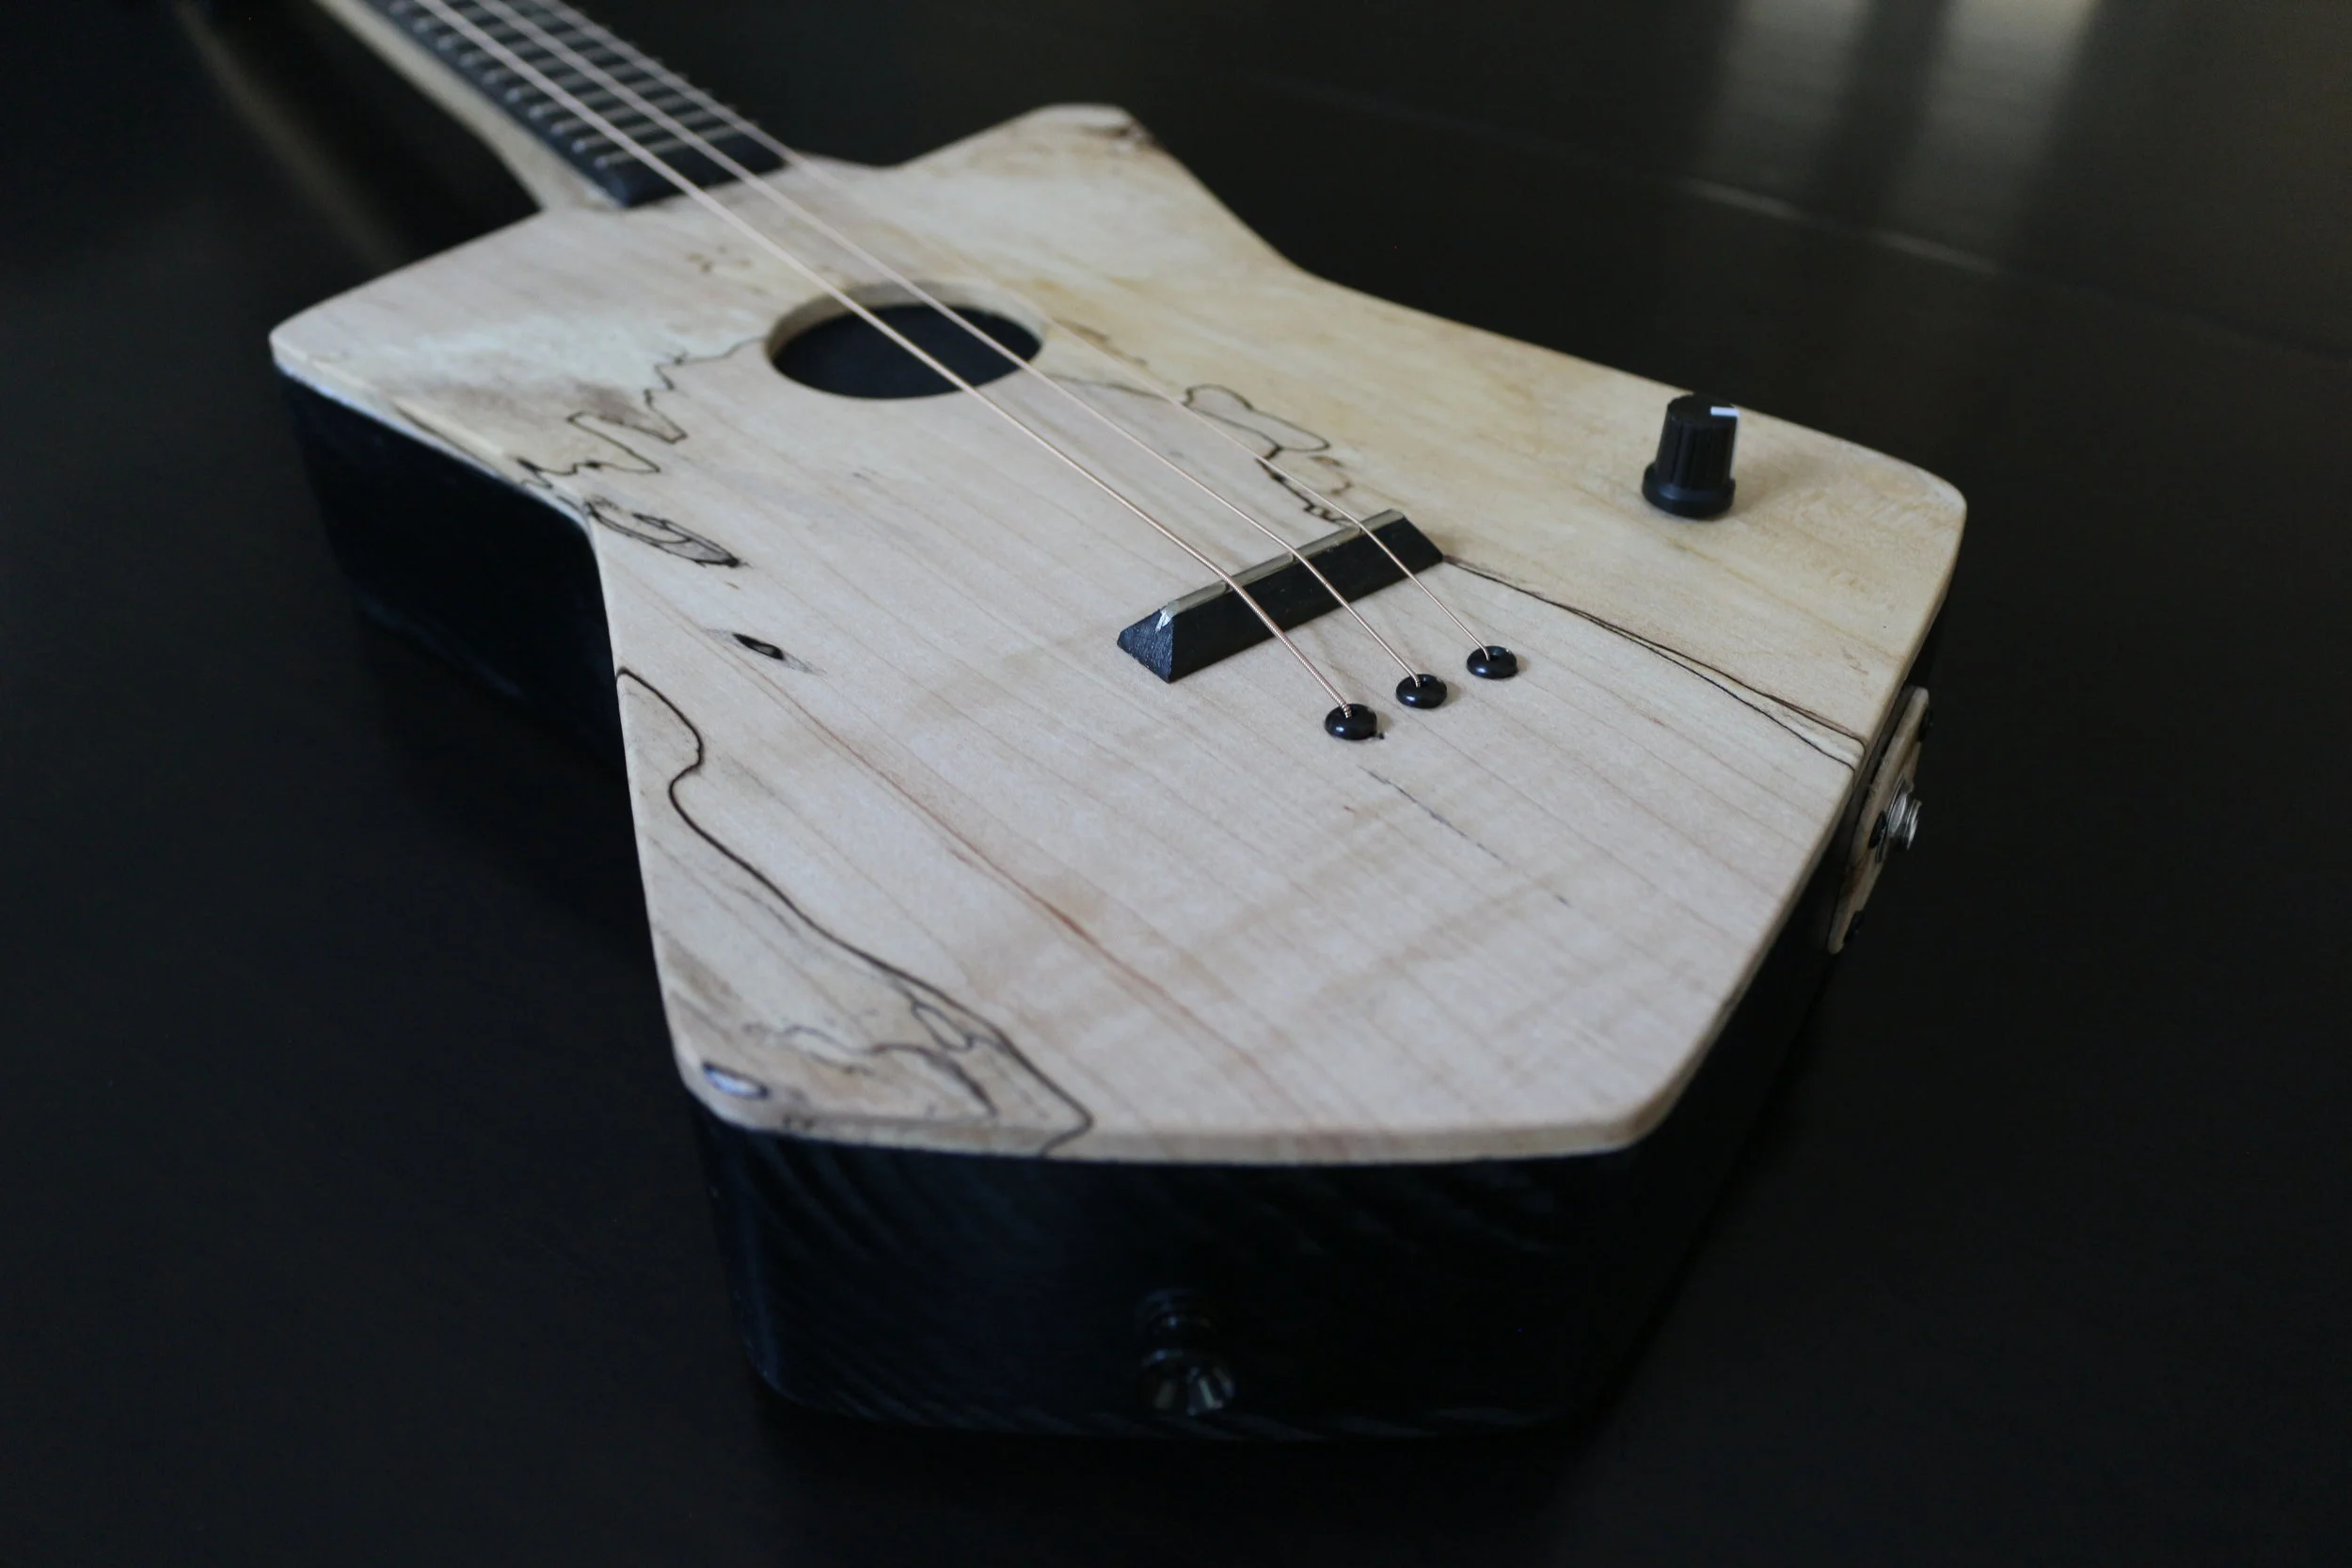
Put the strings through, placed the floating bridge and it was complete!
The strings are the A-D-G strings from a regular acoustic guitar and I tuned them to an open G tuning, which is GDG.

After playing around with the bridge location for getting a perfect intonation I was really happy with the sound!

I am so in love with how this came out. I have never seen anything like this before and I just want to make more of them.

I can't describe the feeling I had when I played that first note. Even better feeling when I plugged it in and it worked.

I would love to see what kind of design you can come up with for your own "Cigar Box" style guitar!

I acknowledge that The Home Depot is partnering with me to participate in the ProSpective 2018 Campaign. As a part of the Program, I am receiving compensation in the form of products and services, for the purpose of promoting The Home Depot. All expressed opinions and experiences are my own words. My post complies with the Worth of Mouth Marketing Association (WOMMA) Ethics code and applicable Federal Trade Commission guidelines.