
Making Dowels without a Lathe

I needed some large hardwood dowels for an upcoming project, so I decided to experiment with different ways to make dowels without a lathe (because I don’t have one).
This was a super fun experiment, some fails, but in the end I found out which method will work best for me.
Check out the full YouTube video below for all the details!
Links below are affiliate links, clicking on them helps me keep this site going at no extra cost to you ;)
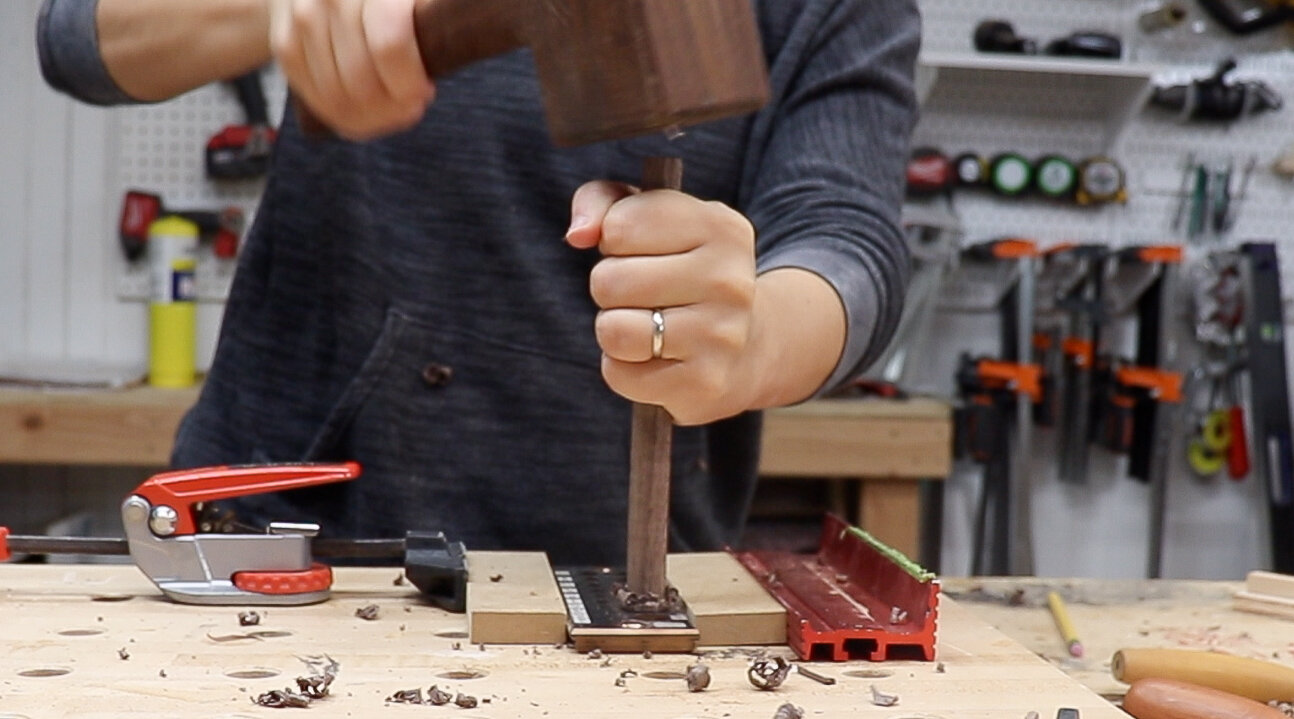
The first method I tried was the tried and true dowel plate.
This is a metal plate with a series of different sized holes to create different sized dowels. This particular plate goes from 1/8” to 5/8”.
To use the dowel plate you just mill up some stock to your desired dowel diameter, taper one end with a knife or chisel so it can fit into the hole, then bang it through the hole with a mallet.
Super easy and great results!
Only problem, I am going to need dowels larger than 5/8” for my project….

The next method I tried was using a roundover bit at the router table.
For this method, you need a roundover bit that’s half the diameter of the dowel size you need. The biggest roundover bit I had was 1/2” so that would create a 1” dowel.
If you want an 1-1/2” dowel you would need a 3/4” roundover bit, and so on and so forth…
In order for this to work correctly, you need to adjust the bit height so the bottom of the curved part of the bit is directly in line and level with the router table top.
Then you need to adjust the fence so it is in line with the router bearing.

This process could not be simpler, just route all four corners off the stock, making sure to leave the ends on for stability on the table.

After all four sides are routed, you have a perfect dowel!
If you choose to use this method, just make sure to cut your stock longer than you actually need so you can cut off the ends.
Also, you have to take the width of your router table top into consideration. The piece needs to rest on the table at the front and back of the cut. If you need dowels that are long, you might need to make a jig to clamp the ends and hold the workpiece.

Since I only had a 1/2” roundover bit, the largest dowel I could get was 1”, I wanted to see if I could go bigger…
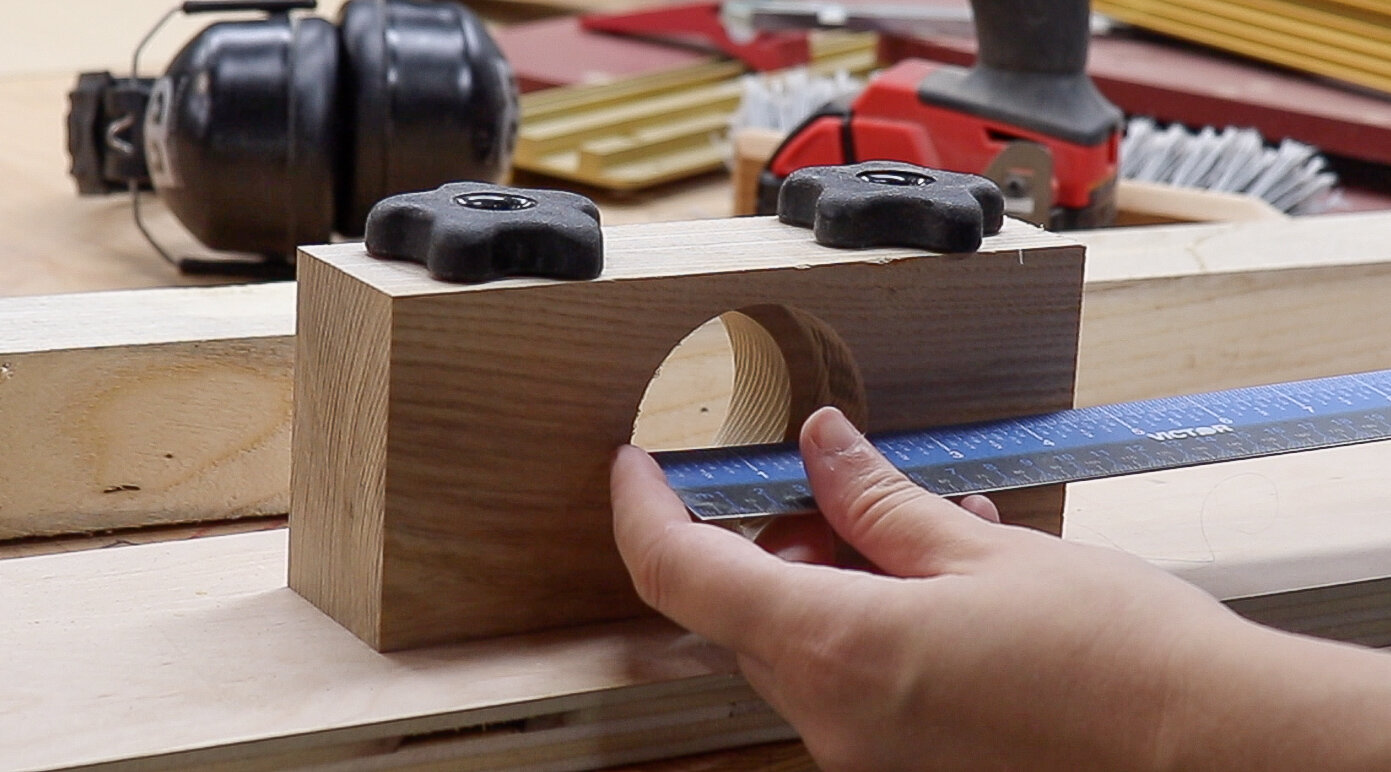
I had a 2” forstner bit, so I thought I could make a jig at the router table using that bit to create 2” dowels.
I took a block of wood and drilled a 2” hole in the center of it. On the other side I drilled a slightly larger 2-1/2” hole.
The larger hole will be for the rough stock to enter the jig. A router bit sticks up through the bottom, cutting the rough stock, then it exits out the 2” hole creating the 2” dowel.

I used a forstner bit to drill the hole on the bottom of the jig where the router bit will go through. I just made sure to make this hole larger than the router bit I am going to use.

Then I drilled 2 holes on the top of the jig so I can attach it to a piece of plywood with bolts.
I decided to do it this way so it would be possible for me to create different blocks with different diameter holes to make different sized dowels.

Then I took a scrap piece of plywood and drilled out the corresponding holes for the router bit and the bolts.

And routed out a small channel on the underside to countersink those bolts. (I used my router edge guide to quickly line up the cut.)

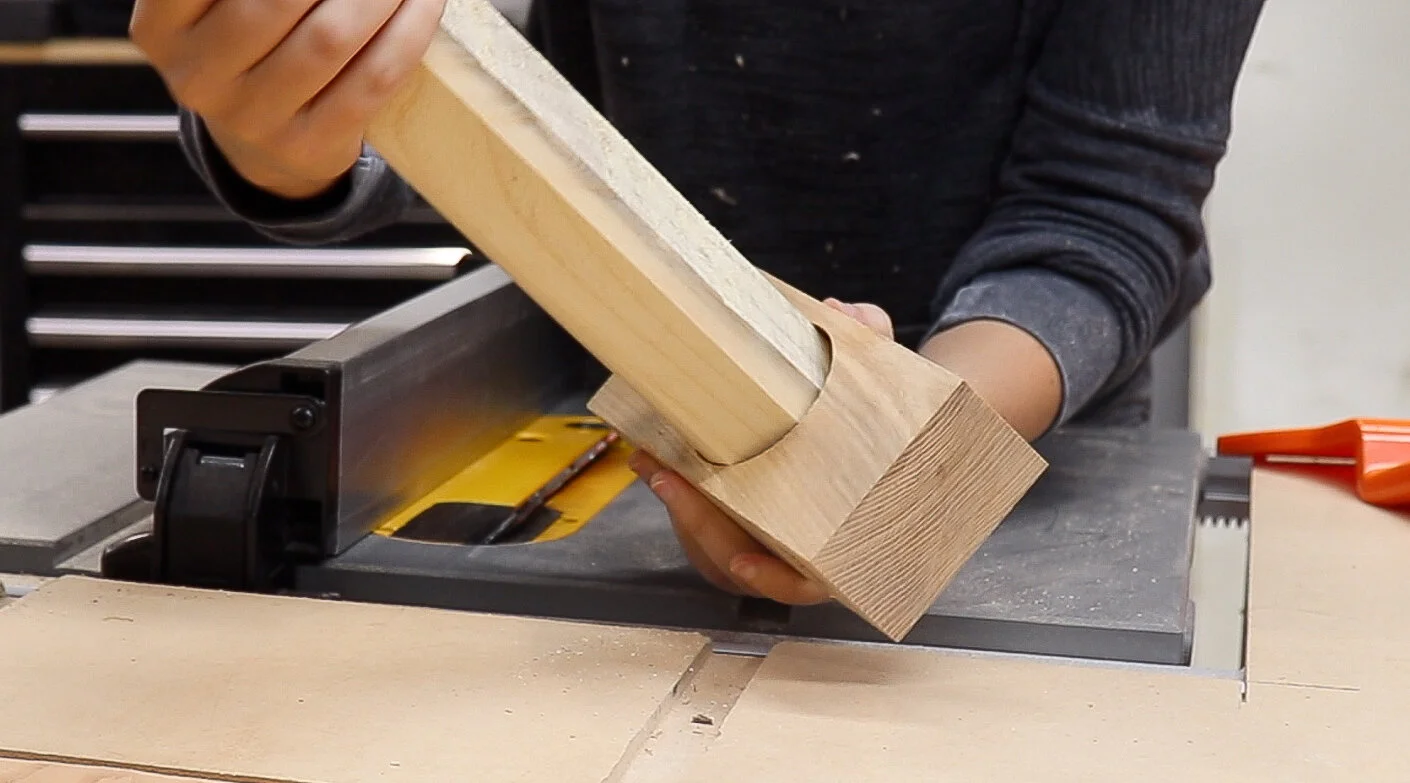
In order to use the jig you need to prep the stock so that it fits into the wider hole.
I knocked off the corners so that it fit into the larger hole and it’s ready to test out!
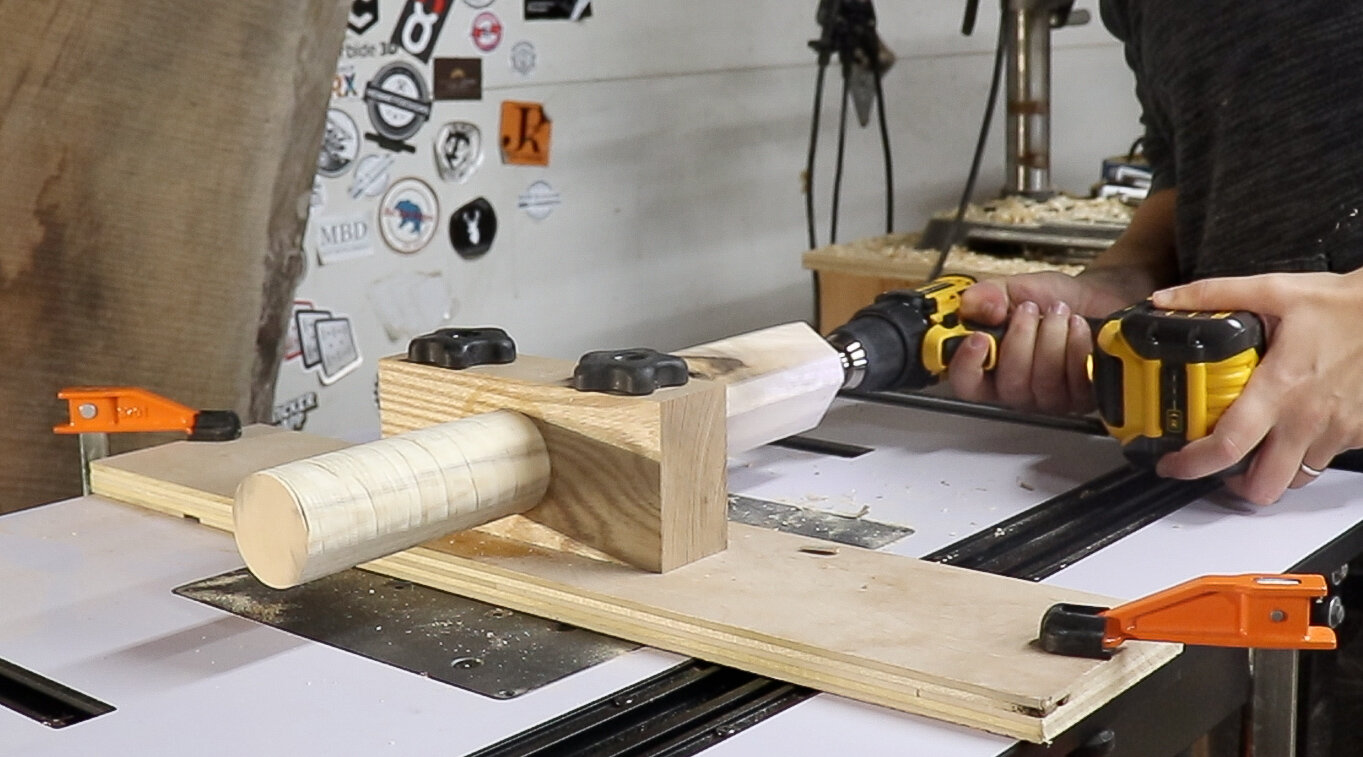
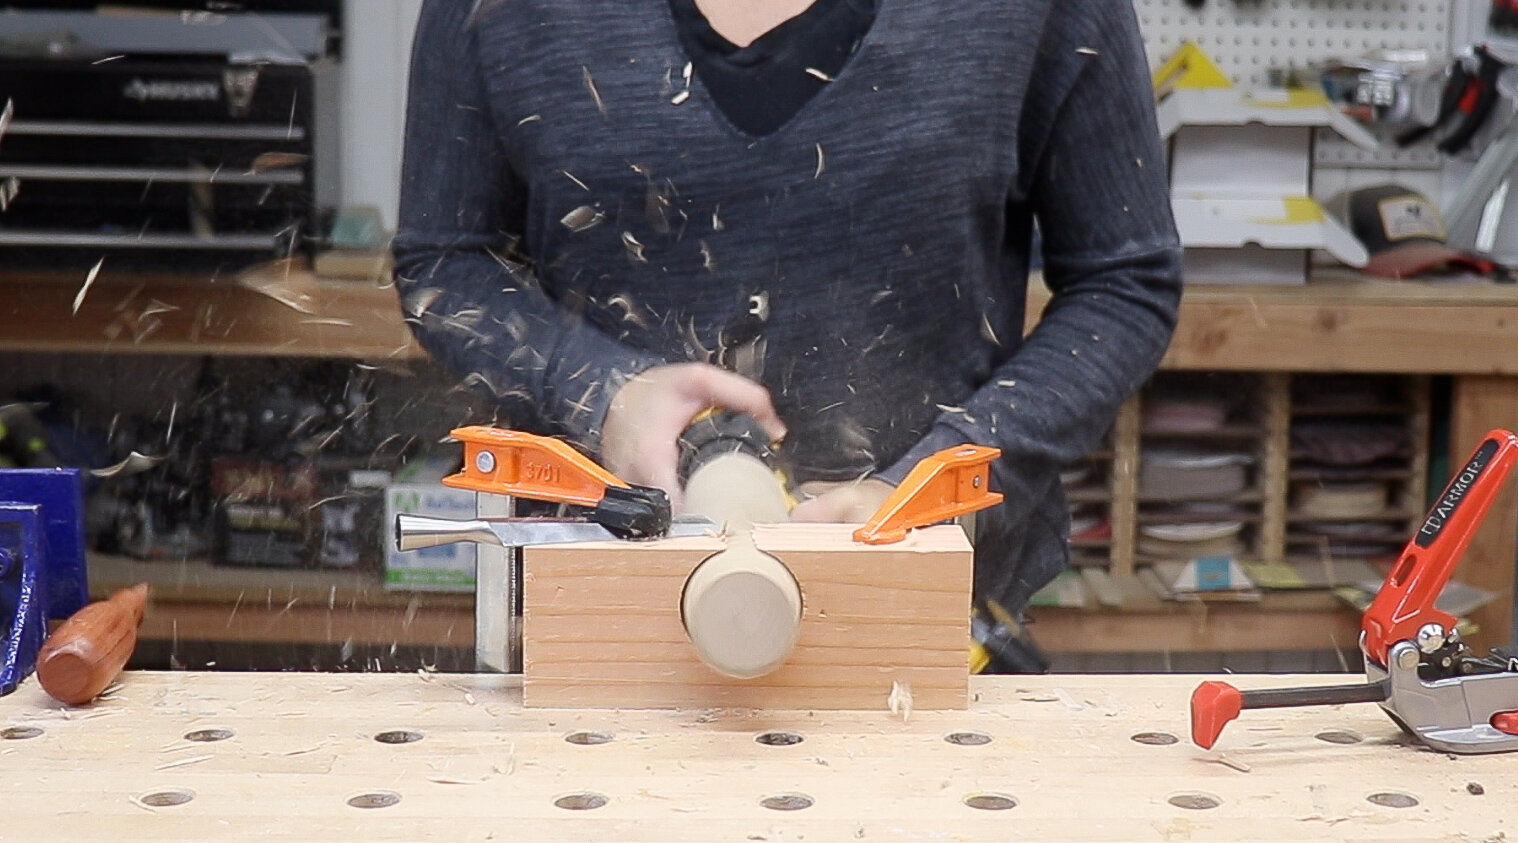
I clamped the jig to the router table and installed a spiral bit so that the top of it was flush with the 2” outer hole. Then drilled a bolt into the end of the rough stock and used a drill to send it through the jig!
This was super fun to do!
(If you’re interested in that DeWalt Drill, I wrote a whole review here - DeWalt Drill Review)
It was not a perfectly clean dowel, there were some lines from the router bit that needed to be cleaned up afterwards…
I wanted to try one last method, it’s very similar to the last set up, except it uses a chisel as the cutter instead of the router.
I drilled a 2” hole in a block of wood, put a large chamfer on one side and cut it at the table saw so that there was a small gap a the top where a chisel would sit at an angle, and clamped it my workbench.
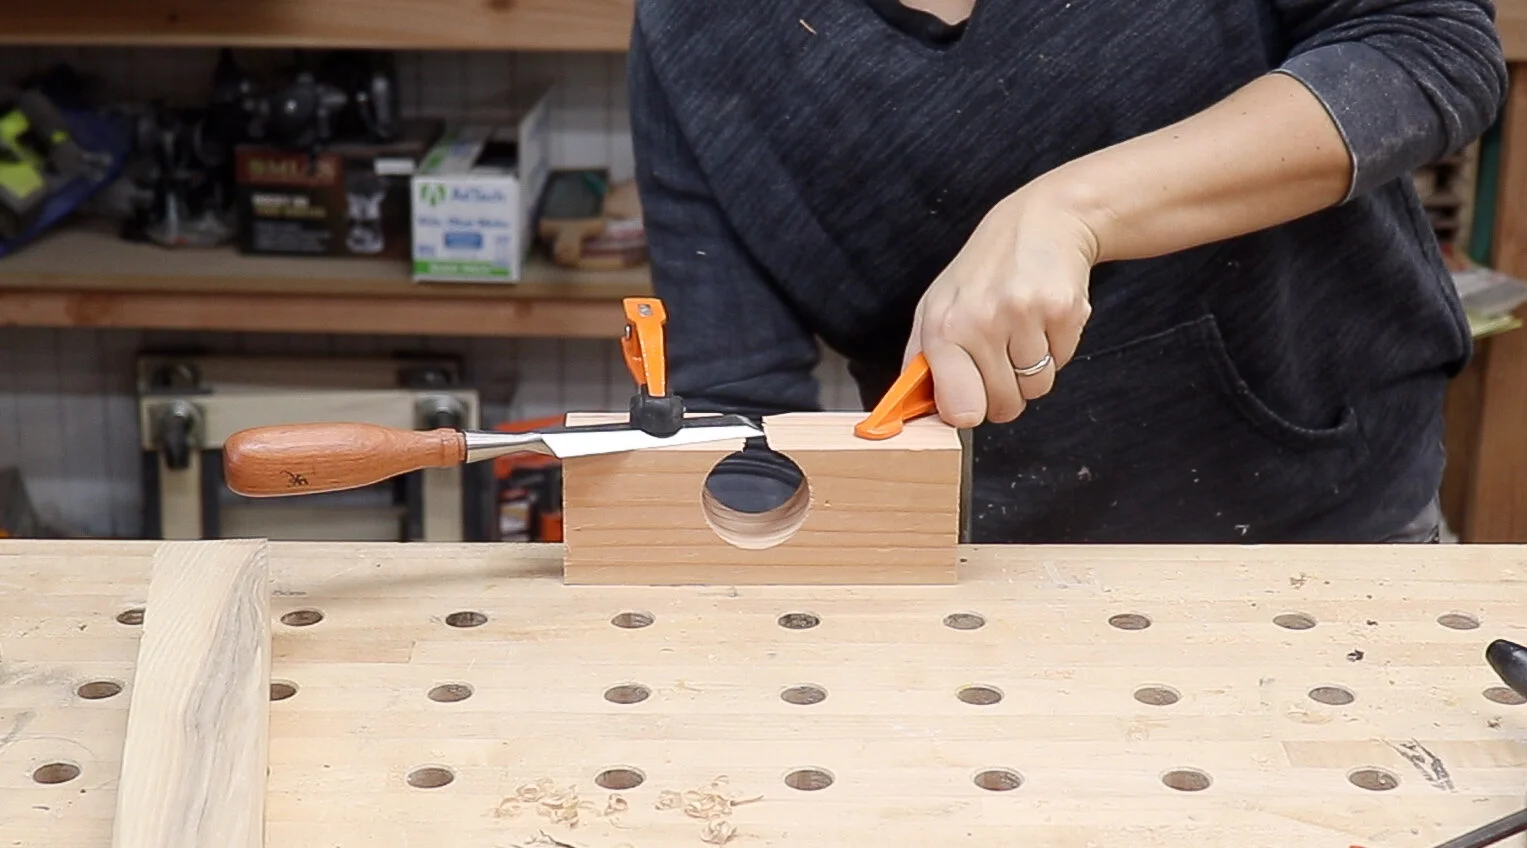
Then I repeated the same process as the router jig, I drilled a bolt into one end and sent it through the jig.

This method sort of worked…. It made a dowel like shape but it was not clean at all and I didn’t feel like the chisel was stable.
If I liked this method, I would probably try to tweak some things, but I just did not like it, so I am not going to waste any more time on it.
I have seen other videos where this works really well for other people, so I know it can be done, it just didn’t work for me.
I had to figure out how to sand the dowels that were made with the router jig, so I used a tied rope through a dog hole in my bench that went around the trigger on the drill.
I could use my foot to press the trigger and turn the drill on while the dowel is set in the drill with the bolt.
This worked really well but it required a lot of work.

In conclusion, it does not say RSVP…. oh wait… no…. in conclusion, I decided the method I liked best was the roundover bit at the router table.
That was the simplest, quickest, cleanest, most efficient method by far. Best part about it, no sanding.
The only issue is that the largest roundover bit I have is 1/2”, so I would only be able to make 1” dowels using that method. Now I know if I want larger dowels, I need to pick up a larger roundover bit. 1” roundover for 2” dowels, 3/4” roundover for 1-1/2” dowels.
This was such a fun experiment, now back to making some projects!