
Easy DIY Router Edge Guide
I have a project coming up where I am going to be routing a bunch of straight lines. To make my life easier, I decided to make this super simple jig!
This jig takes less than 10 minutes to make and it will be such a time saver in the future!
For more details check out the full video below!
Links below are affiliate links, clicking on them helps me keep this site going :)
MATERIALS
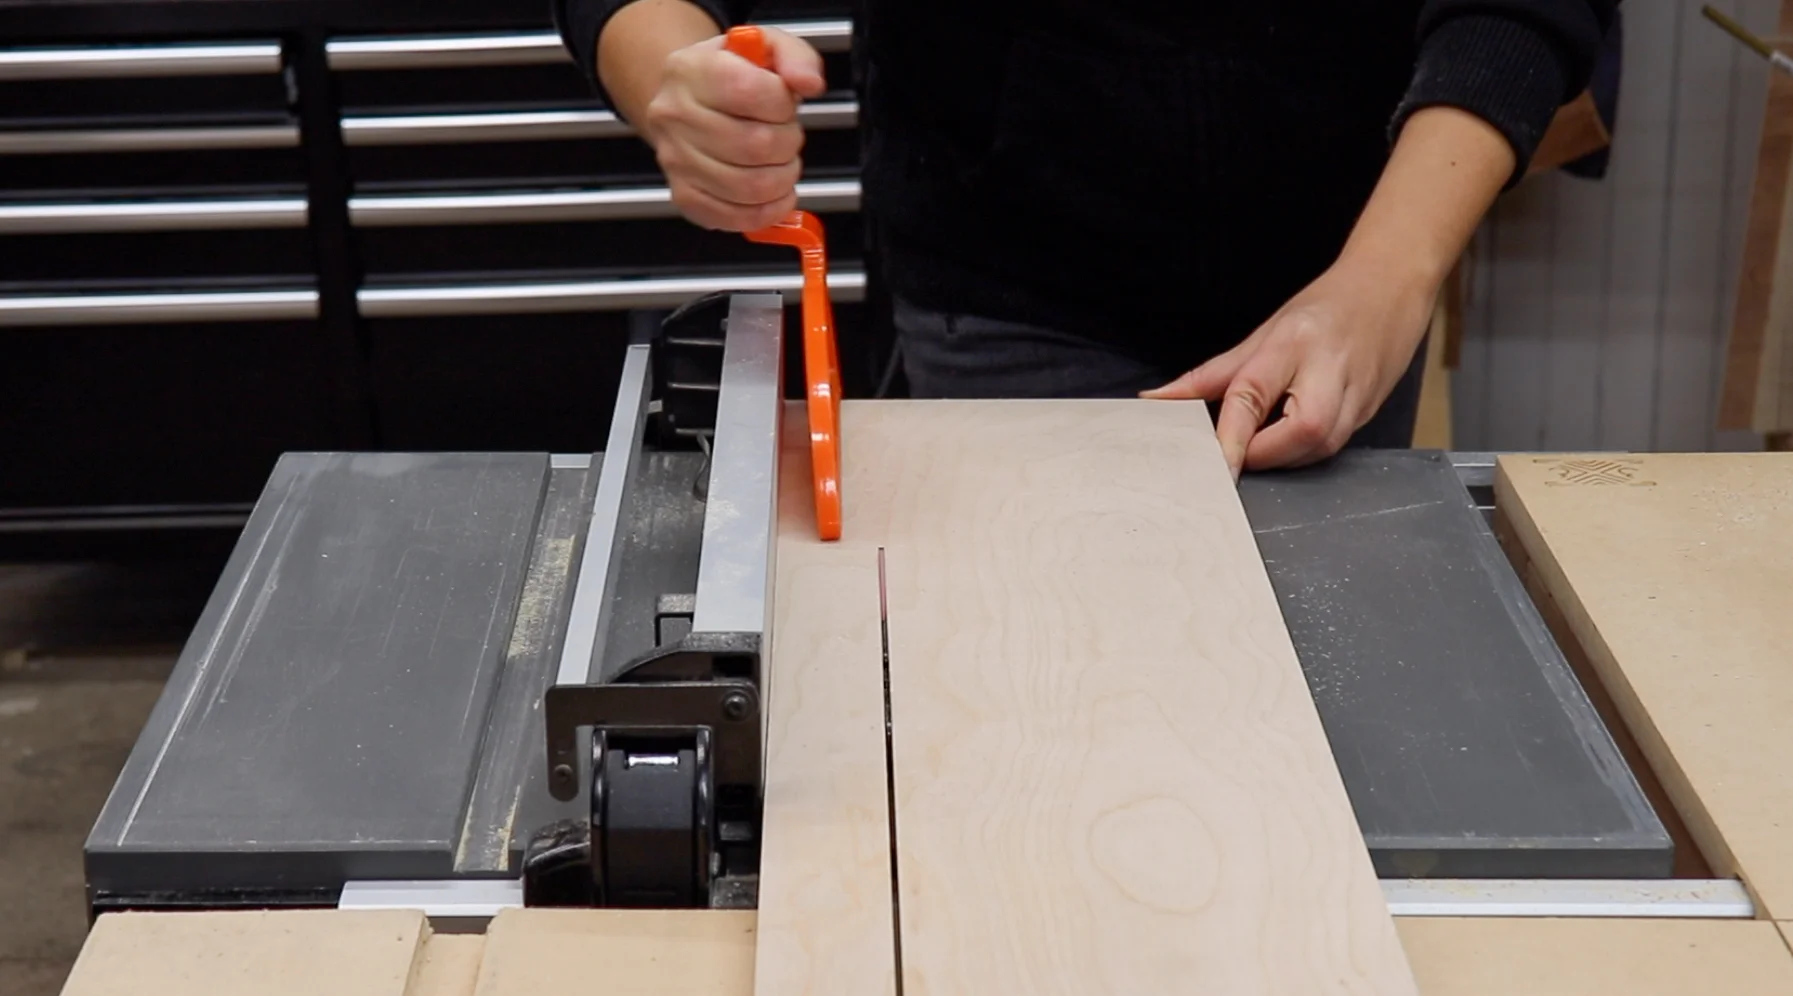
The first thing to do is cut your guide to size.
I measured the hinge I was using (24”) to get this measurement, then cut the plywood to size.

After the plywood was cut to size, I could move on to measuring the distance between the center of where the router bit would go to the outer edge of the router baseplate.
An easy way to do this is by putting a v-groove bit in your router. Since the v-groove bit comes to a very sharp point at its center, it’s easy to use the tip as a reference for finding center.
If you don’t have a v-groove bit, you can use also use a small straight bit and use its center for reference.

I put the base plate on and measured from the tip of the bit to the outer edge of the router base plate.
Mine measured 1-3/4”.

So I set the fence of the table saw to 1-3/4” (it would vary if you have a different router), and ripped the plywood!
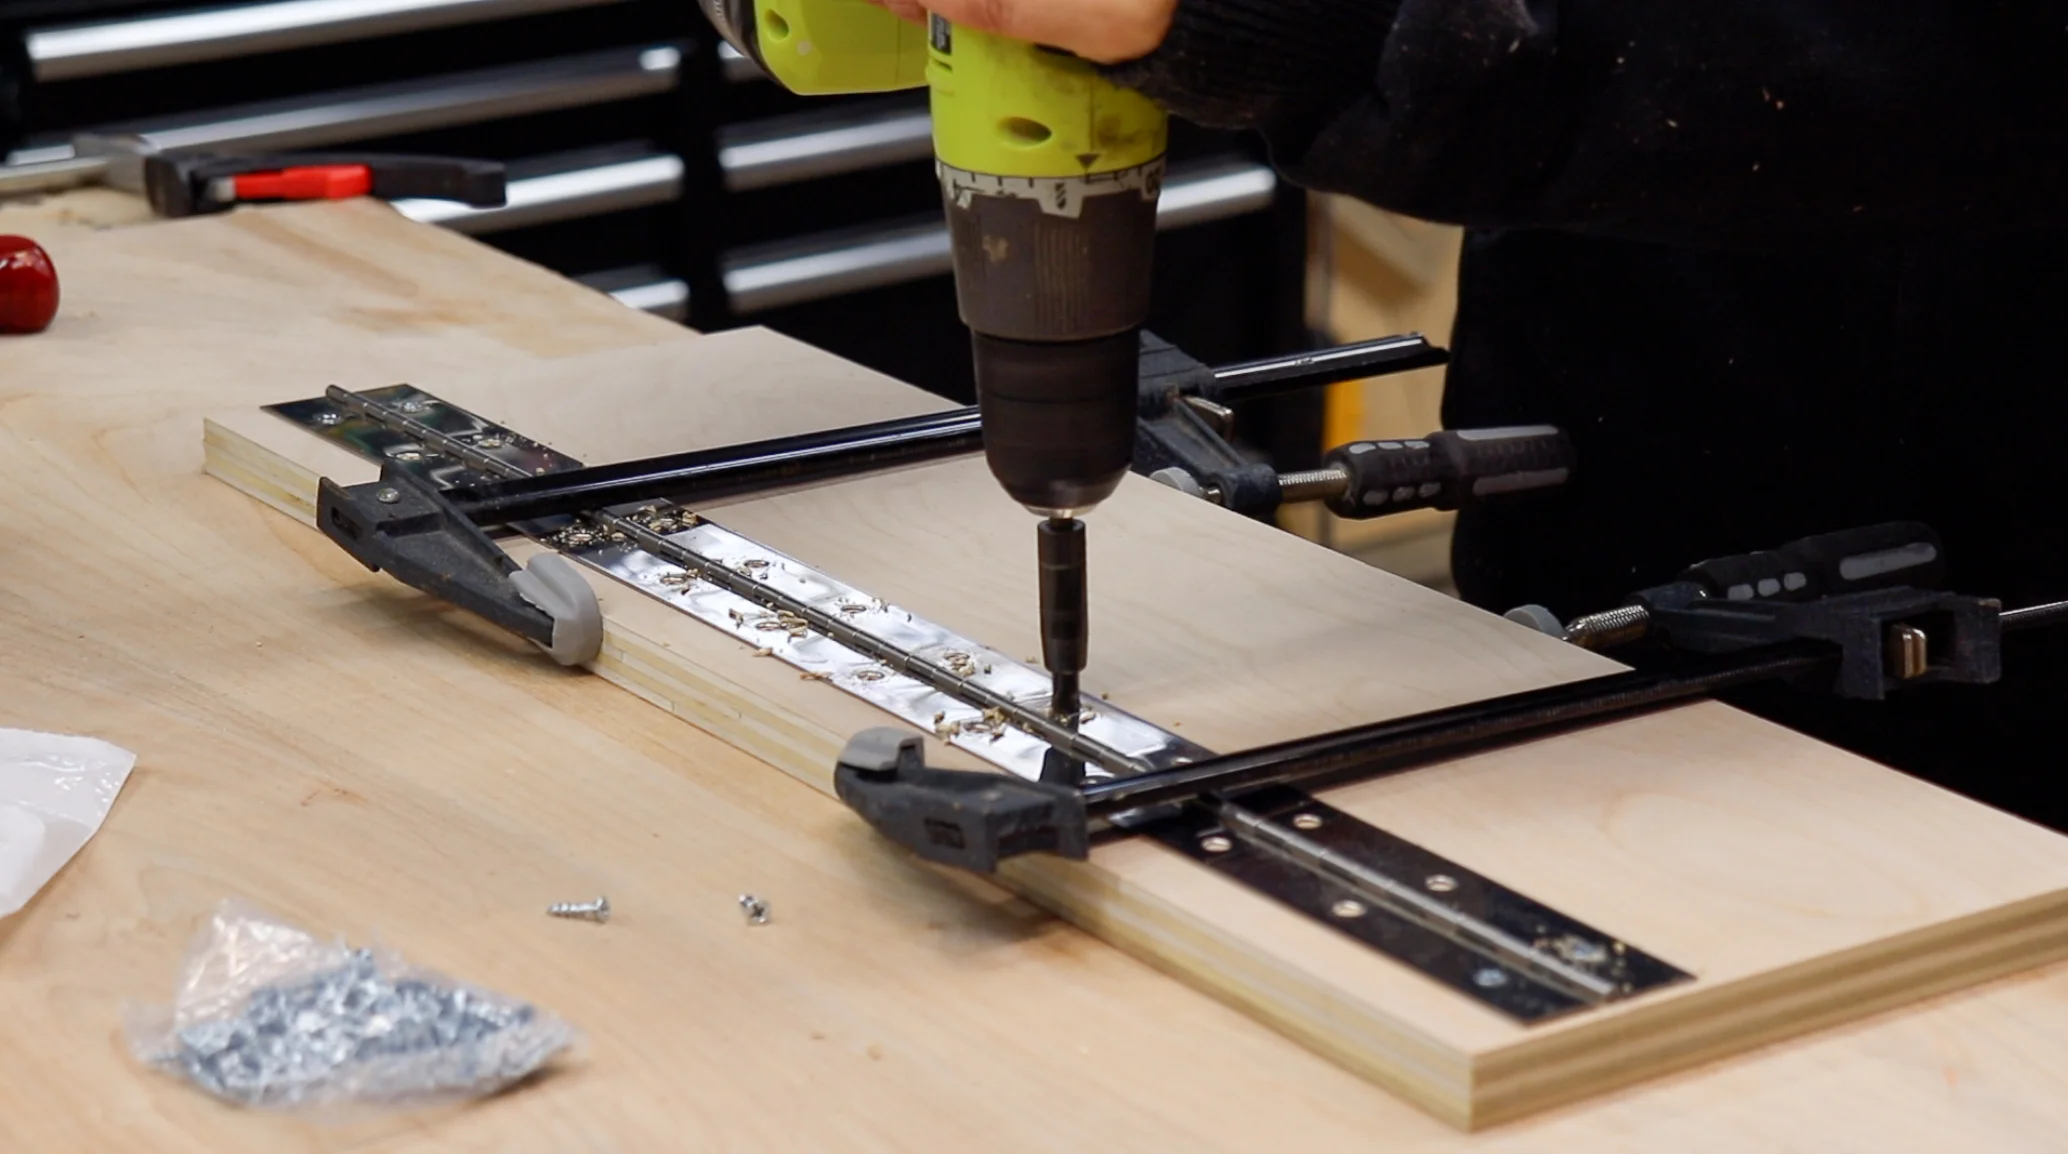
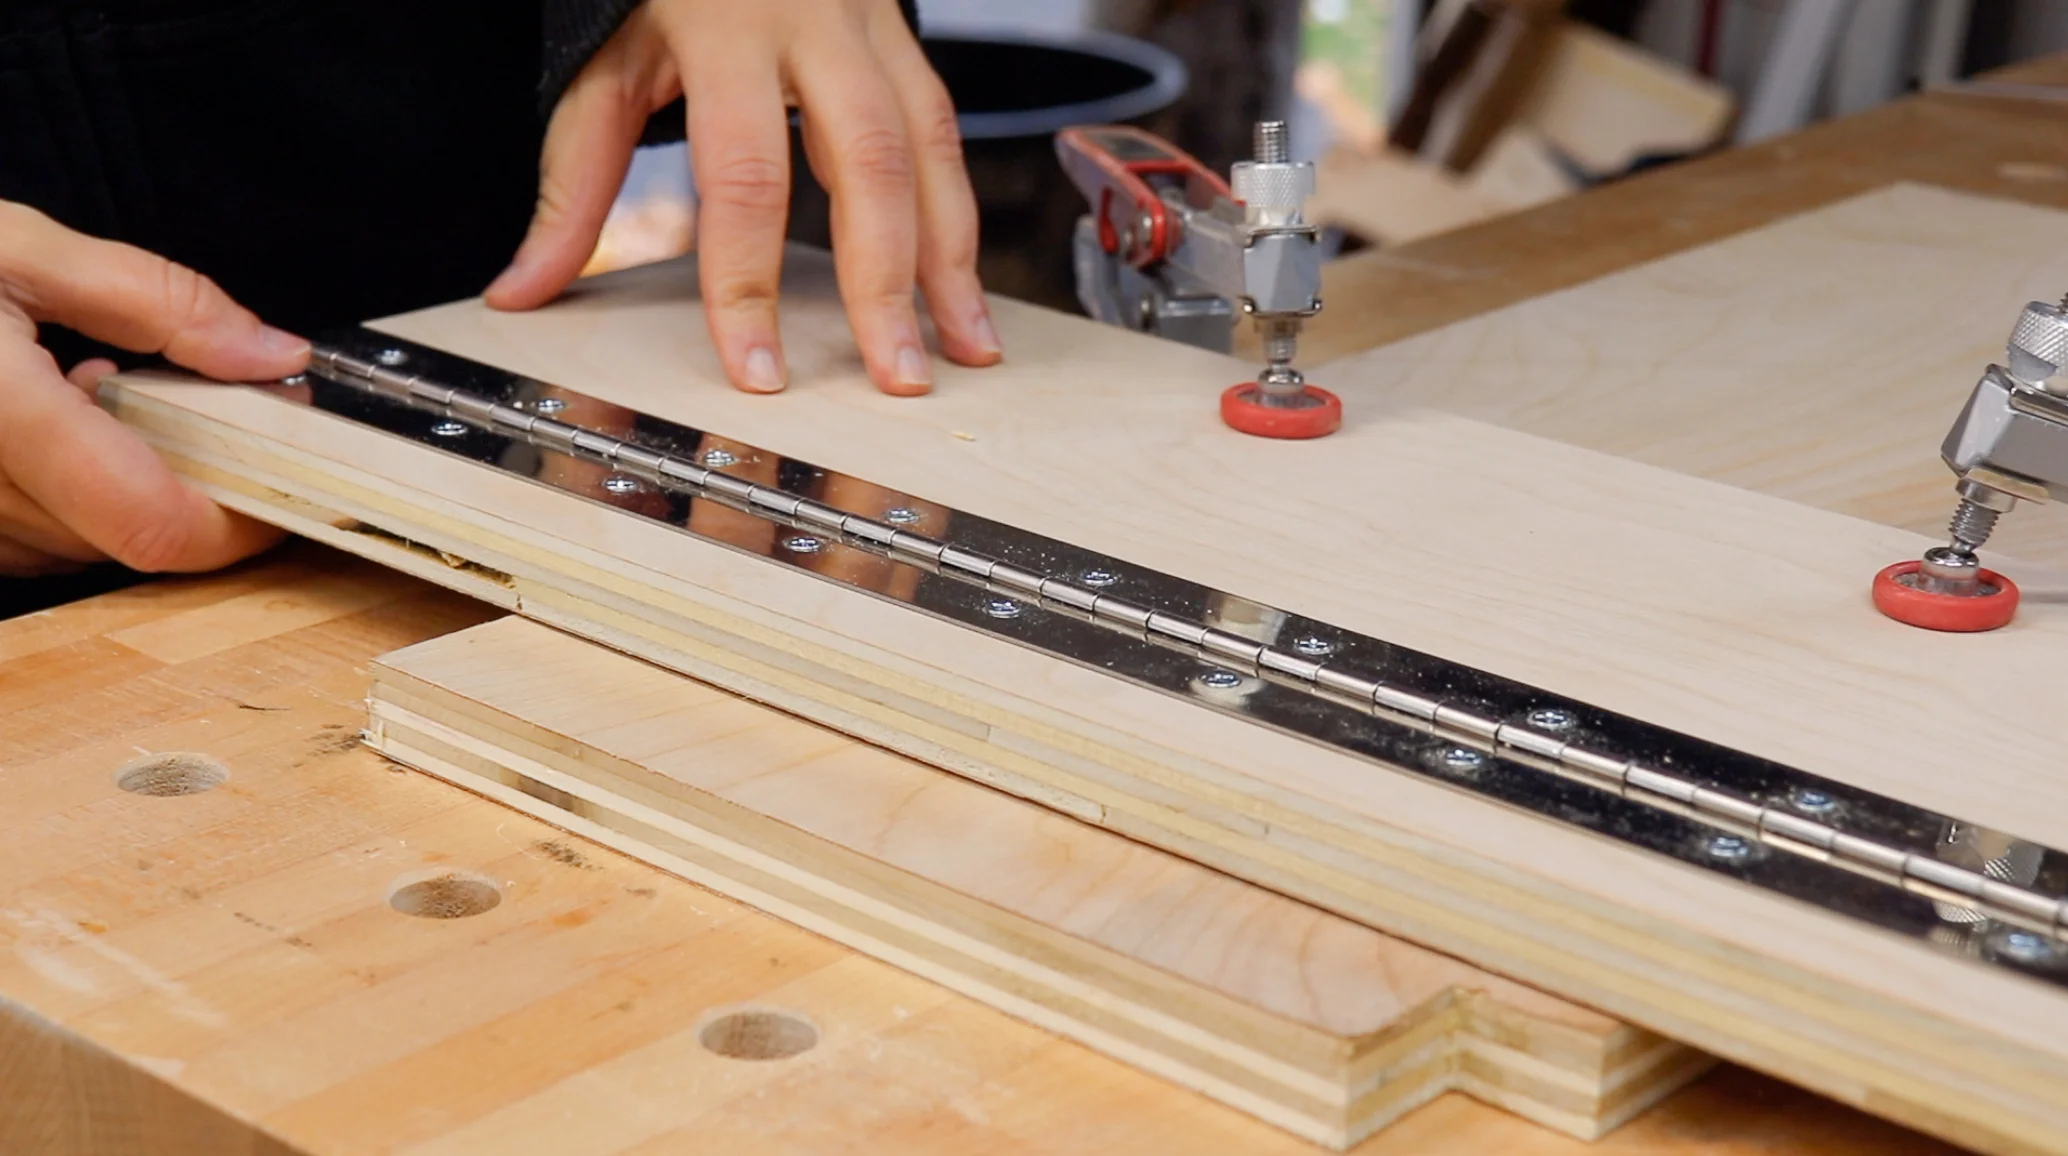
Next it was time to attach the piano hinge onto the two pieces of plywood.
In order to get the best accuracy from this jig its important to attach the two pieces as close as possible. So I clamped them lightly to each other.
Then I put some double sided tape on the piano hinge and placed it so the barrel of the hinge was right on top of where the two parts met.
The double sided tape helps keep it in place while attaching it.

I predrilled the holes using a vix bit, or center finding bit. This bit is great for hinges like these, it ensures that you are drilling perfectly centered into the hole.
I started with the outer ends first so that I didn’t have to worry about alignment of all the holes in the middle.
I placed the screws in the outer ends before pre-drilling all the holes in the center.
Once I put the screws in the outer ends, I moved the clamps towards the center then proceeded to pre-drill the rest of the holes and then put all the screws in place.
And it’s done!
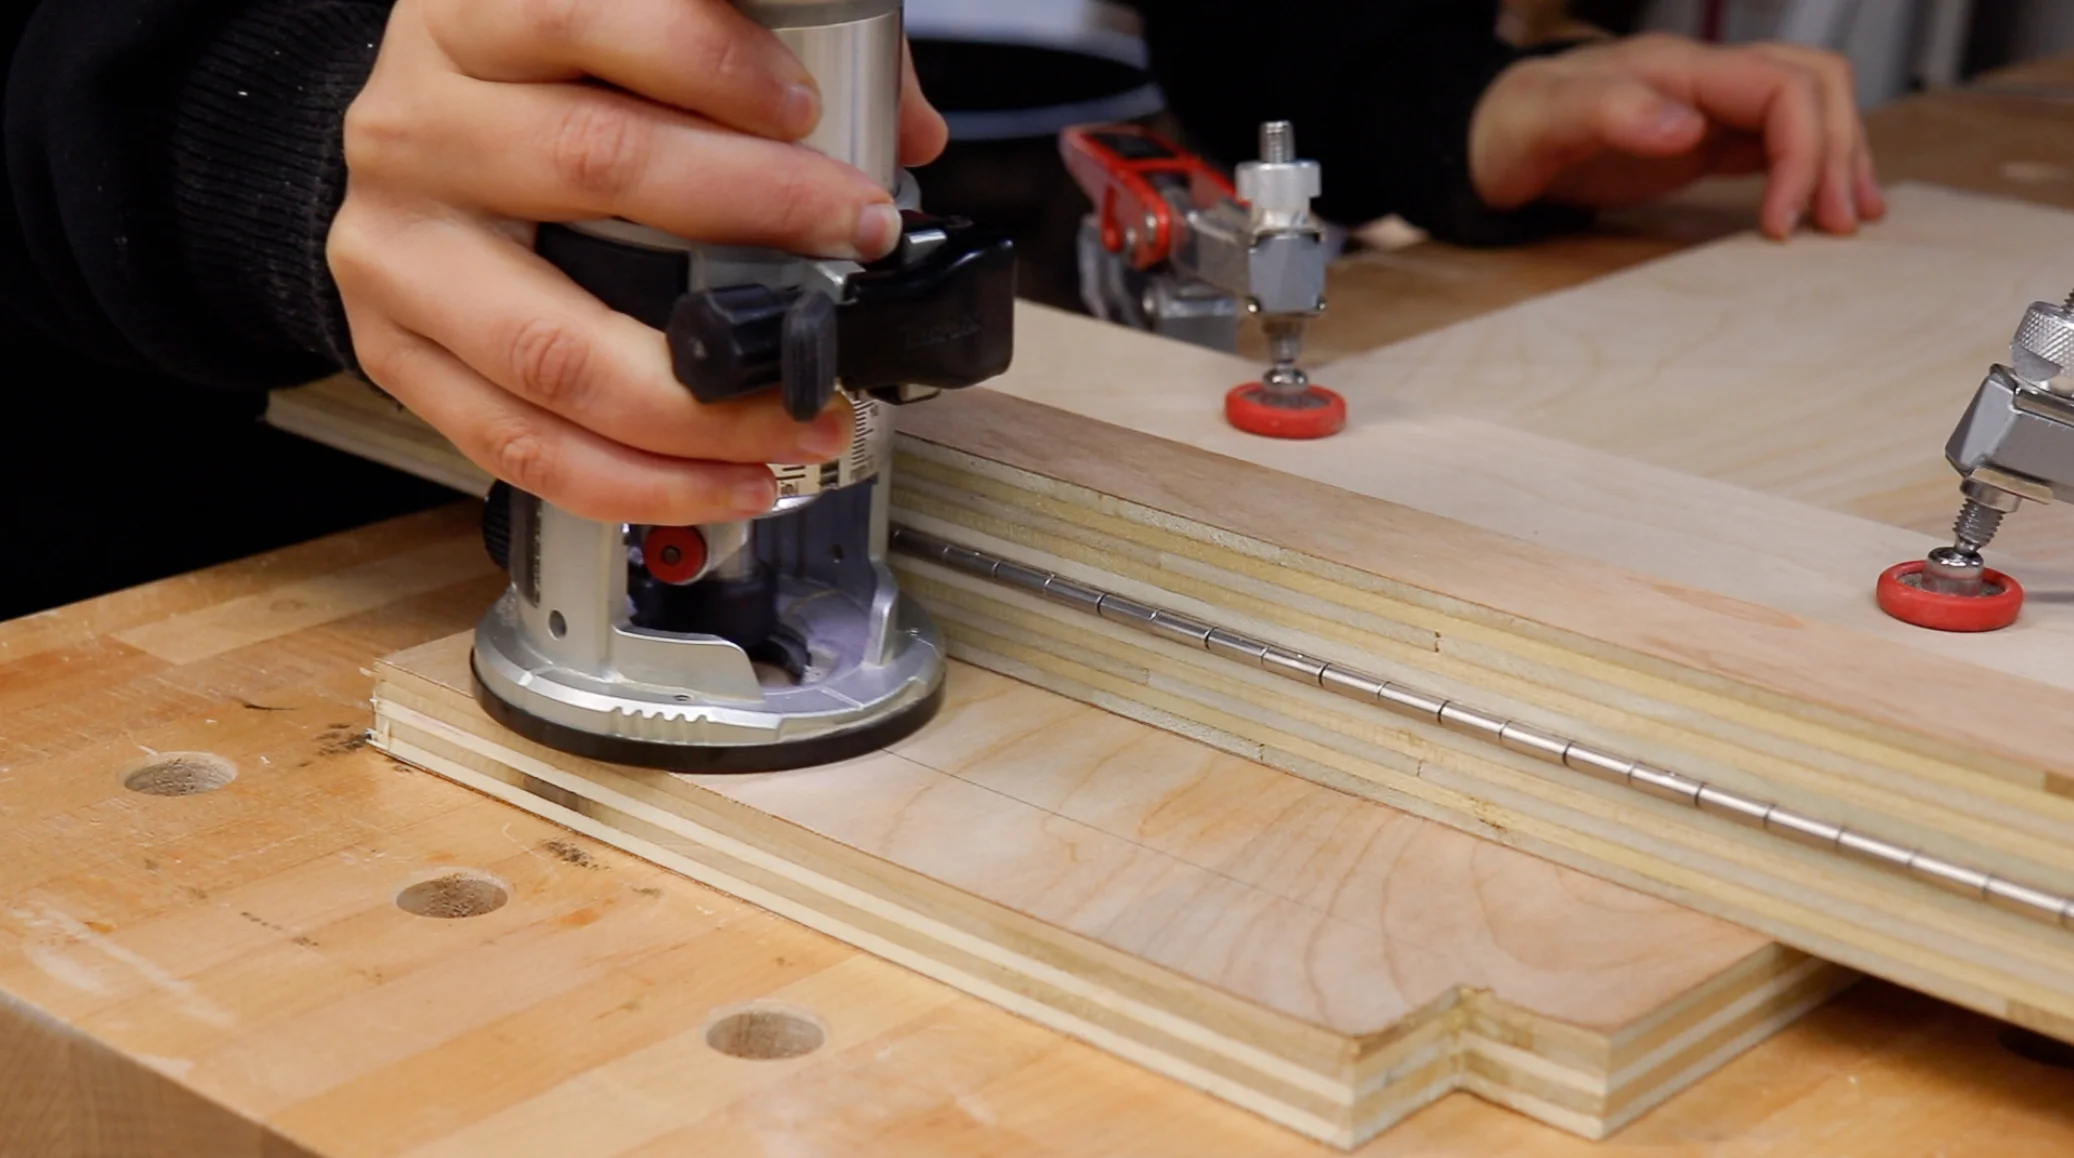
To use the jig, all you have to do is line up the edge of the narrower piece with your cut mark and clamp it down.
Then you simply lift up the flap and route away!
Because I measured from the center of the v-groove bit to the outer edge of the baseplate, I can use this jig for multiple sized bits and the cut line will always be in the center.
The important thing to remember with this jig is that it will always cut in the center, so you have to keep that in mind when marking out lines for cuts.
I hope that was helpful and now I need to go use it for my next project!