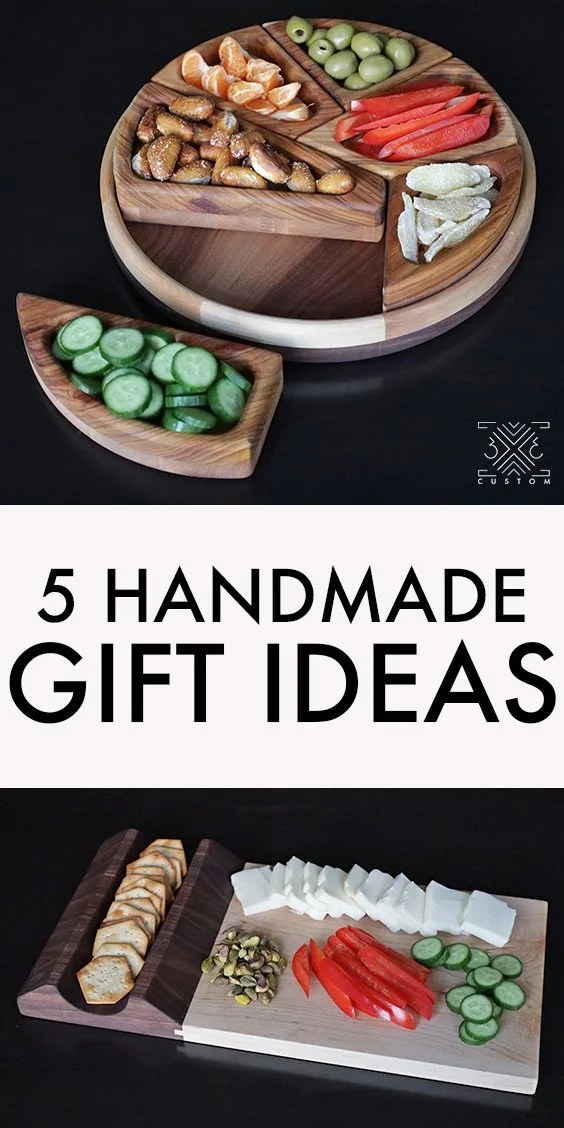
5 Easy Handmade Holiday Gift Ideas

This year I wanted to challenge myself to come up with a few Holiday Gift ideas that anyone can make only using wood… Meaning there is no hardware you need to order to get these done, and these can also be made from scrap wood!
Check out the full build video below to see how I made all of them!
Let’s begin!
#1 MODERN KNIFE BLOCK
First, download the free printable template here - KNIFE BLOCK HOLE PATTERN TEMPLATE
or click the image below…

Cut out the two rectangles on the template and use spray adhesive on the edges of one of your boards.
You will need two boards that are 8” wide x 10” long (the boards will be trimmed to final length after the next step.)

Place your two boards together using double-sided tape and drill out all the 1/2” holes on both pieces at the same time using the drilling template as a guide.

The drilling template also has a centerline running through all the holes to use as a guide for where to cut the boards to the final length, which is 9”.
It’s easy to do this while the boards are still double side taped together.

You will need 22 dowels cut at 4” long to fit into the slots made in the previous step.
If you are purchasing pre-made dowels, you can purchase two 48” long dowels.

Then simply glue and tack the dowels in place!
You can clamp them or use another smaller dowel as a decorative feature, that would be cool.

Make sure to sand the inside before assembly and to clean up all the glue squeeze-out, but the outside can be sanded after glue-up.

Then add some finish!

And it’s done!
This is a super simple project that could be made in a couple of hours and it is so unique.
It would be even cooler, to customize the sides by adding someone's initials or a logo. Love it.

#2 CHEESE AND CRACKER SERVING BOARD
This board is made from two parts… 1) The main tray 2) The cracker well
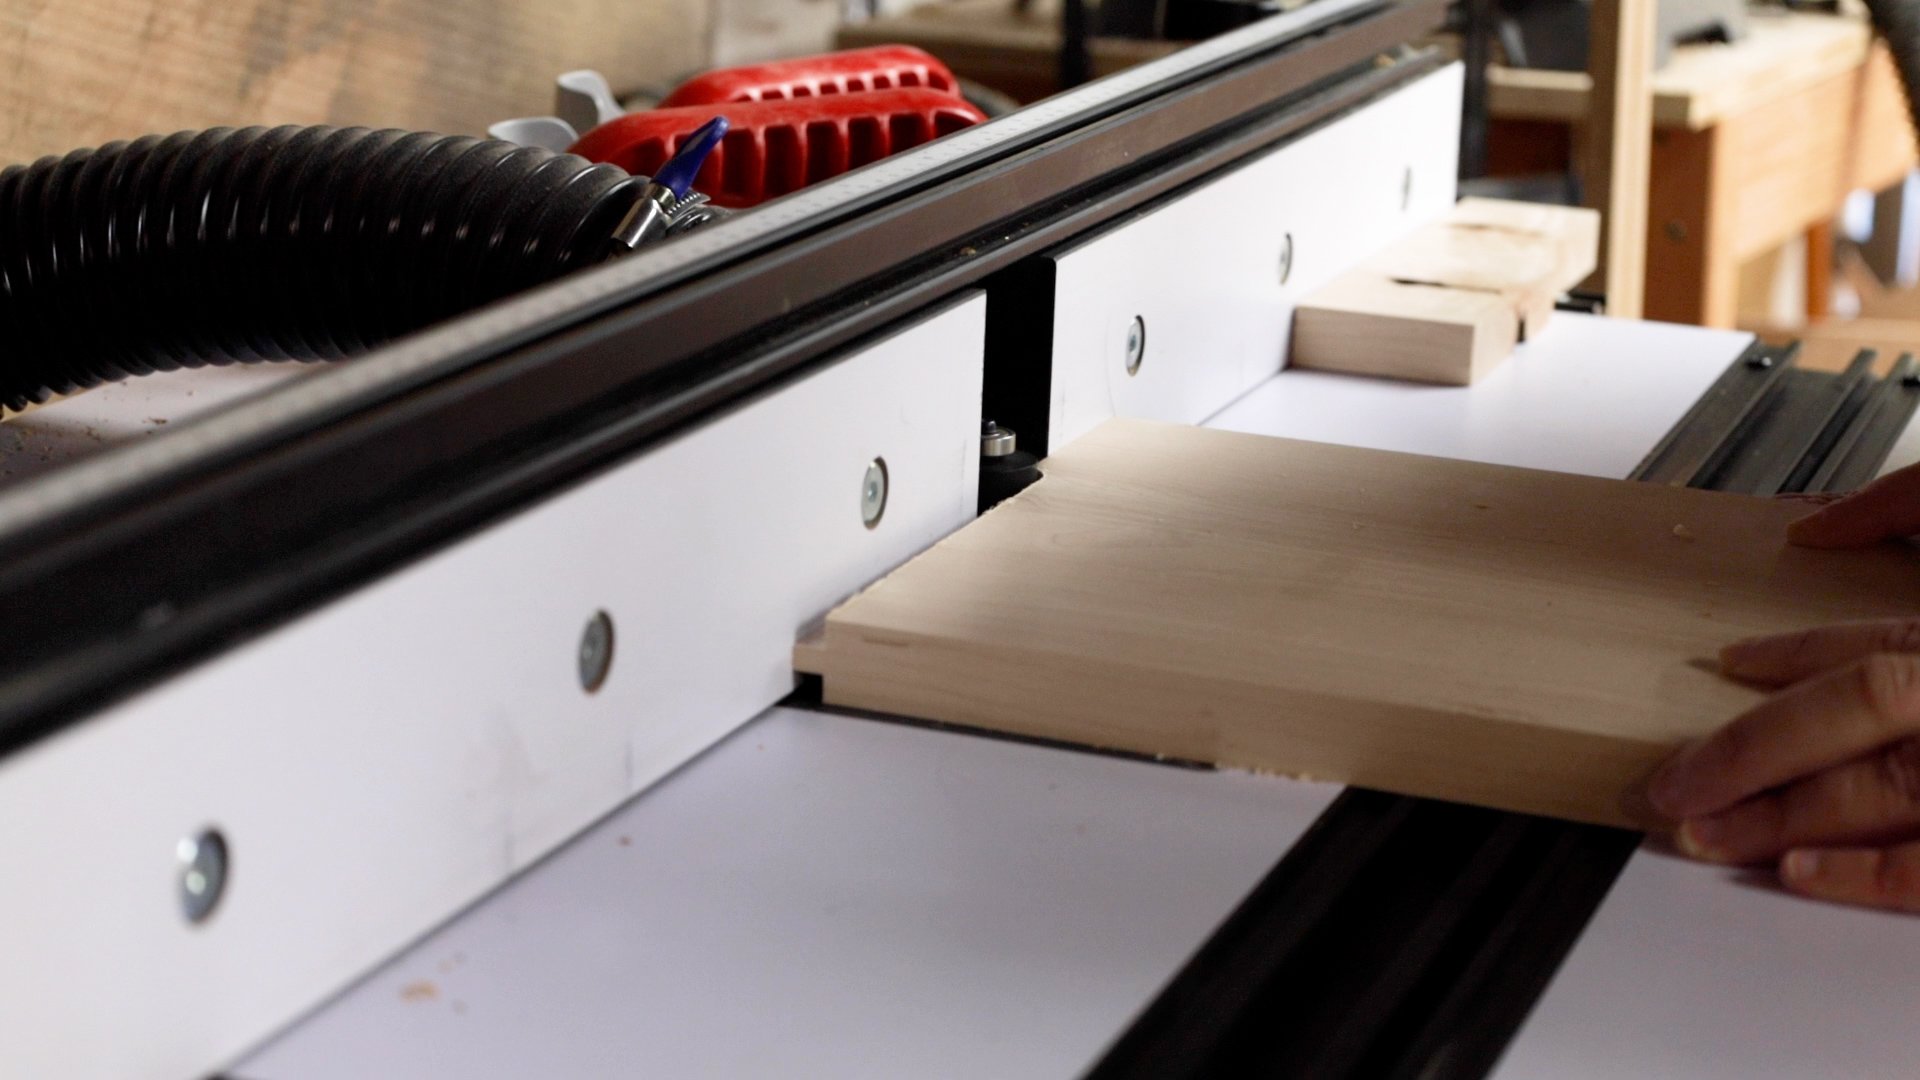
First glue up a panel to make the main tray that will be about 9-1/2” wide x 12” long x 3/4” thick.

Next cut the pieces that are going to make the cracker well.
The wood thickness you are starting off with may vary… this section should also be 9” wide so cut as many pieces as it takes to get to that width.
These pieces should be around 6” long by 1-3/4” tall.

Before gluing them up, cut out a semi-circle that will act as the cracker well. I used a 2-1/2” forstner bit to make a template. If you don’t have one you can also use a hole saw, jigsaw or bandsaw.
You can do this with a template, freehand with the bandsaw or jigsaw, or with a hole saw. Always options.

Now glue up all those pieces that will make the 9” long cracker well!

Once dry, clean up both parts. There is a little handwork involved in getting the cracker well clean. A gooseneck card scraper was great for this task.

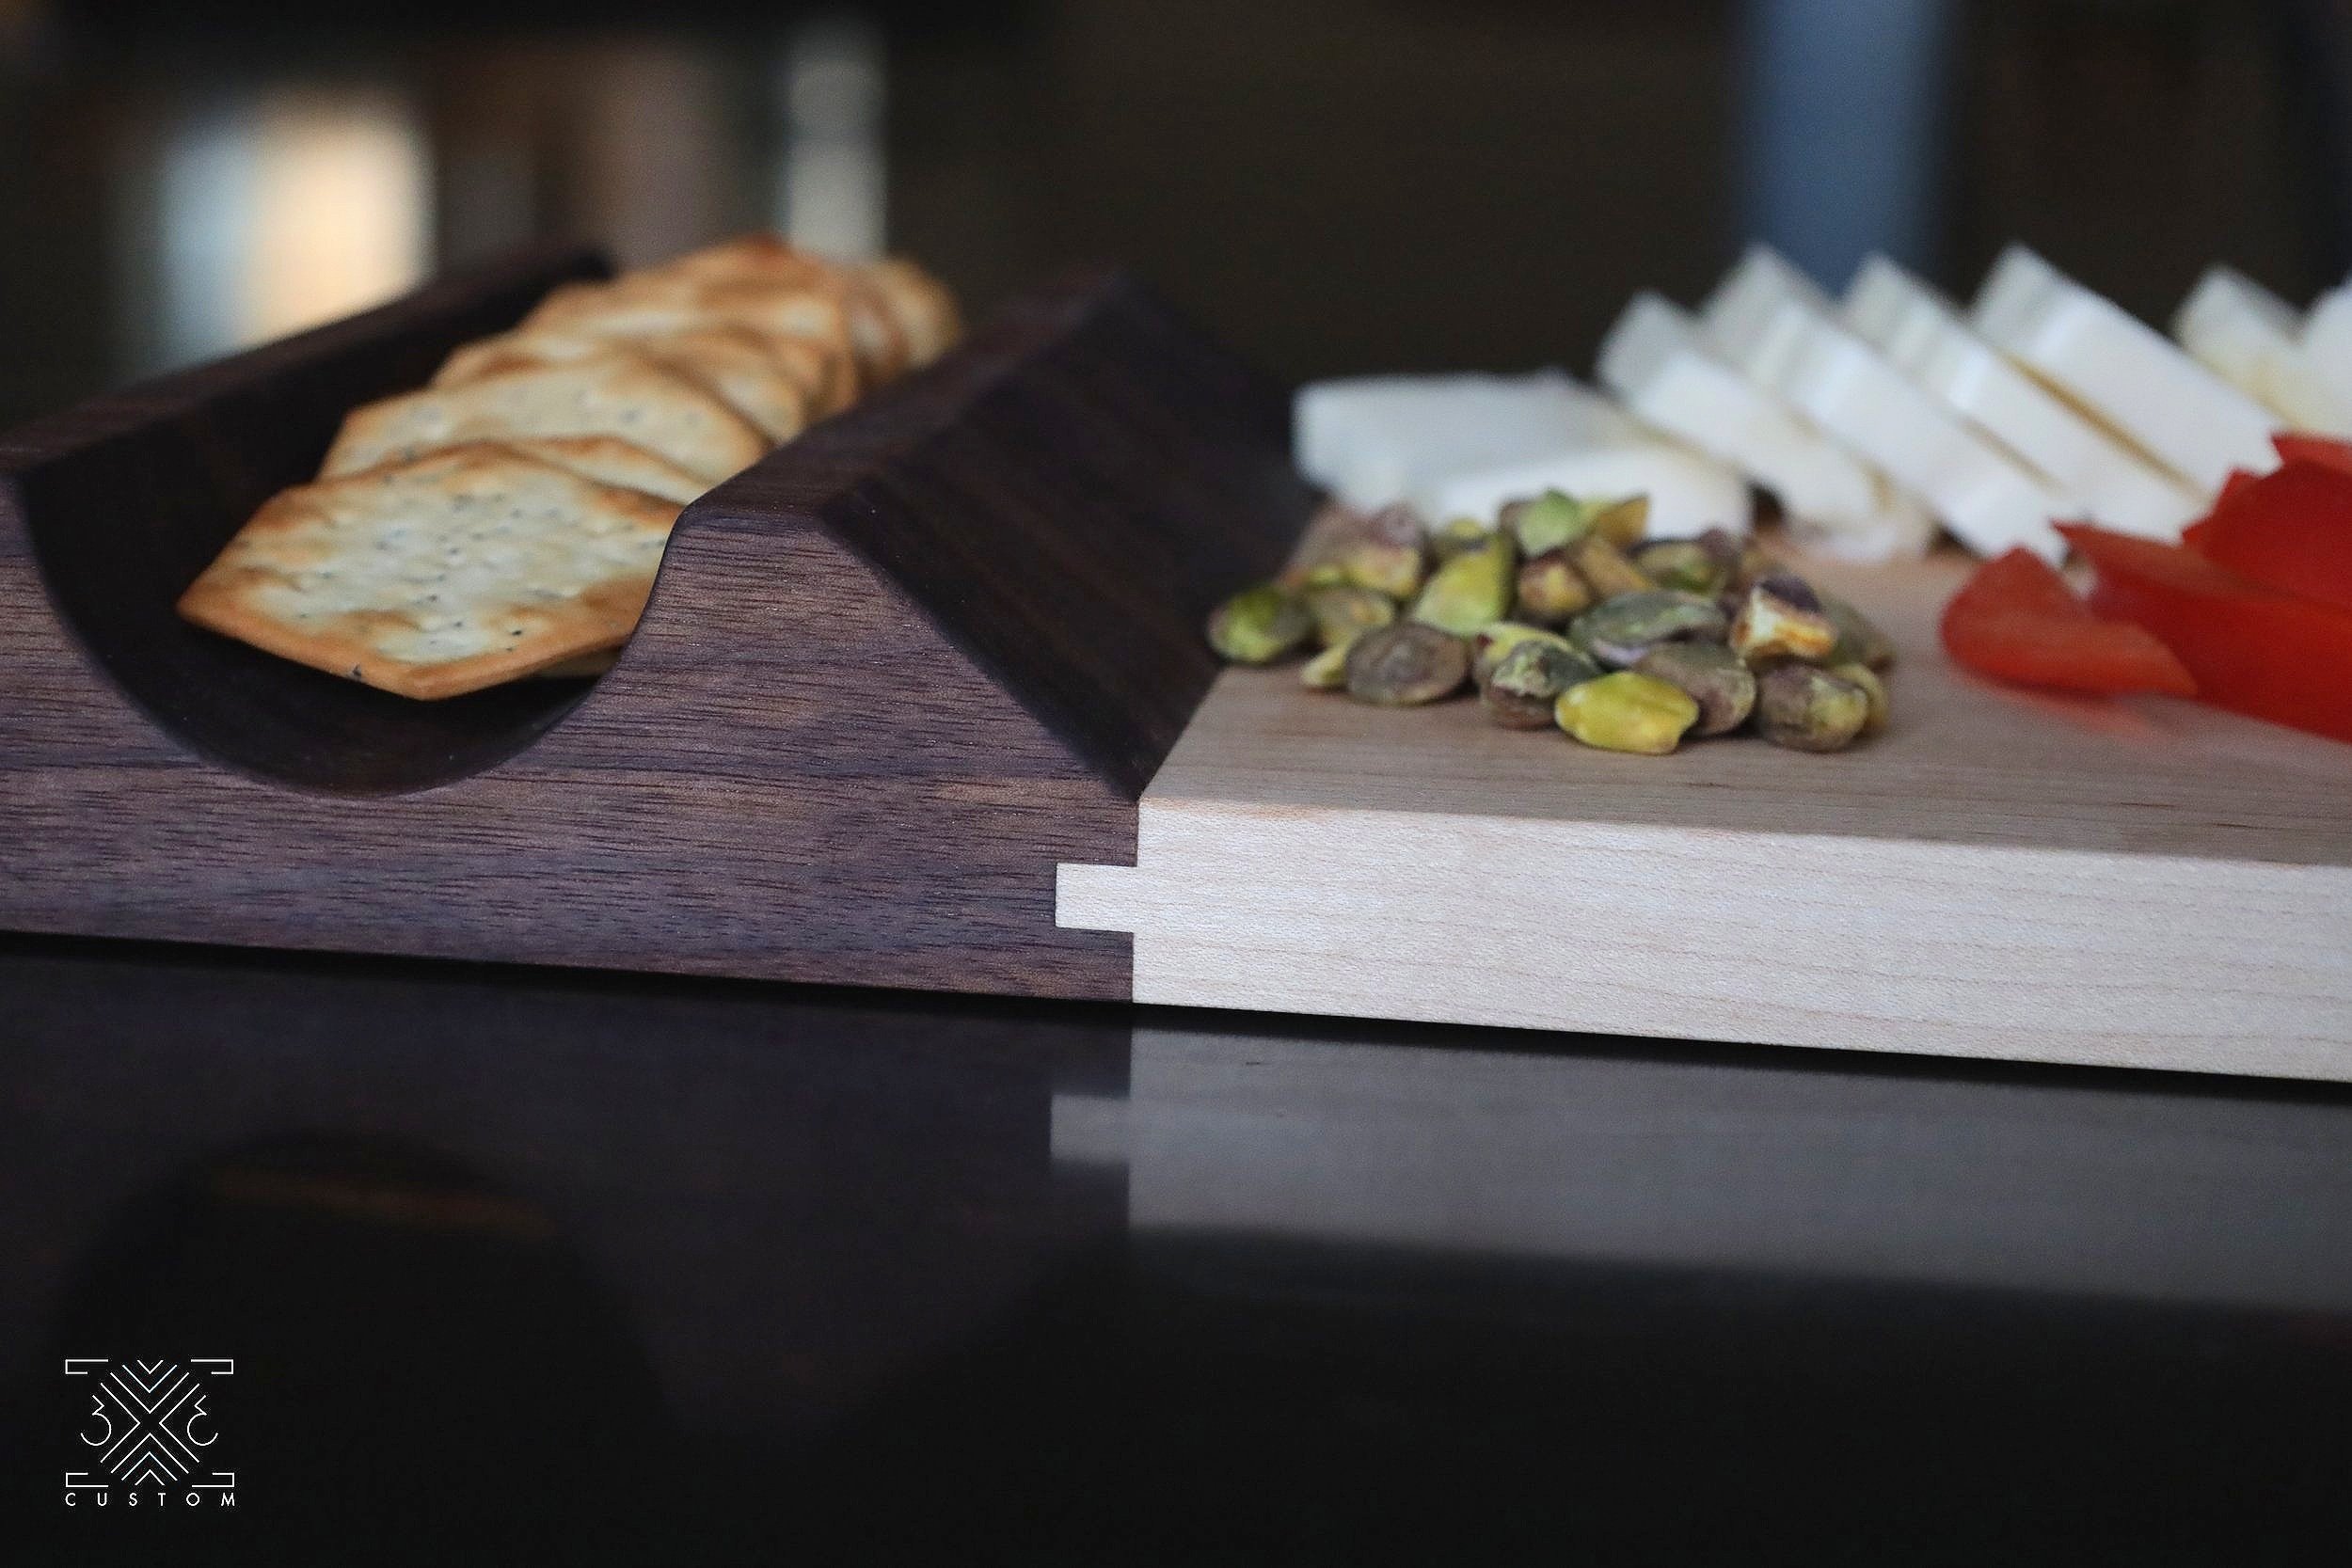
Time to join the two parts together!
I chose to use a tongue and groove, but there are lots of options. Magnets would be really cool or maybe even sliding dovetails!
First I made the tongue on the main part of the tray.
Then the groove gets cut on one end of the cracker well.
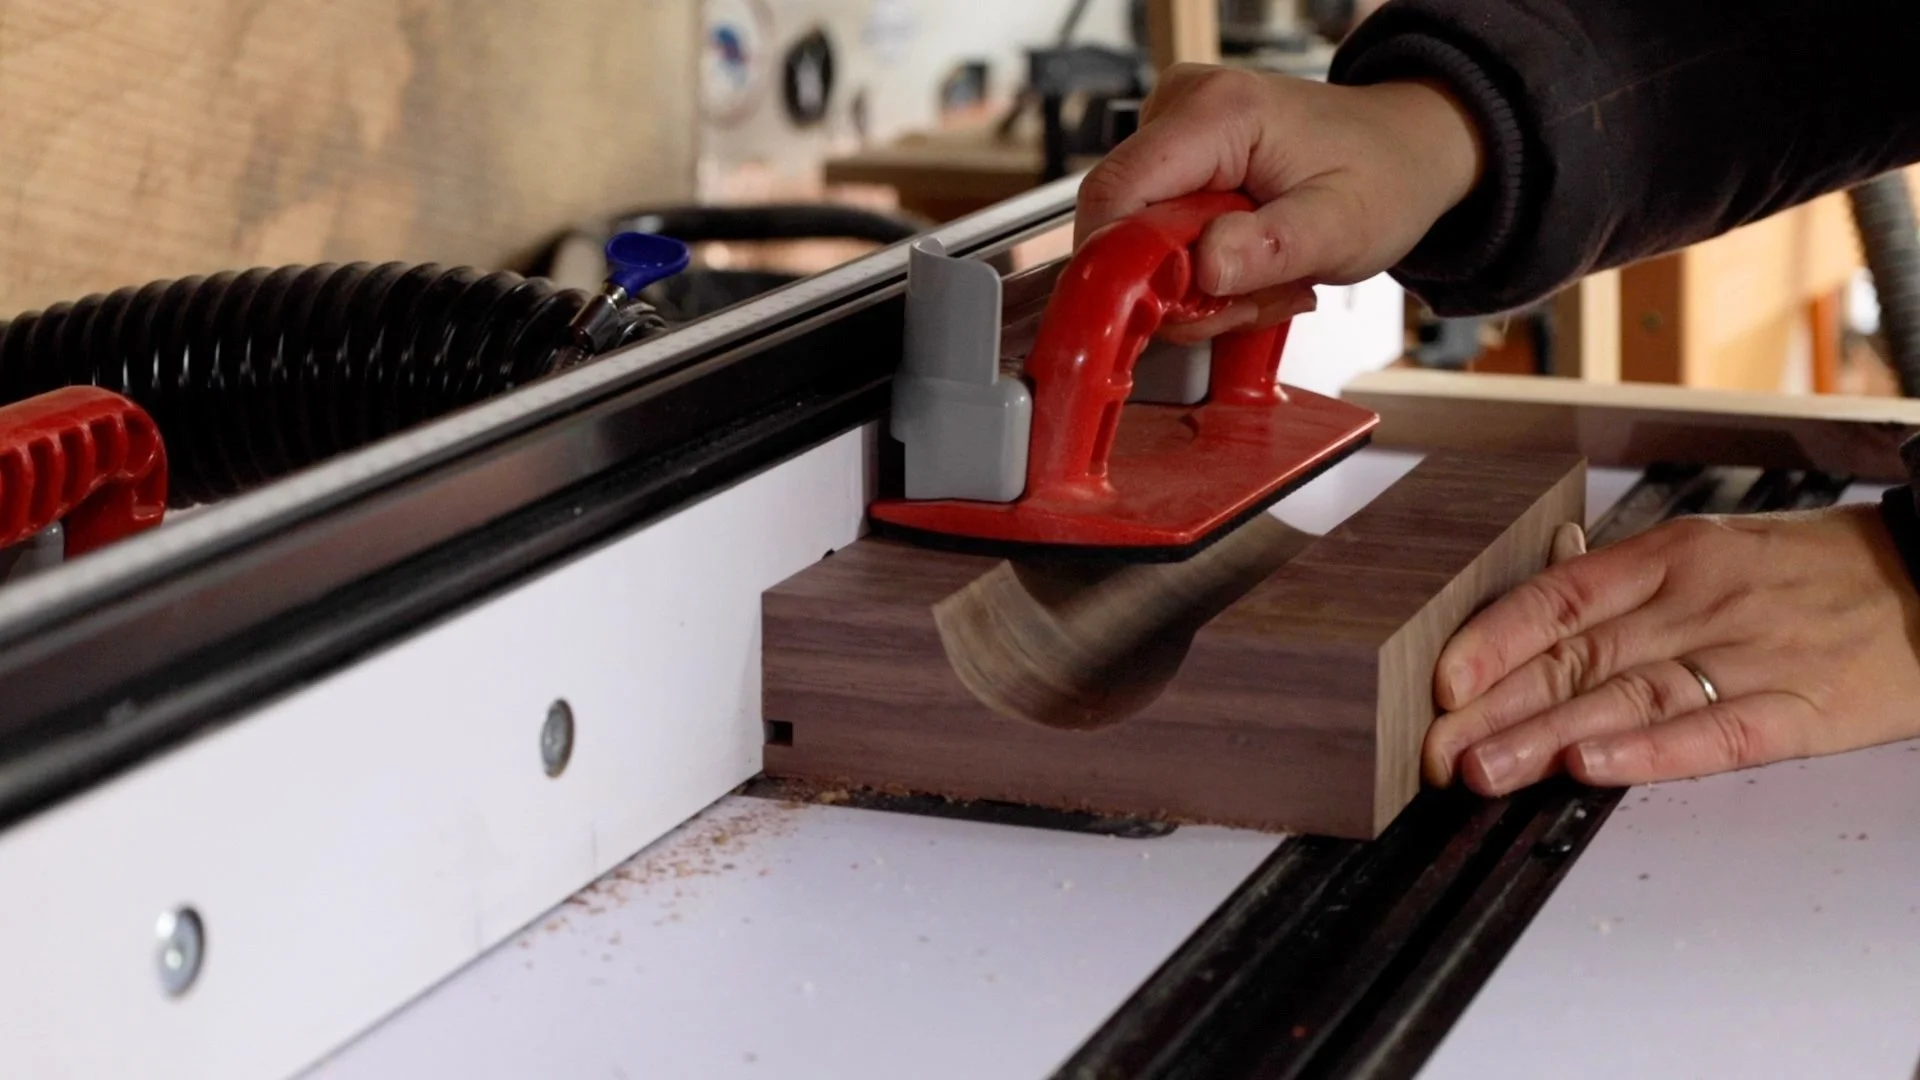
The cracker well then gets shaped do its less bulky and the edge is flush with the main tray.

And the two parts get glued together! Again, you don’t have to glue it if you want to make these two separate trays.

Pour on some food safe finish.

And it’s done!
I LOVE this board. It’s just such a unique way to serve cheese and crackers and I can’t wait to use it!

The contrast with the joinery is also such a killer detail, a sliding dovetail would really work here as well!
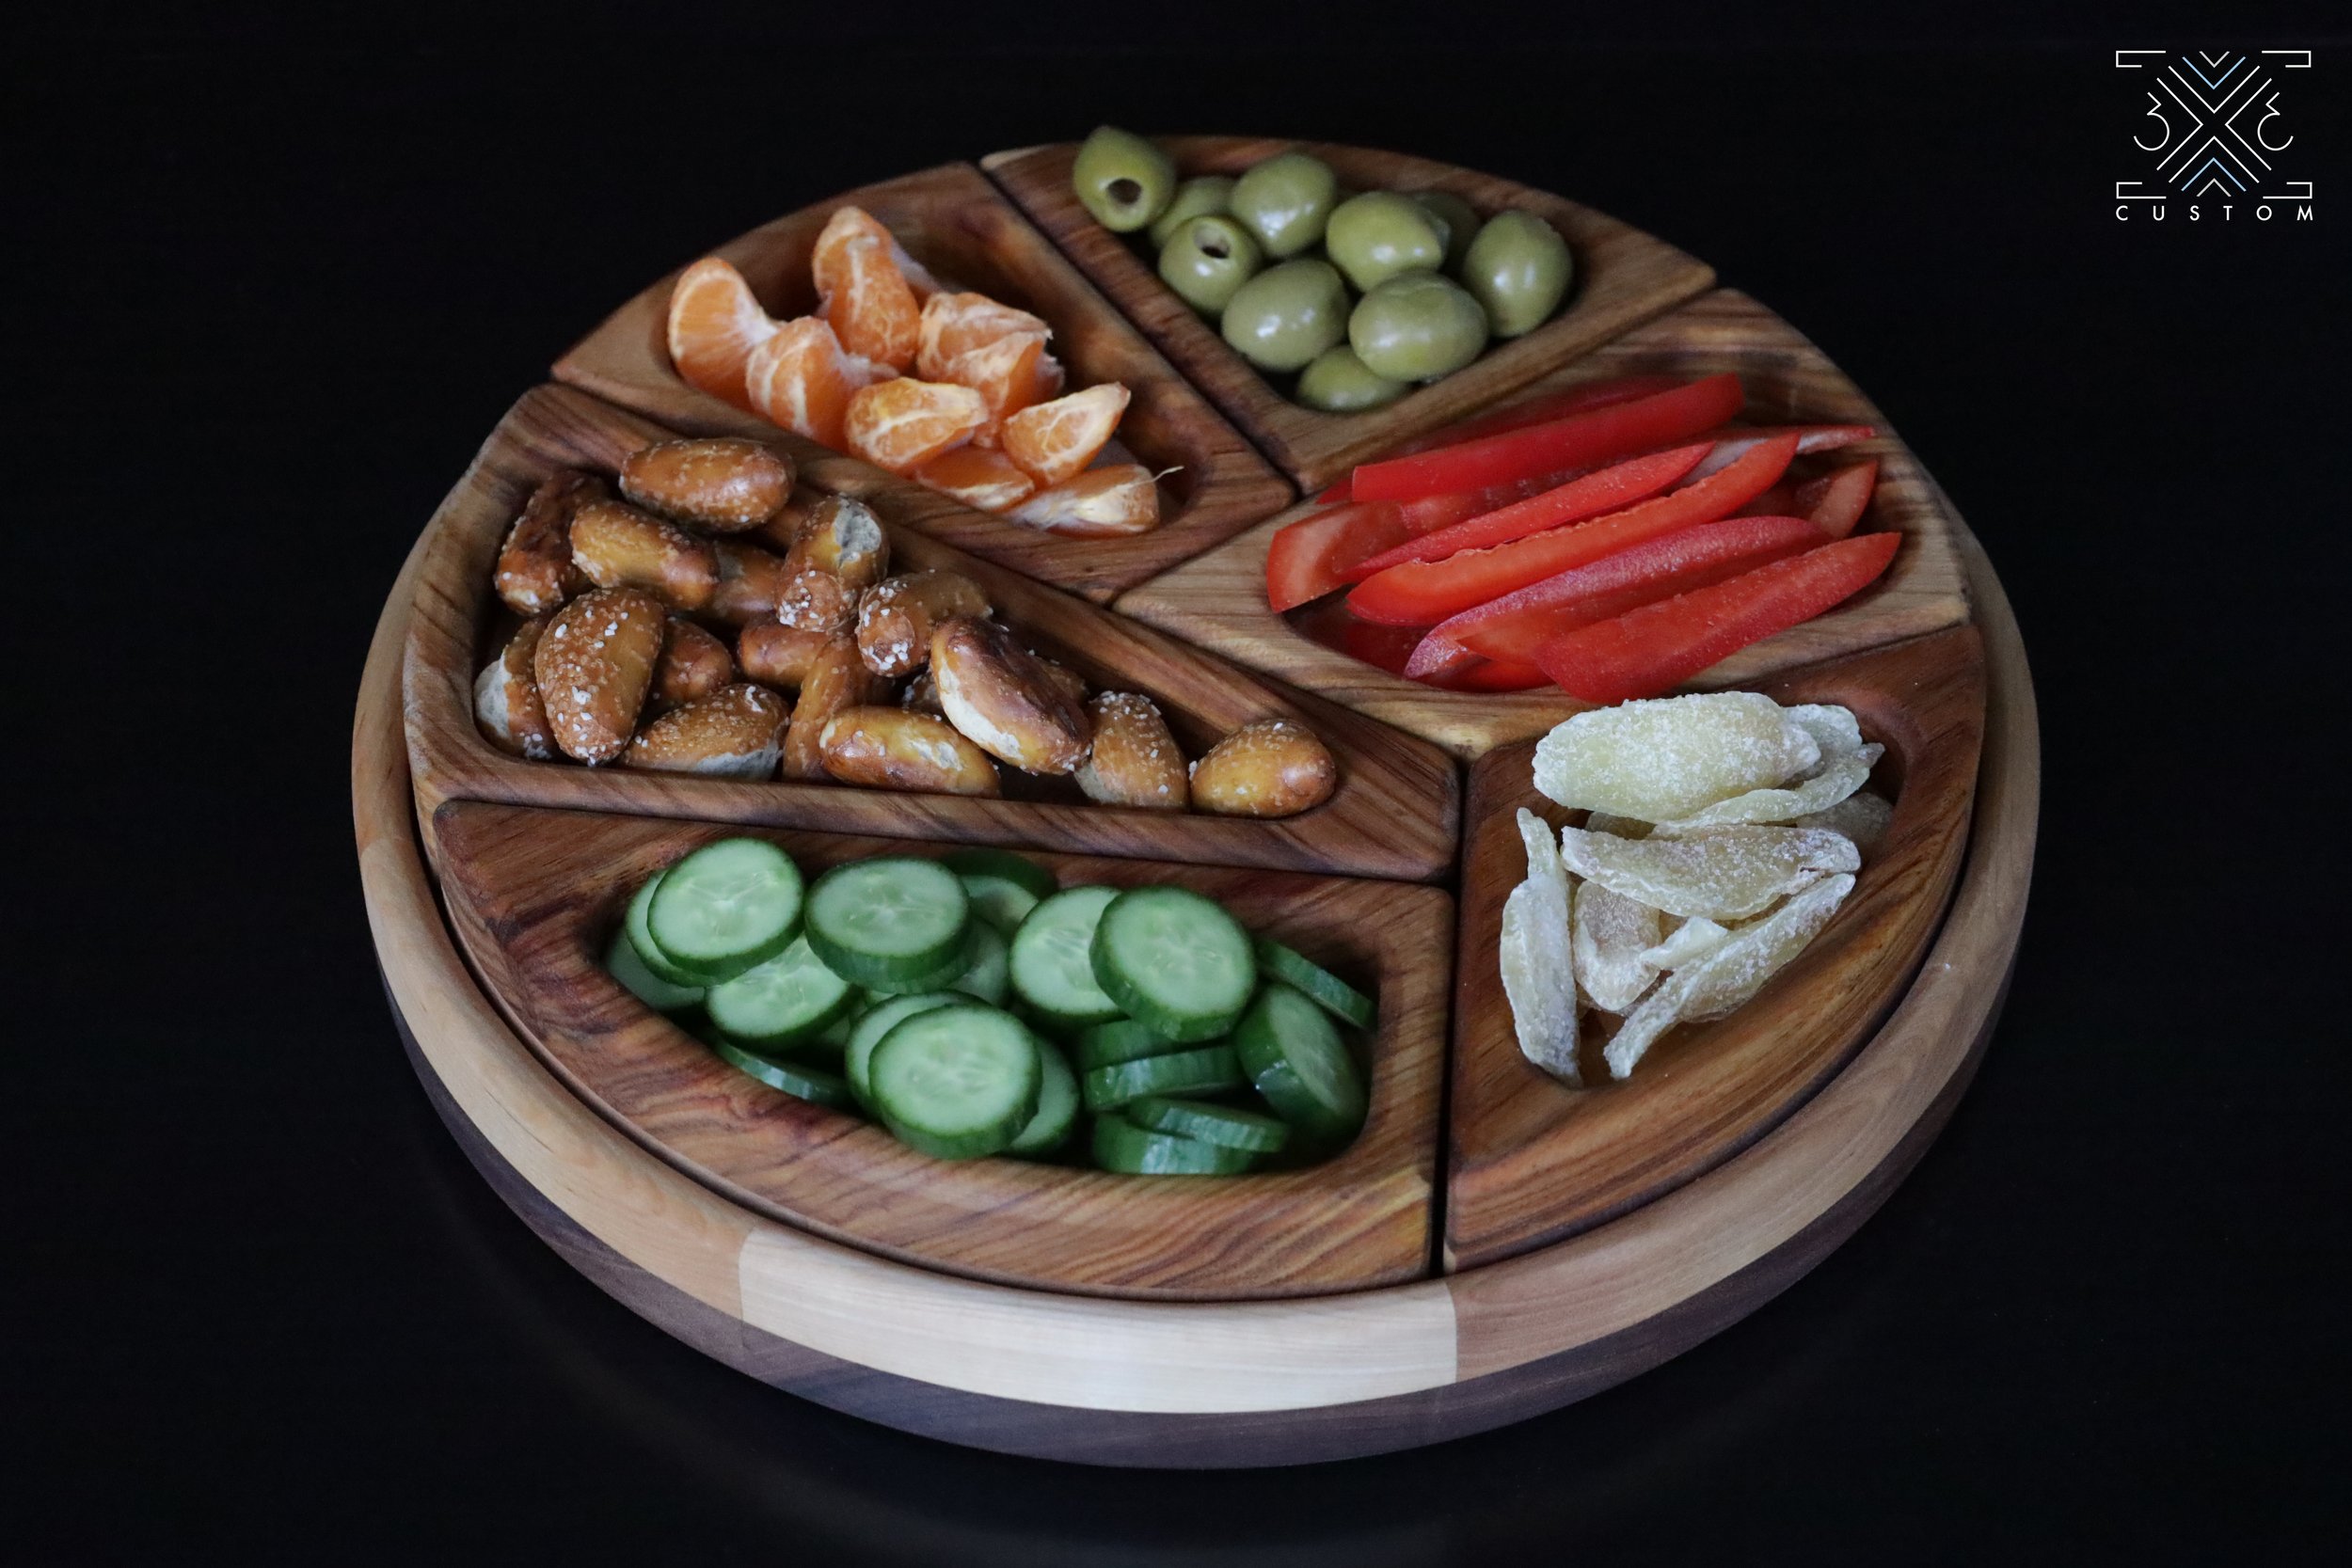
#3 GEOMETRIC PUZZLE SERVING TRAY
This tray is going to be made from one main tray that is 13” round and six inner geometric trays that will fit into the circle. You can find the template for the inner trays here - GEOMETRIC SERVING TRAY TEMPLATES
There are a few ways you can make this tray. One way is to use thicker stock, make a template and use a bowl bit with a bearing to carve it out…
I’m going to show another way where you start off with thinner stock and you laminate them together to create the bowl.
To begin, glue up a panel that will create a 13” circle for the bottom of the main base. I went with 3/4” thick material, but use what you got.

The top lip of the main base is created by first making an octagon with 8 pieces. The ends are cut to 22.5-degees to create this shape.
You are aiming for the top lip of the base to be 13” like the bottom, but it is only 1/2” wide, so it should be 12” from the inside.

To make the correct size circle, rip them to 1-3/16” wide and 5-1/2” long from the long ends as pictured below.

Then glue them up into an octagon!

Use a circle cutting jig to create the 12” circle from the inside. This is the most important measurement here.
The geometric trays on the template are made to fit inside a 12” circle.

Next cut a 13” circle from the main base piece.

Then glue the base to the top ring making sure it overlaps the top ring by 1/2”.

The top ring then gets cut to rough shape based on the bottom base.
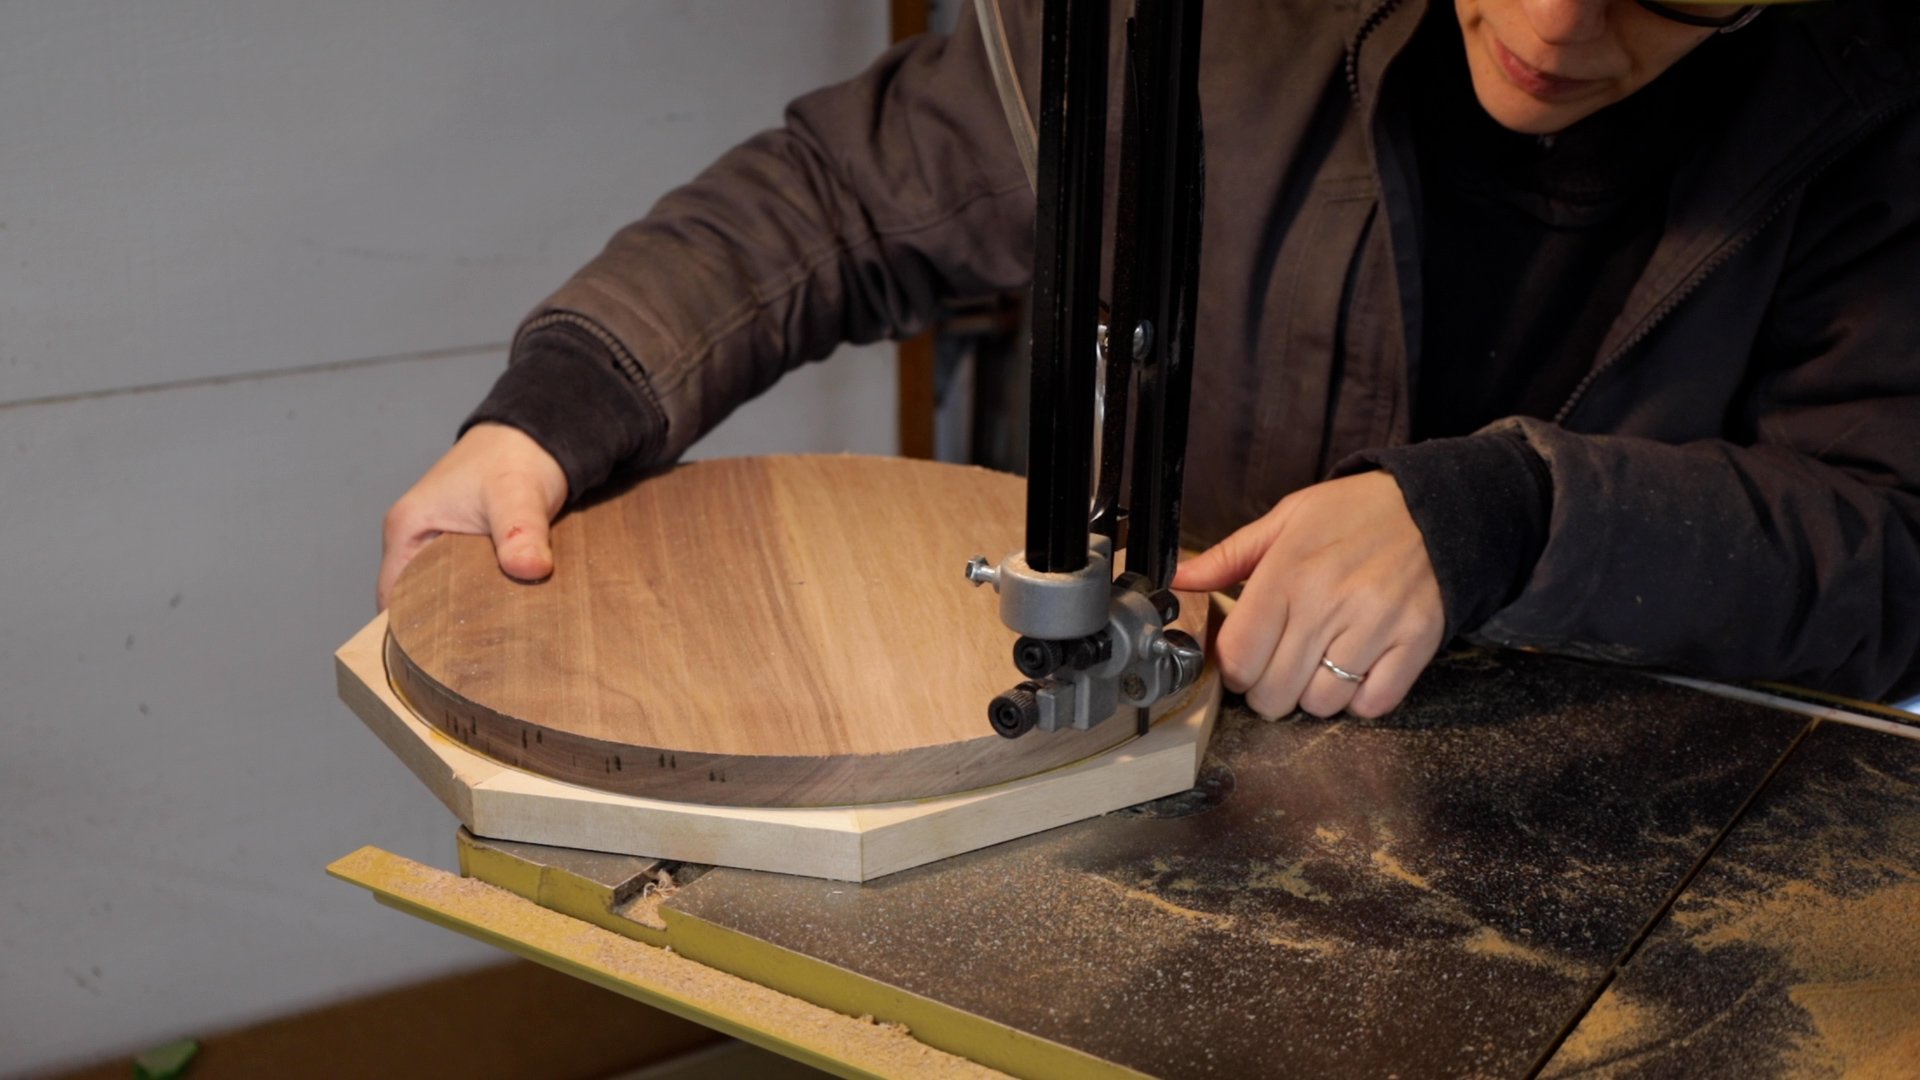
And made perfect with a flush trim bit.

On to the inner geometric trays! You can download the templates here - GEOMETRIC SERVING PLATTER TEMPLATES
Like anything with woodworking, there are multiple ways to accomplish this. You can shape the pieces directly from the paper templates, or you can make hard templates from the paper templates and use a flush-trim bit.
Always options.

I chose to make hard templates from out of 1/4” MDF from the paper templates.
Just like the main base, these trays will be a lamination process, but you can start off with thicker wood and use a bowl bit instead.
Start off by creating the bottom of the inner geometric trays using the outside of the template.

Rough cut using a bandsaw, jigsaw or scroll saw.
I chose to use 3/4” thick material but you can use whatever you got.
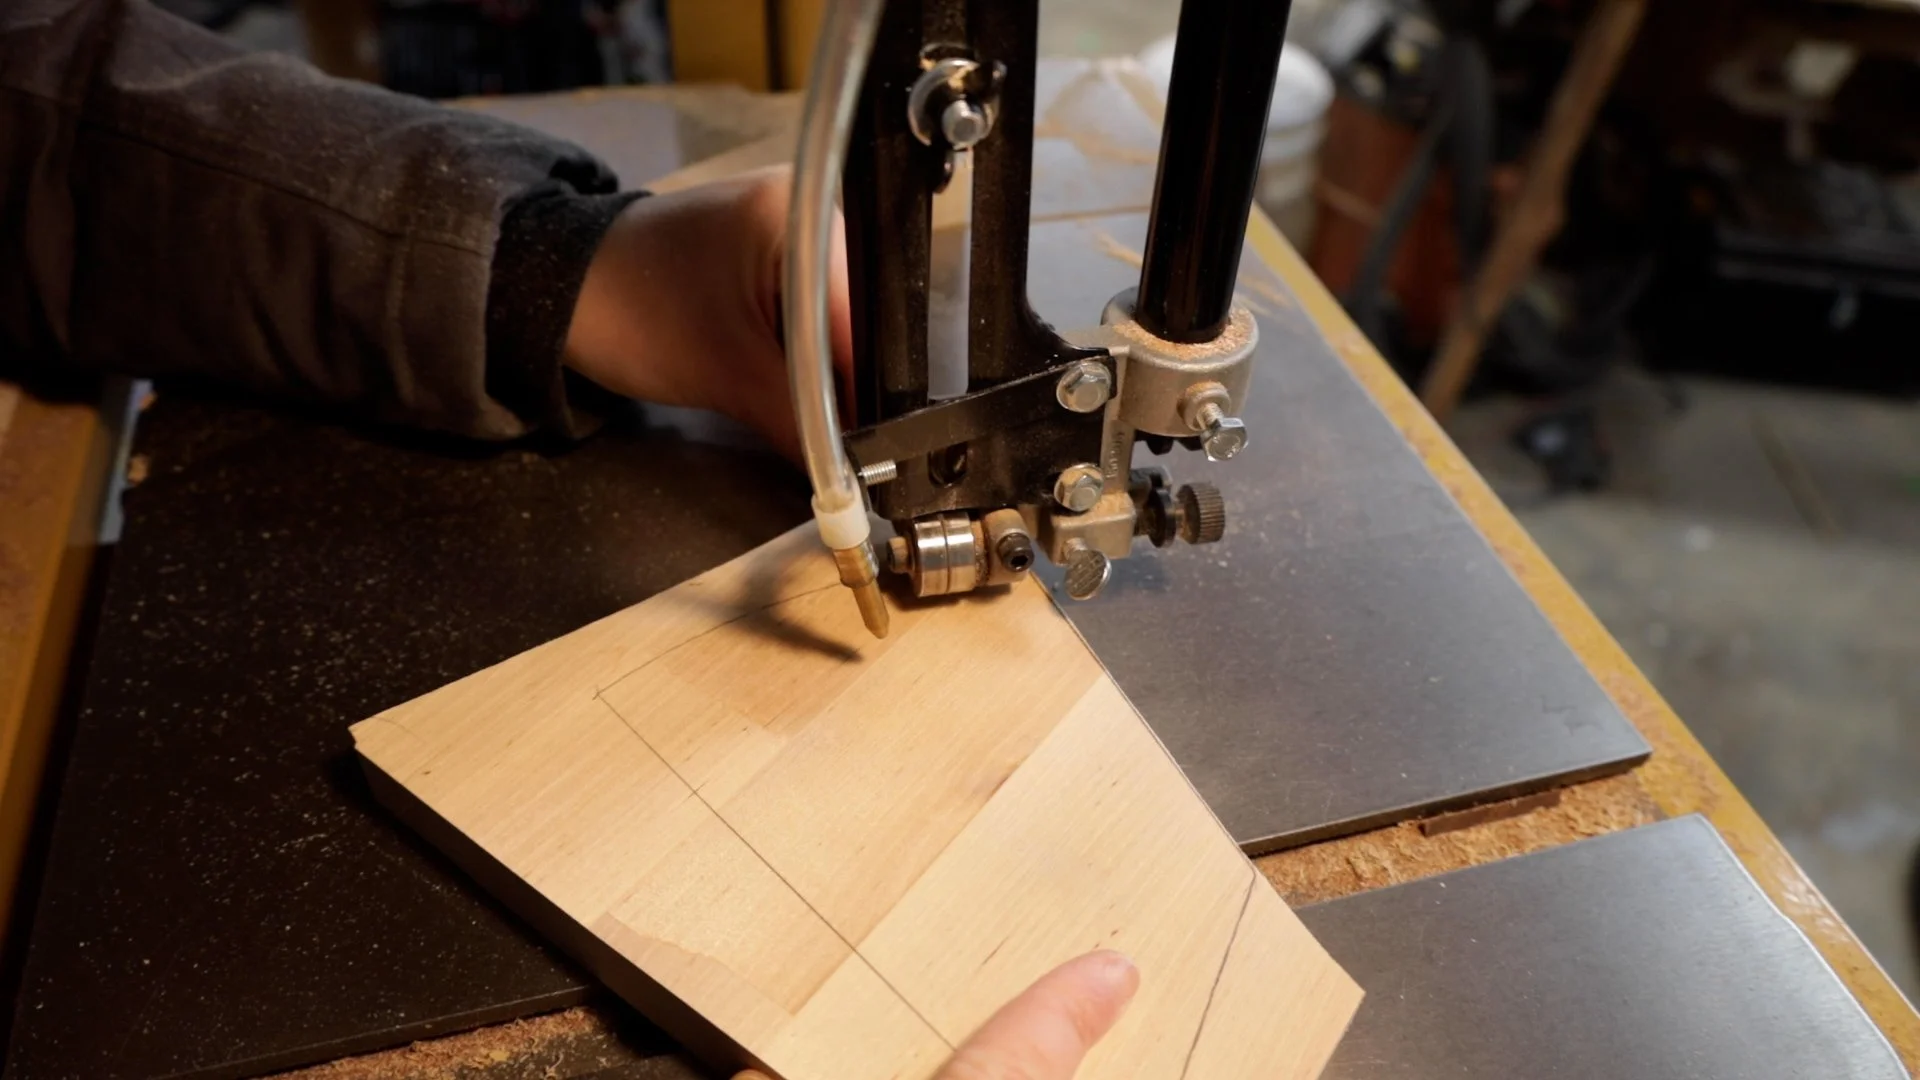
Then refine the shape using a flush trim bit or a bunch of sanding.
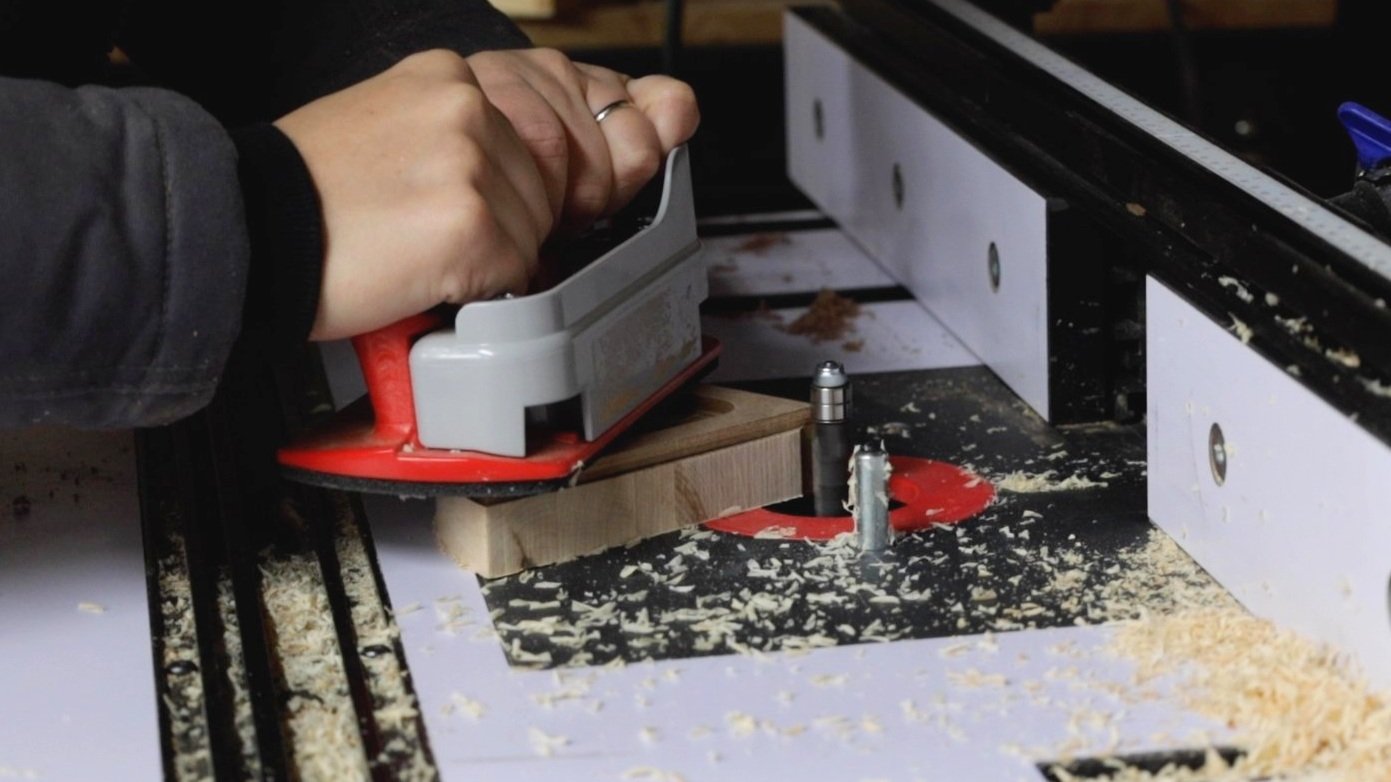
Next work on the top lip of the inner trays.
Make sure to mark the outside and the inside of the template for these pieces on 3/4” thick material.

Rough cut the inside shapes with a jigsaw or a scroll saw, then refine the fit with a router or sanding.
The inside of these bowls is not important, you don’t have to be exact with the fit, you can even get creative with the inner shapes.

Rough cut the outer shape of the top lips and glue up the two parts!

After the glue dries you can refine the shape of the top lip to match the bottom piece with a flush-trim bit.
Make sure all your inner trays fit inside the circle, if the fit is too tight, refine the fit with sanding.

Add some food safe finish…

And it’s done!
How cool is this?!
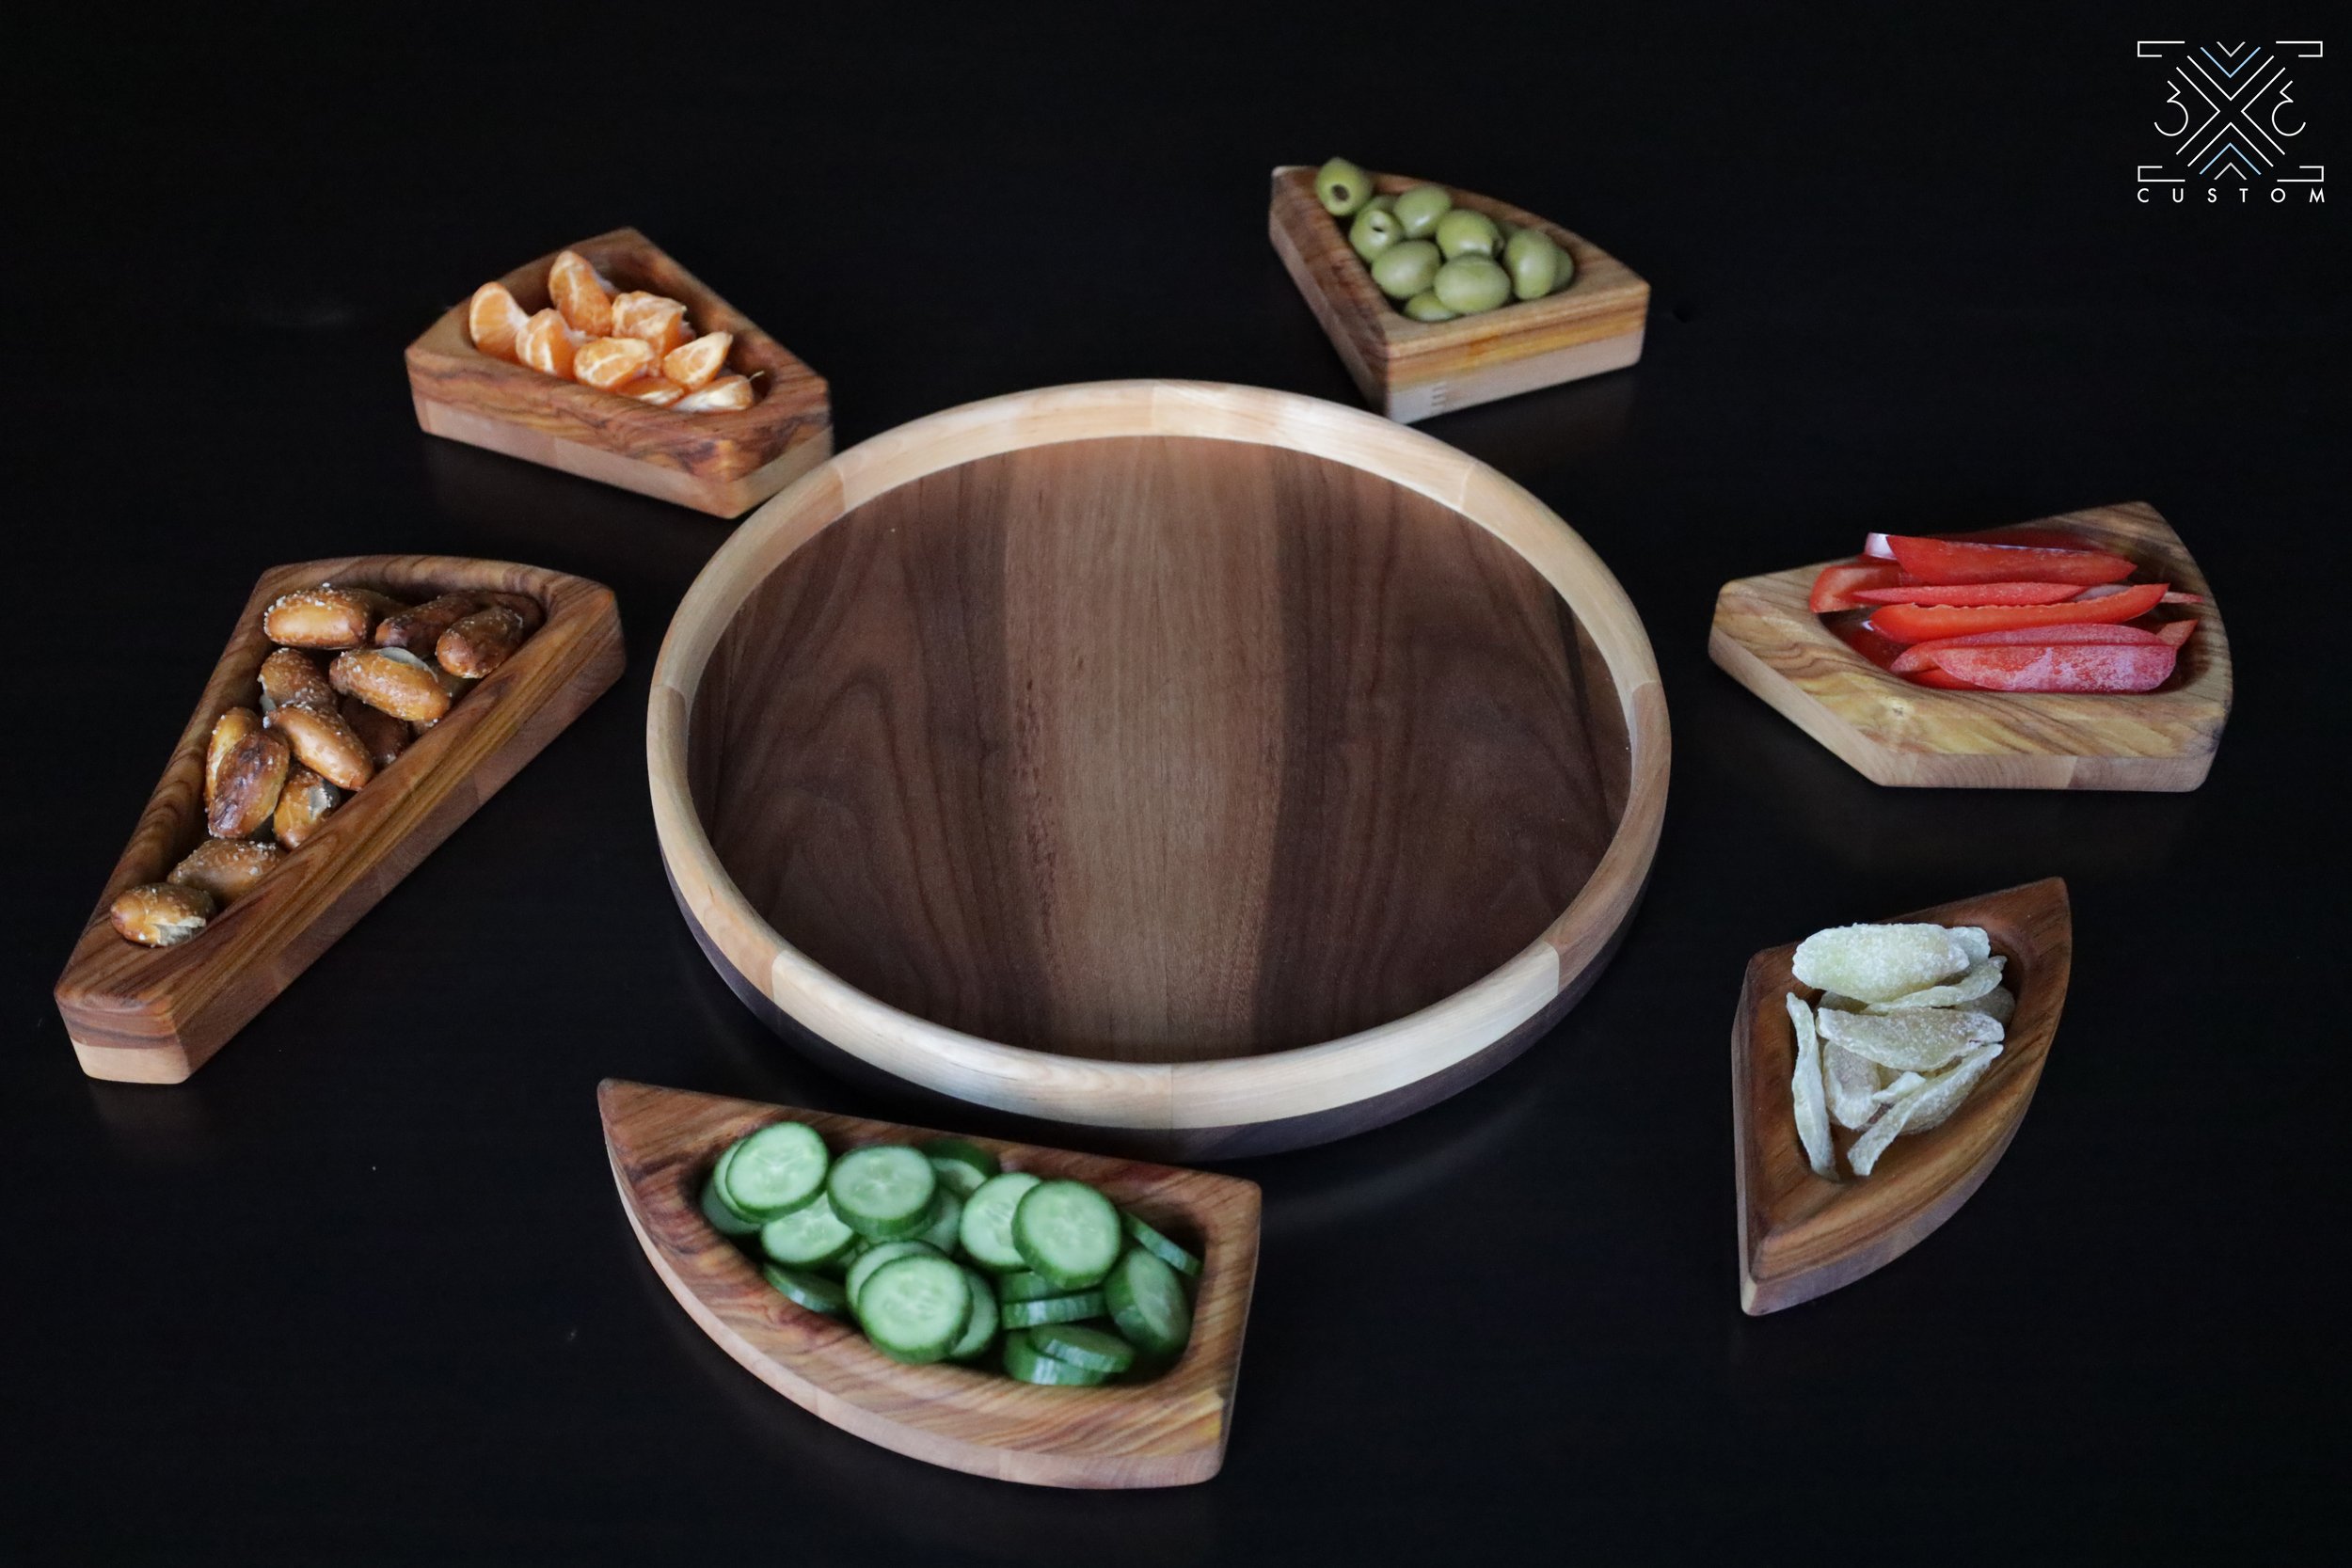
You can serve it with all the geometric trays in the main tray.

Or remove some trays and fill it with chips!
So many ways to use this and it is definitely a conversation piece!

So fun!
#4 BAGUETTE BOARD
There are no rules with this board… I think the beauty of an item like this is how unique and individual each one can be… but here is the gist…
Start with a board that’s at least 16” long, 5” wide, and deep enough to carve into.
Mark out a rough bowl shape on the end and draw a centerline on one face.

Using the depth stop on the drill press, drill out a bunch of holes to the bottom of the curve marked out on the end.
These holes will act as a guide when carving.

Now just have fun with an angle grinder and a carving disk!
Just keep going until all the holes you drilled disappear.
This is a fun process, but it is also a very messy one… It’s best to do this outside.

After refining the shape of the bowl cut the slots in it.
You can use a cross-cut sled at the table saw, the depth stop on your miter saw or even your circular saw to make these cuts. You just want them to be spaced about 1/2” apart and the blade should be set so it cuts just below the curved area you carved.

I felt it was too bulky, so cut off the bottom corners to refine the shape… but this is definitely where you can get creative.

After a bunch of sanding, put some finish on!
I chose to stain this red oak black using a butcher block oil + stain.

And it’s done!

You can make this in just a couple of hours and it is so fun to get creative with it to make each one unique!
You can even switch up the angle of the cuts so the slices will be cut on the bias… remember, always options!

When you’re not using it to slice up baguettes, you can use it to hold some fruit! So it’s a multi use product!

#5 BANDSAW SCOOPS
These are fun quick little project you can make from scrap wood.
Take any small piece of scrap and use the bandsaw to cut a semicircle chuck out of the center.

Slide the center chunk back inside the cutout and glue and clamp it in place.
The inside portion that was cut will become the handle and the outside portion will become the scoop.

After the glue dries, rough cut the shape of the handle on the bandsaw.

Then refine the shape with a lots of sanding.

This is where you can get creative. Add some hand-carved details if you like.

Put some oil on it and it’s done!
I think these are such an awesome use of small scraps!

These were all so fun to create, I hope this gives you guys some good ideas for what to make your loved ones for the holidays this year.
Happy Holidays!