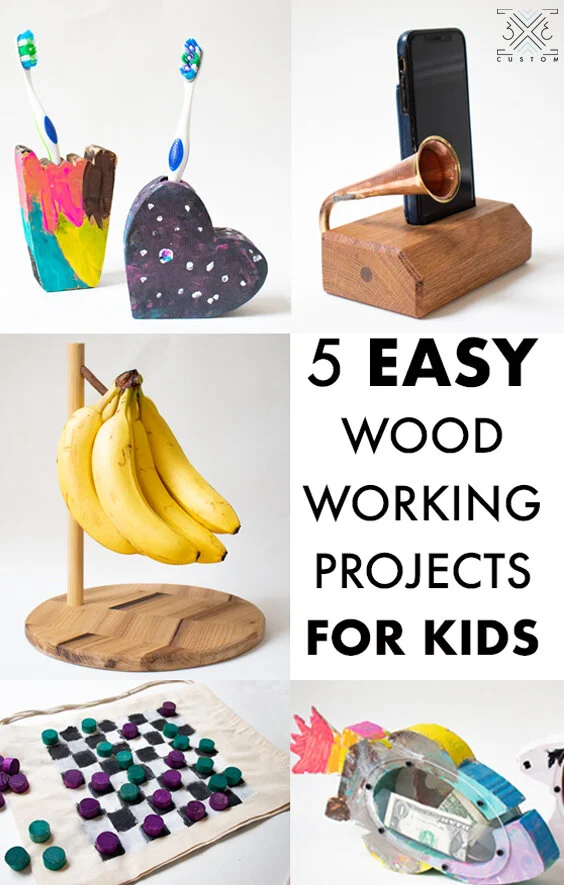
5 Easy Woodworking Projects for Kids
Looking for some quick and simple woodworking projects to build with your kids this summer?
Here are 5 that I have done with my kids and they really enjoyed!
DISCLAIMER: Woodworking is dangerous. Determine for your self whether or not your child is able to use a specific tool and always wear the proper PPE. Be SMART, be SAFE and have FUN!
Check out the full video below where I describe the projects in more detail!
*Links below are affiliate links, I get a small commission if you click on them at no extra cost to you ;)
PROJECT #1
TOOTHBRUSH HOLDERS
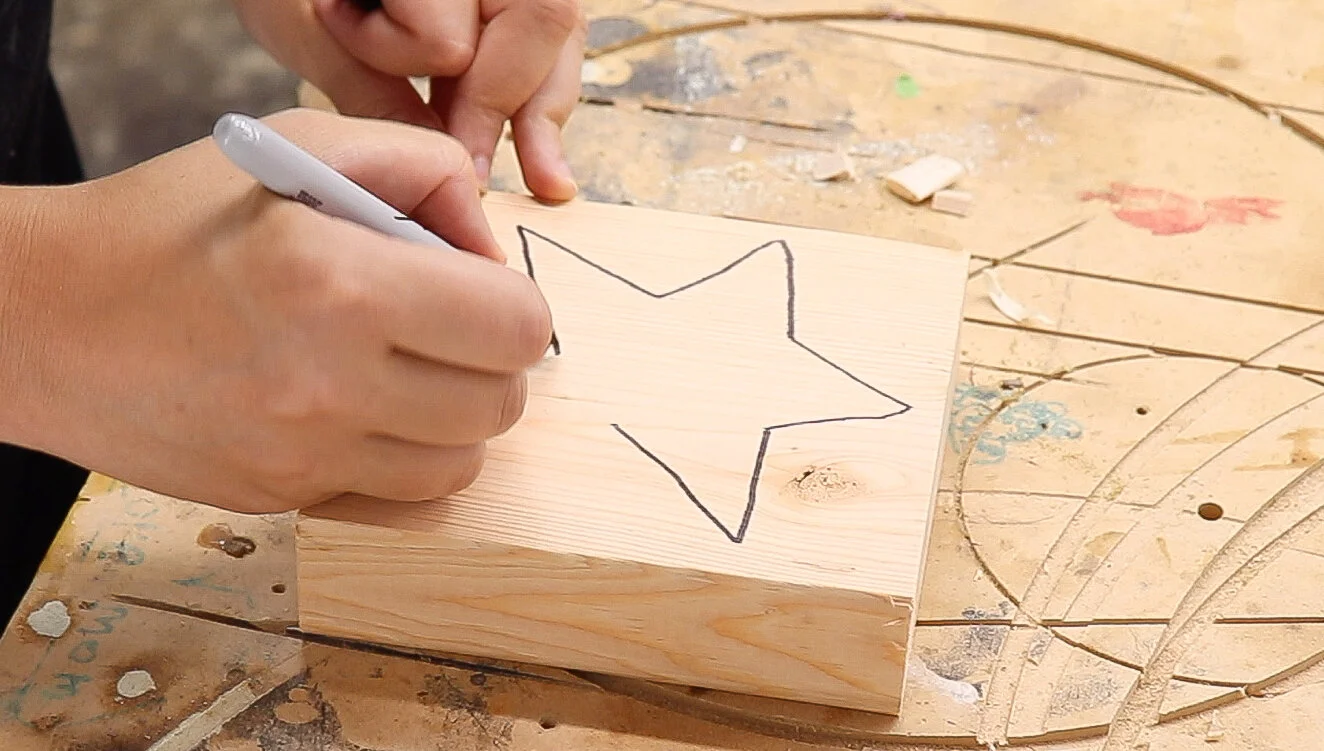
STEP 1
Take a scrap 2x6 and have your child draw any shape they want.
You can find printable templates, but I think it’s more fun for the kids to be free creatively.
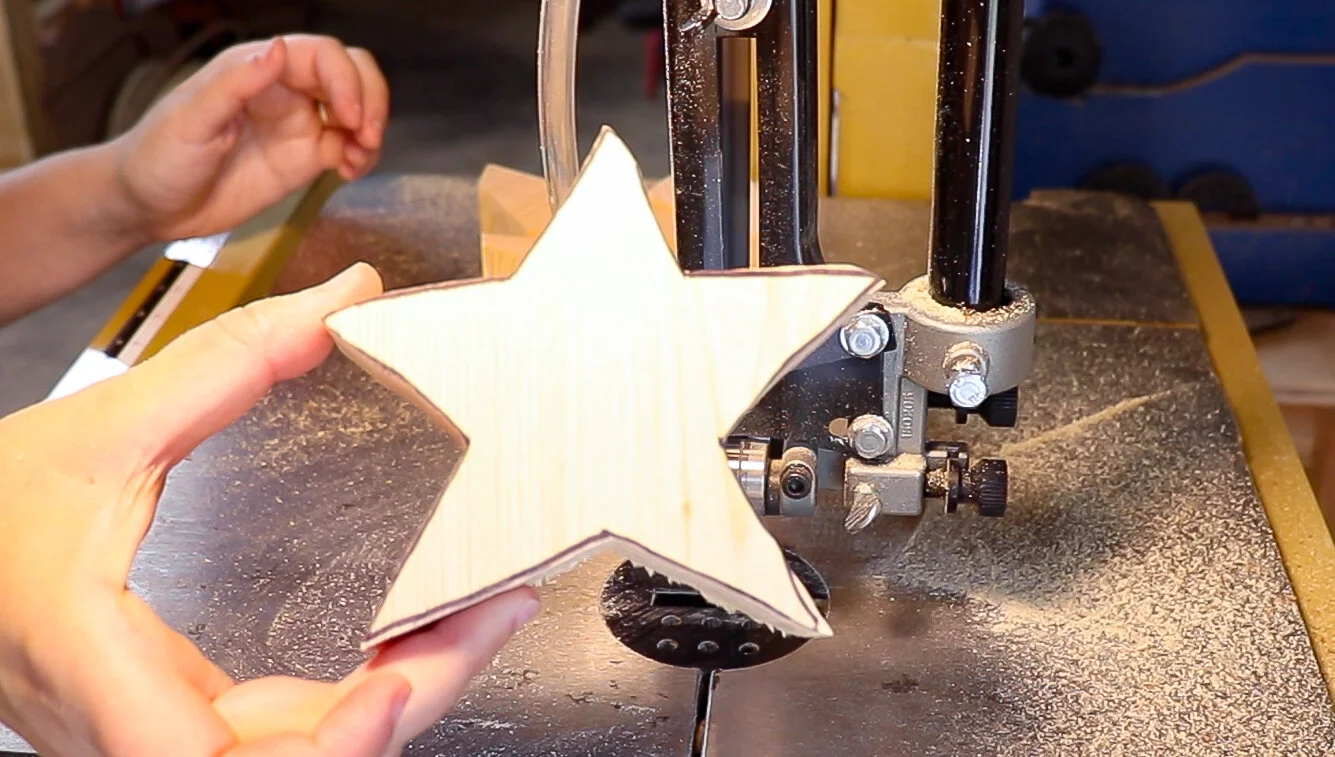
STEP 2
Cut out the shape!
Depending on how old your kid is you will have to do this step for them. You can use a jigsaw, bandsaw or scrollsaw. A scrollsaw is actually a great first power tool to introduce to kids.
STEP 3
Drill out a hole on the edge for a toothbrush!
I used a 1” forstner bit to drill this out. Kids love using a drill, so this is fun for them.
Just make sure everything is clamped really well…

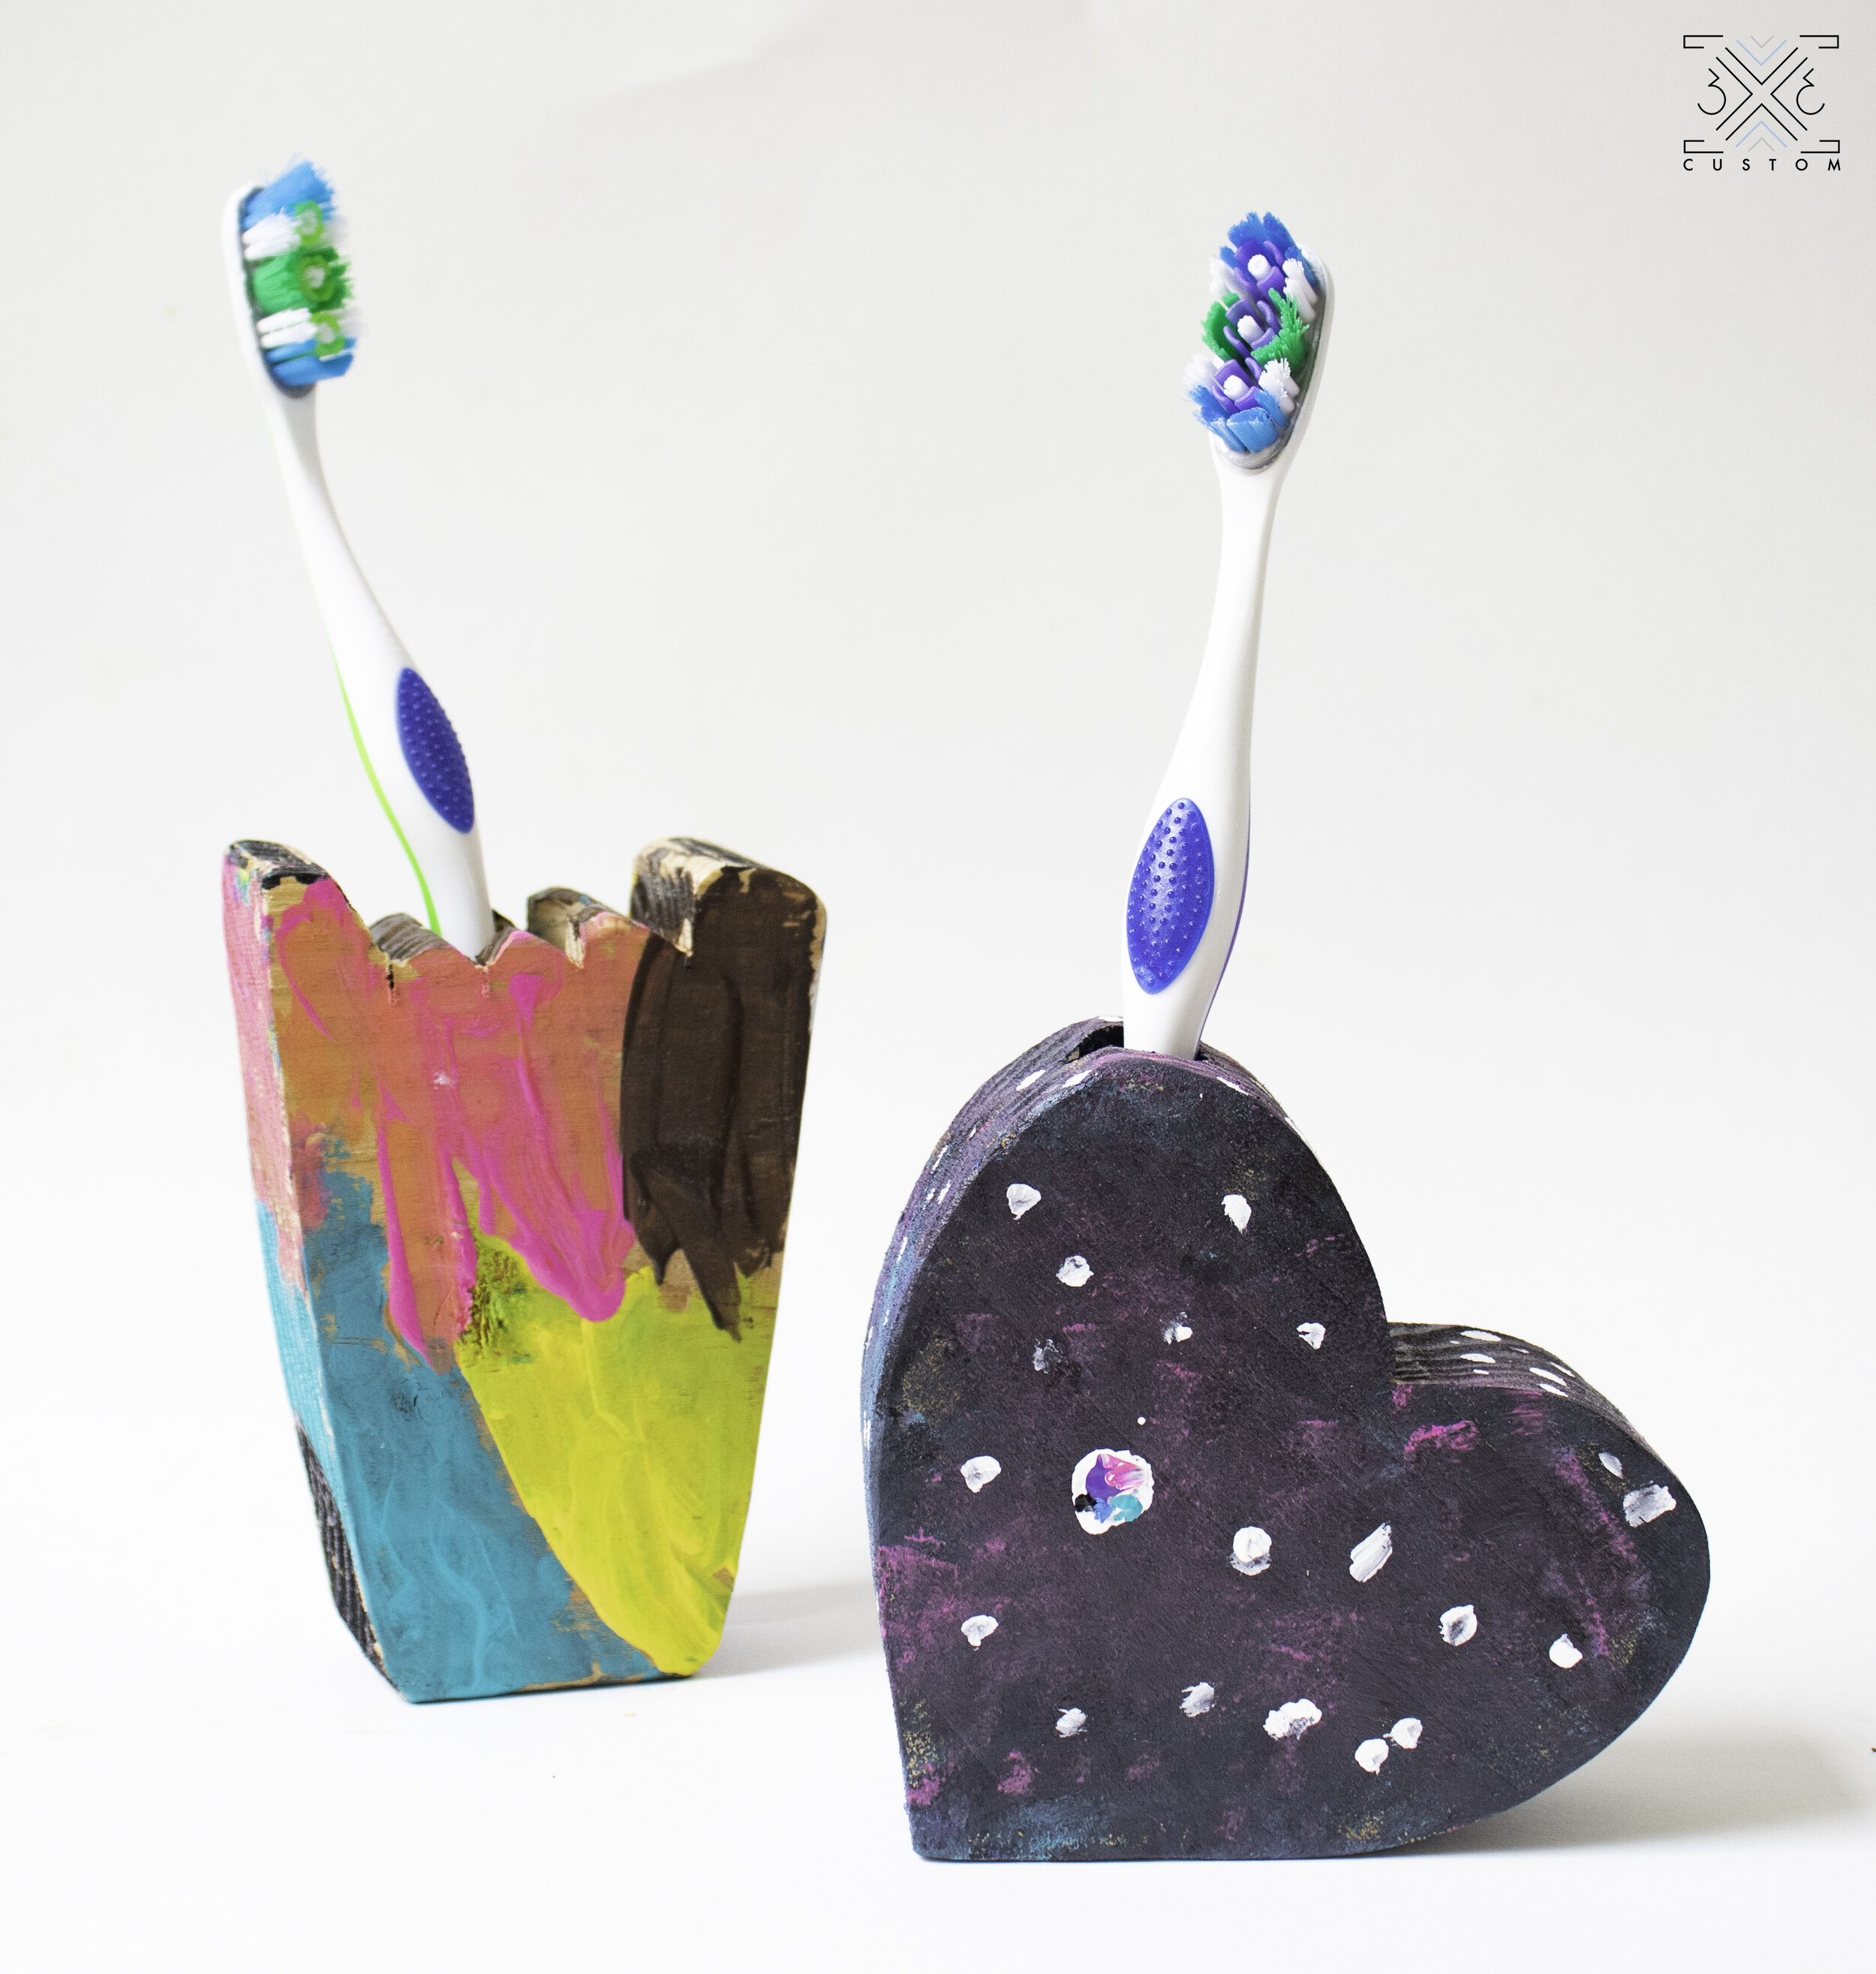
STEP 4
Sand and Paint! Both are activities kids love to do!
And they are done!
I love how the kids decided what shapes these should be, it’s cool for them to see their imagination come to life. And it got them excited to actually brush their teeth!
PROJECT #2
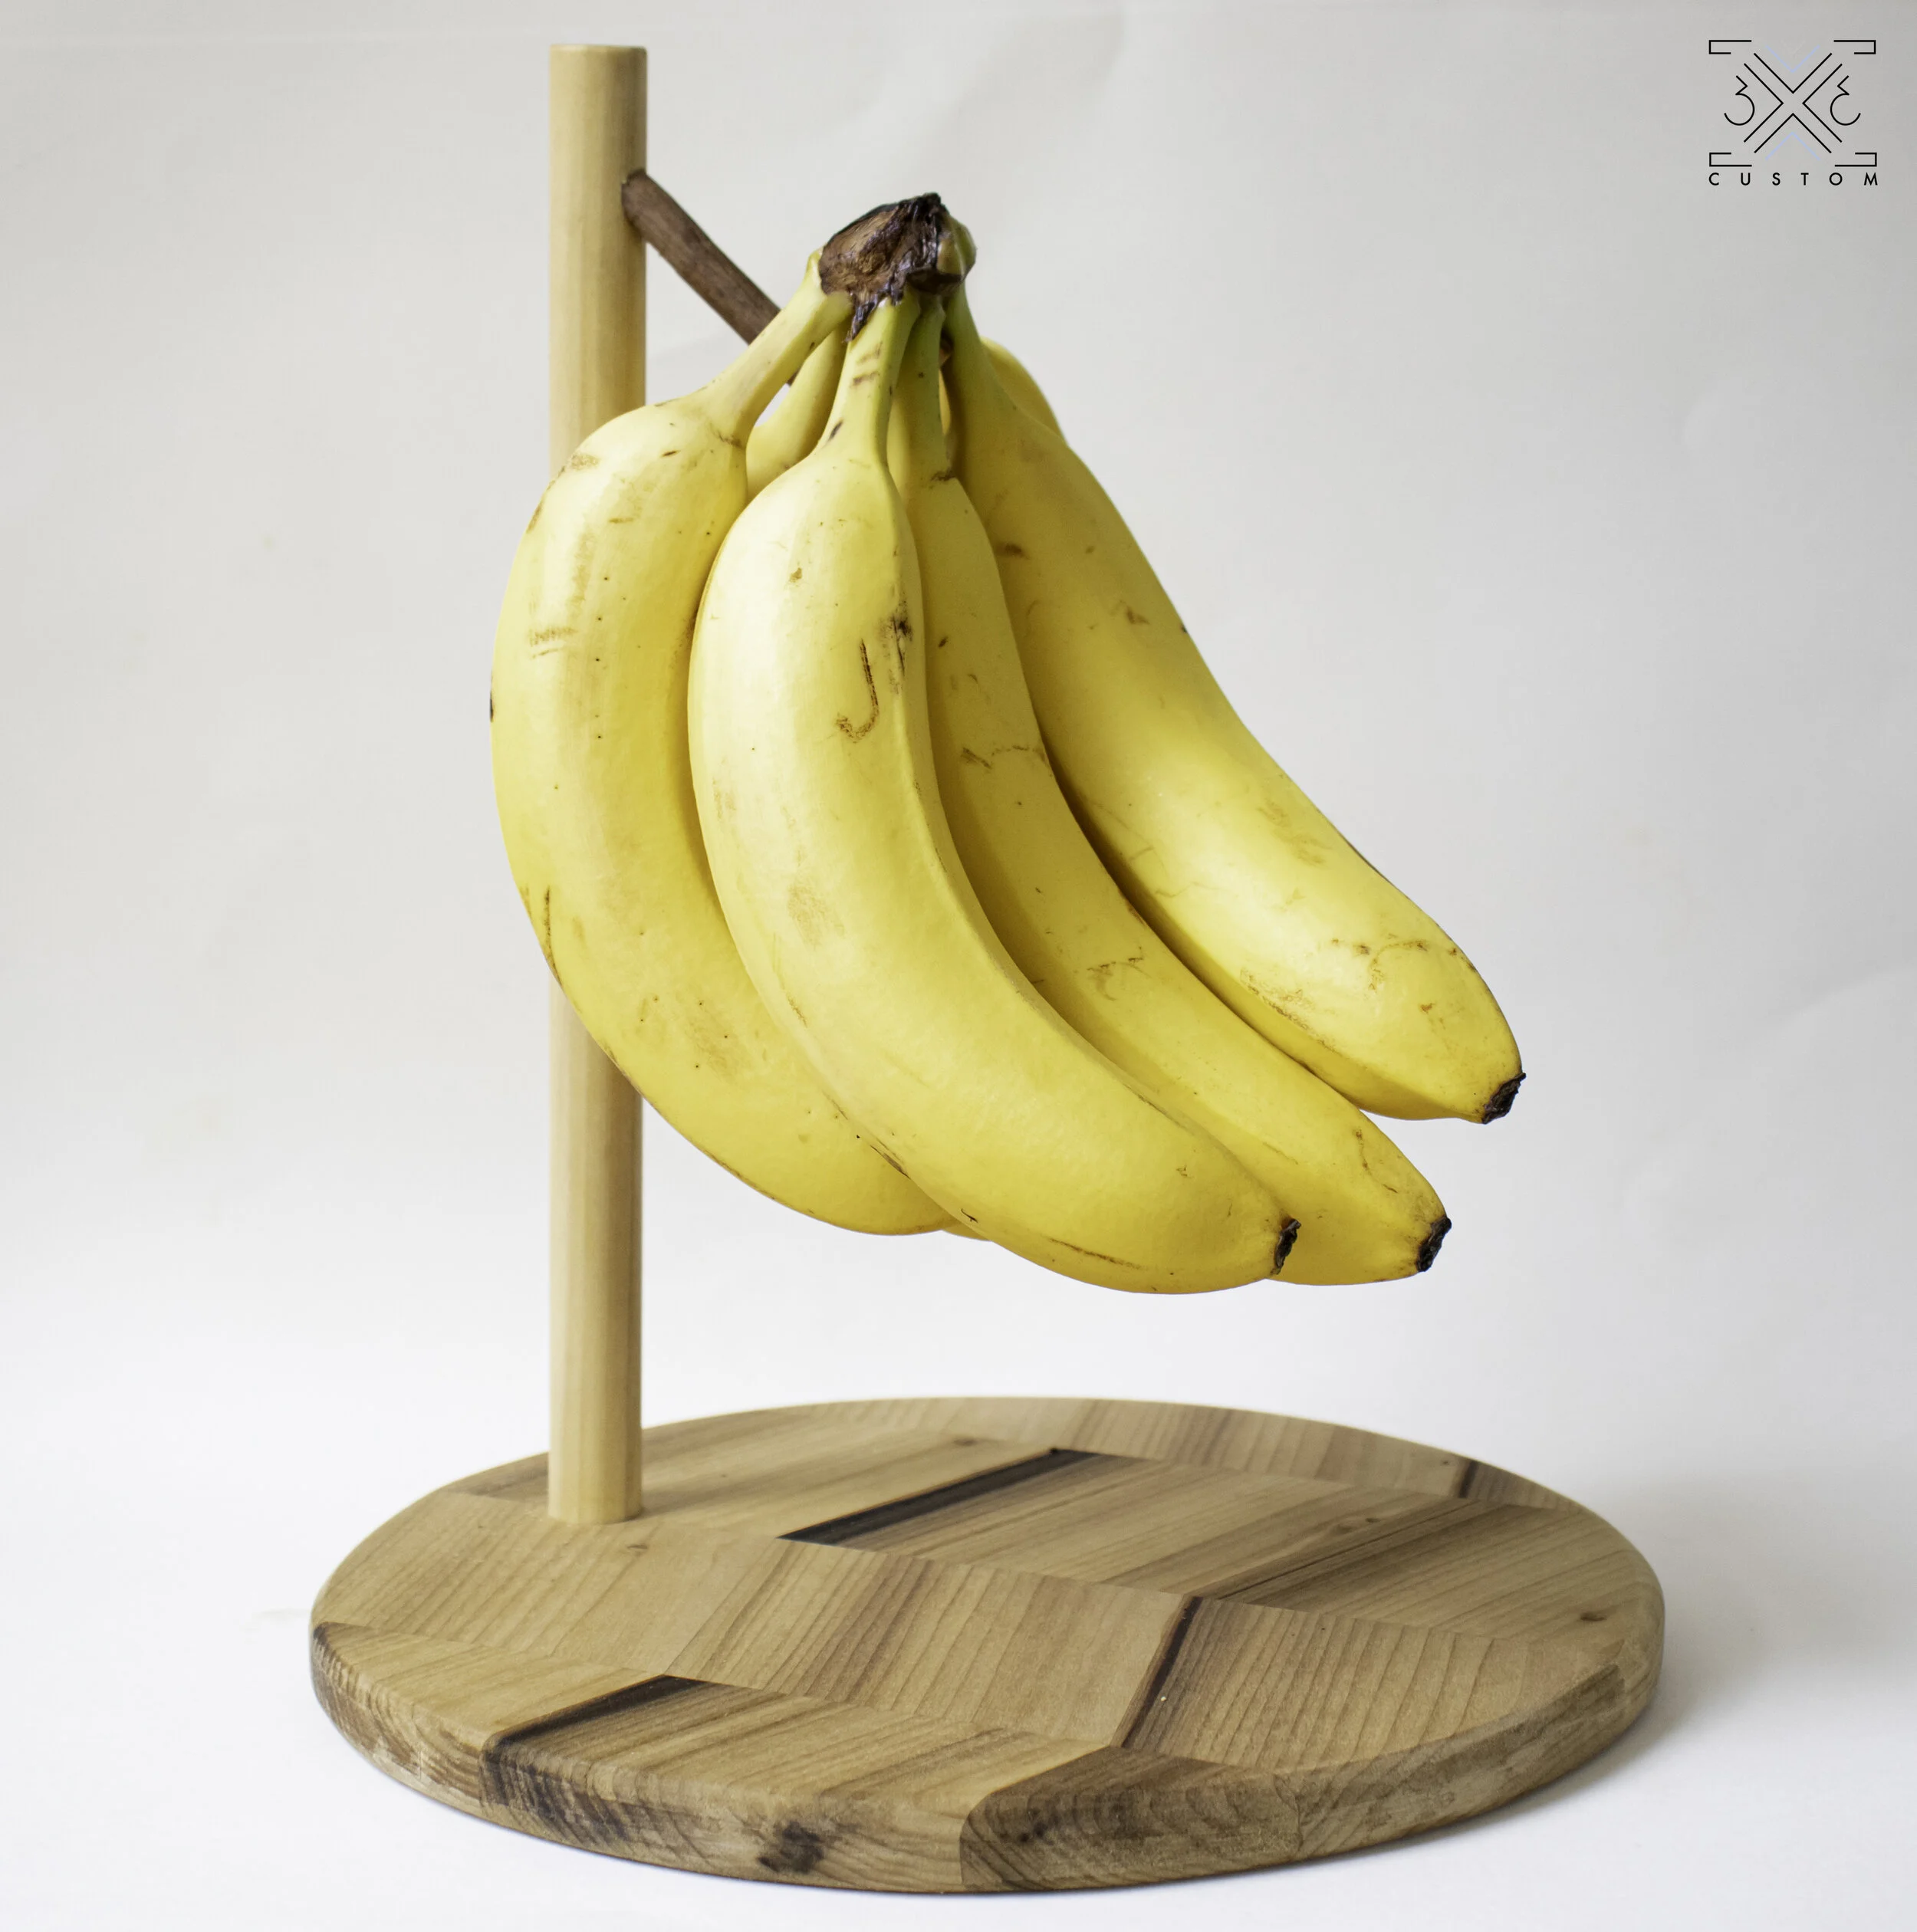
BANANA HOLDER
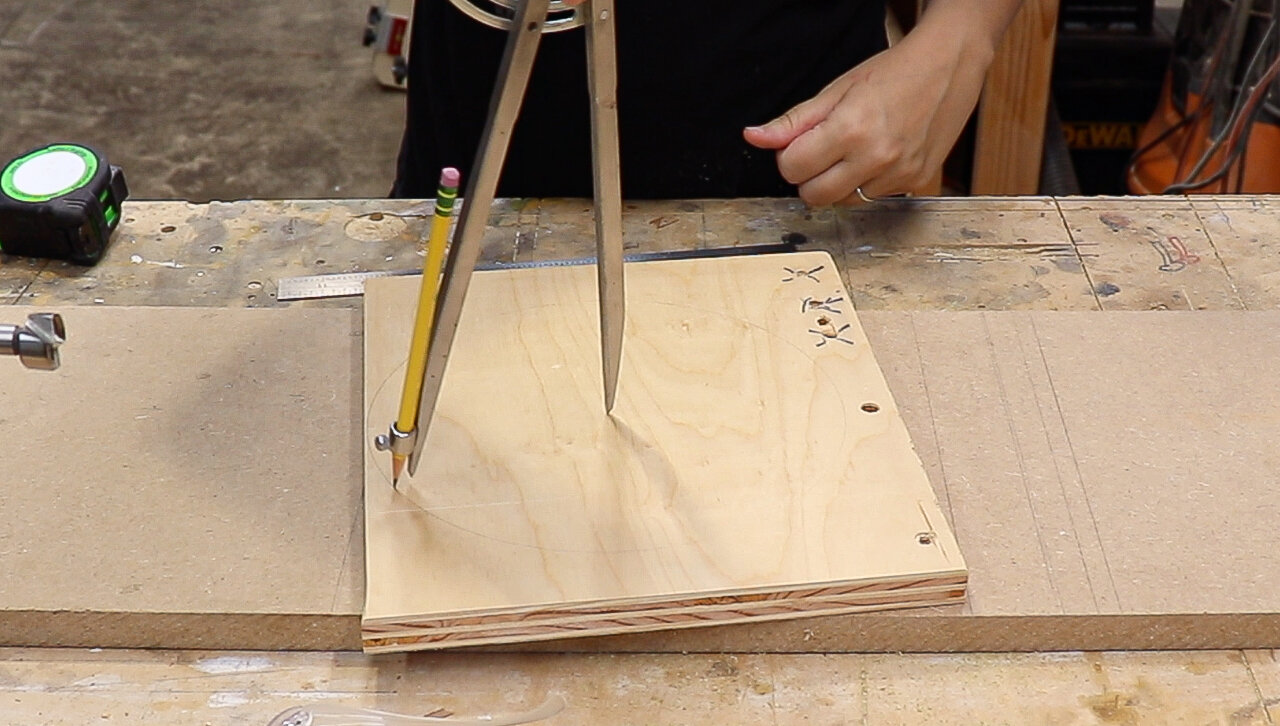
STEP 1
Use a compass to 4-1/2” to make a 9” circle.
This is going to be the base of the banana holder, you can use any material you like!
I am demonstrating this on a piece of 3/4” plywood, but it would be cool if you could glue up some scraps to make this! (That’s what I did on the original one pictured below.)
STEP 2
Cut out the circle for the base!
The base doesn’t even have to be a circle, you can make it whatever shape you like.

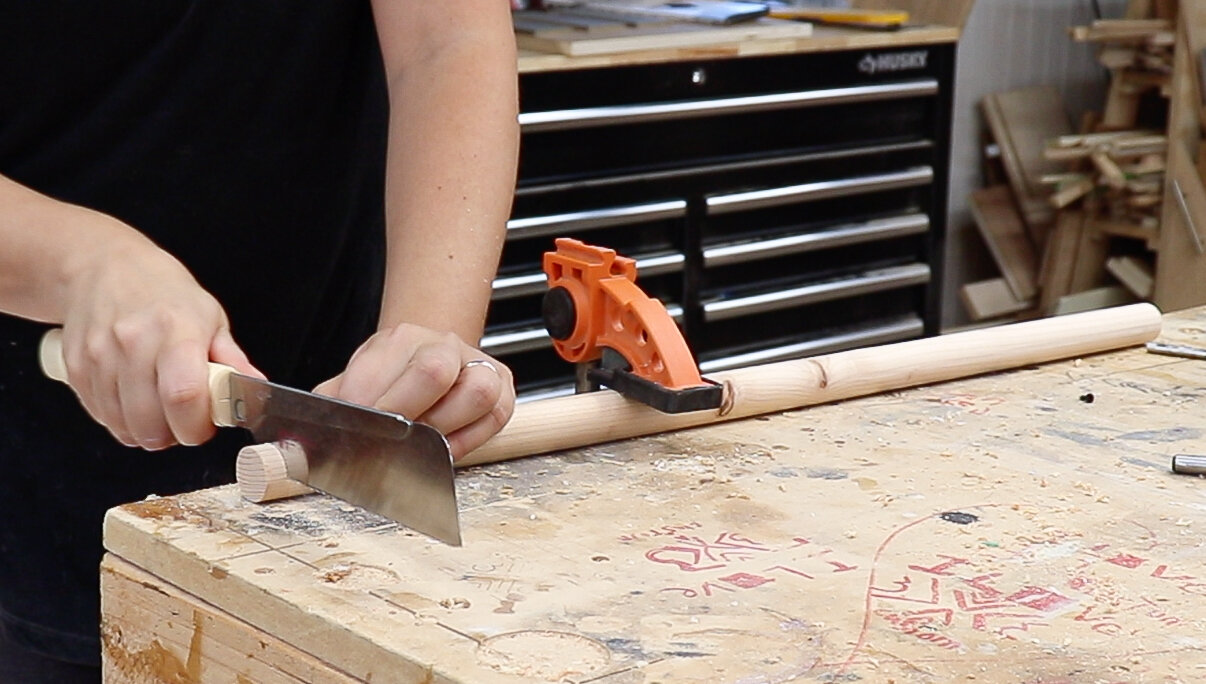
STEP 3
Cut a 3/4” dowel for the stand to 12” long.
Handtools are a great way to involve your kids in the shop, they love using saws like this!

STEP 4
Cut a 3/8” dowel to around 4” for the hook.

STEP 5
Drill a hole into the stand at an angle to hold the 3/8” dowel hook.
This angle or location does not need to be precise, just eyeball it!

STEP 6
Drill a 3/4” hole in the base to hold the 3/4” dowel stand. Don’t drill all the way through.
Again, this does not need to be in a precise location, it just needs to be near the edge of the circle, not the middle.

STEP 7
Glue the dowels in place. Gluing is an activity kids LOVE to do!
Sand and finish it!

In the picture above I didn’t even put any glue on it and it’s holding the bananas just fine!
Love how these look in a kitchen.
PROJECT #3
PIGGY BANKS
STEP 1
Draw and cut out shapes onto some scrap 2x6 material.
Just make sure that there will be enough room in the center of the shapes to be the actual piggy bank part.

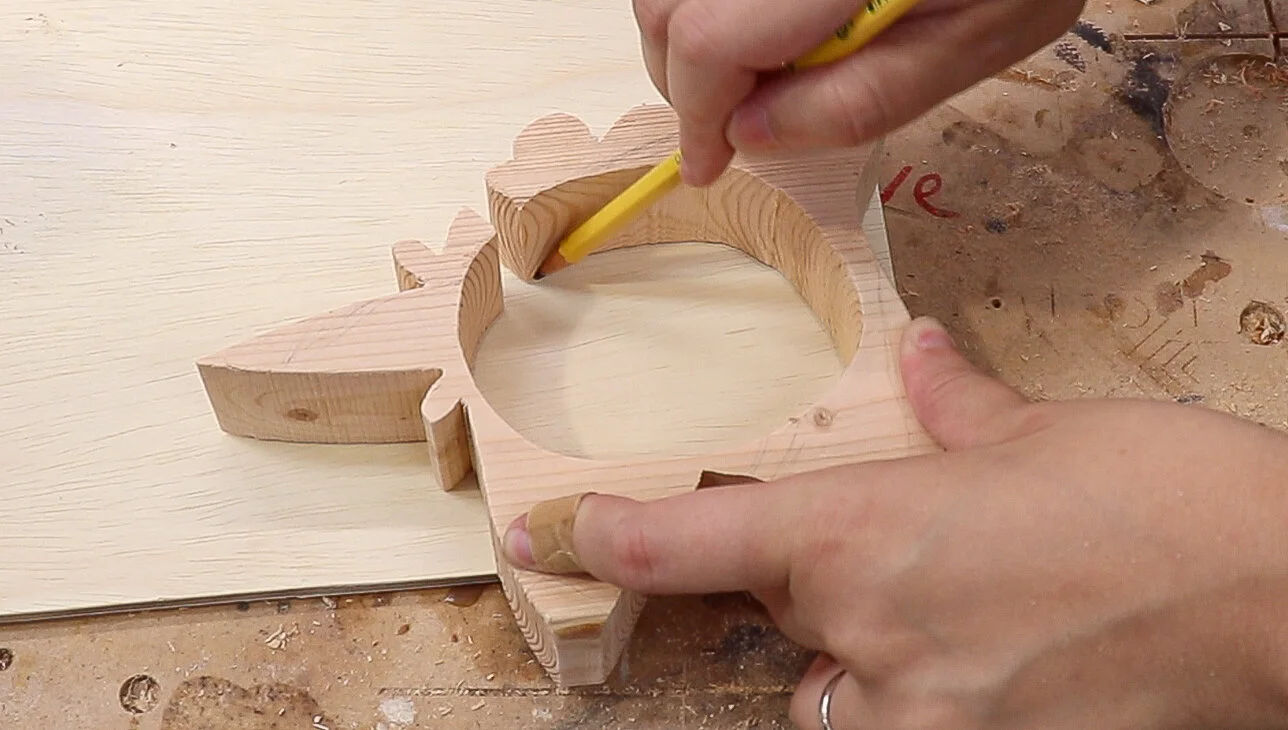
STEP 2
Cut out the center of the shape to create the piggy bank.
When doing this, make sure you leave a notch on the side big enough for coins or bills to fit through.

This is what it should look like…. A shape with its center cut out and notch on the edge.
This would be a great scroll saw project if you have one!
I’m sure you can find pictures to use as templates online, but once again, it’s so awesome for the kids to see what the have in their minds come alive!

STEP 3
Cut out the pieces that will make the front and back of the piggy bank.
To do this, trace out the center hole you cut out in STEP 2 on a piece of 1/4” plywood that will be the back.
Then make that circle about 1/4” larger, this does not need to be perfect at all….
Making it larger than the hole will ensure that you will be able to screw it in place.

And cut it out!

After it’s cut, you can then trace it onto a piece of 1/4” acrylic and cut it to shape.
This will be the front of the piggy bank.

STEP 4
Drill out the holes on the front acrylic and back plywood.
Lay the acrylic over the center hole of the piggy bank, it’s easy to see through the acrylic to make sure there is an even overlap.
Use an awl or something to mark out the hole locations.

Then drill out the holes!
Make sure these holes are larger than the screws you will use so the screws won’t crack the acrylic.

Then you can use the holes in the acrylic to mark out the holes for the plywood back and drill them out.

STEP 5
Sand, paint, attach the front and back with screws!
And they’re done!
I think it’s so cool for your kids to see these come to life. Such a fun project!

PROJECT #4
BACKGAMMON or CHECKERS IN A BAG
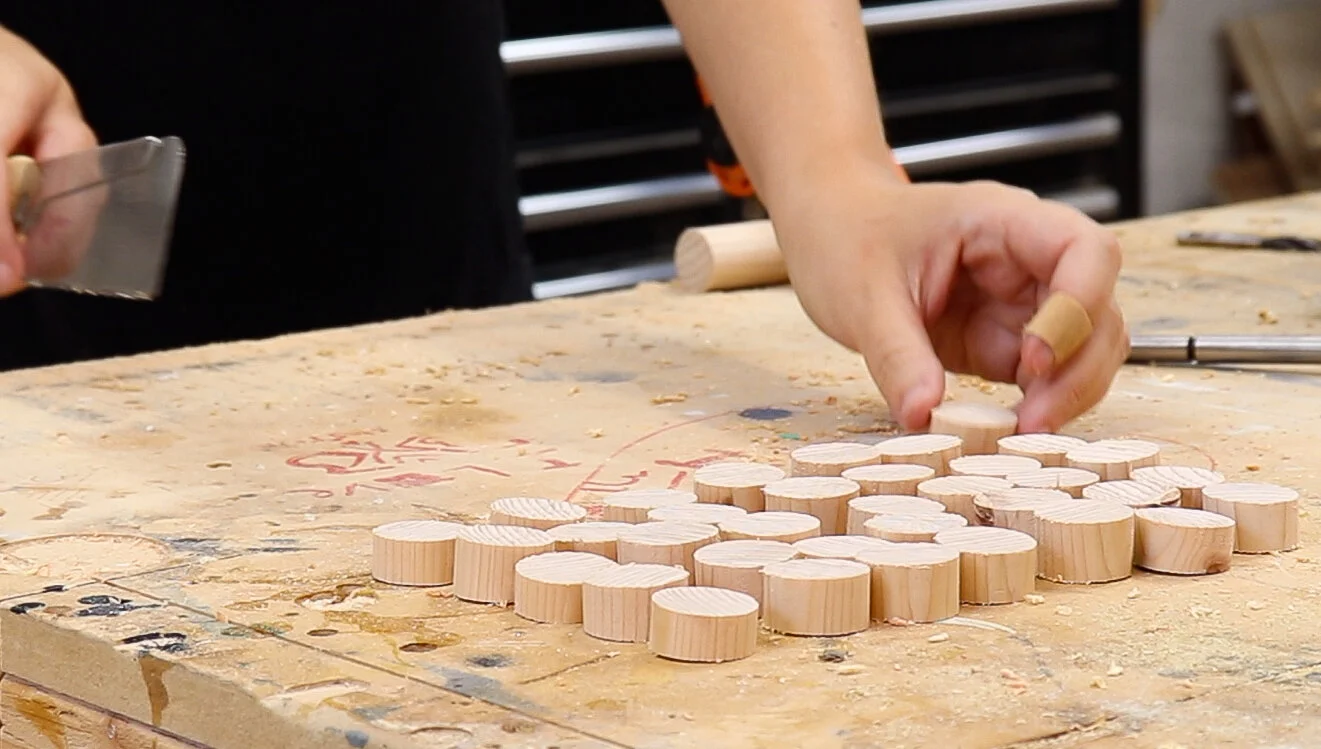
STEP 1
Cut all the game pieces.
This is fun because your kids can actually go and hunt for the game pieces in your backyard. You can use branches that are around 1” in diameter and just cut them to about 3/4” thick.
To demonstrate though, I used a 1” dowel.
For Checkers you will need 24 pieces. For Backgammon you will need 30.
So I cut 36 just in case any of them get lost…
STEP 2
Paint the pieces with two opposing colors.
My kids had fun with this…

STEP 3
Draw out the game-boards on a canvas bag and paint it!
One side of the bag will have Checkers and the other will have Backgammon.
No need for templates here, just look at some pictures of the game boards online to make sure they look correct!

The kids had a lot of fun with this one.
I love that you can pack up the bag with the game pieces and some snacks, then head to the park and have some fun!

PROJECT #5 (VERSION 1)
ACOUSTIC PHONE SPEAKER
STEP 1
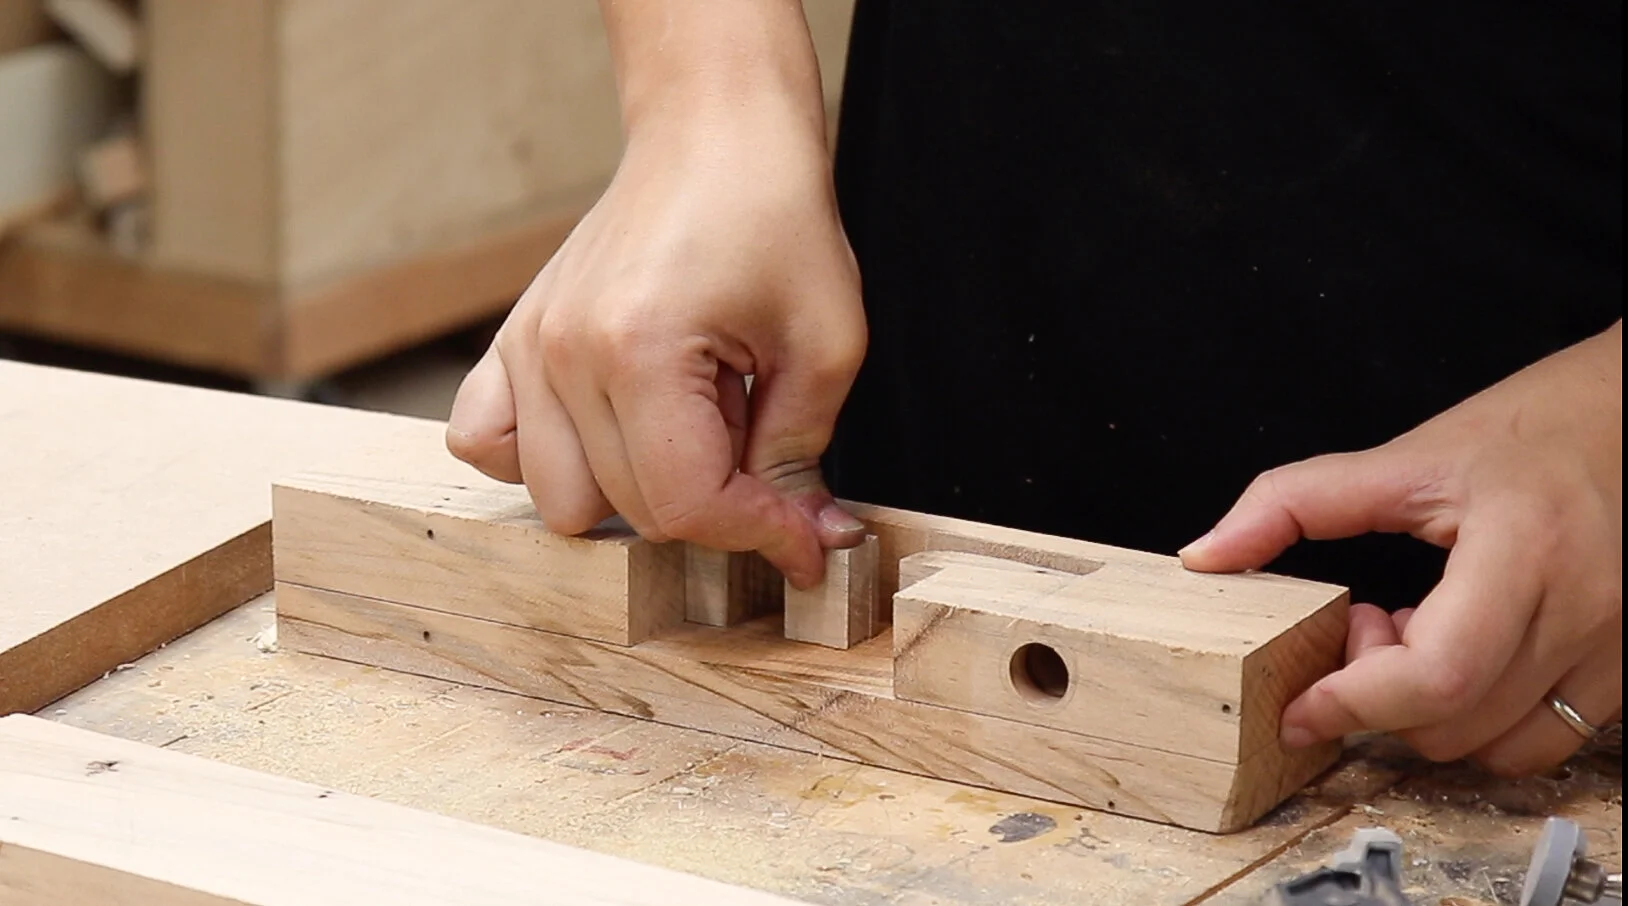
Prepare whatever you are using as the speaker portion.
I made 2 of these, for the first one I used a funnel to act as the speaker and spray painted it black.

STEP 2
Measure your phone to make sure it will fit and make the necessary cuts.
For the first one I made, I ripped a big block into 3 strips to cut out a center piece that was the same thickness as my phone with the case on.

Then I slid that center piece out of the way and placed my phone in between the front and back pieces to determine how deep I should make a notch to fit my phone.

STEP 3
Cut out the sound holes.
Cut out a notch to fit your phone first.

Then drill a hole that the funnel will fit in.
Make sure you drill this hole deeper than the notch you cut out previously.

STEP 4
Connect the sound holes.
I marked out the speakers on the bottom of my phone to make sure the sound will be carried towards the funnel hole.

Then I connected the two holes that were cut and drilled in STEP 3.

STEP 5
Glue all the pieces back together.
First I glued on a little block using CA glue to temporarily hold it in place and make sure it was in the right spot.
Then I put glue on all the pieces and clamped it up!
After the glue dried, I cleaned up all the edges and sanded it.

STEP 6
Glue the funnel in place with epoxy.

And it’s done! How cool is this?!
I had so much fun making this, I wanted to try another way that wouldn’t require cutting and gluing a block so it could be a bit more kid friendly…

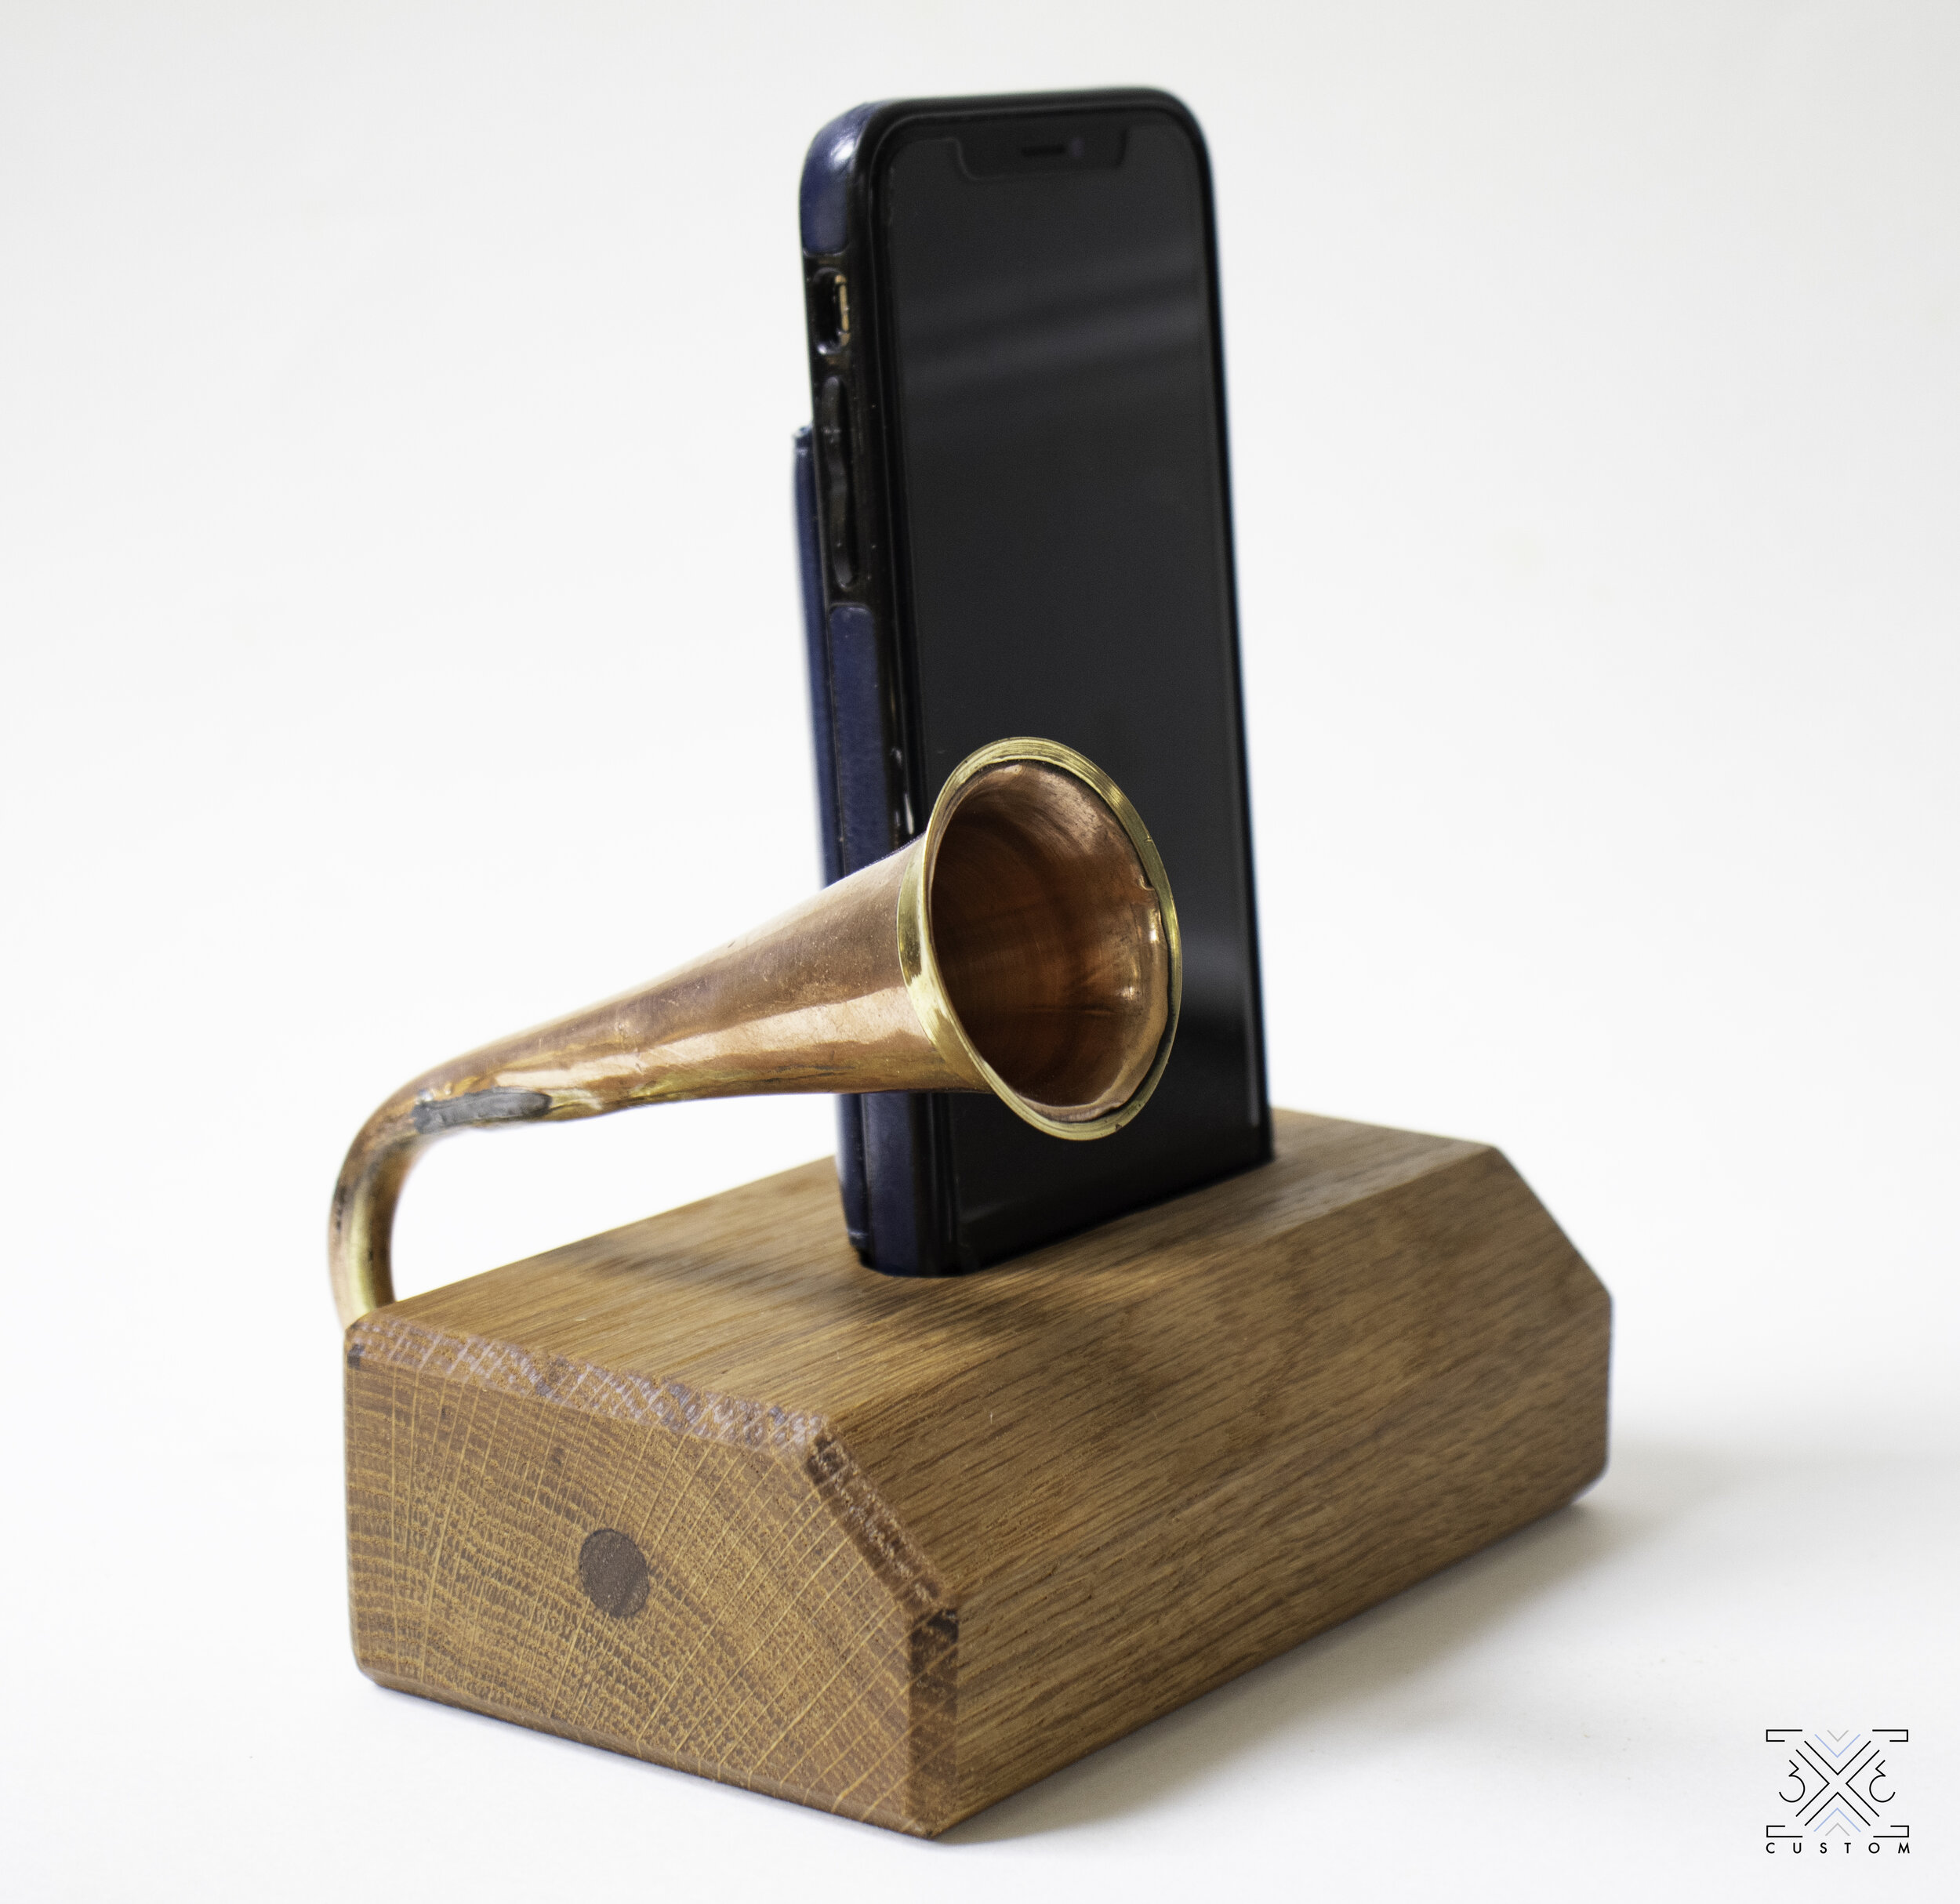
PROJECT #5 (VERSION 2)
ACOUSTIC PHONE SPEAKER
STEP 1
Drill out the sound holes for your phone.
Drill a series of holes into a board that goes as wide as your phone is. Make sure to use a bit that is the same thickness as your phone. Go only about a 1/2” deep here.
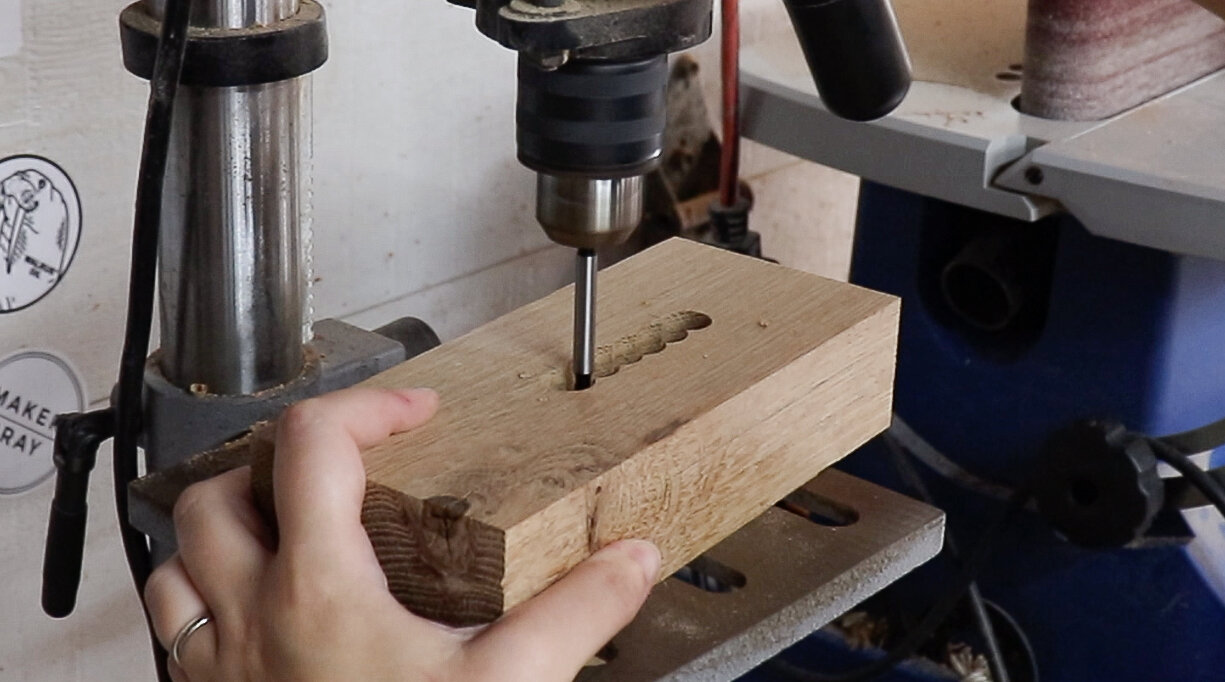
Then drill out a channel that goes deeper than than first one, but use a smaller bit and don’t make it as wide.
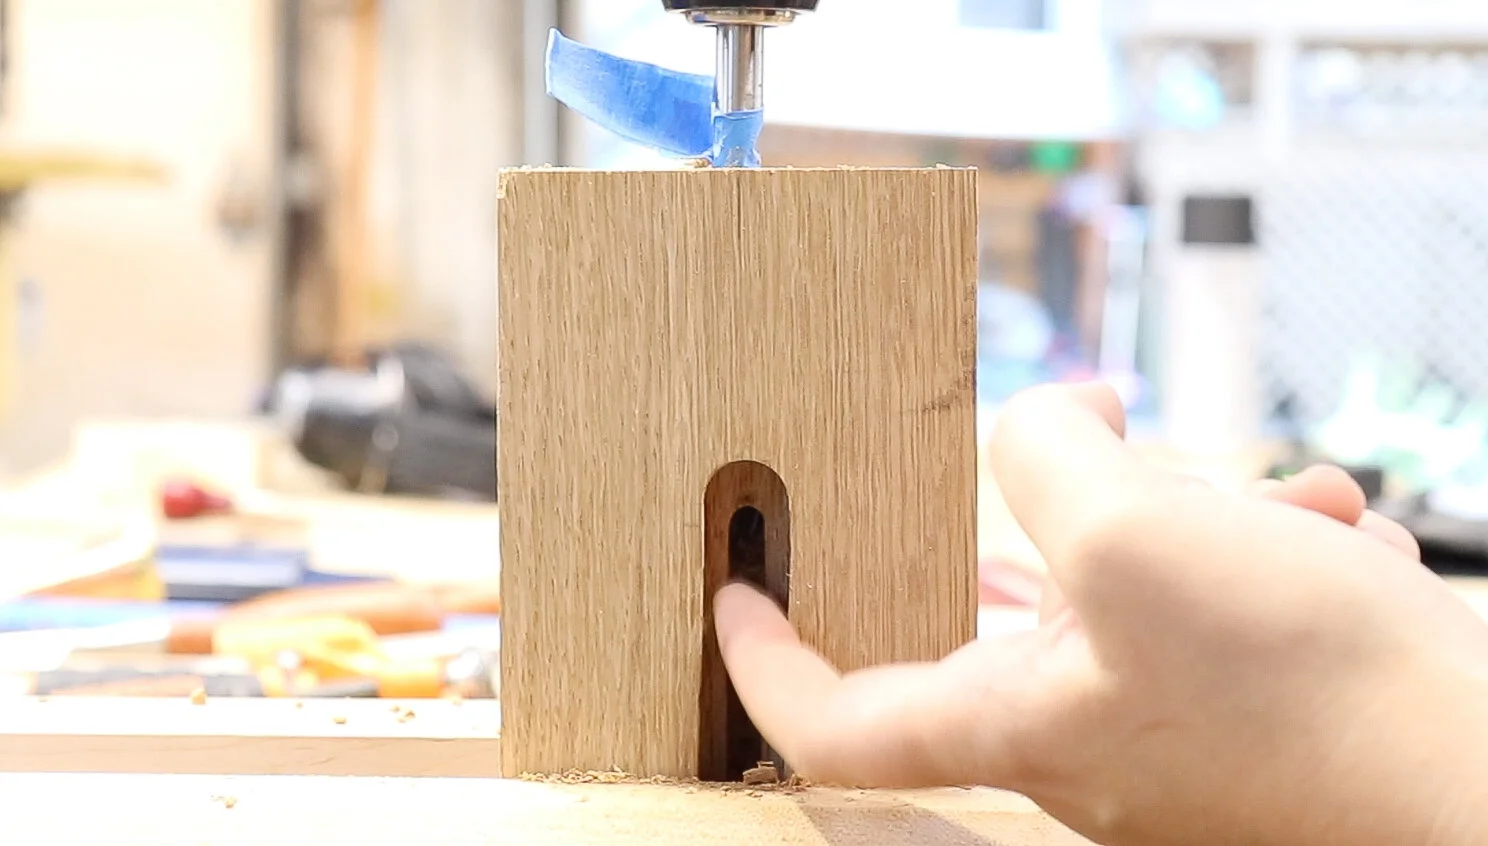
The larger more shallow hole will hold your phone. The smaller deeper channel will carry the sound.
After drilling, clean up the pointy bits left over from the forstner bit with a chisel, you should be left with a stepped mortise that looks like the picture below.

STEP 2
Drill a hole for whatever you are using as the speaker.
I used a toy bugle, but I’m sure kids can come up with great ideas!
Drill this hole at the same depth as the bottom skinnier mortise you drilled out.

STEP 3
Connect the two sound holes.
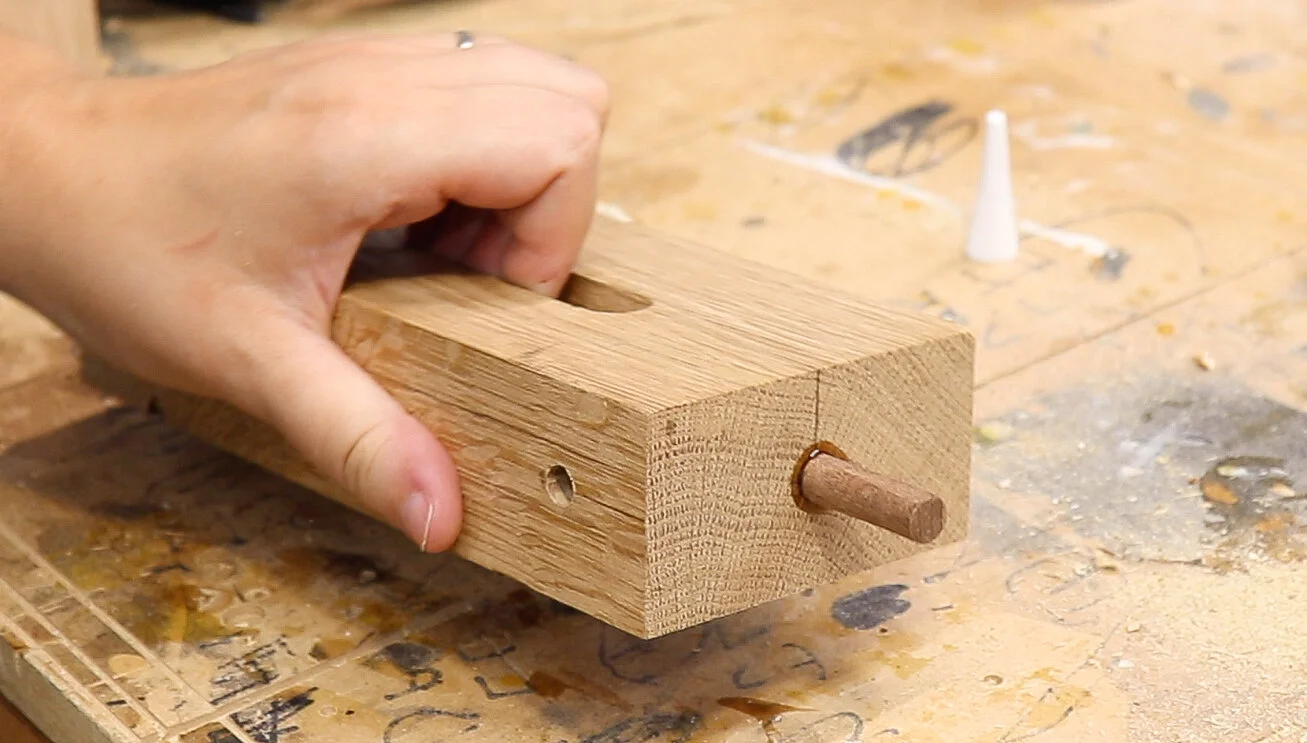
Drill a hole from the end grain to connect the hole drilled out in STEP 2 to the bottom skinny mortise drilled out in STEP 1.
STEP 4
Plug up the hole drilled in STEP 3.
Take a dowel that is the same diameter as the hole drilled out in STEP 3 and plug it up just until it comes in contact with the speaker hole drilled in STEP 2.
You don’t want the dowel to block the phone hole from getting to the speaker hole, you just want to make sure no sound will be coming out of the hole of the end grain.
The point of drilling the hole in the end grain in STEP 3 was to connect the phone hole from the speaker hole, so it’s really important that you don’t block it with this dowel.
After the glue dries you can flush cut it and finish sand it!
STEP 5
Epoxy the speaker into the hole drilled in the back in step 2!

Put some finish on it and it’s done!
How cool is this!
I love that there are endless possibilities for ways to connect the sound holes, it would be so awesome for kids to come up with ideas, and to just experiment and test them out!
I hope this inspires you to go out and make stuff in the shop with your kids. Just remember, be safe, have fun and let go of perfection.
These projects will not be perfect, all your kids will see when they look at them is the quality time they spent with you.
Happy Building!