
Wireless Charging Nightstand
*This post is sponsored by The Home Depot
This season’s Builder’s Challenge was a Wireless Charging Side Table designed by the folks at Wood Magazine, so this is my take on their build!
In case you don’t know what The Builder’s Challenge is, it’s a super fun challenge hosted twice a year where one set of plans are sent out and you have three weeks to build your version of the project. It’s such a fun time, and amazing prizes are awarded to the winners!
I decided to turn the side table plans into a couple of nightstands and I switched up all the joinery. I used tongue and groove, dowels and dovetails! (My altered plans are below but all these joinery methods are optional.)
Check out the full build video below!
For all the dimensions and steps click here for the full build plans —> Wireless Charging Nightstand Plans
THINGS YOU MAY NEED
The first step is to glue up the panel that will create the drawer box and bottom shelf. I used Elm that was 3/4” thick, you can use any wood you prefer.
Gluing the panel long and then cutting it to size will help with a flowing grain pattern.

Next I cut all the parts to size from that panel.
For the drawer box, I made sure to cut one side, then the top, then the other side so the grain pattern will flow nicely.

Since these are solid wood panels it’s best to account for wood movement when attaching them to the base, so I went with tongue and groove joinery.
I used a rabbeting bit at the router table to make the tongues around all four sides of the drawer box top and bottom shelf.
This tongue is 1/4” thick and 3/8” deep.

Now’s the fun part! The wireless charger!
I made a template out of MDF using a 4” hole saw for the charger, table saw for the cord and bandsaw for the part where the charger and cord meet. (Check out the full build video for all the details on that.) You can also just cut it out with a jigsaw though.
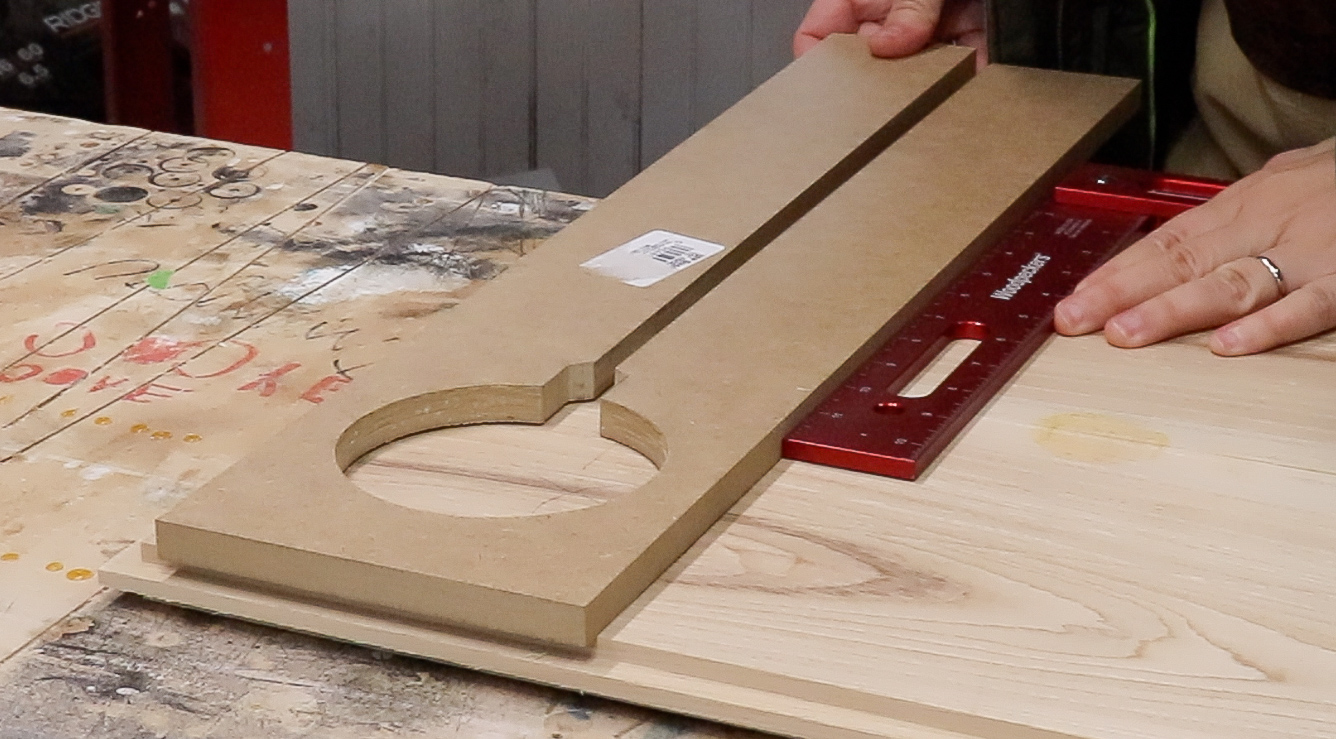
Then I used my plunge router with a pattern bit along the template to slowly route out the pocket for the charger.
I was so scared I was going to route through the top of the table, but it ended up working perfectly!
I did some tests before routing out this pocket and 1/8” thickness worked great with the charger.

Since I don’t have any guide bushings for my router and I didn’t have a pattern bit that would fit in the slot I made for the cord on my template, I just used my router edge guide and a 1/4” router bit to make the groove for the cord.
This groove doesn’t need to be as deep as the pocket for the charger, just about 1/4” deep or so.

Now it’s time to join the main drawer box!
I joined the box using dowels. In order to perfectly align the dowels, I made a template for all the parts that will be joined on the face grain.

Then used a center finding dowel jig on all the end grain parts.
The jig I made for the dowel holes on the face grain helped me align this perfectly. (More details on that in the full build video.)

Then I glued it all up using dowels!
I started with the bottom then finished with the top.

Next I cut all the material for the base. I used 5/4 lumber which ends up being 1-1/16” thick when milled, so all the pieces for the base were 1-1/16” square.
You can use 2x2’s for this or any other thickness you prefer.

I cut all the base pieces to size and made a groove in all the front and side pieces to accept the tongues on the top and bottom shelf.
Since the tongues I made were 1/4” thick, I was able to use a 1/4” straight bit at the router table.
I just had to make sure they started 1/4” from the edge of the piece so they would line up nicely with the panels.
The tongues I made were 3/8” deep so I set the router bit height to slightly higher than that to allow for the wood to expand when the weather changes.

Since the material I used for the drawer box was 3/4” thick and the base pieces were 1-1/16” thick, I needed to make a notch in the drawer box sides so the front and back base pieces would fit nicely.
This was an afterthought, so this probably could have been done before assembly, maybe at the table saw or bandsaw.

In order for the legs to sit flush with all the side pieces, I needed to cut off all the corners of the tongues on the top and bottom shelf.
I just had to be really careful not to cut into the table top.

The drawer box is ready, moving on to assembling the base!
I used dowels again. I could not drill for the dowels in the center of the base pieces because it would be too close to the grooves I cut earlier so I made a marking gauge with a scrap that was the same thickness as the material and a little nail.
I drilled a hole on the scrap that was half the distance of the material from the top edge of the gauge and off center from the side.
This way I could easily mark out all my hole locations on all the parts.

Then I drilled the holes at the drill press.

For the end grain, I did the same thing with the marking gauge but then drilled the holes by hand.

After all the holes were drilled I glued in dowels and glued up just the side parts of the base. I didn’t glue up any of the front or back pieces just yet.

I decided to finish all the parts before assembly because I was scared I would stain the Elm black… And I am really happy I did this.
I used India Ink, which is SUPER black!
It is water based, so it will raise the grain. I did one coat, sanded with 220, did a second coat then top coated it with 3 coats of satin spray lacquer.
I used OSMO oil in the natural color for the Elm. This is an oil and wax finish that keeps the wood looking really natural looking and has a really nice feel to it.

The last part to prepare before assembly is the bottom panel of the drawer box which is made out of 1/2” plywood.
I cut it to size then made a rabbet 1/4” thick and 3/8” deep on all four sides so that it will fit into the groove.

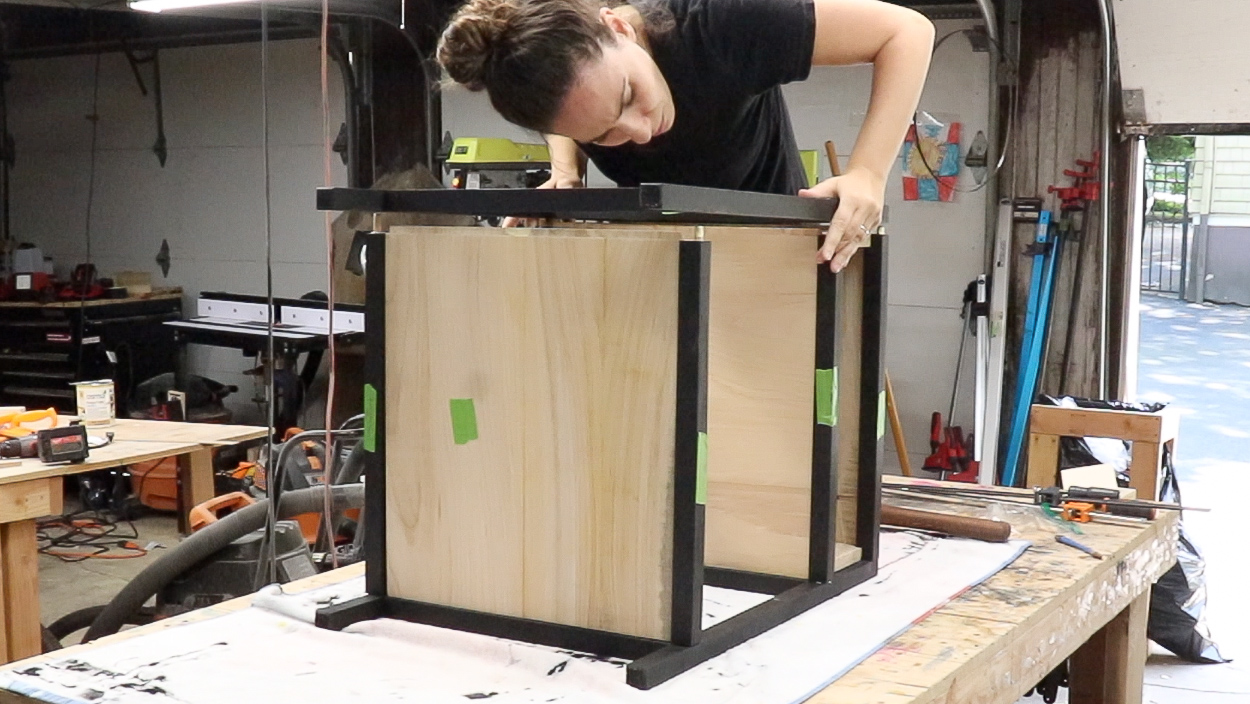
Everything is ready to assemble now!
I started by laying down one of the sides, then for the drawer box and bottom shelf I only put glue in the center of the groove before putting them into place.
This holds the parts in place in the center but still allows the panels to expand and contract into the rest of the groove when the seasons change.
For the bottom plywood panel that goes under the drawer box, I put glue in the whole length of the groove since plywood is dimensionally stable.
Then I glued on all the front and back pieces and lastly glued the other side into place.
While the glue dried, I got to work on the drawers.
I cut all the parts to size at the table saw.

Then I used my table saw dovetail jig to make the dovetails for the drawer.
You can use whatever joinery method you prefer for drawers.

The front of the drawer has dovetails and the back piece is held in place with a dado, no one is ever going to see the back of the drawer so I didn’t want to spend time making pretty joinery…
I cut a groove in the front and side pieces of the drawer to fit a 1/4” sheet of plywood for the drawer bottom. I cut the back to be the height of the top of that groove so I could slide the plywood into place during assembly.

Before setting the drawer in place, I used hot glue to secure the wireless charger into the pocket I routed out.
I just went around all the edges of the charger, I didn’t cover the whole thing.
And I also hot glued the wire into the groove.
In case I ever need to replace the charger I could easily remove the hot glue.

I cut another piece of Elm for the drawer front and screwed it into place.

Then I cut a piece of 1/2” plywood for the back and made a notch at the bandsaw so the wire can hang out the back.
I attached this with screws in case I ever need to remove it and have access to the charger.

The last thing to do it attach the drawer pulls!
I made a template to make sure I didn’t mess this part up and it worked perfectly.

The screws on the pull were too long and I didn’t want them jutting out into the drawer, so I cut them to length using the Milwaukee M12 FUEL cut off tool .
This is a cool little tool that comes with three different blades, this cut off wheel for cutting steel, stainless steel and non ferrous metals. A carbide abrasive blade for cutting drywall, fiber cement and plastic. And a diamond tile blade for, well, cutting tiles.
This cut off tool is very small and is meant to be used with one hand, despite that, the brushless motor is super powerful.
I like how you can change the rotation of the blade so you can cut all different ways and control which way the sparks will fly.
It is definitely fun to use and it’s compatible with the whole M12 system that features over 80+ tools.

The drawer pulls attach inside the drawer with nuts, again, I didn’t want these nuts to extend into the drawer, so before attaching the pull I used a forstner bit to make the hole wide enough for a socket wrench to fit in.
The Milwaukee 56pc 3/8” Drive Ratchet/Socket Set comes with everything you would need for situations like this plus more. The set comes with 56 pieces in both SAE and Metric sizes so you will always have the right size for the situation.
The ratchet has 90 teeth so there is only 4 degrees of arc swing which makes it really easy to use in tight spaces
The sockets have parallel flats so they grip really tight and it prevents rolling.
Definitely a great set to have around!

The build is done! I just wanted to do a final buffing of the wax finish so that it was super smooth.
To do this I used the Dremel Versa 4-Volt Cordless Lithium-Ion Power Cleaner Tool. This tool takes the elbow grease out of the job. It comes with different attachments like the non-scratch pad which could have been good for this, but instead I just attached one of my regular white non abrasive pads to the velcro backing.
If you ever run out of the pads you can always pick up the Dremel Versa Power Cleaner Variety Pack
It comes with an Eraser pad that removes dirt and marks from hard surfaces like glass and leather without damaging them
A Non-scratch pad that removes dirt and marks from delicate surfaces like stove tops and stainless steel without damaging them
And a Heavy-duty pad that removes more stubborn stains and small surface scratches.
I recently used the Heavy-duty pad to clean up my outdoor furniture and it worked like a charm.

And it’s done! I am so thrilled with the way these turned out!

Lots of hidden joinery going on in here, but I love how you can see the dovetails in the drawers.

I really think it mimics the metal look with the black base and I love how it looks.

And the wireless charging feature is just an added bonus!


I acknowledge that The Home Depot is partnering with me to participate in the ProSpective 2018 Campaign. As a part of the Program, I am receiving compensation in the form of products and services, for the purpose of promoting The Home Depot. All expressed opinions and experiences are my own words. My post complies with the Worth of Mouth Marketing Association (WOMMA) Ethics code and applicable Federal Trade Commission guidelines.