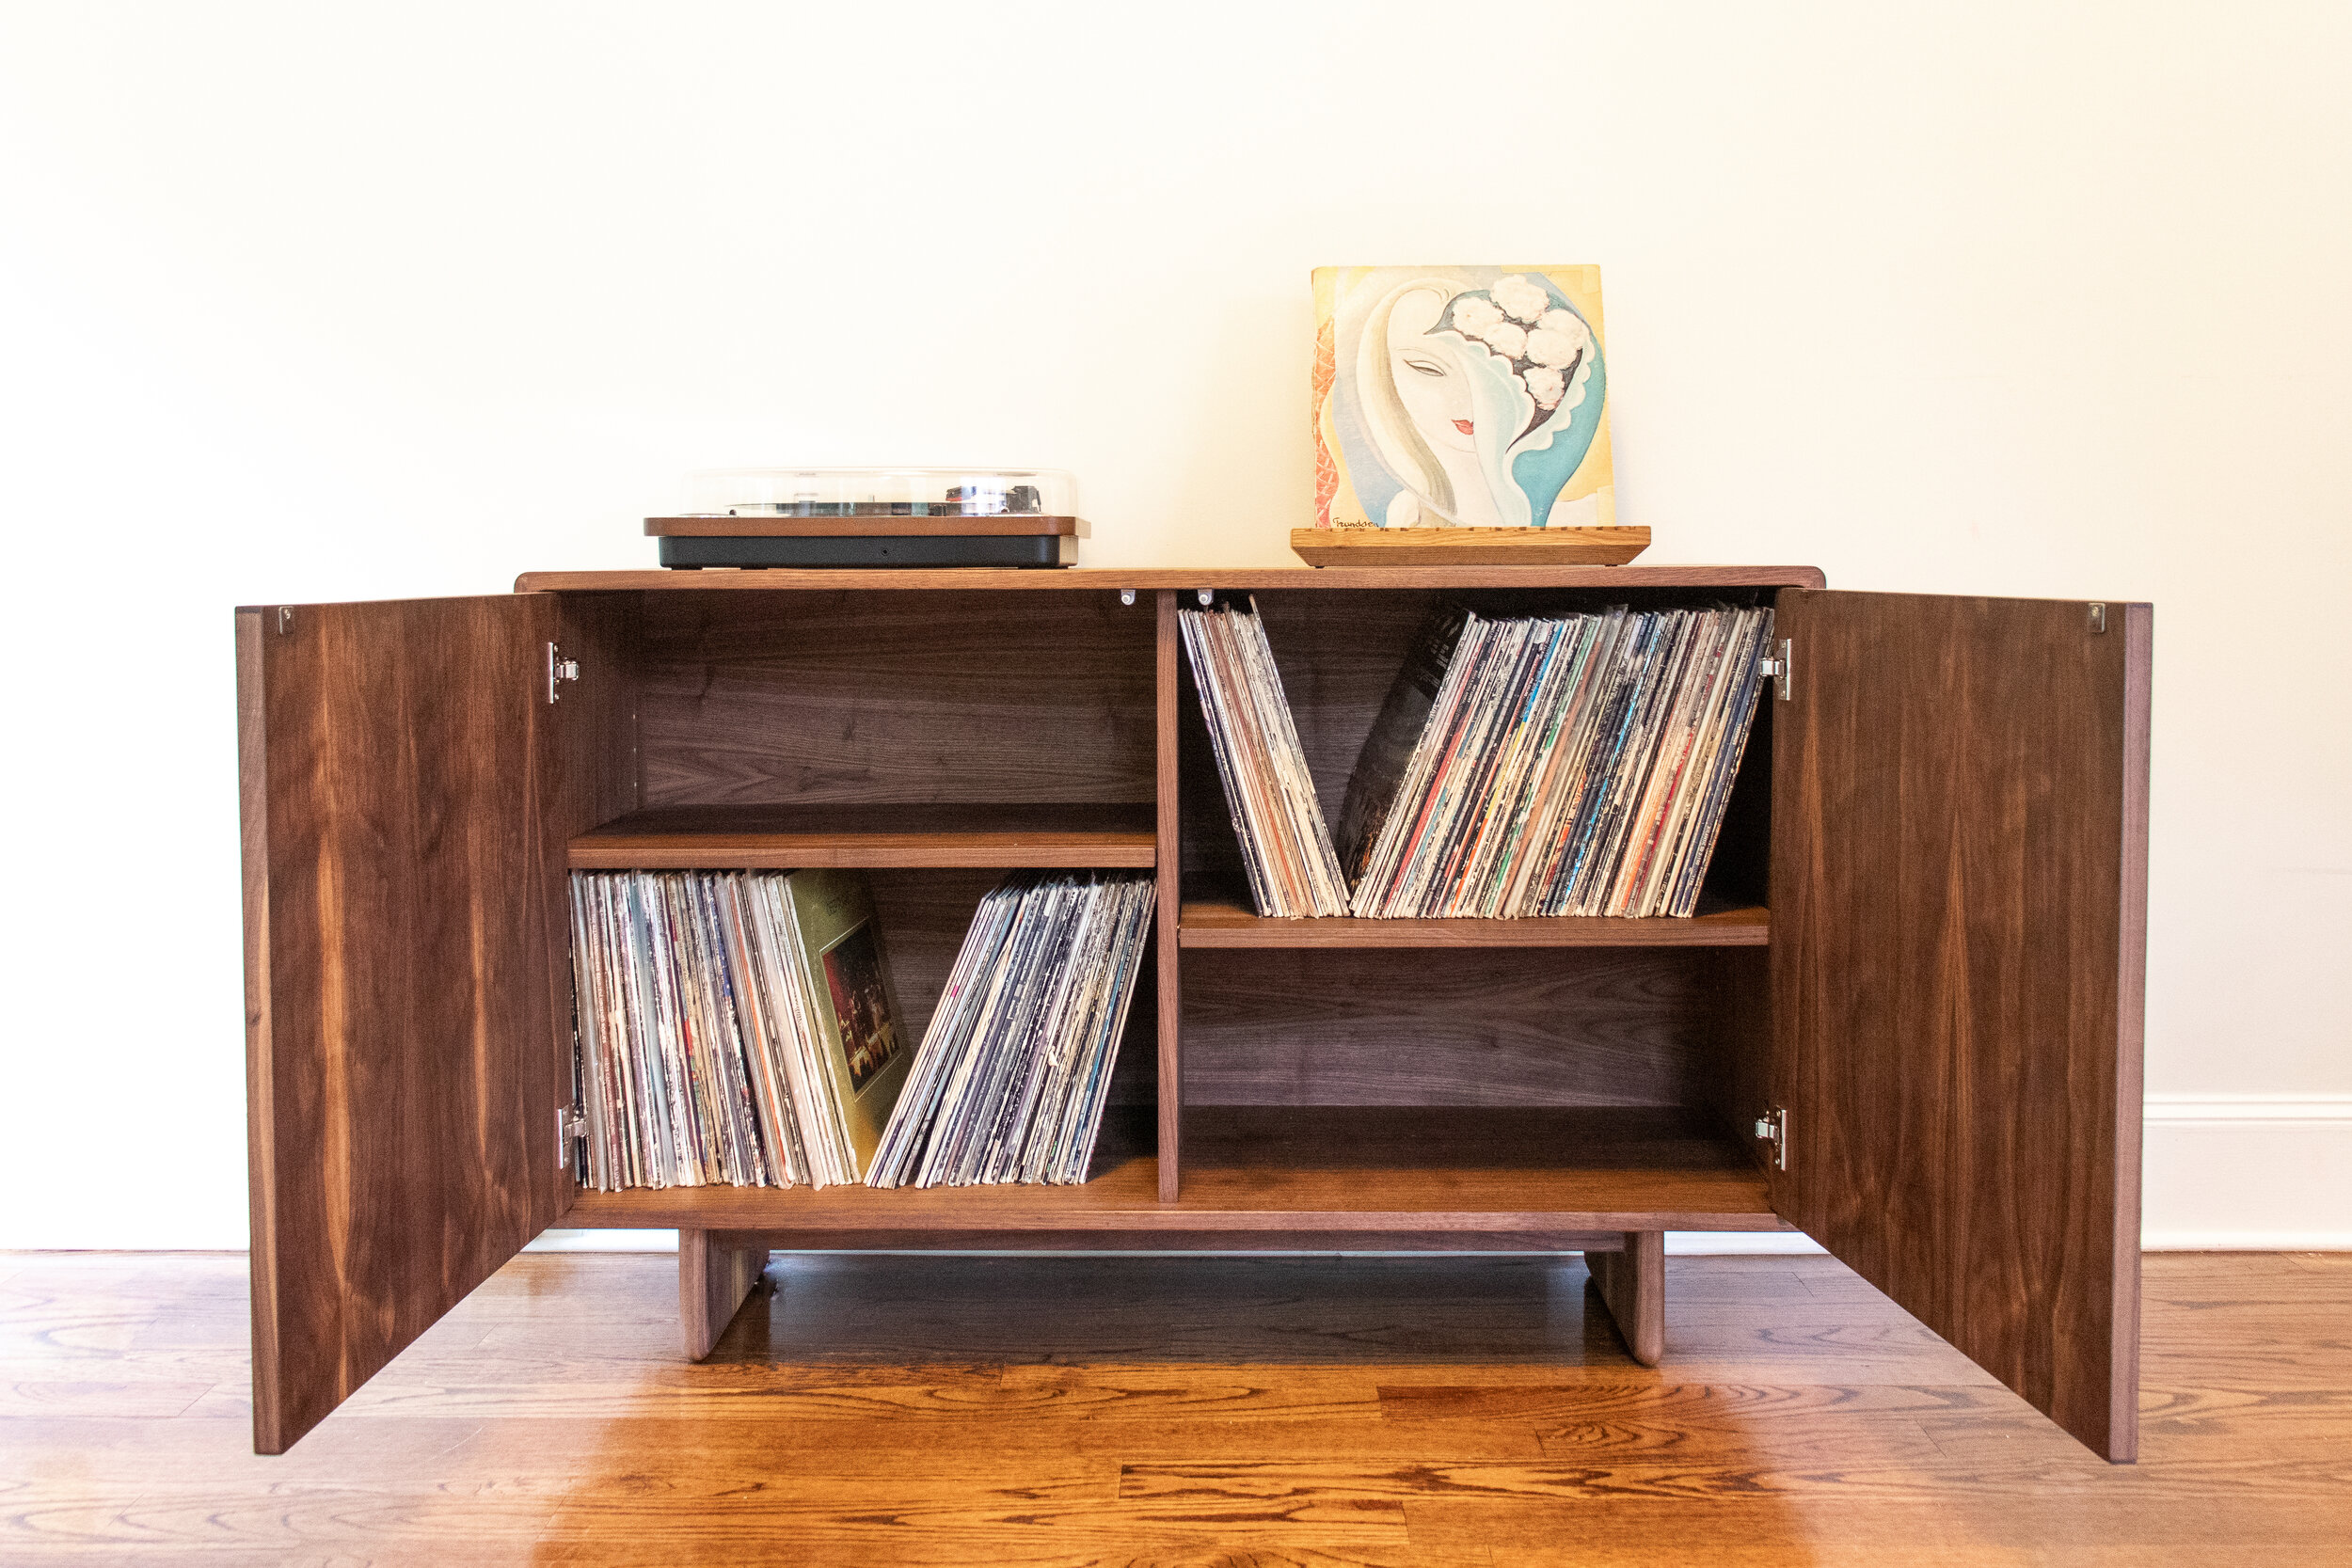
Geometric Veneer Record Player Stand
This season’s Builders Challenge build was a Mid-Century Modern credenza designed by Jory Brigham. In keeping with the retro vibe, I decided to turn my build into a record player stand and keep some vintage elements in the design, but modern it up a bit.
This was really fun to design and execute… check out the full build video below if you are interested in watching how it all went down!
The carcass for this build is made of 3/4” walnut veneer plywood.
The first thing to do is break down the plywood into all the necessary pieces.
A track saw is really handy here! Especially with a TSO square that clamps right onto the track.
With the TSO square, there is no need to check and make sure your track is set to square and it fits the Triton, Makita, and Festool tracks!

The center divider is going to be installed into the top and bottom panels using a stopped dado.
I made a jig to do this operation using a guide bushing in my plunge router.
I also routed both the top and bottom panels at the same time so everything will line up really nicely in the end.

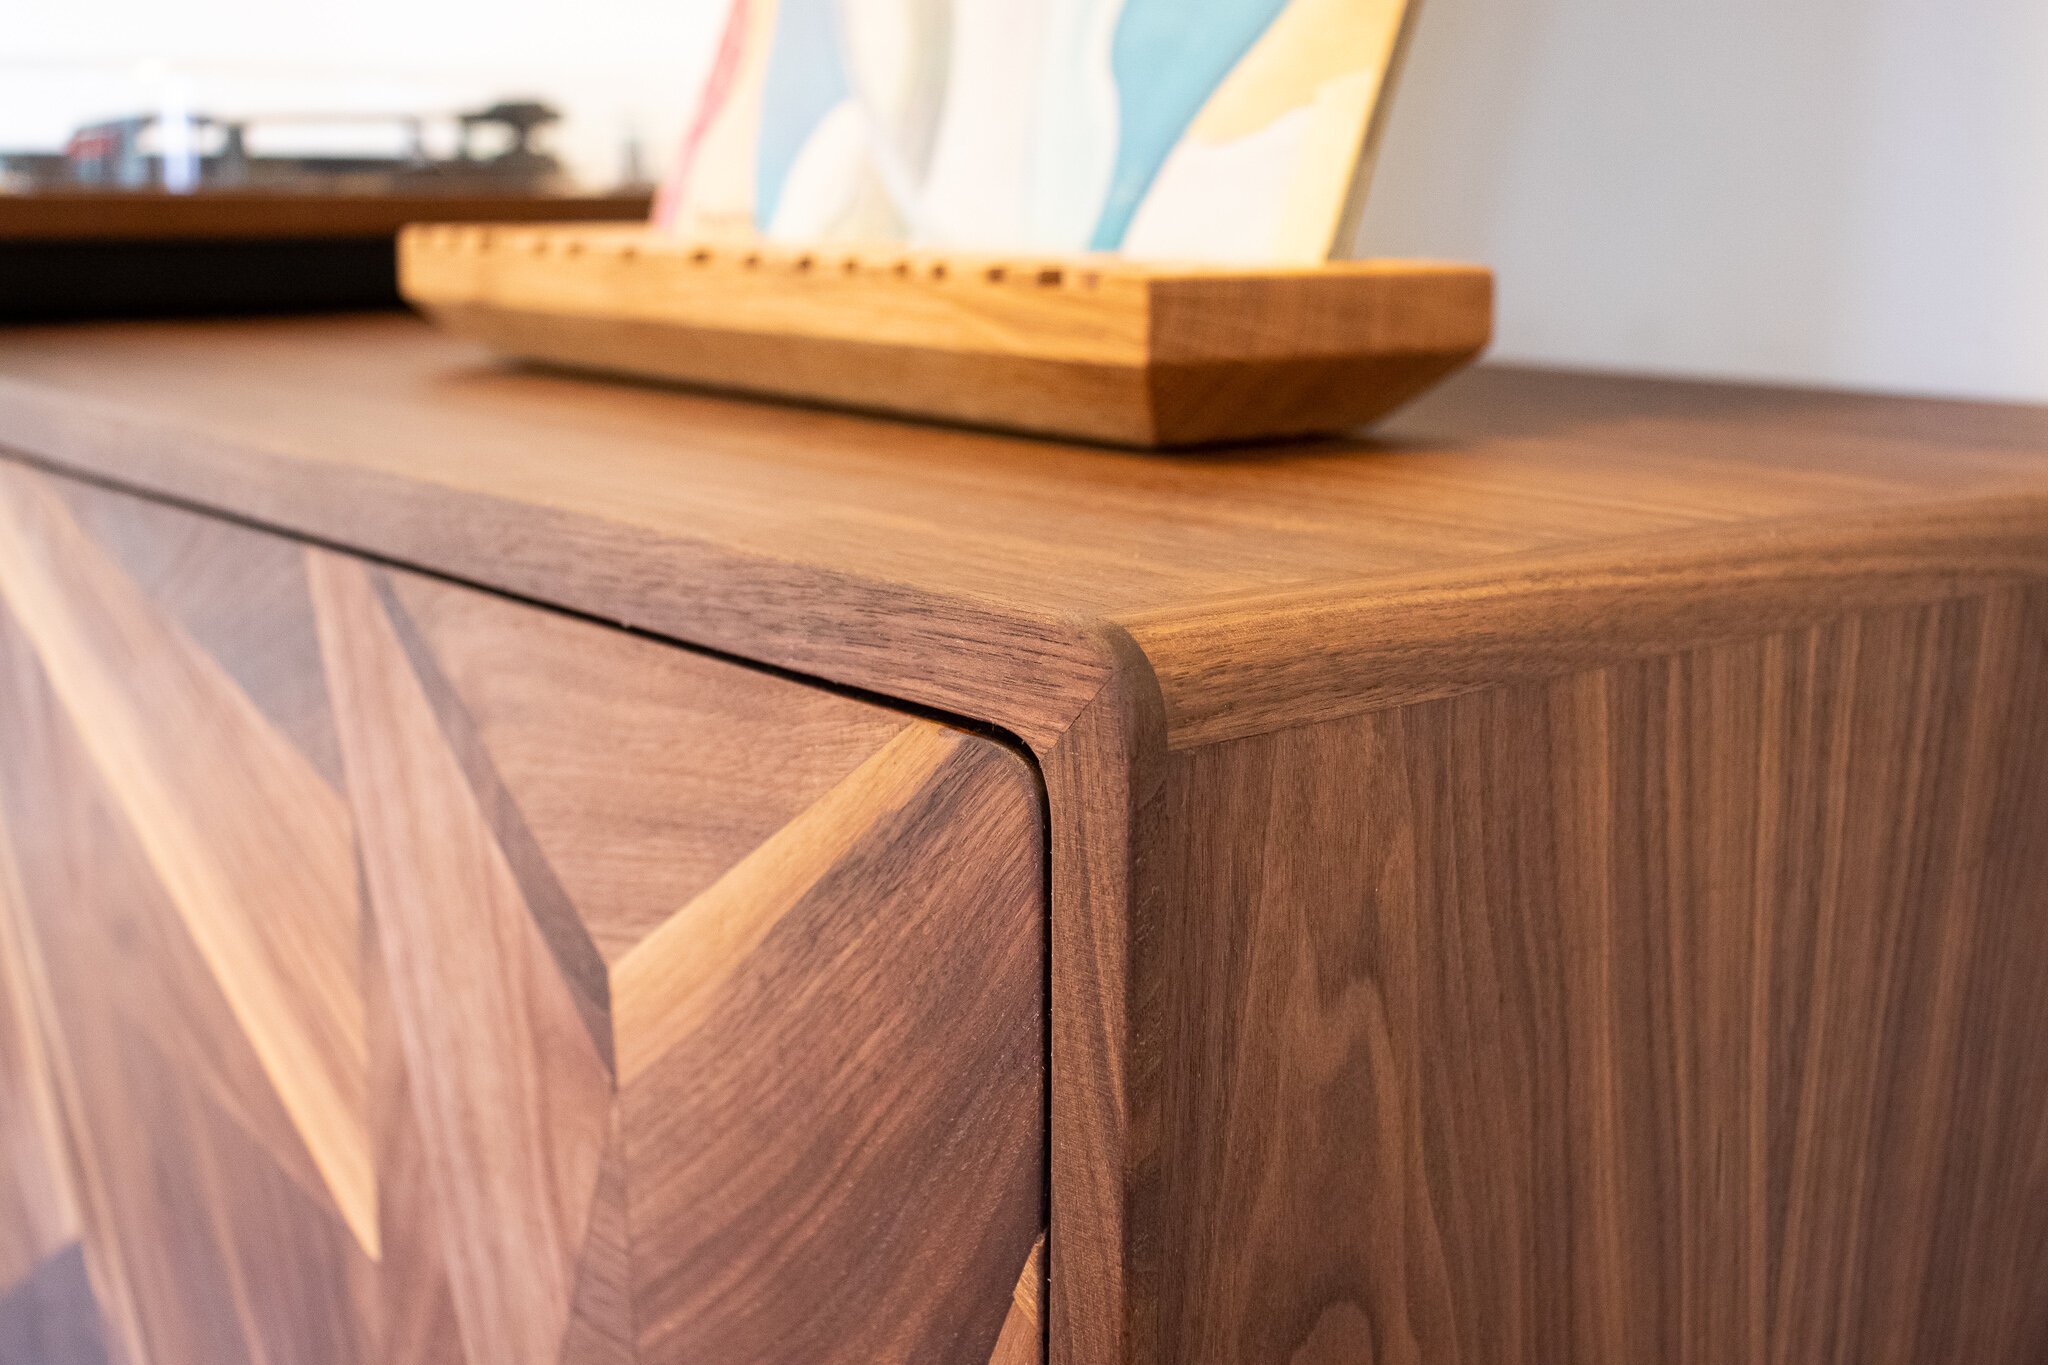
The corners of the carcass are going to get a big 5/8” roundover… Since I am working with plywood, I needed a way to cover up the plywood ends, so I will attach a hardwood filler piece at all the mating corners.
I actually did a whole separate video on how to do this whole process if you are interested in learning more, you can watch it here —> Plywood Corner Roundover

These hardwood corner pieces get 2 grooves cut into them on adjacent sides.
Just make sure to leave enough meat in the center of the hardwood to make sure these stay strong.

A mating groove gets cut into the edges of the plywood using a slot cutting bit.
This could also be done at the table saw.
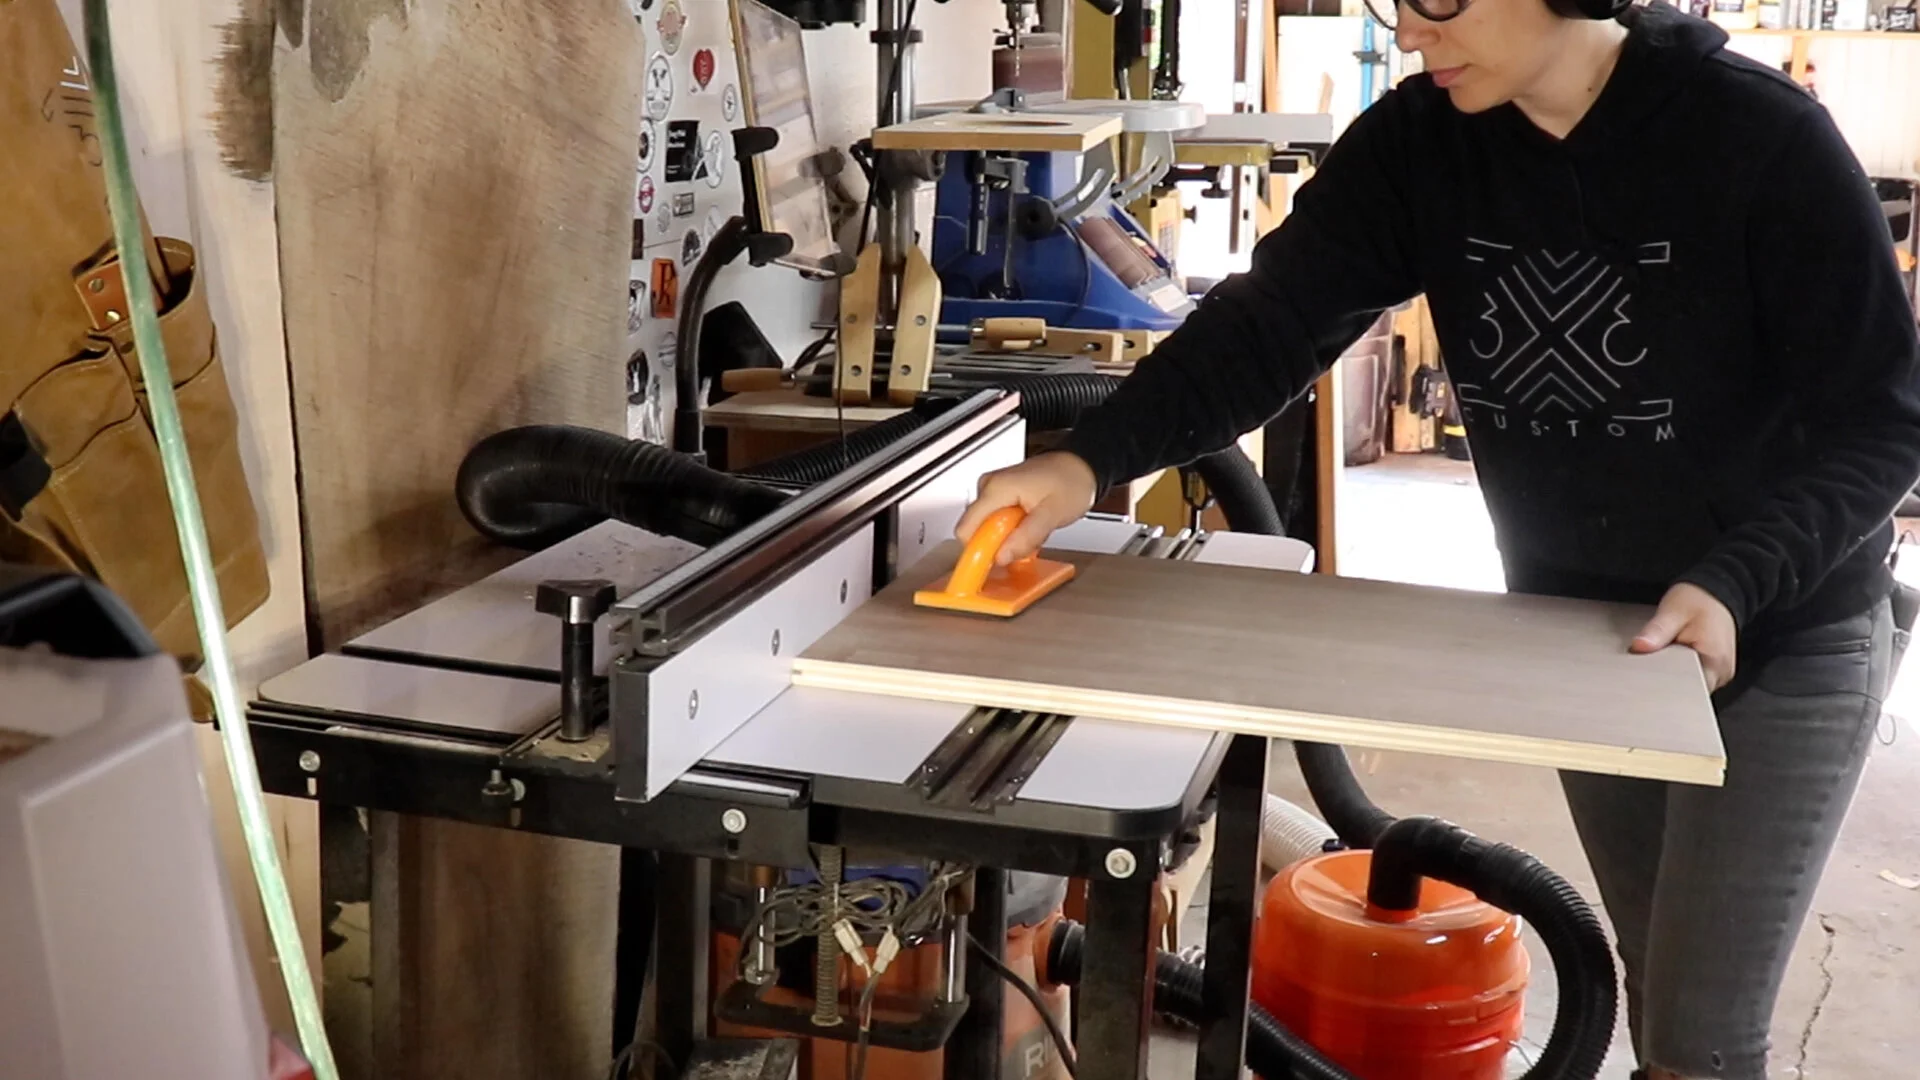
And splines are ripped to width at the table saw.
I used scrap maple, but I think it would be best if plywood was used.

You can see in the picture below how these corners will go together.
Splines get glued into the slots in the hardwood corners, then the plywood panels get glued into the remaining splines. Cool.

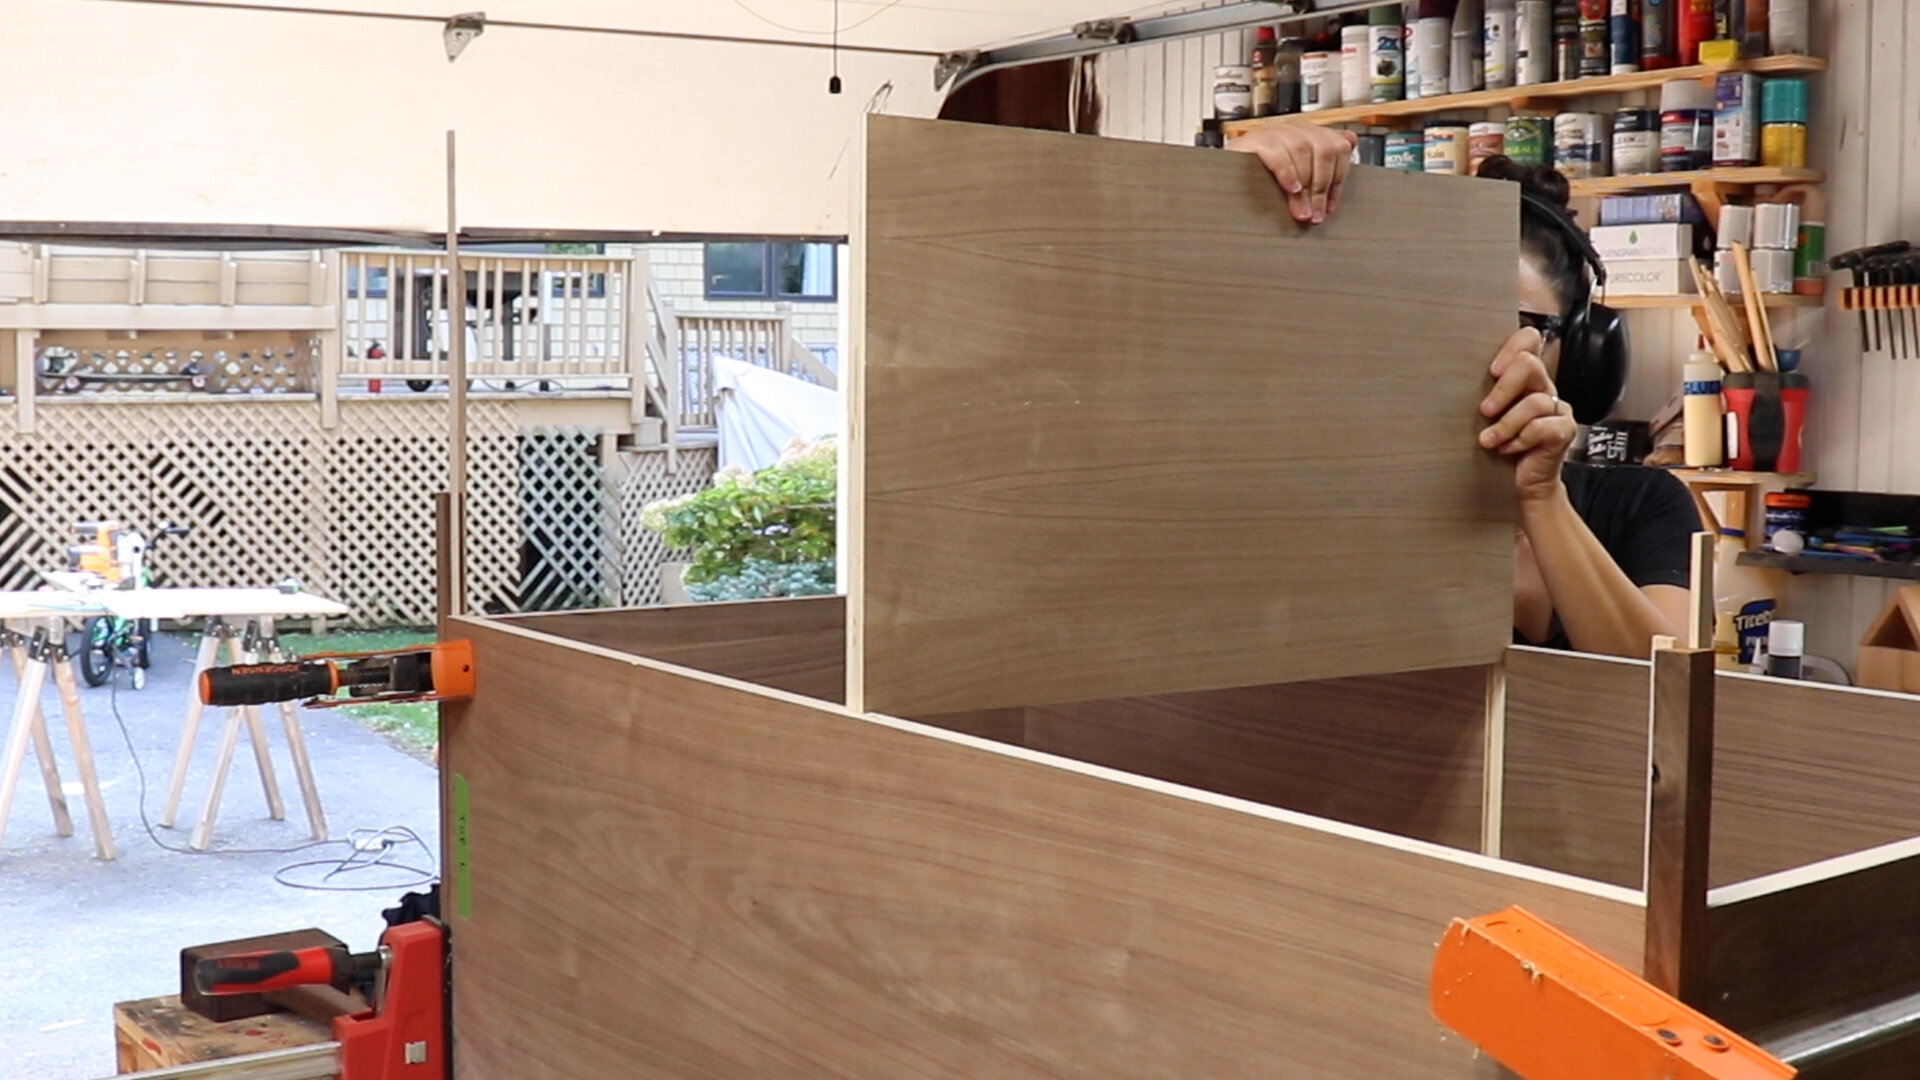
The center divider then gets cut to size to fit into the stopped dado.
And some final details get worked on before assembly.
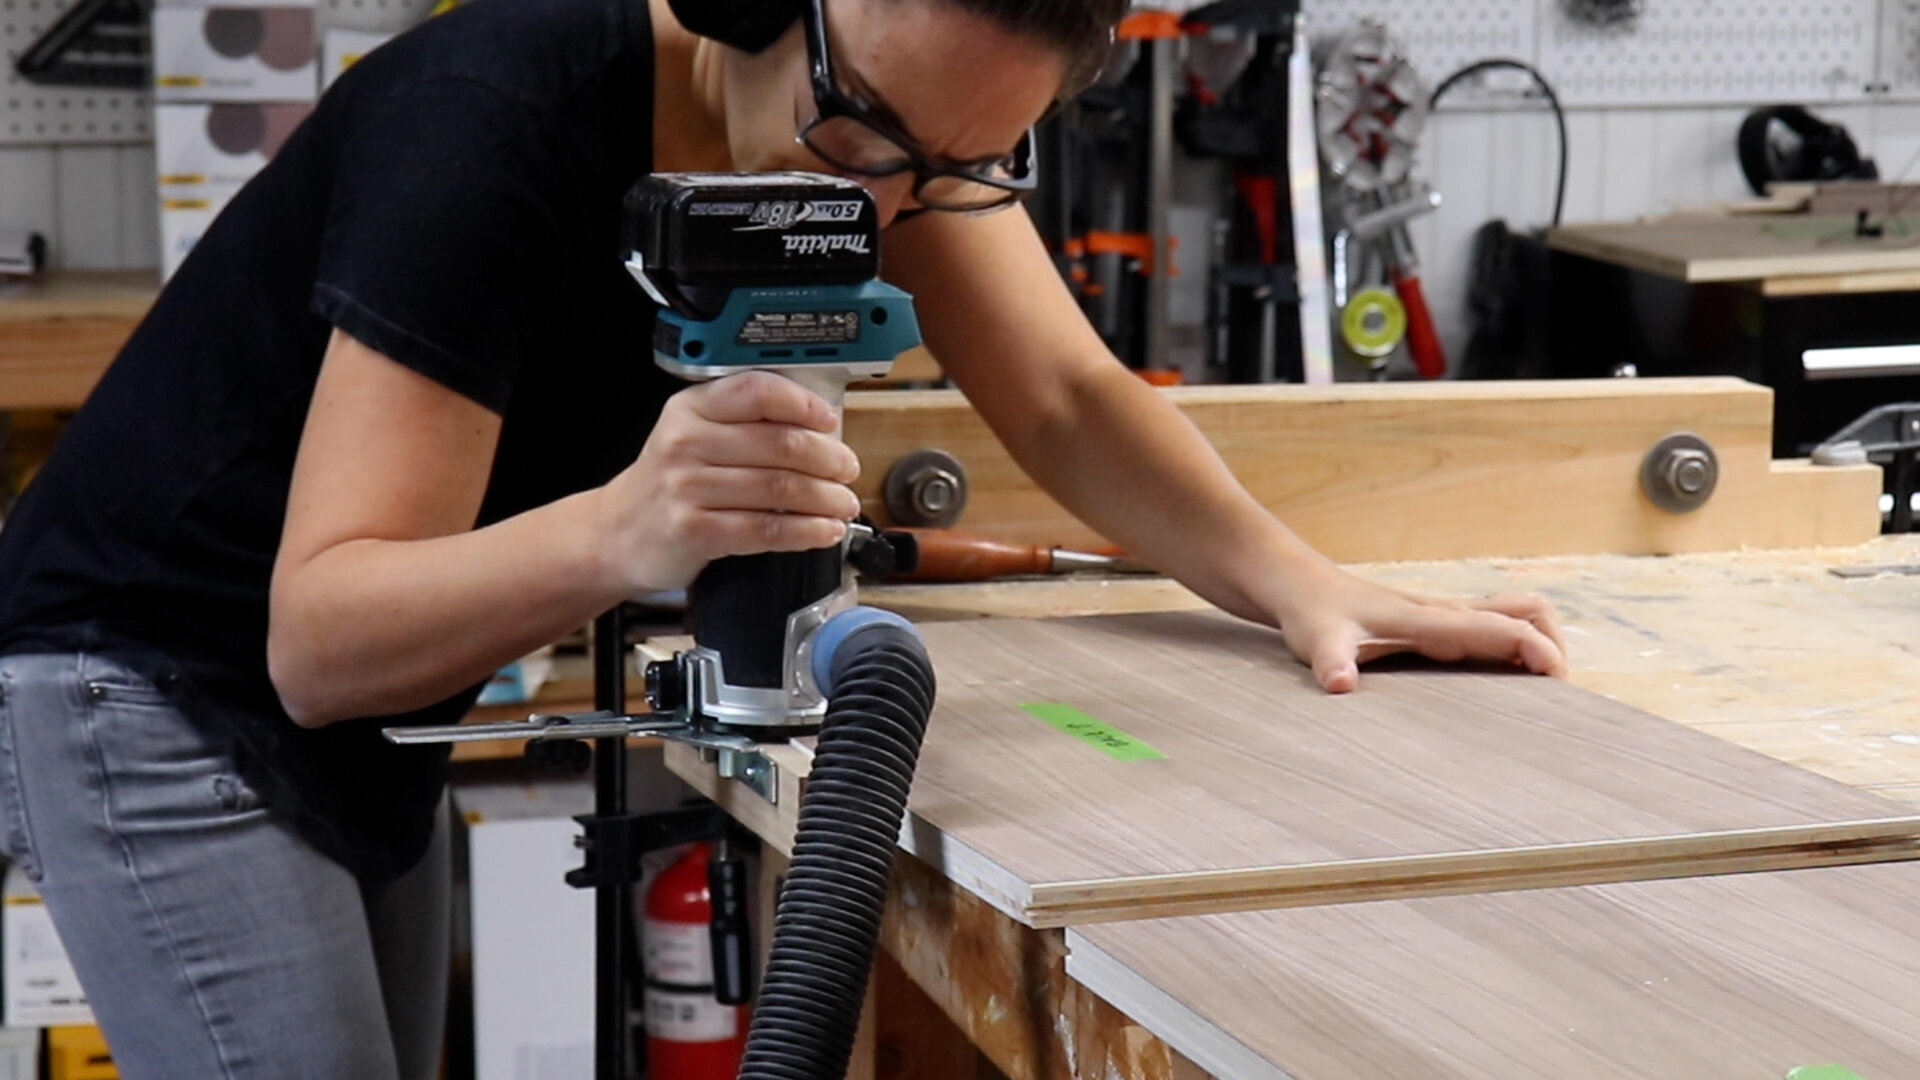
I chose to add a rabbet on the backs of all the pieces before assembly using an edge guide and a straight bit in my trim router. But you can totally do this after assembly with a rabbeting bit.
I notched out the front corners of the center divider so the stopped dado will look nicer and be seated in the correct location.
I did this on the bandsaw, but you can do it with a handsaw or the table saw.
Whatever you are comfortable with!

I also drilled for all the shelf pin holes before assembly, but this can be done after as well.

Finally time for a glue up!
To reduce stress, I broke this glue up down into stages.
First I glued the hardwood corners into the side panels using the splines.
The only important thing here is to make sure the adjacent grooves that will connect the top and bottom panels are facing in the correct orientation, which is IN towards the cabinet.
These pieces are also left long so worrying about placement during the glue up is not an issue. They will get cut flush after the glue dries.

Then hardwood edge banding gets glued to the front of the center divider.
I like to cut my edge banding to about 1/4” thick. I also leave these long and wide so they can get flushed up after the glue dries.

Time to assemble the whole carcass!
The splines made it really easy to align and clamp up, but I should have waited to put the middle divider in… watch the video to see the disaster I am referring to… ha!

The front frame of the whole carcass is going to have curves on the outside and inside corners.
We already dealt with the outside curve by adding the hardwood filler pieces, now time to tackle the inner curve.
I took some more walnut and made a curved profile on one corner using a cove bit at the router table.

Then at the table saw I could simply cut away the excess wood, leaving over just the cove molding strip.
It would be really difficult to put the cove profile on such a small thin piece of wood, so it’s really just safer to do it this way, even though you are creating a lot of waste. More scrap for scrap projects!

It would also be difficult to clamp this cove molding to the inner corners.
So I put on some regular wood glue…

Then a few dabs of CA glue in the spots where I didn’t put wood glue.

And then just held it into place for about 30 seconds until the CA glue set up!
The CA glue holds it in place but it doesn’t really have strong lasting holding power. That’s where the wood glue comes in. The wood glue will fully cure and it will be stuck on forever, no clamps required!

That joint looked very cool, but I am going to be covering it up with some hardwood edge banding…
I ripped the walnut into 1/4” thick strips and cut miters on the ends using the miter fence on my cross cut sled.

No measuring required here, just line up the edge banding on the carcass, make a mark and cut it to fit.

The important thing about this edge banding is to make sure it is wide enough so that it covers the cove molding that was glued into the inner corners so it will create the inner curve.
The edge banding then gets glued onto the front frame of the carcass using painters tape as clamps and then it’s flushed up to the carcass using hand tools or a flush-trim bit in your router.

After the edge banding is all trimmed up, I added the big 5/8” round over to all the outside corners, taking multiple passes to reduce tear-out.

I also used a flush-trim bit on the inside corners to create that inner and outer curve.
Love how this looks…

Moving on to the doors!
I used the track saw to cut them both out.

Then glued on edge banding in stages. First I did the sides then I did the top and bottom.
This just made it less stressful and more accurate.
I chose to edge band before adding the veneer so that you would not see any edge banding on the face of the doors.

On to the veneers!
I made a quick tall resaw fence to support these wide boards while reaswing at the bandsaw.
It worked great but I think I need to get or build myself a tall featherboard for this operation.

I cut the veneers to be somewhere between an 1/8th and a 1/16th. After each cut, I would pass the board through the planer to get a clean face to reference on the fence for the next piece.

For stability reasons, it’s best to veneer both sides of a board, so the inside of the doors just gets a bookmatched veneer from the same walnut.
To make sure these veneers would be seamless I planed all the edges before gluing it all up.

Painters tape works really well to hold all the veneer pieces in place, it has just enough give to slightly pull the pieces together and it is also easy to remove without any residue.

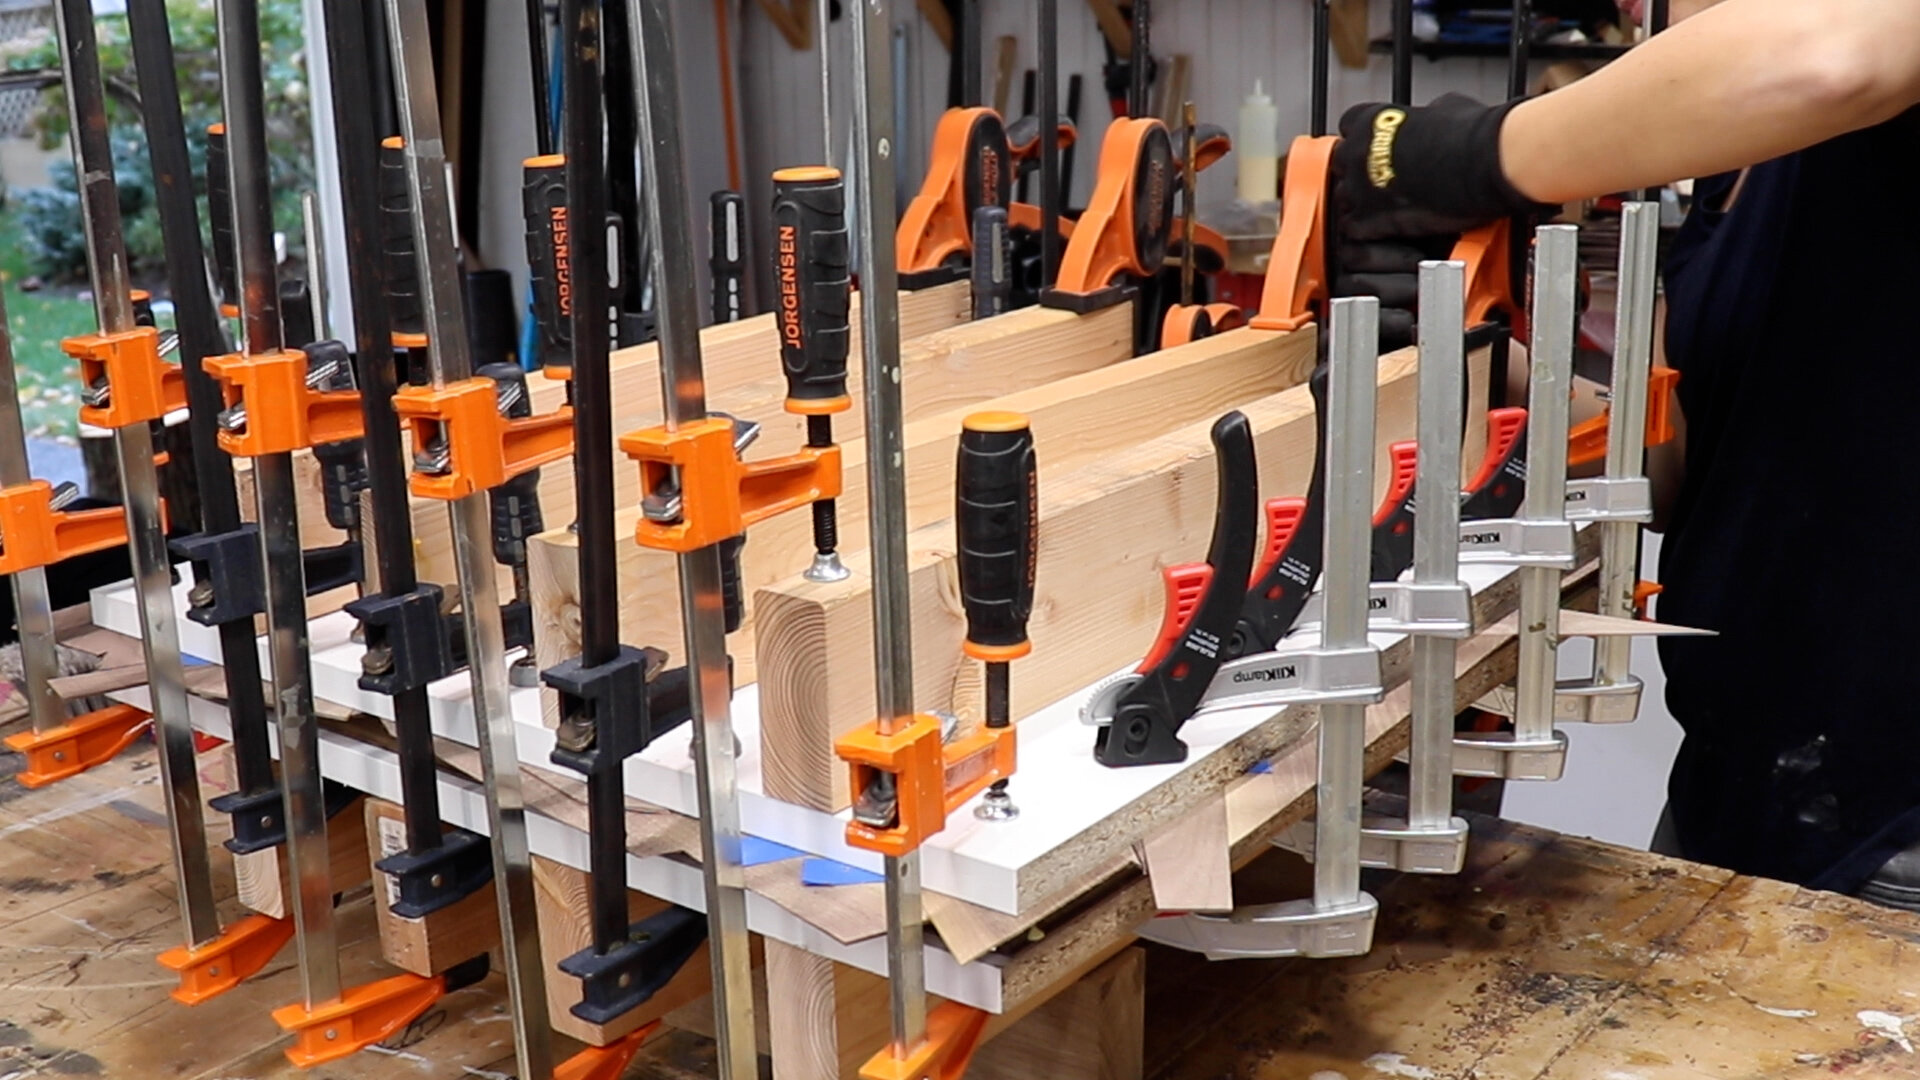
Typically veneer is applied to a panel using a vacuum press… but I don’t have one!
So I set up this crazy clamping situation using cauls to put pressure in the middle of the panels.
The 2x4 cauls were planed down on the ends leaving a hump in the middle. When pressure is applied to either end, the middle hump bears down in the middle of the panel acting as a clamp.
I set the panel on a piece of melamine which was on the cauls, poured on a ton of glue, then placed the veneer sheet tape side up on the panel.

I did both doors at once here, creating a melamine, plywood, glue, veneer, and caul sandwich.
While this worked without a vacuum press, I think a vacuum press would be a better option if you have one!

Onto the geometric front!
All you need is a utility knife and a straight edge to cut out the desired shape.

I like to plane the edges of all the shapes on a shooting board to make them really nice and smooth.
But, I showed in the YouTube video how you can use sandpaper to do the same thing.

The hardest part is when you need an exact shape to fit into an opening.
This just takes a lot of back and forth to get the right fit, then all the pieces can be taped up next to each other.

It took me about 3 hours to do each door. It was a lot of work, but worth it in my opinion.
The glue up is the same as the inside of the doors.
Place it tape side up on the panel that is covered in a ton of glue.

Then sandwich it all together with melamine, cauls and a billion clamps.
All thats left to do is sand the panels after the glue dries!

Moving on to the base.
I glued up some walnut to create the two main legs for the base.

Then route stopped dovetail slots on the top of those panels using a dovetail bit at the router table to hold the stretchers that will have a sliding dovetail.

The sliding dovetail gets cut with the same router bit. The height stays the same but the fence gets moved incrementally away from the bit to sneak up on the perfect fit while the stretcher is held vertically in a tenoning jig.

The bottom of the dovetail slots cut in the base pieces are round, so I rounded off the bottom of the sliding dovetail tenon using a combination of handsaws, chisels, and a Shinto rasp.

Glue is then applied to the sliding dovetails and it is really satisfying to snap these pieces into place.

The base is going to connect to the carcass using oversized holes drilled in the underside of the stretchers.
First, drill all the way through, then using a larger forstner bit to drill a countersunk hole that the head of the screw can sit into.

Final finessing of the doors is done to get the perfect reveals, including adding a curve to the outside corners of the doors.

Then drill out for all the door hardware using this concealed hinge jig.

Time for the finish!
It was easier to finish the inside of the carcass without the back on so I could reach into the corners.

Then I applied finish onto the 1/4” back panel, using tape on the edges so I can add glue in the rabbet.

The corners of the back panel are notched away to accommodate the hardwood corners, or you can cut away the hardwood corners to accommodate the back panel… either one is fine.
And the back panel is secured into place using glue and brad nails.

This was the most exciting part of the build, watching that grain pop on the door fronts.
I used Walrus Oil furniture finish here for a few reasons. It’s all-natural and easy to apply.
There are some caveats to using it though.
It soaks into the wood, it does not form a film finish, so it will need regular maintenance with Wood Wax or Wood Butter. As a woodworker, I am fine with that… I probably would not use this finish on items that I am selling because I wouldn’t expect a customer to have to maintain the finish on their furniture.

And that base… No one will ever see it… but I am so happy that I built something that will be really strong and sturdy.

I flipped the base on the underside of the cabinet making sure it was centered all around and locked it down with screws.

Flipped it right side up and clicked the doors into place making any necessary adjustments.

I didn’t want hardware to detract from the geometric fronts, so I used these magnetic push latches instead.
Really easy to install!
Just screw the main base into place.

Then screw the metal plate on the door!

Load it up with some of your favorite records…

And it’s done! I can’t get over these doors…

I’m so thrilled with the way this turned out. These records have been sitting in a cardboard box in our attic for 13 years… It’s really so awesome to watch the kids learning all this awesome music.
I’m loving all the details on this. That corner is going to be rock solid and it looks really cool too.

Let’s not forget about the base! Very simple but super solid!

I really had a lot of fun designing this project, building it and now watching my kids actually use.
Seeing them sort through and listen to these records is such an awesome much needed break from their screen time…