
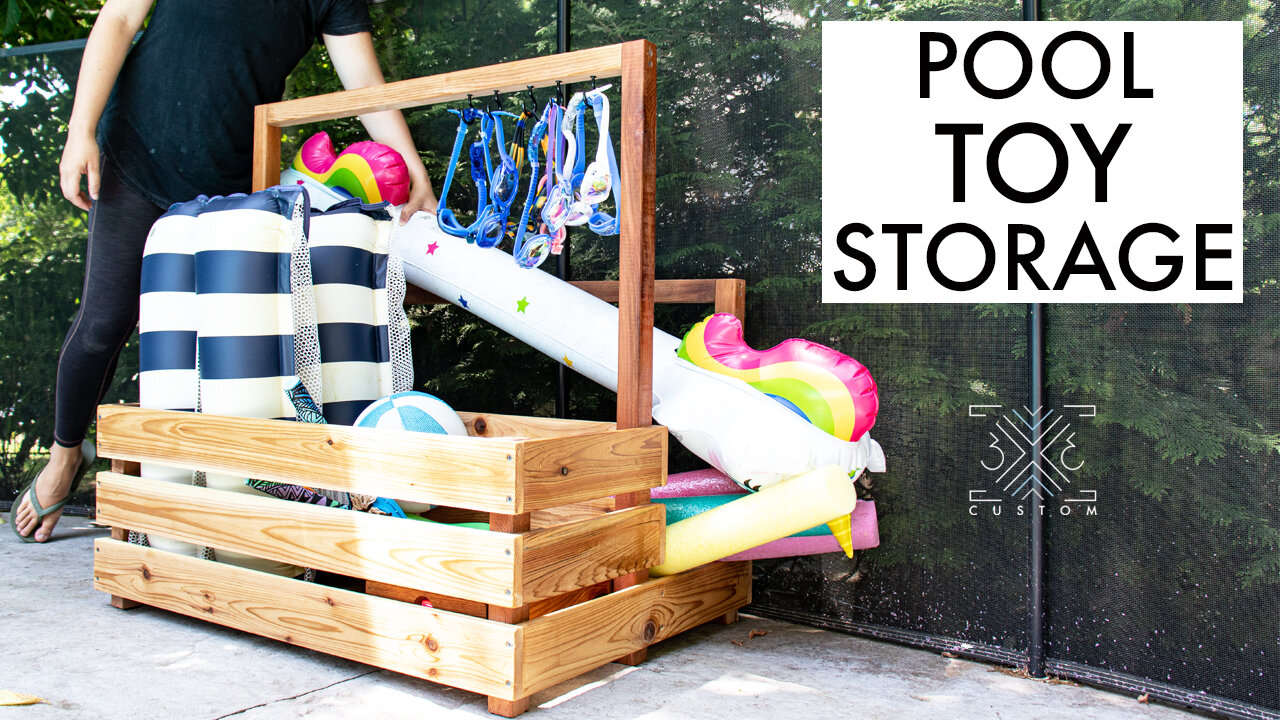
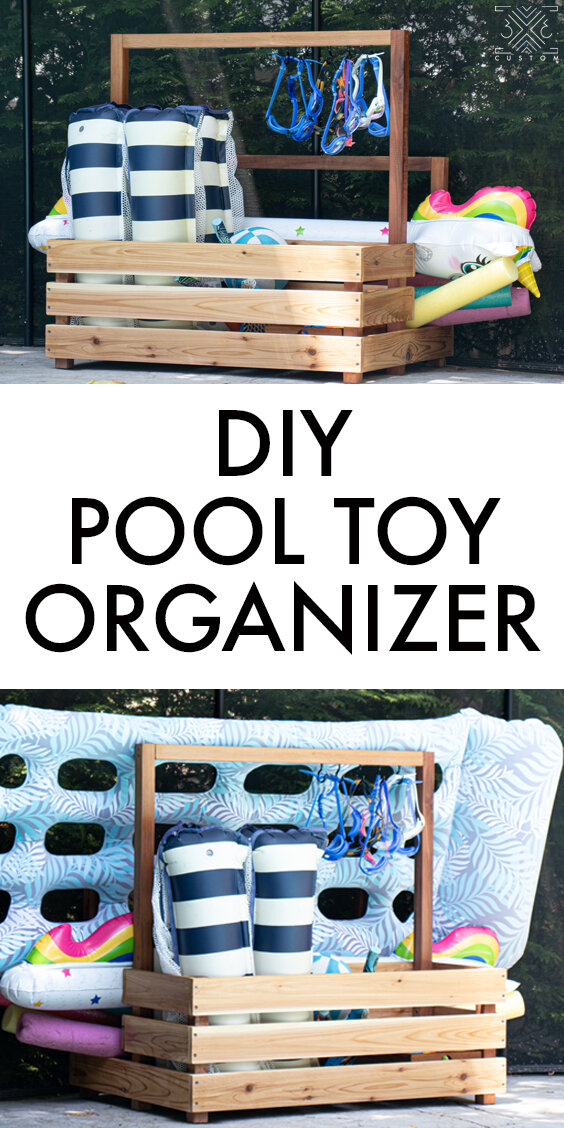
Pool Toy Storage
*This post is sponsored by The Home Depot
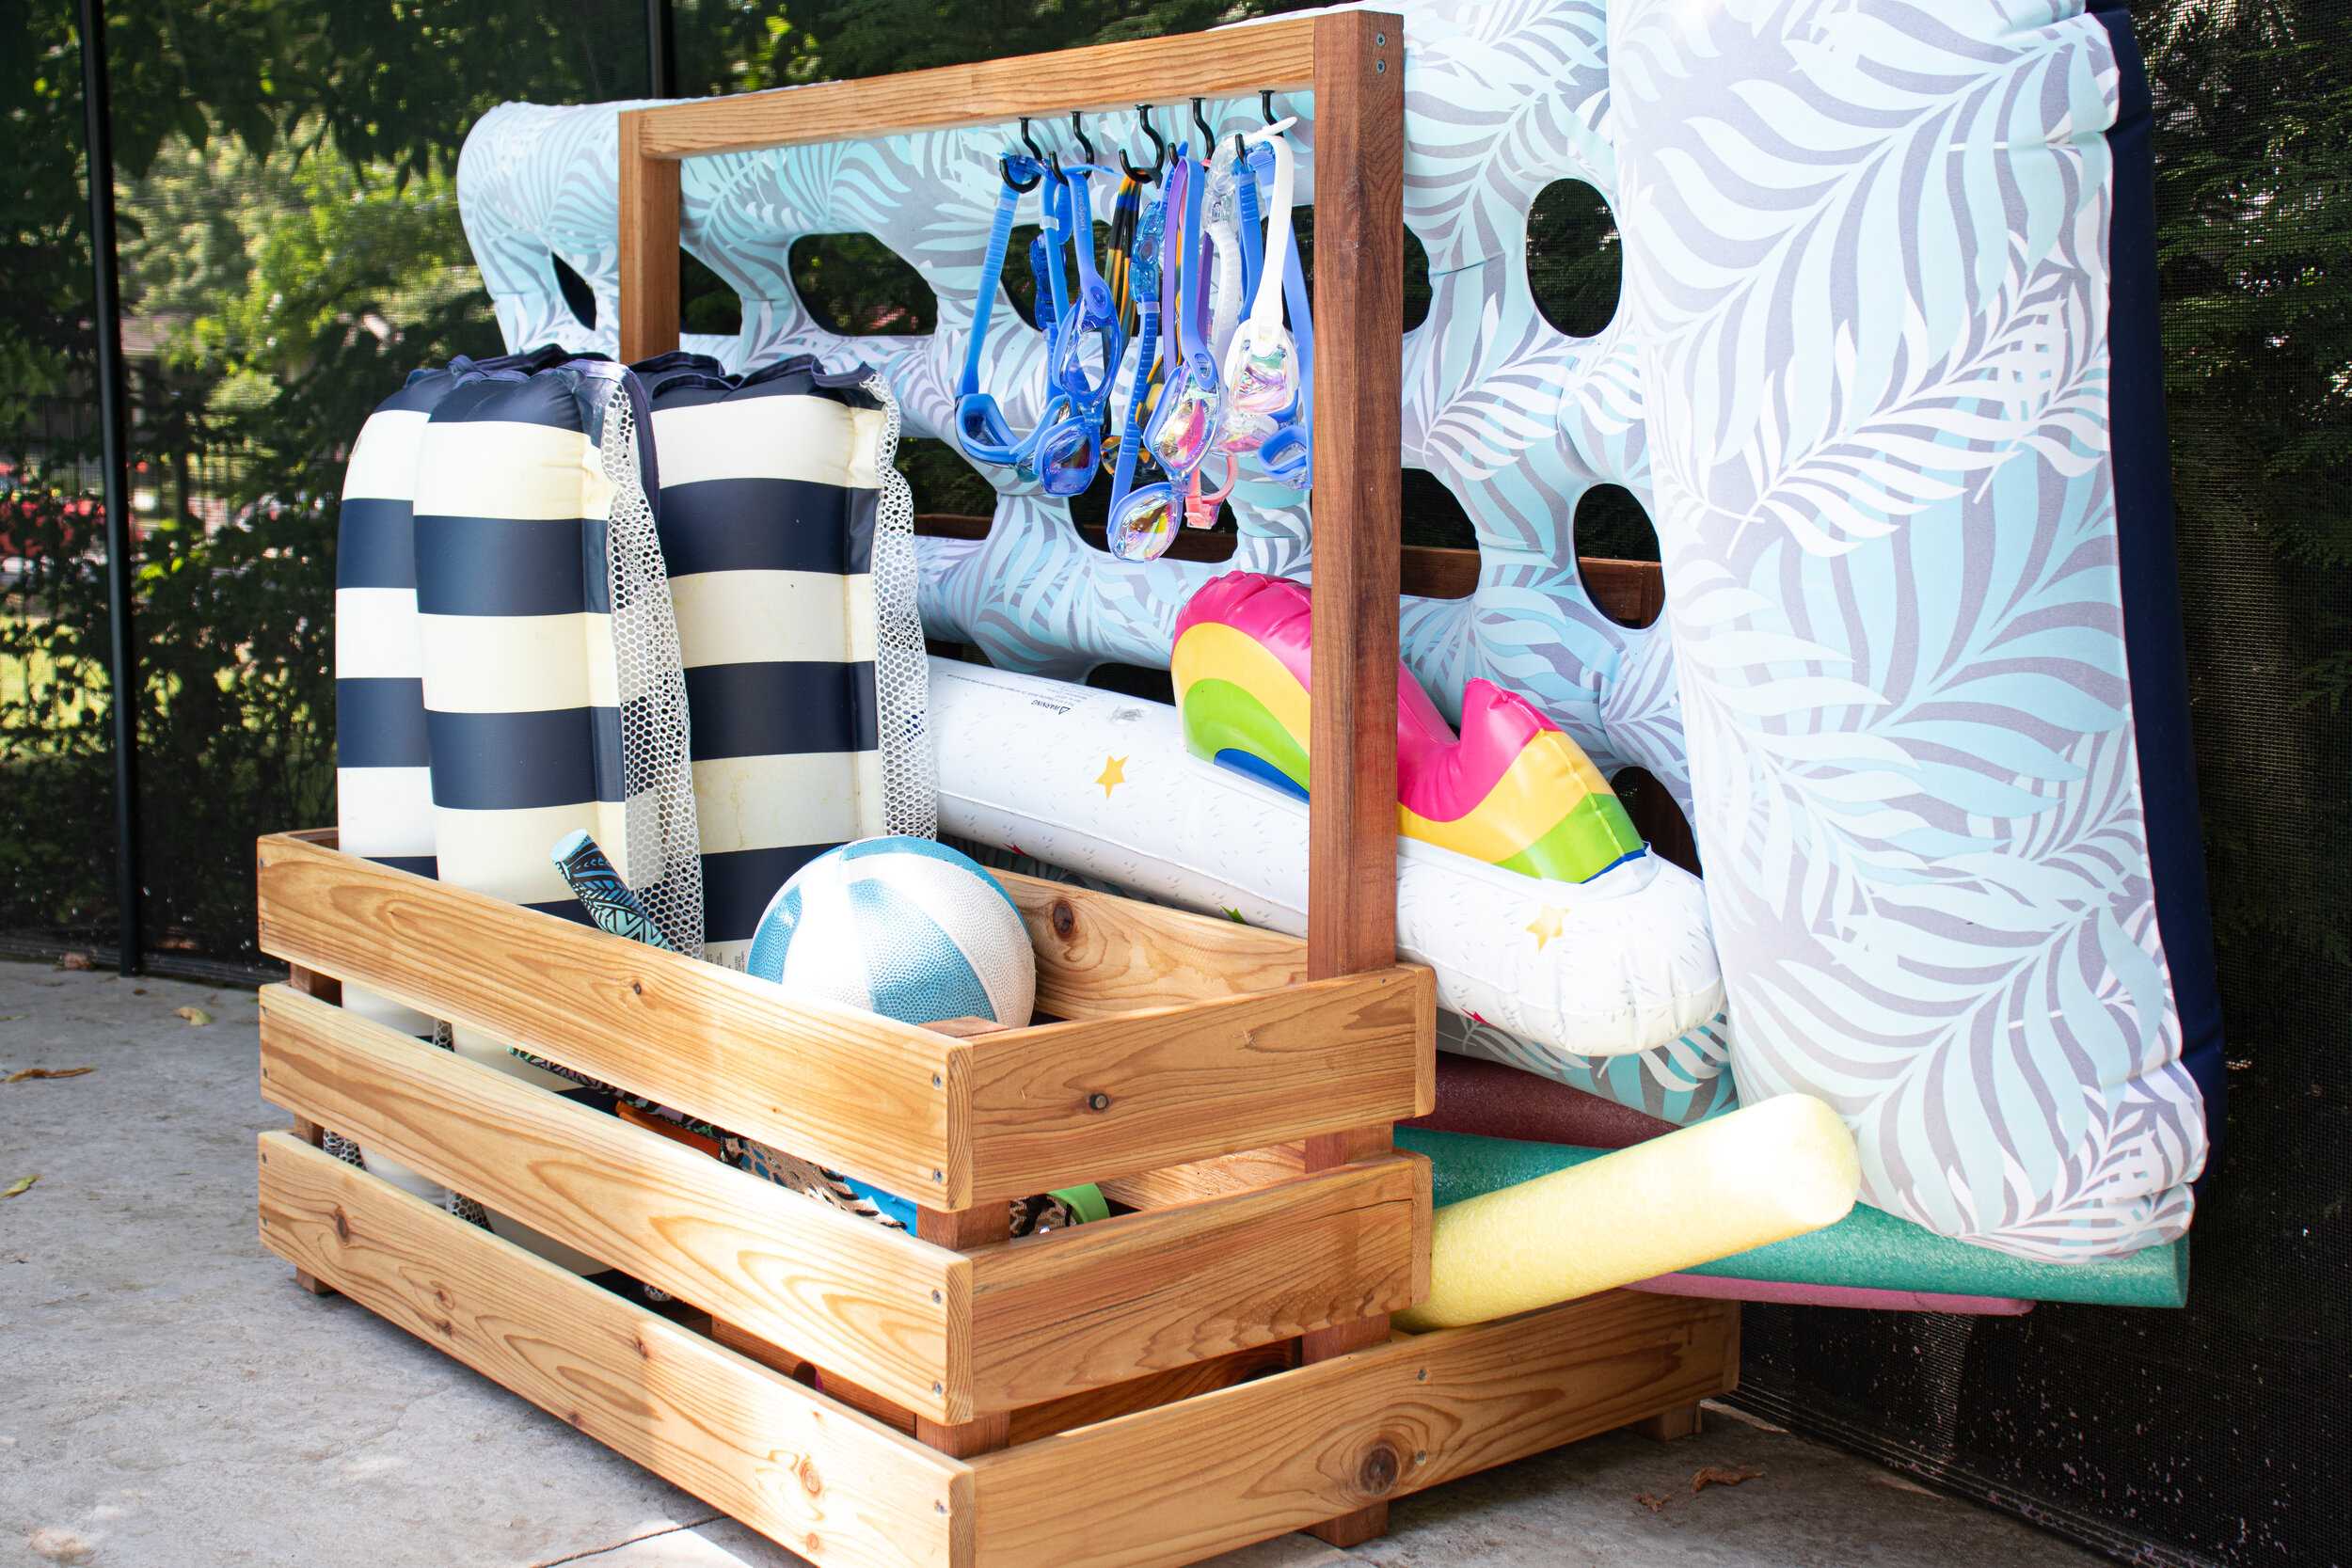
Our pool toys are usually just scattered around the pool deck, this drives me nuts… so I needed to build a storage bin! This bin was so simple to build, it came together in just a couple of hours with a minimal amount of tools!
I based this design off of a Teak Pool Float Organizer I found at Pottery Barn. They charge $399 for it and it only cost me about $30 worth of cedar to build!
It can be even less expensive if you rip your own 2x2’s or if you use pine and paint it…
Check out the full build video below!
Want to build this?
Check out the plans here —> Pool Toy Storage Plans
STEP 1: Cut all the pieces to size.
(Cut list is written out on the plans linked above.)
This can easily be done with a circular saw and straight edge. If you have a miter saw, even better!

The bottom base is a box with a divider in the middle.
This is going to divide the front storage section that holds small pool accessories from the back section that holds larger items like noodles and floats.
Two more boxes will be cut for the front storage section.
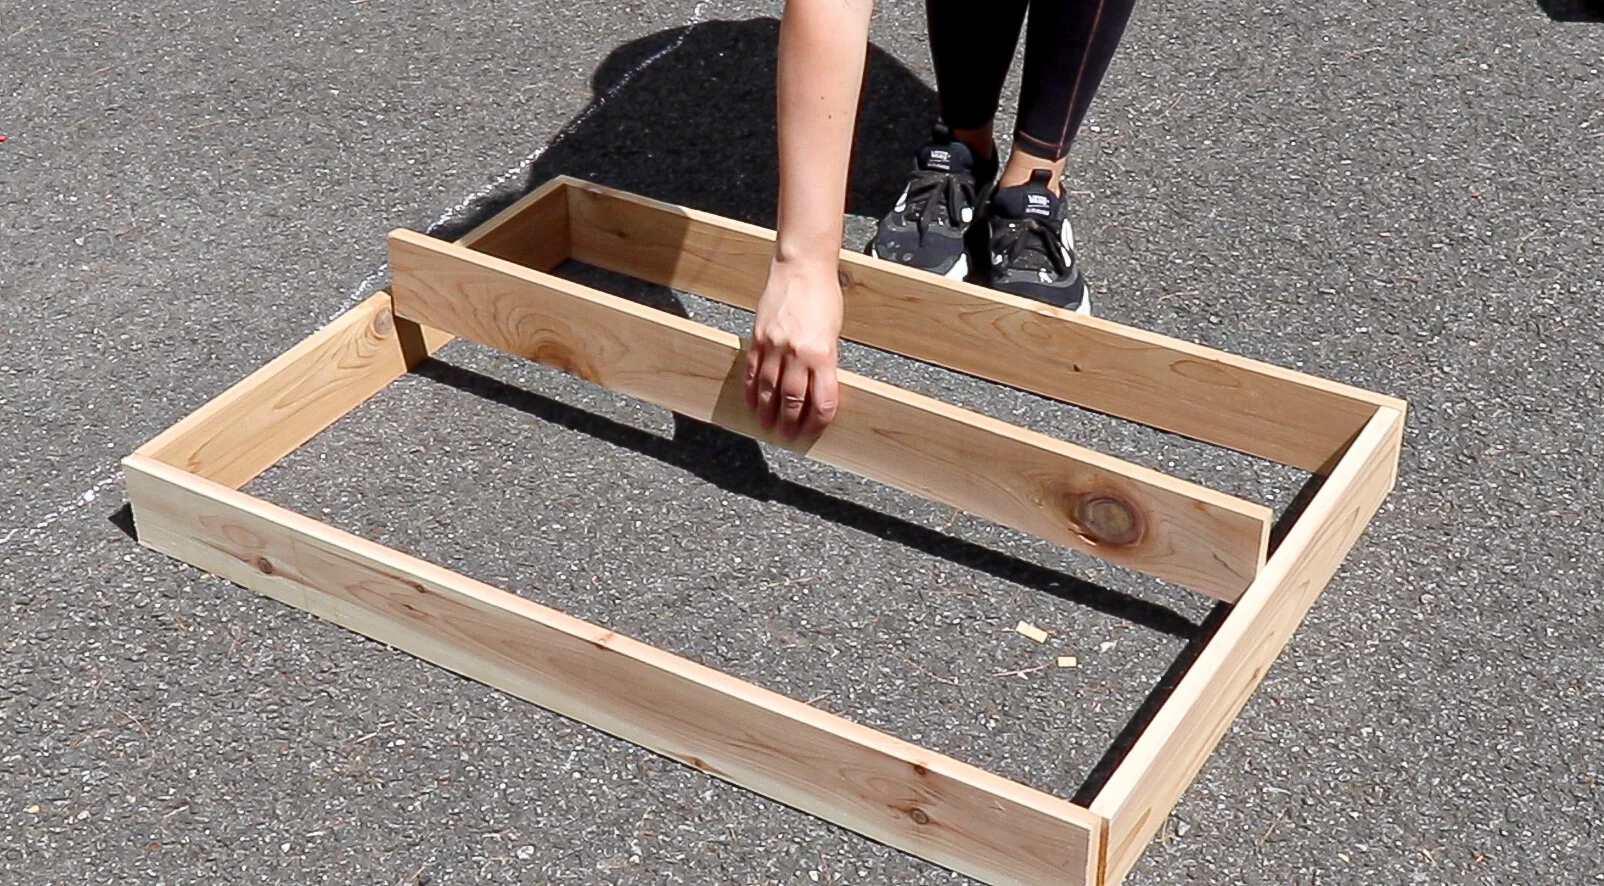
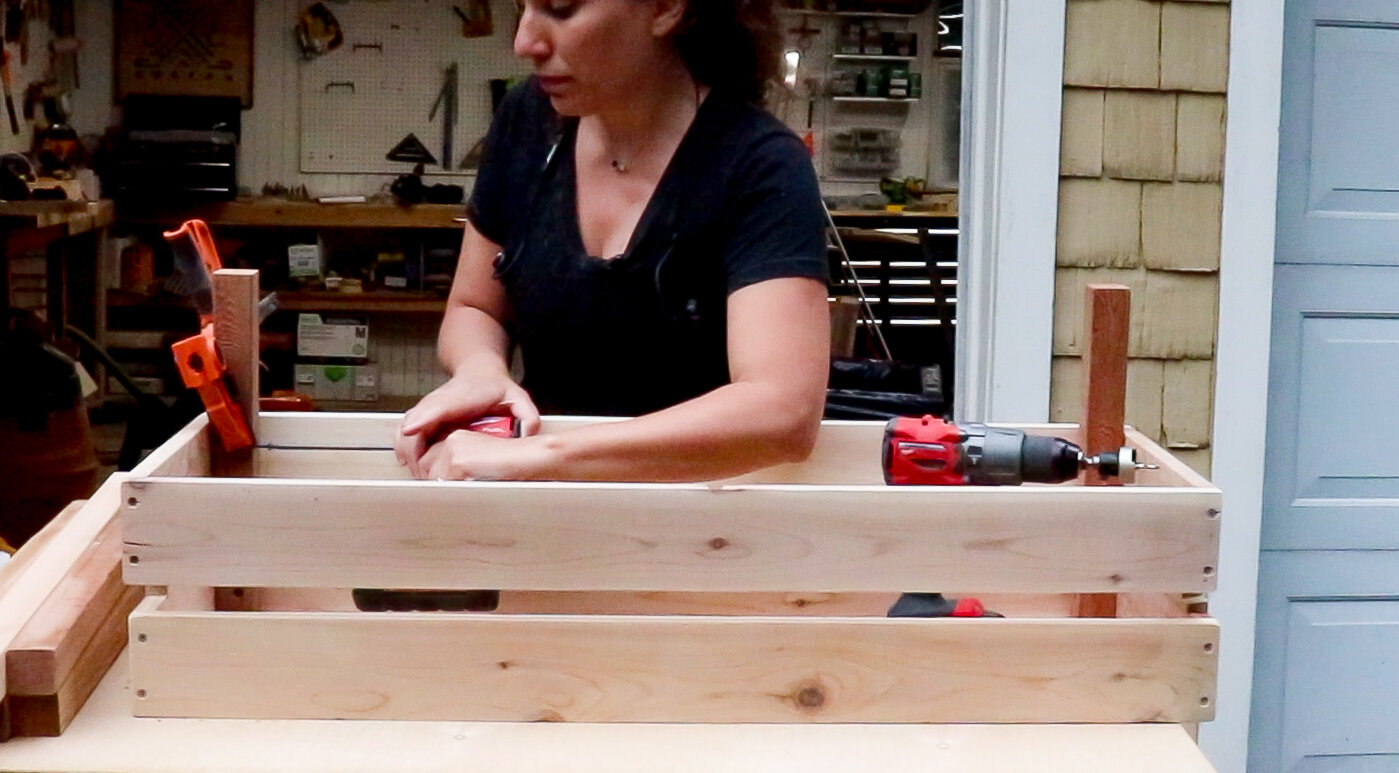
STEP 2: Assemble the boxes.
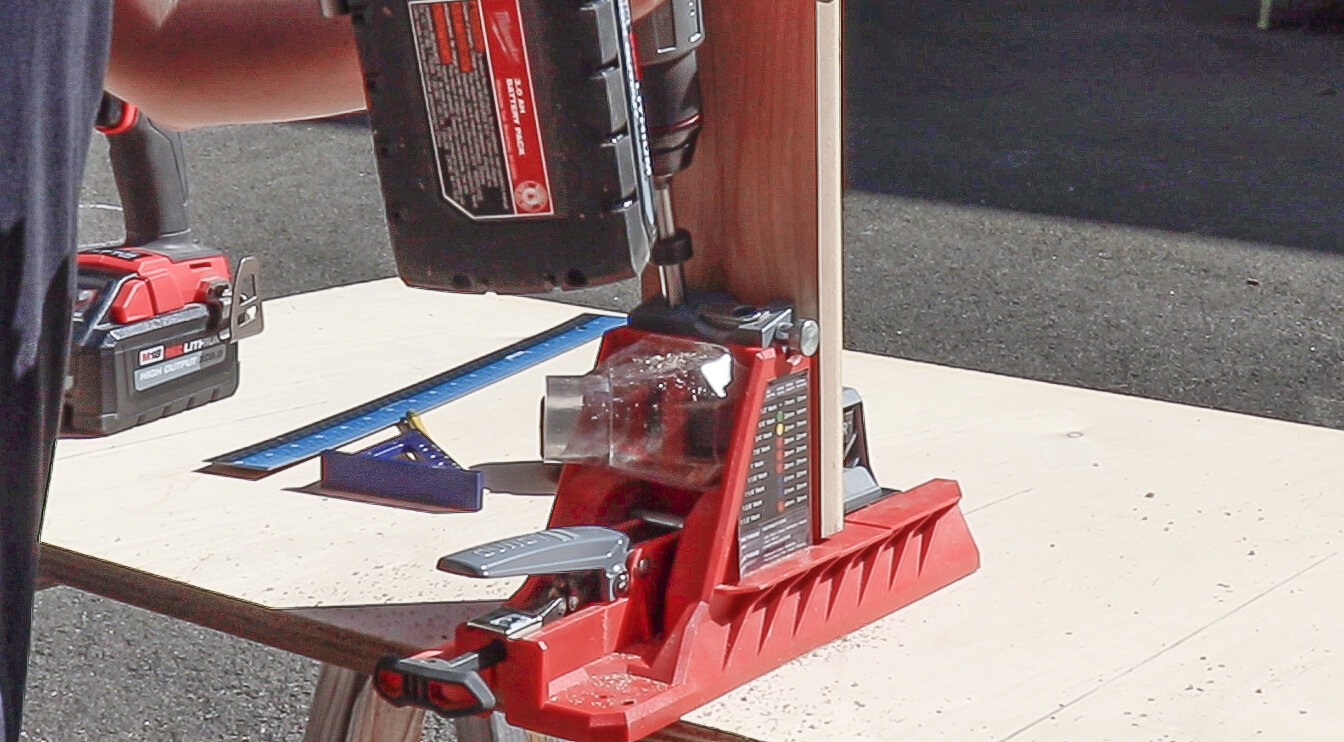
Pre-drill holes on the pieces to avoid splitting.

Clamp the pieces down and screw them into place to create the boxes.
I am using this bit set from Ryobi - Impact Rated Driving Kit
These bits are safe to use with your impact driver, but one of my favorite things in this kit is the bit extender you can see in the picture below.

There are 40 bits included in this bit set including Socket Adaptors, and Nut Drivers. And I love the handy case all the bits come in.
I think Ryobi bits are a great value. They are not expensive at all and they are built to last!
If you need more bits, here is another great bit set - 70 piece kit. This kit has every bit you will need and then some!
If you’re looking for other great bit sets, check out this 60 piece kit. This one also includes a hole saw, which is great to have around! It also includes my favorite brad point bits. I find brad point bits to be the most accurate bits for drilling holes since there is a sharp point at the tip.

Take the pieces that are going to be used as the bottom of the front storage section and use them as a spacer for where to attach the middle divider on the bottom base.

STEP 3: Attach the bottom slats.
Drill pocket holes on the underside of all the bottom slats.
Use the 2x2’s you will be using as the uprights as spacers for where to attach the right and left bottom slat.

Then equally space out the rest of the slats, attaching them with pocket hole screws.

STEP 4: Attach the front uprights.
This is going to be assembled upside down to make it easier…
Start with the top box to make sure the top of the 2x2’s are flush and level with the top of the box. Then attach the 2x2’s to the front using screws from the inside.

Use a 1” spacer in between the boxes to attach the next box to the 2x2 front uprights.
Flip that whole assembly over on to the bottom base.
Once again, use a 1” spacer in between the slats, then screw the 2x2’s into the bottom box.

Put a 1” spacer under the bottom box to lift the whole assembly up off the ground 1”.
Then screw the middle uprights to the inside back of the front storage section.

Lastly, screw the back uprights to the inside of the back storage section.

STEP 5: Attach the stretchers.
Pre-drill and screw the stretchers into place in between the uprights.

STEP 6: Put on finish.
I chose to use a spar varnish, any outdoor finish of your choice would work.

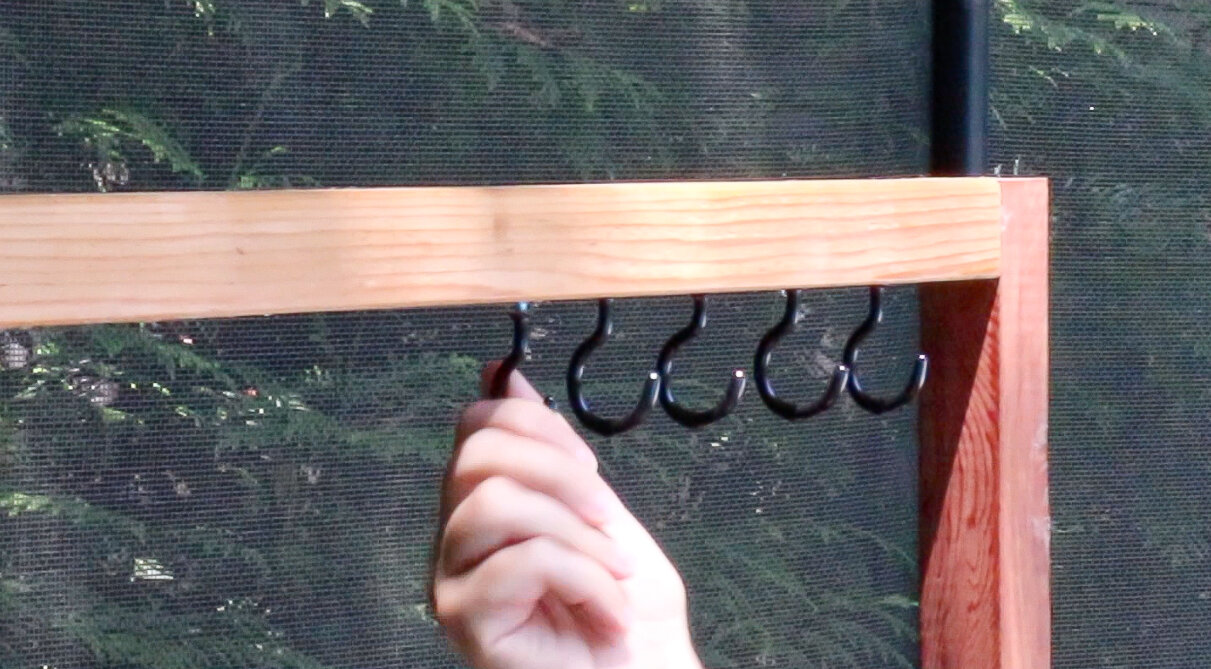
STEP 7: Add hooks.
Not a necessary step, but a nice addition.
I added some outdoor hooks to hold all the kids goggles.
I added some outdoor hooks to hold all the kids goggles.
And it’s done!
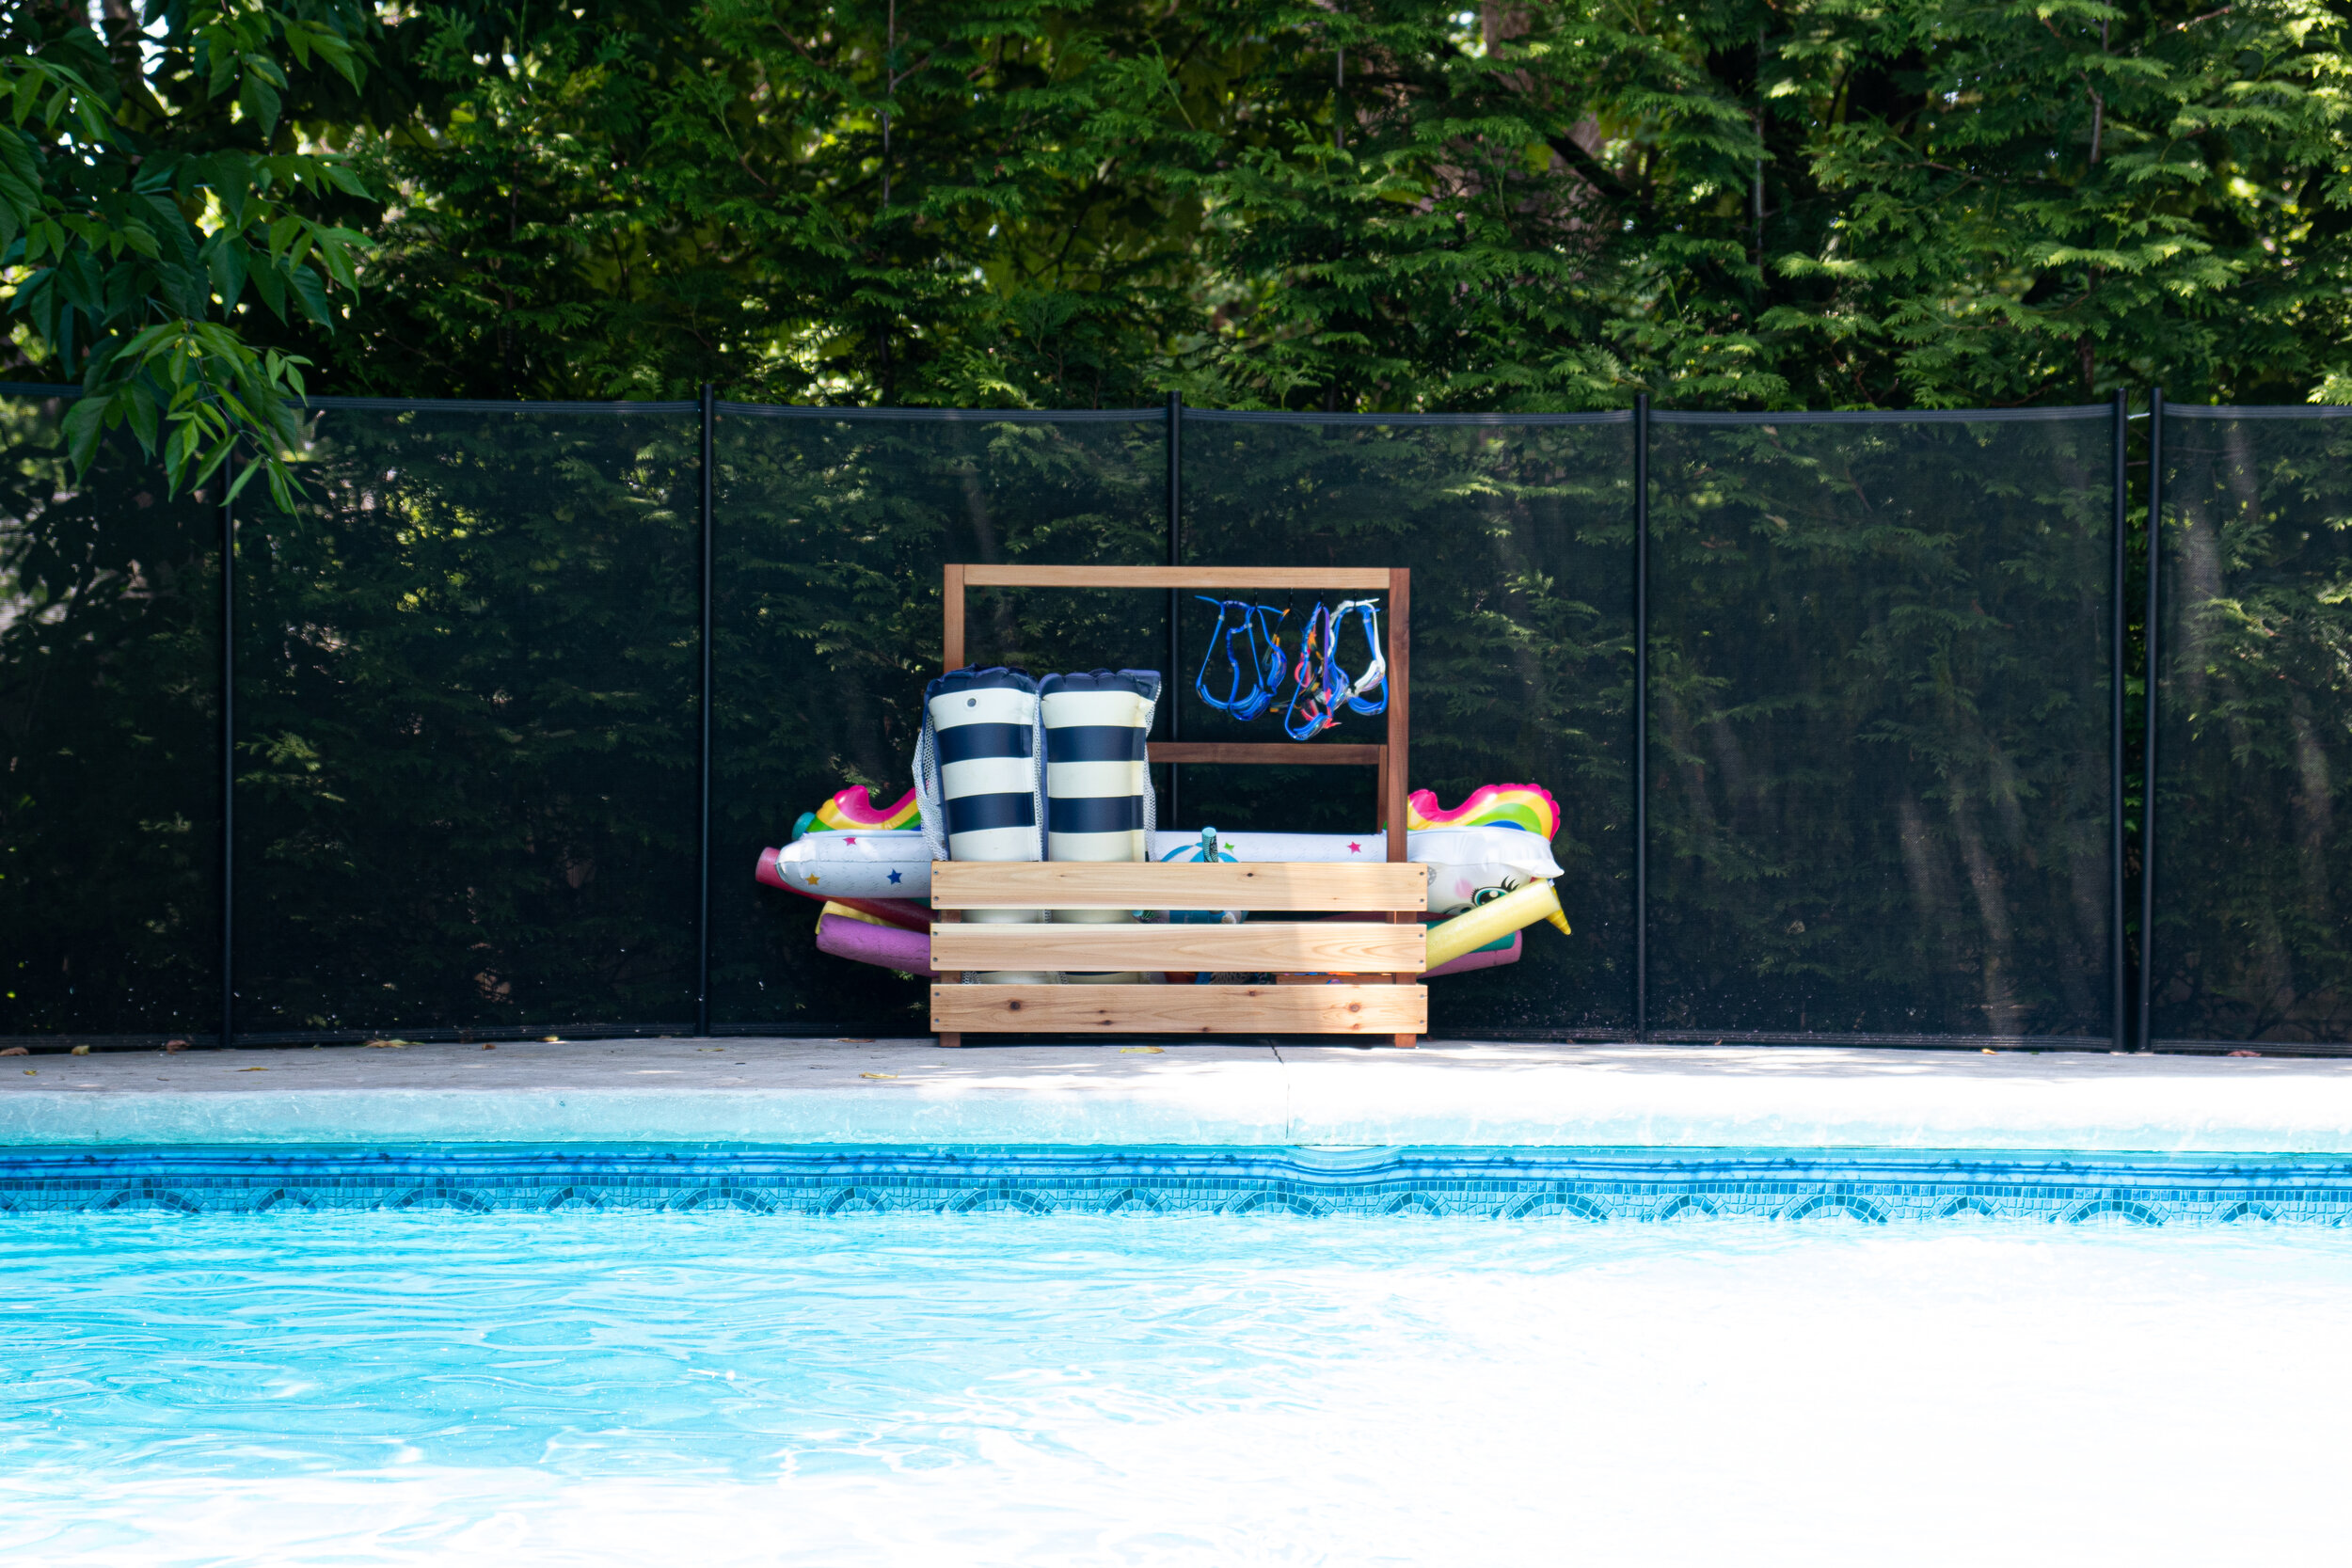
I am loving this organization so much!
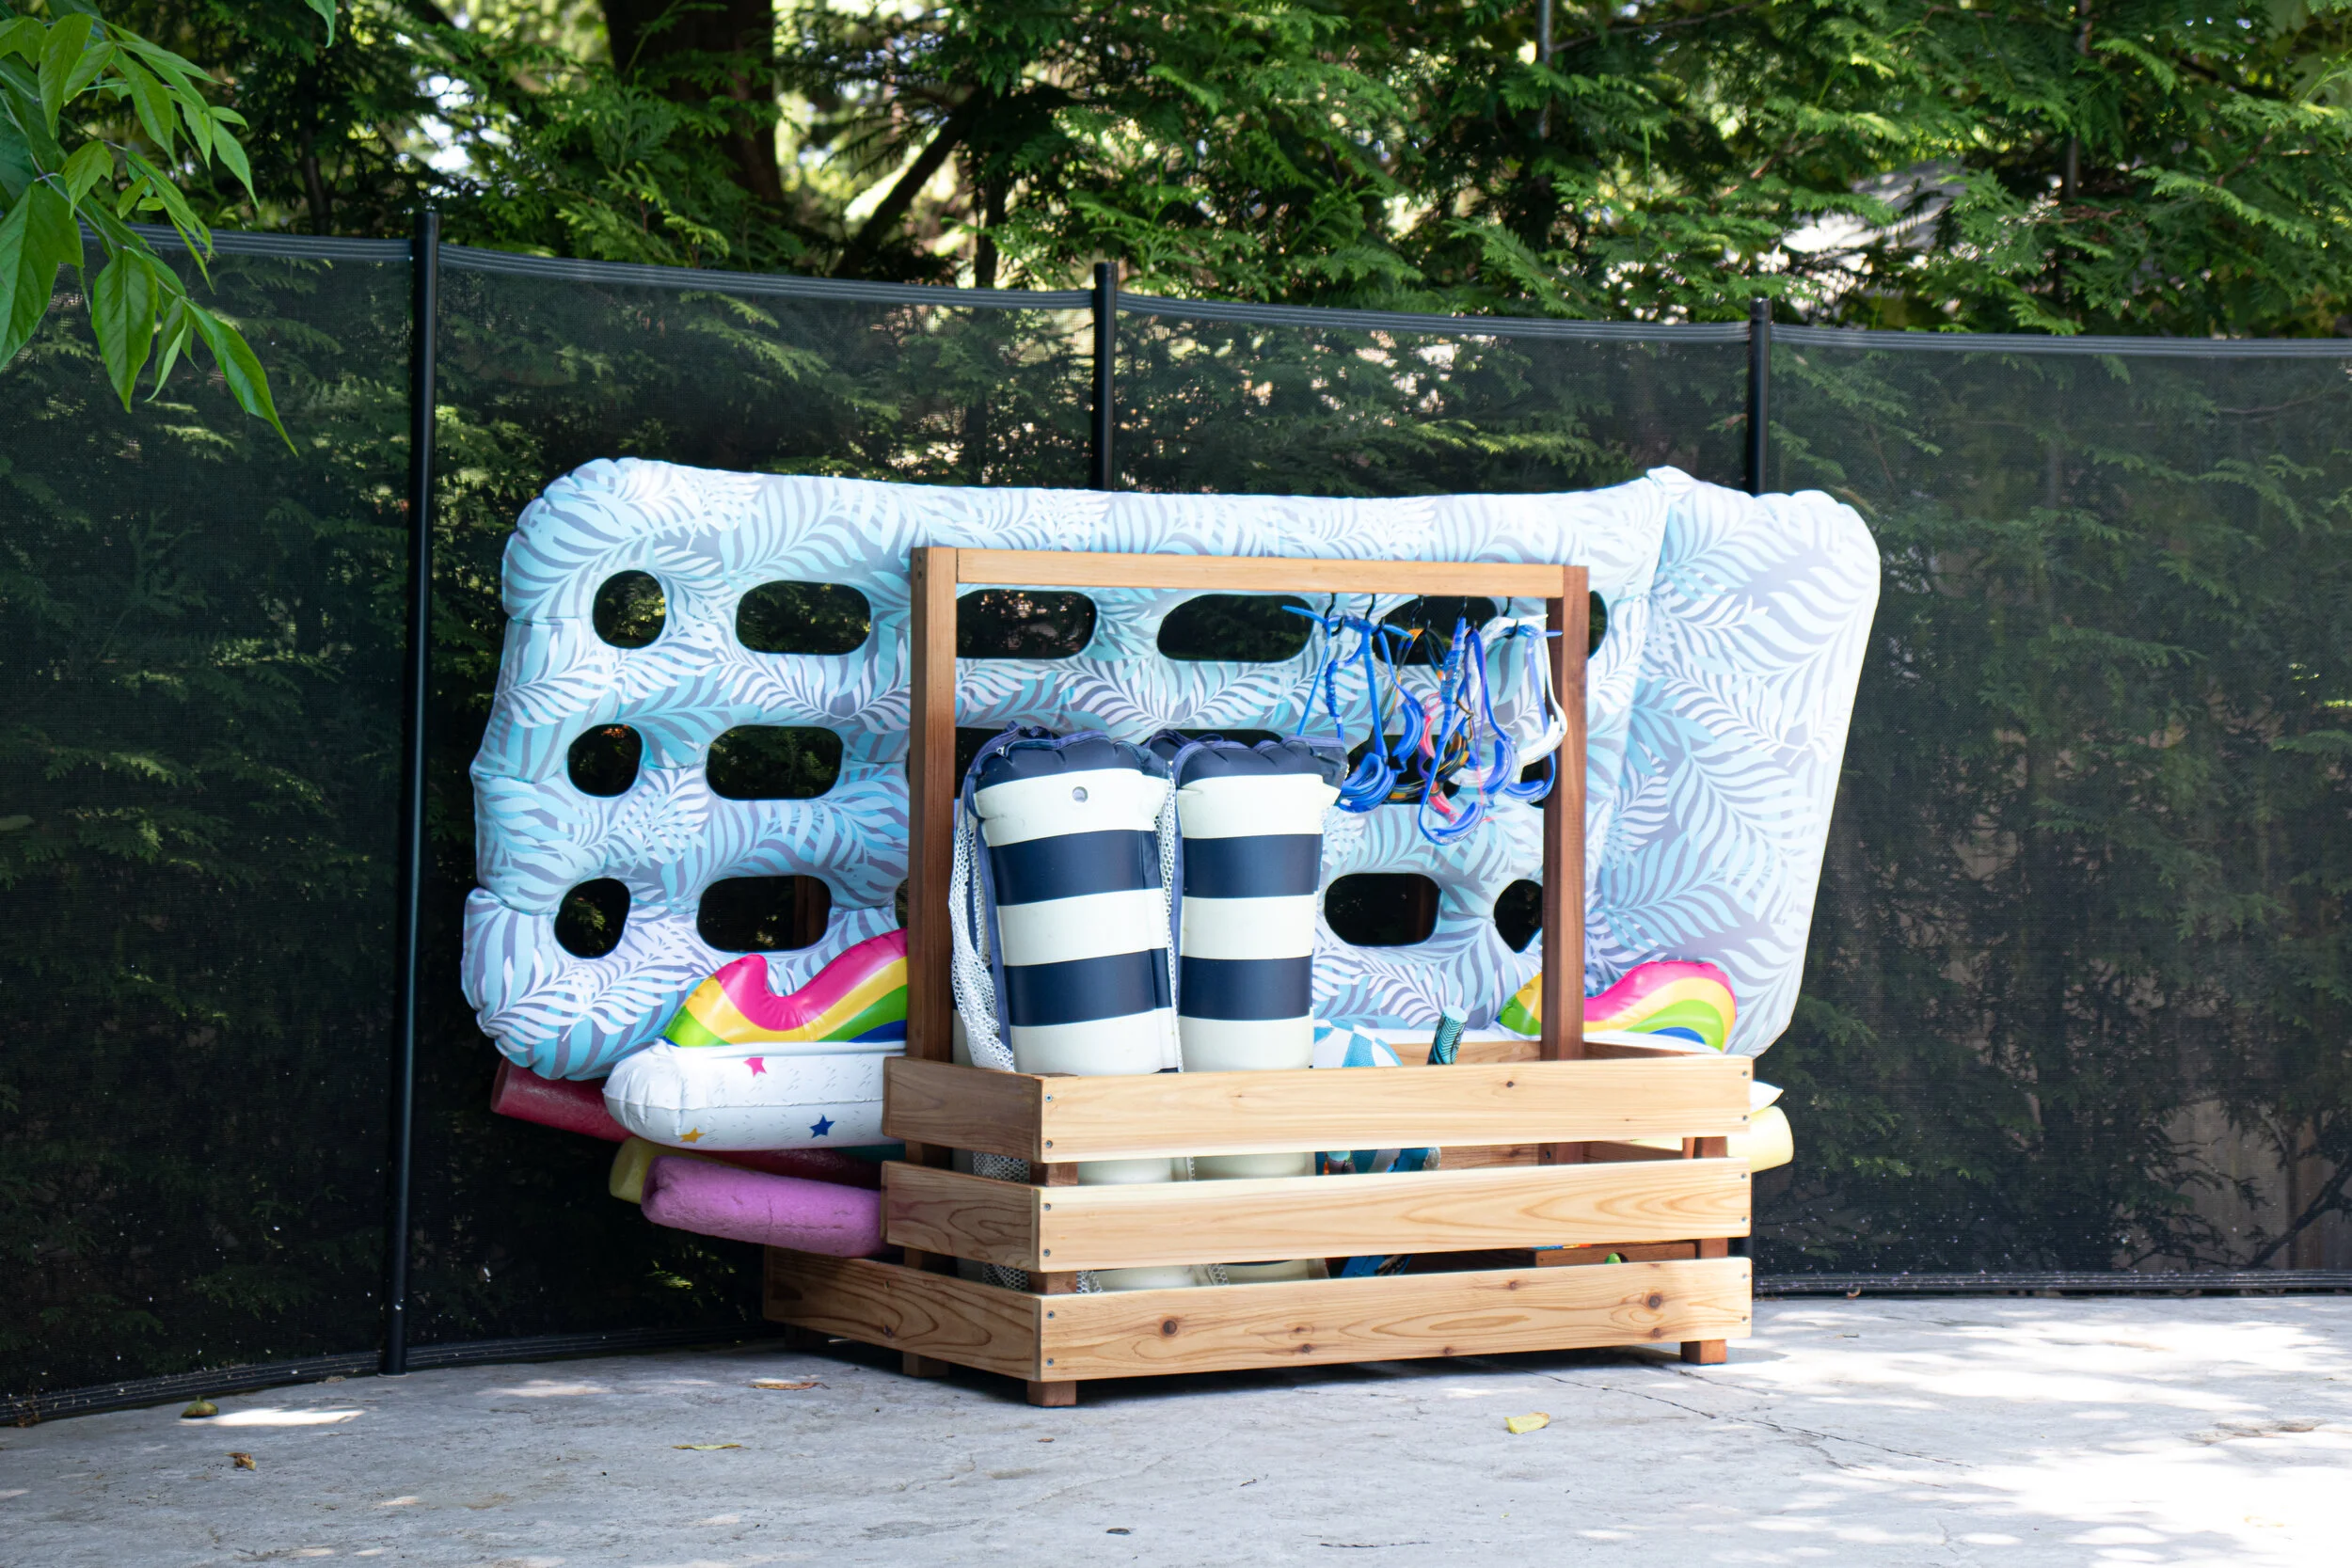
It’s a small little bin, but it really holds a lot of stuff! There is definitely room for more!
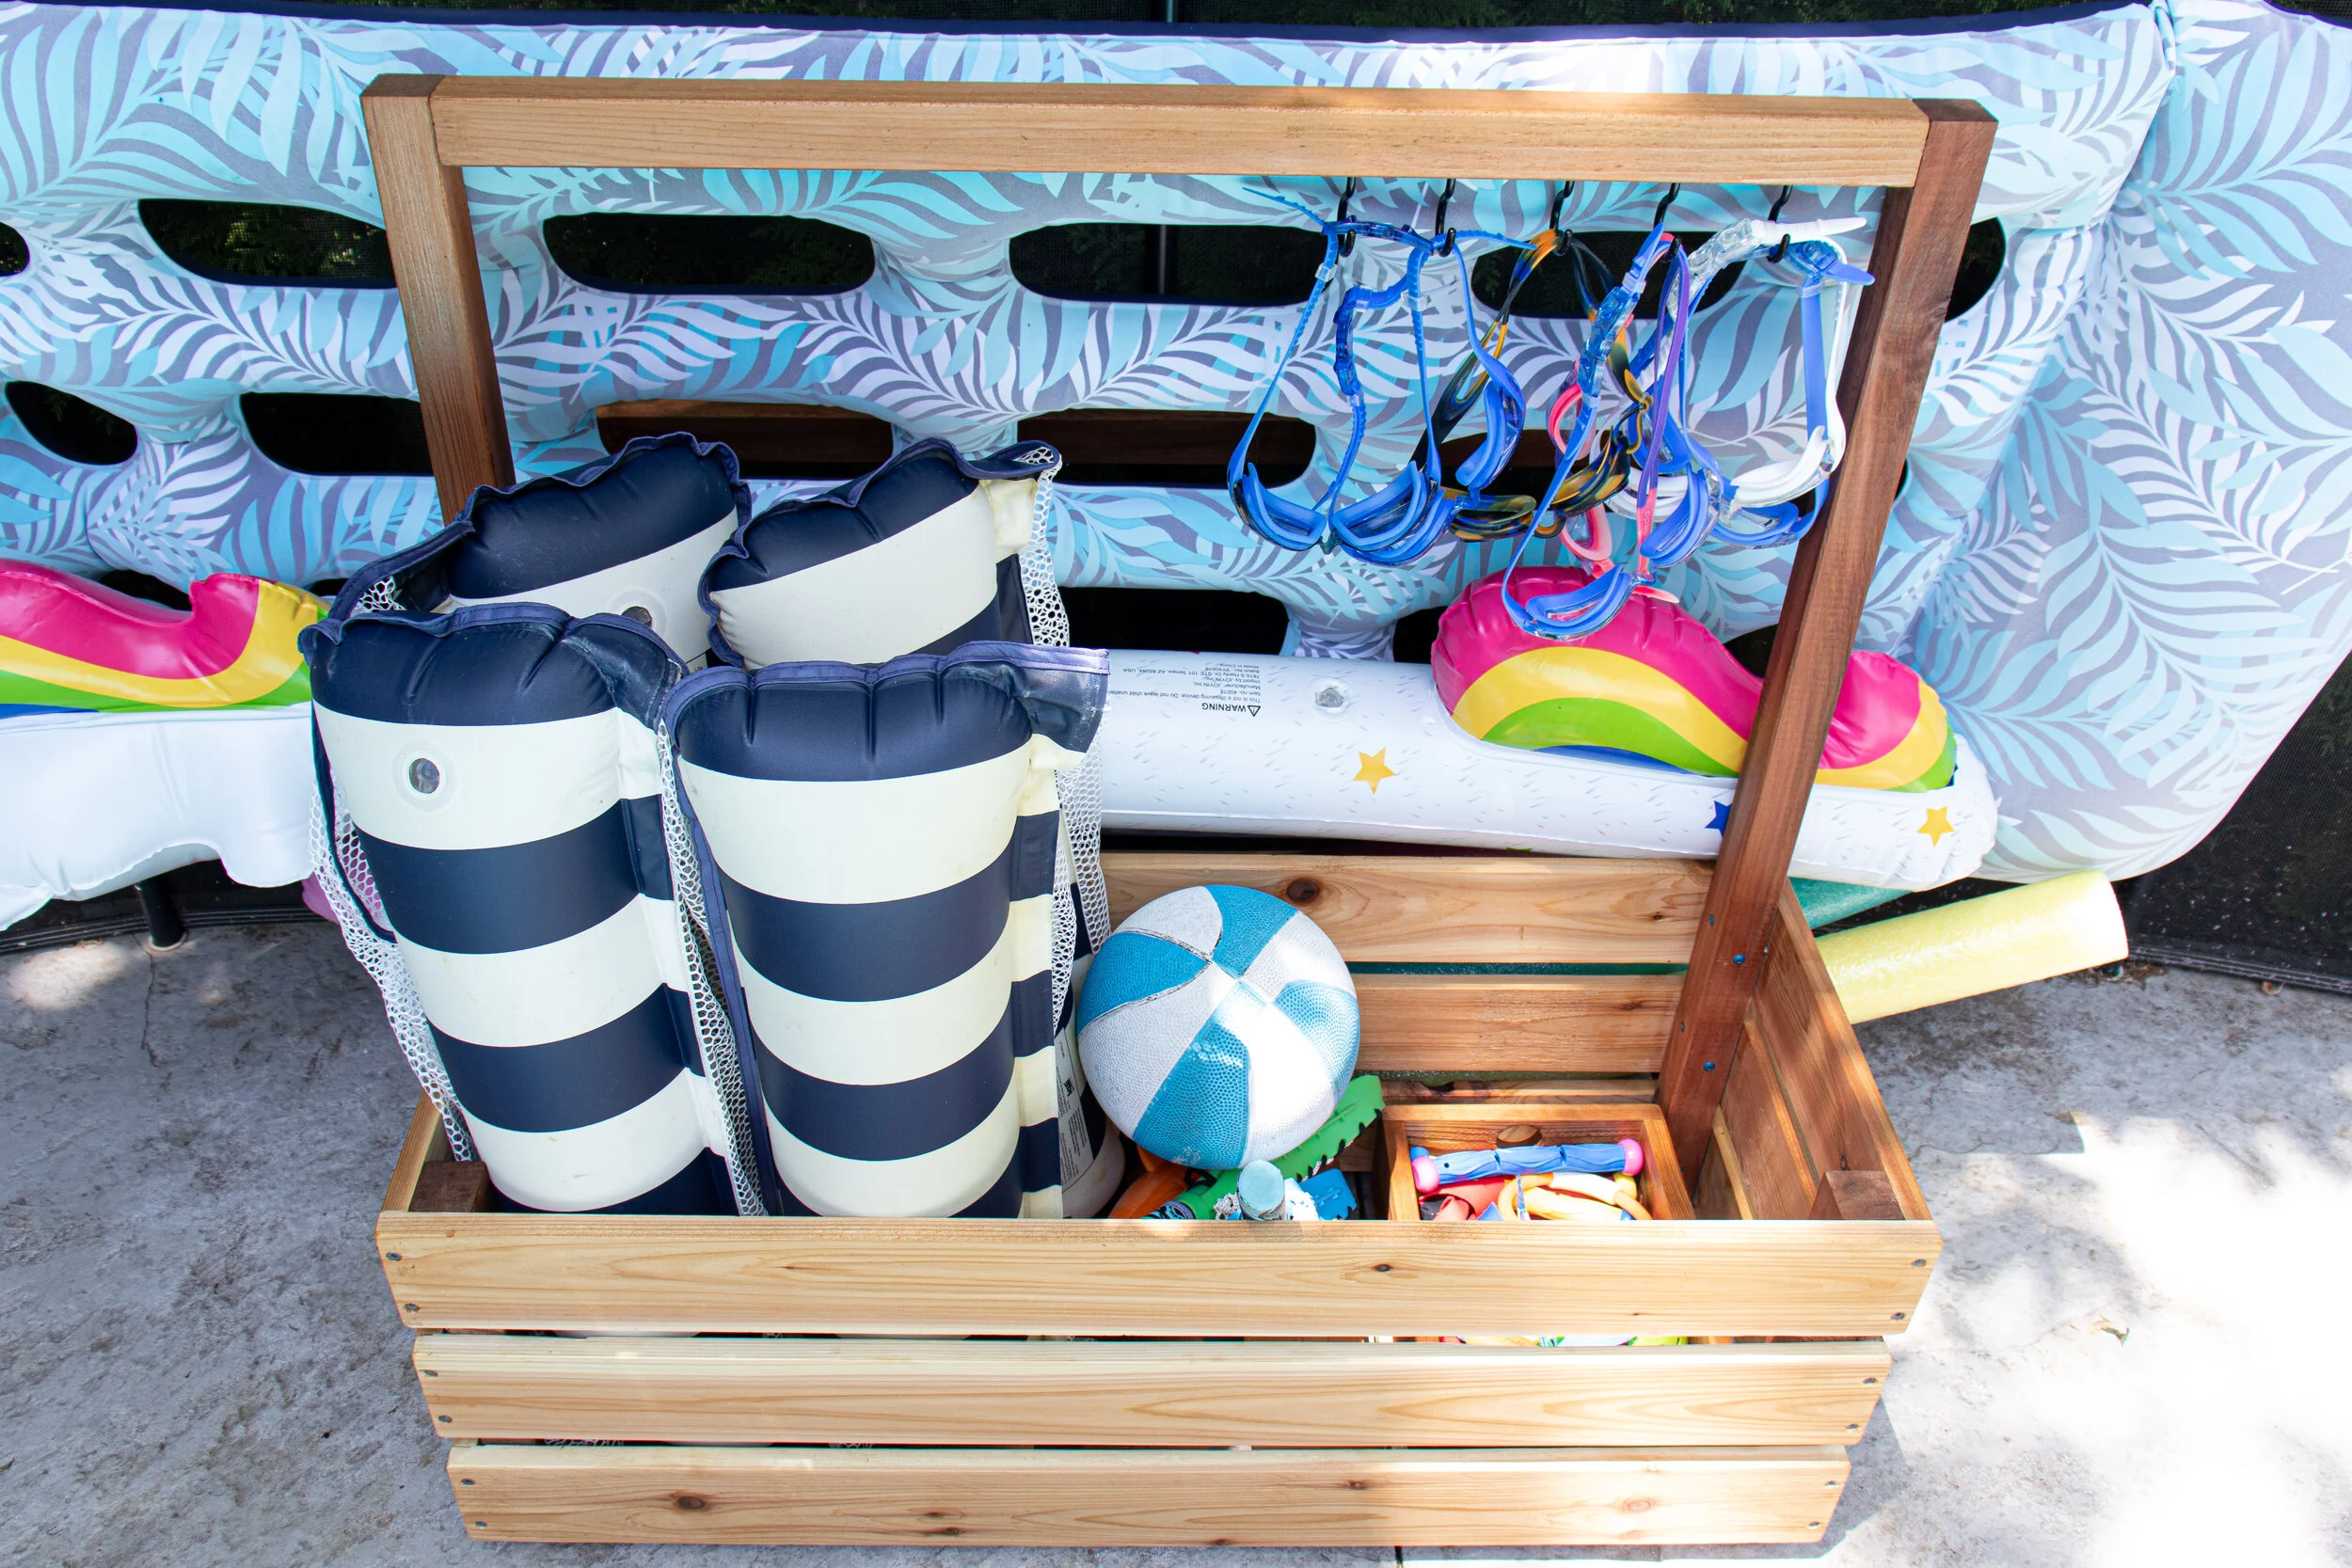
We have a lot of these small diving toys, so I made a simple little box from the scraps to hold them all.
It’s great that the kids can take this basket out and bring it closer to the pool if they want, then they can store it back away in the larger bin. Awesome.

So far my kids have been cleaning up after themselves… let’s see how long that lasts! Ha!
I acknowledge that The Home Depot is partnering with me to participate in the ProSpective 2019 Campaign. As a part of the Program, I am receiving compensation in the form of products and services, for the purpose of promoting The Home Depot. All expressed opinions and experiences are my own words. My post complies with the Worth of Mouth Marketing Association (WOMMA) Ethics code and applicable Federal Trade Commission guidelines.