
No Weld STEEL & Oak Bookshelf Storage Bench

I have been putting this project off for a couple of years…. A Toy Storage/Bookshelf bench for my kid’s playroom. I am so thrilled I finally got around to building it!
Lots of fun experiments, like the veneer process and the NO-WELD steel dividers!
Check out the full build video down below to see how I put it all together!
*Links below are affiliate links, I get a small commission if you click on them at no extra cost to you ;)
First off, there are no plans for this build… this was built to fit my specific location, which just happened to be 10 feet long, so I had to connect the plywood pieces to make them longer.
I started by breaking down all the plywood with a track-saw.
(Using a self squaring attachment like the one from TSO is really handy here)

I decided to use White Oak veneer for the tops of these shelves. But you can’t just veneer one side of a board.
You need to add what’s called a “Balance Backer” to the opposite side so the boards won’t warp.
I cut this Balance Backer a little oversize than what I actually needed.

Then I applied contact cement to the plywood.

And applied it to the veneer as well.
You need to wait until the contact cement dries before attaching the two pieces together, this takes about 30 minutes or so.

Once dry, place strips of scraps between the plywood and the veneer so the two aren’t touching… once they touch they will be bonded forever…
Round dowels would work best here, but use what you got.
Take out the scrap pieces one by one and use a veneer scraper or a scrap of plywood to make sure to get all the air bubbles out and to ensure adhesion.

A flush trim bit quickly cleans up the excess.
My 6-IN-ONE Trim Router Base really came in handy here!

Cut the rest of the pieces that will thicken the look of the plywood and be the supports for the steel.
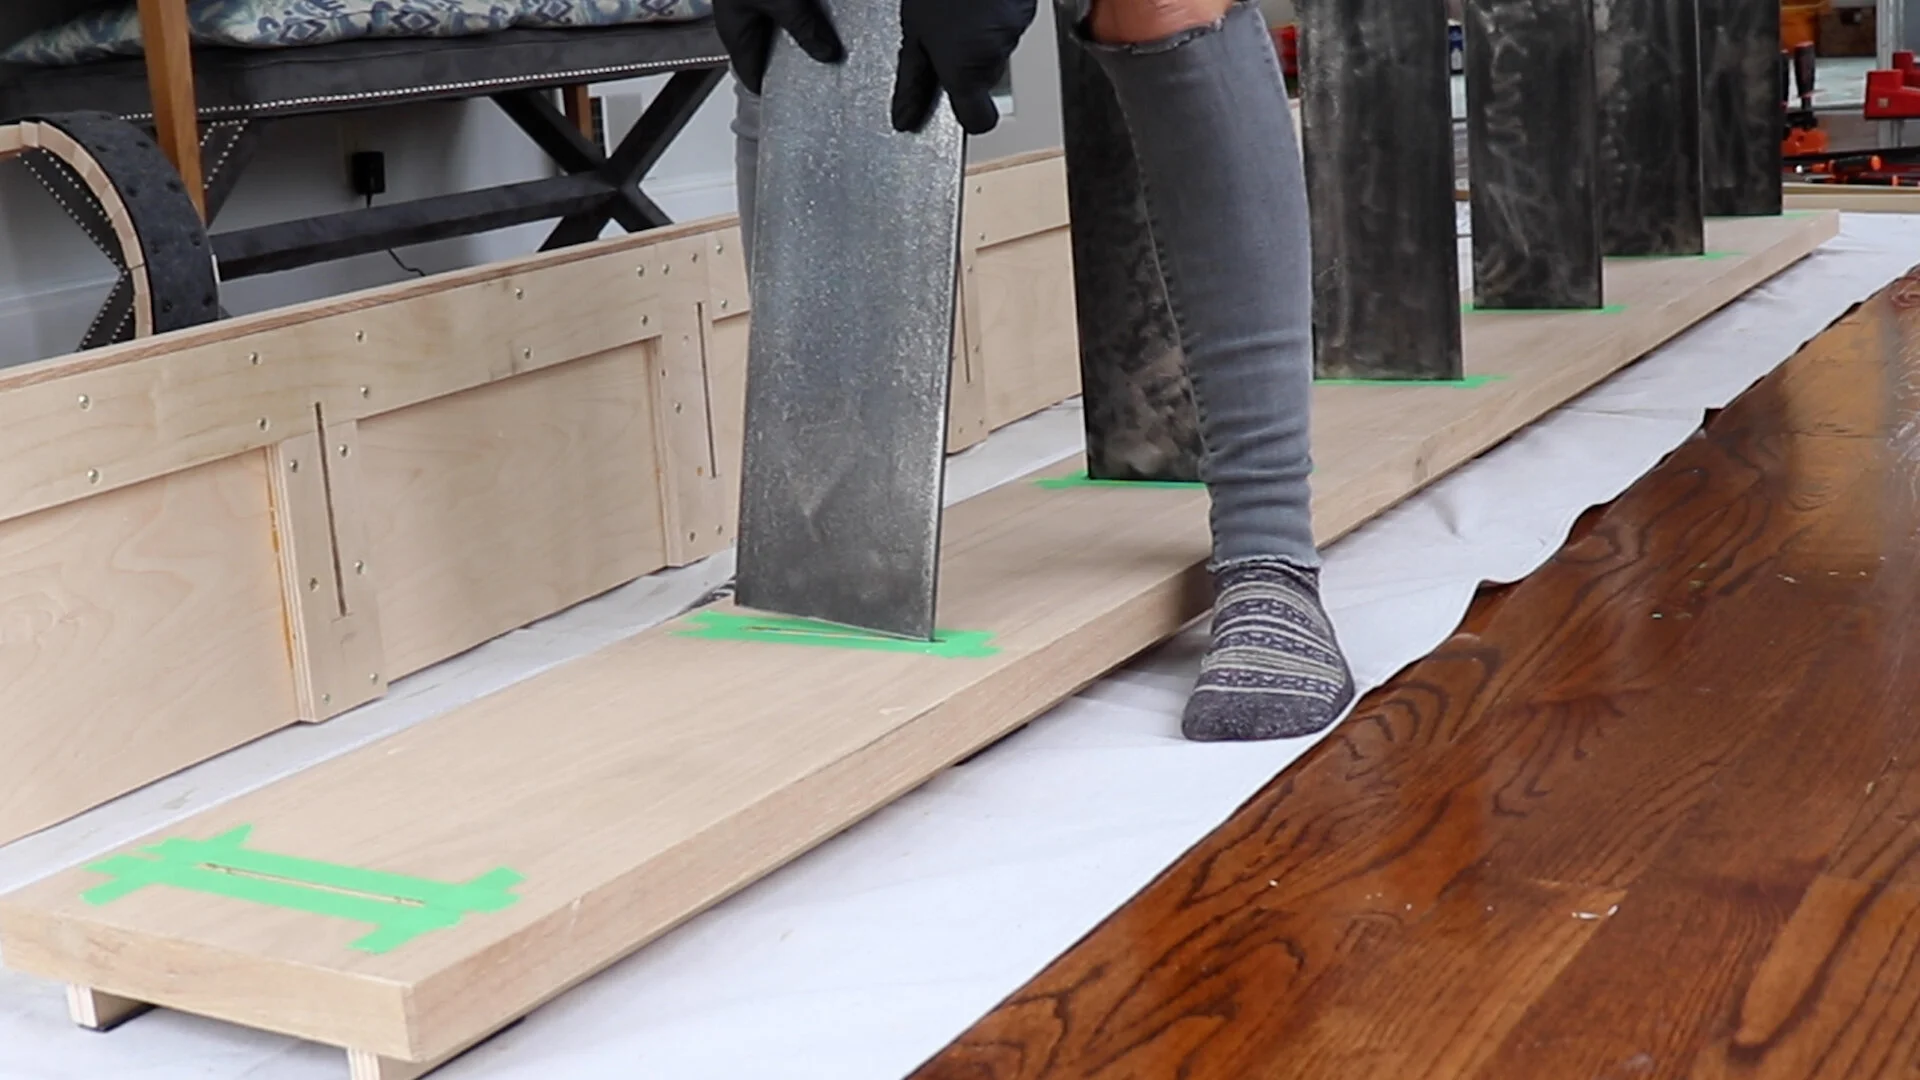
Mark out the locations where the steel will go.

Pre-drill and countersink holes in all those pieces making sure to avoid the areas where the steel will be inserted.

Use glue and screws to attach these pieces to the underside of the plywood.

I decided to make my own hardwood edge-banding here and I attached it using wood glue and tape as clamps.
You can use iron-on edge-banding as well, but I find this to be more durable.

Start with the side pieces first. That way you can add the front edge-banding and it will cover up the end grain of the side pieces, it just looks cleaner this way.

Use a flush trim saw to cut off any excess hanging over the sides.

And then flush up the top and bottom to the plywood.
You can use a flush-trim bit here, but I prefer to use the flush trim feature on my 6-IN-ONE Trim Router Jig.

Before applying the top veneer, make sure to sand all the jointed areas really well so they are nice and flush.
Then same as before, I applied the contact cement to both the plywood and the veneer.
Waited about a half hour for it to dry.
Then applied it making sure to use pressure from a scrap piece of plywood.

Last but not least, flush up all the excess.

This steel is 1/4” thick and 6” wide. I had it cut to length when I ordered it online.
The only work I needed to do on them was to clean them up, they were a bit rusty…
I decided to leave the mill scale on there because I actually like the black look on them.

The steel will attach to the plywood in dados.
To make sure the dados were aligned on both the top and bottom I routed them out at the same time using the same straight edge jig for my trim router.

This made it really accurate and precise!

The last step before assembly was to add some feet, or risers made of whatever scrap was leftover.
This won’t really be seen…

Time for assembly!
I decided to use epoxy to permanently attach the steel dividers to the plywood.

This Epoxy is called CRACKZILLA from MAS epoxies.
I love the whole mechanism for dispensing it. There is a tip that mixes the 2 parts of the epoxy for you and it is easily dispensed through a caulk gun. Awesome.

Then I placed all the steel pieces into the epoxy filled dados!
And repeated the same process for the top of the shelf.

This was really a two person job… but I got it done…
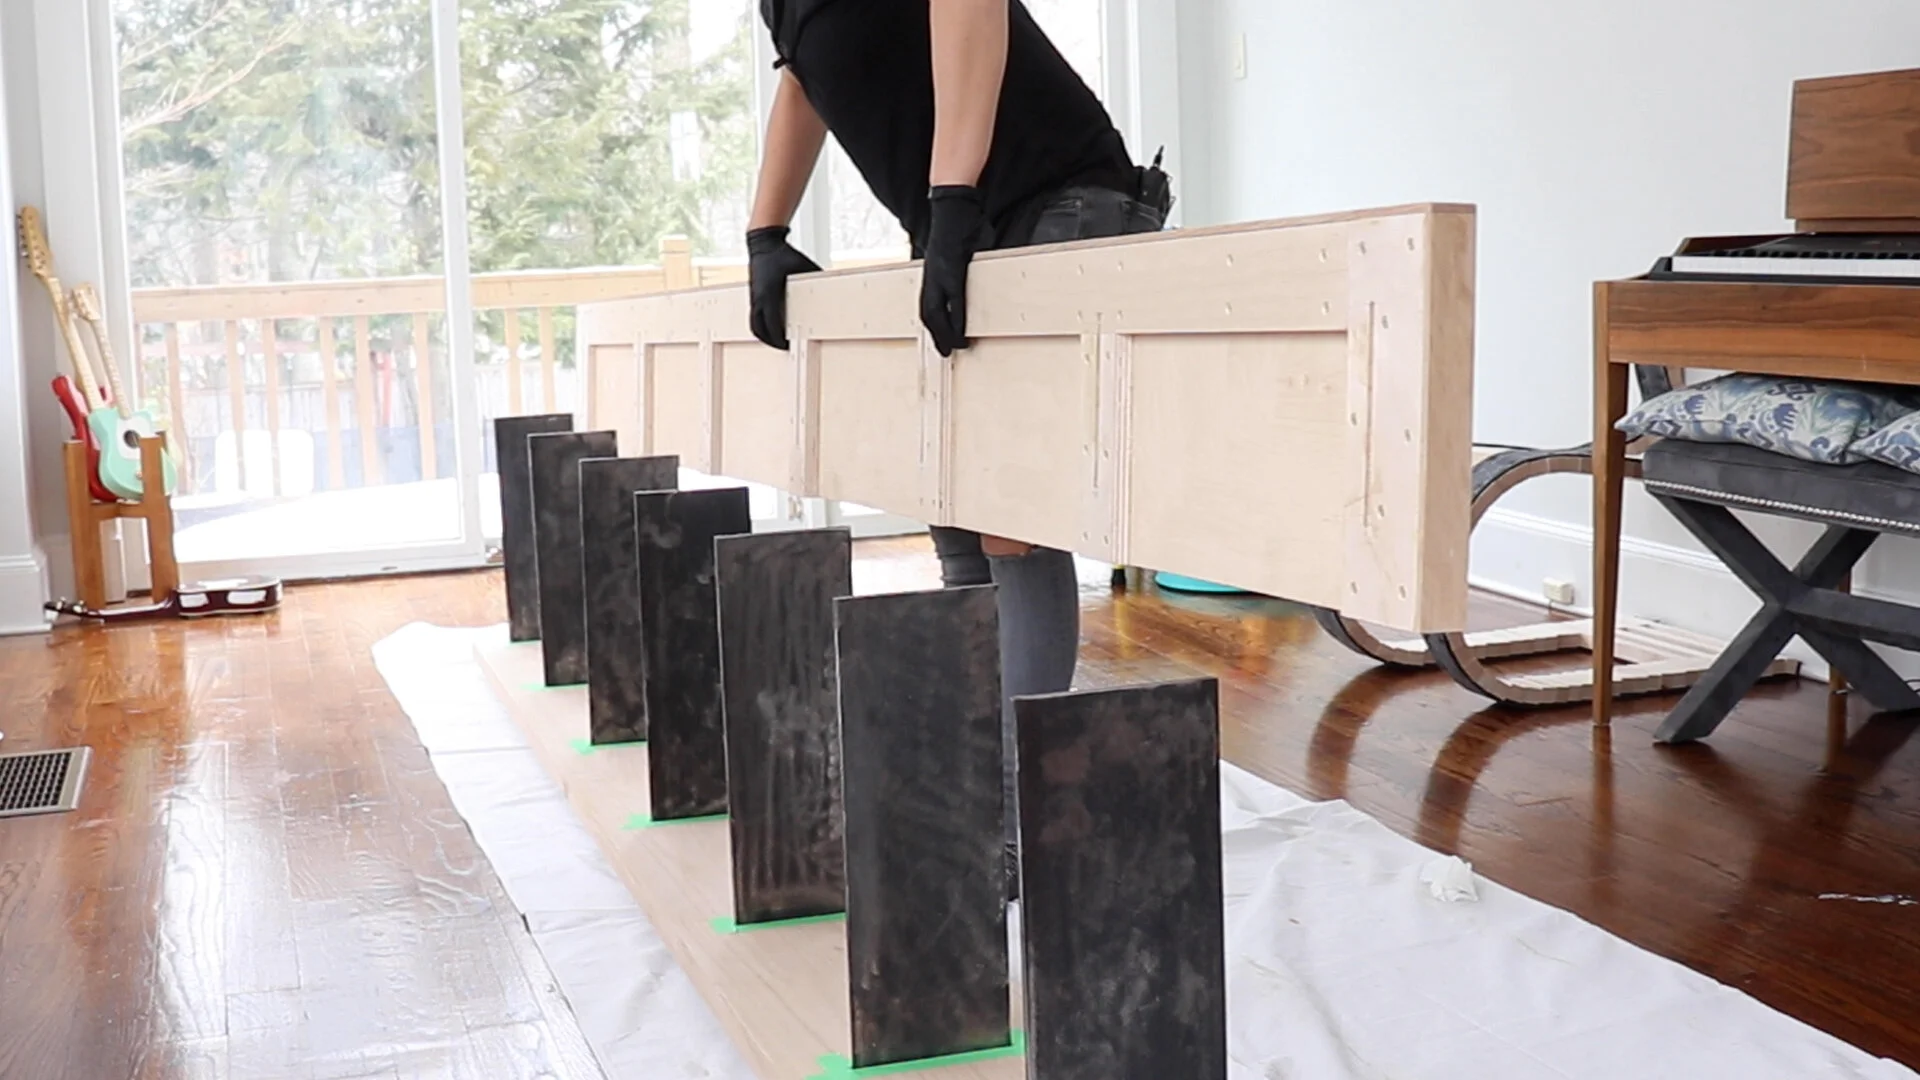
I used a caul across 2 clamps to make sure the steel was really seated will into the dados.

Time for the finish!
I used Walrus Oil Furniture finish. This stuff is awesome.
It is all-natural, easy to apply, looks great, and smells great too.

Simply wipe all over the wood, let it soak into the wood fibers for 24 hours.
Come back the next day and rub off all the excess.
I found that it is best to do this step twice. So pour on some more oil, wait 24 hours and rub off the excess.
Since it is all-natural and doesn’t have any added metallic driers, it might take a few days or up to a week to dry. But I am ok with this trade-off! This is sitting in my kid’s playroom and I would rather wait for it to dry than have my kids inhale lacquer fumes…
Even though it might feel dry to the touch after a few days it might not be fully cured. So just avoid pouring liquids on it for a couple of weeks until it fully hardens and cures.
If you want it to look and feel even better Walrus Oil also makes a Furniture wax that is really awesome, just wait a few days after applying the oil to put it on.

And it’s done!
I am SO thrilled with how this tuned out! This is the start of reorganizing my whole playroom, I can’t wait to get going on the rest of it!

I just love how light and airy the steel makes this whole thing look.
It almost looks like it’s floating. Love it.

I can’t get over how easy it was to incorporate steel into my project without knowing how to weld!
It is definitely something I want to learn though! For now, I am just so happy with this.

