
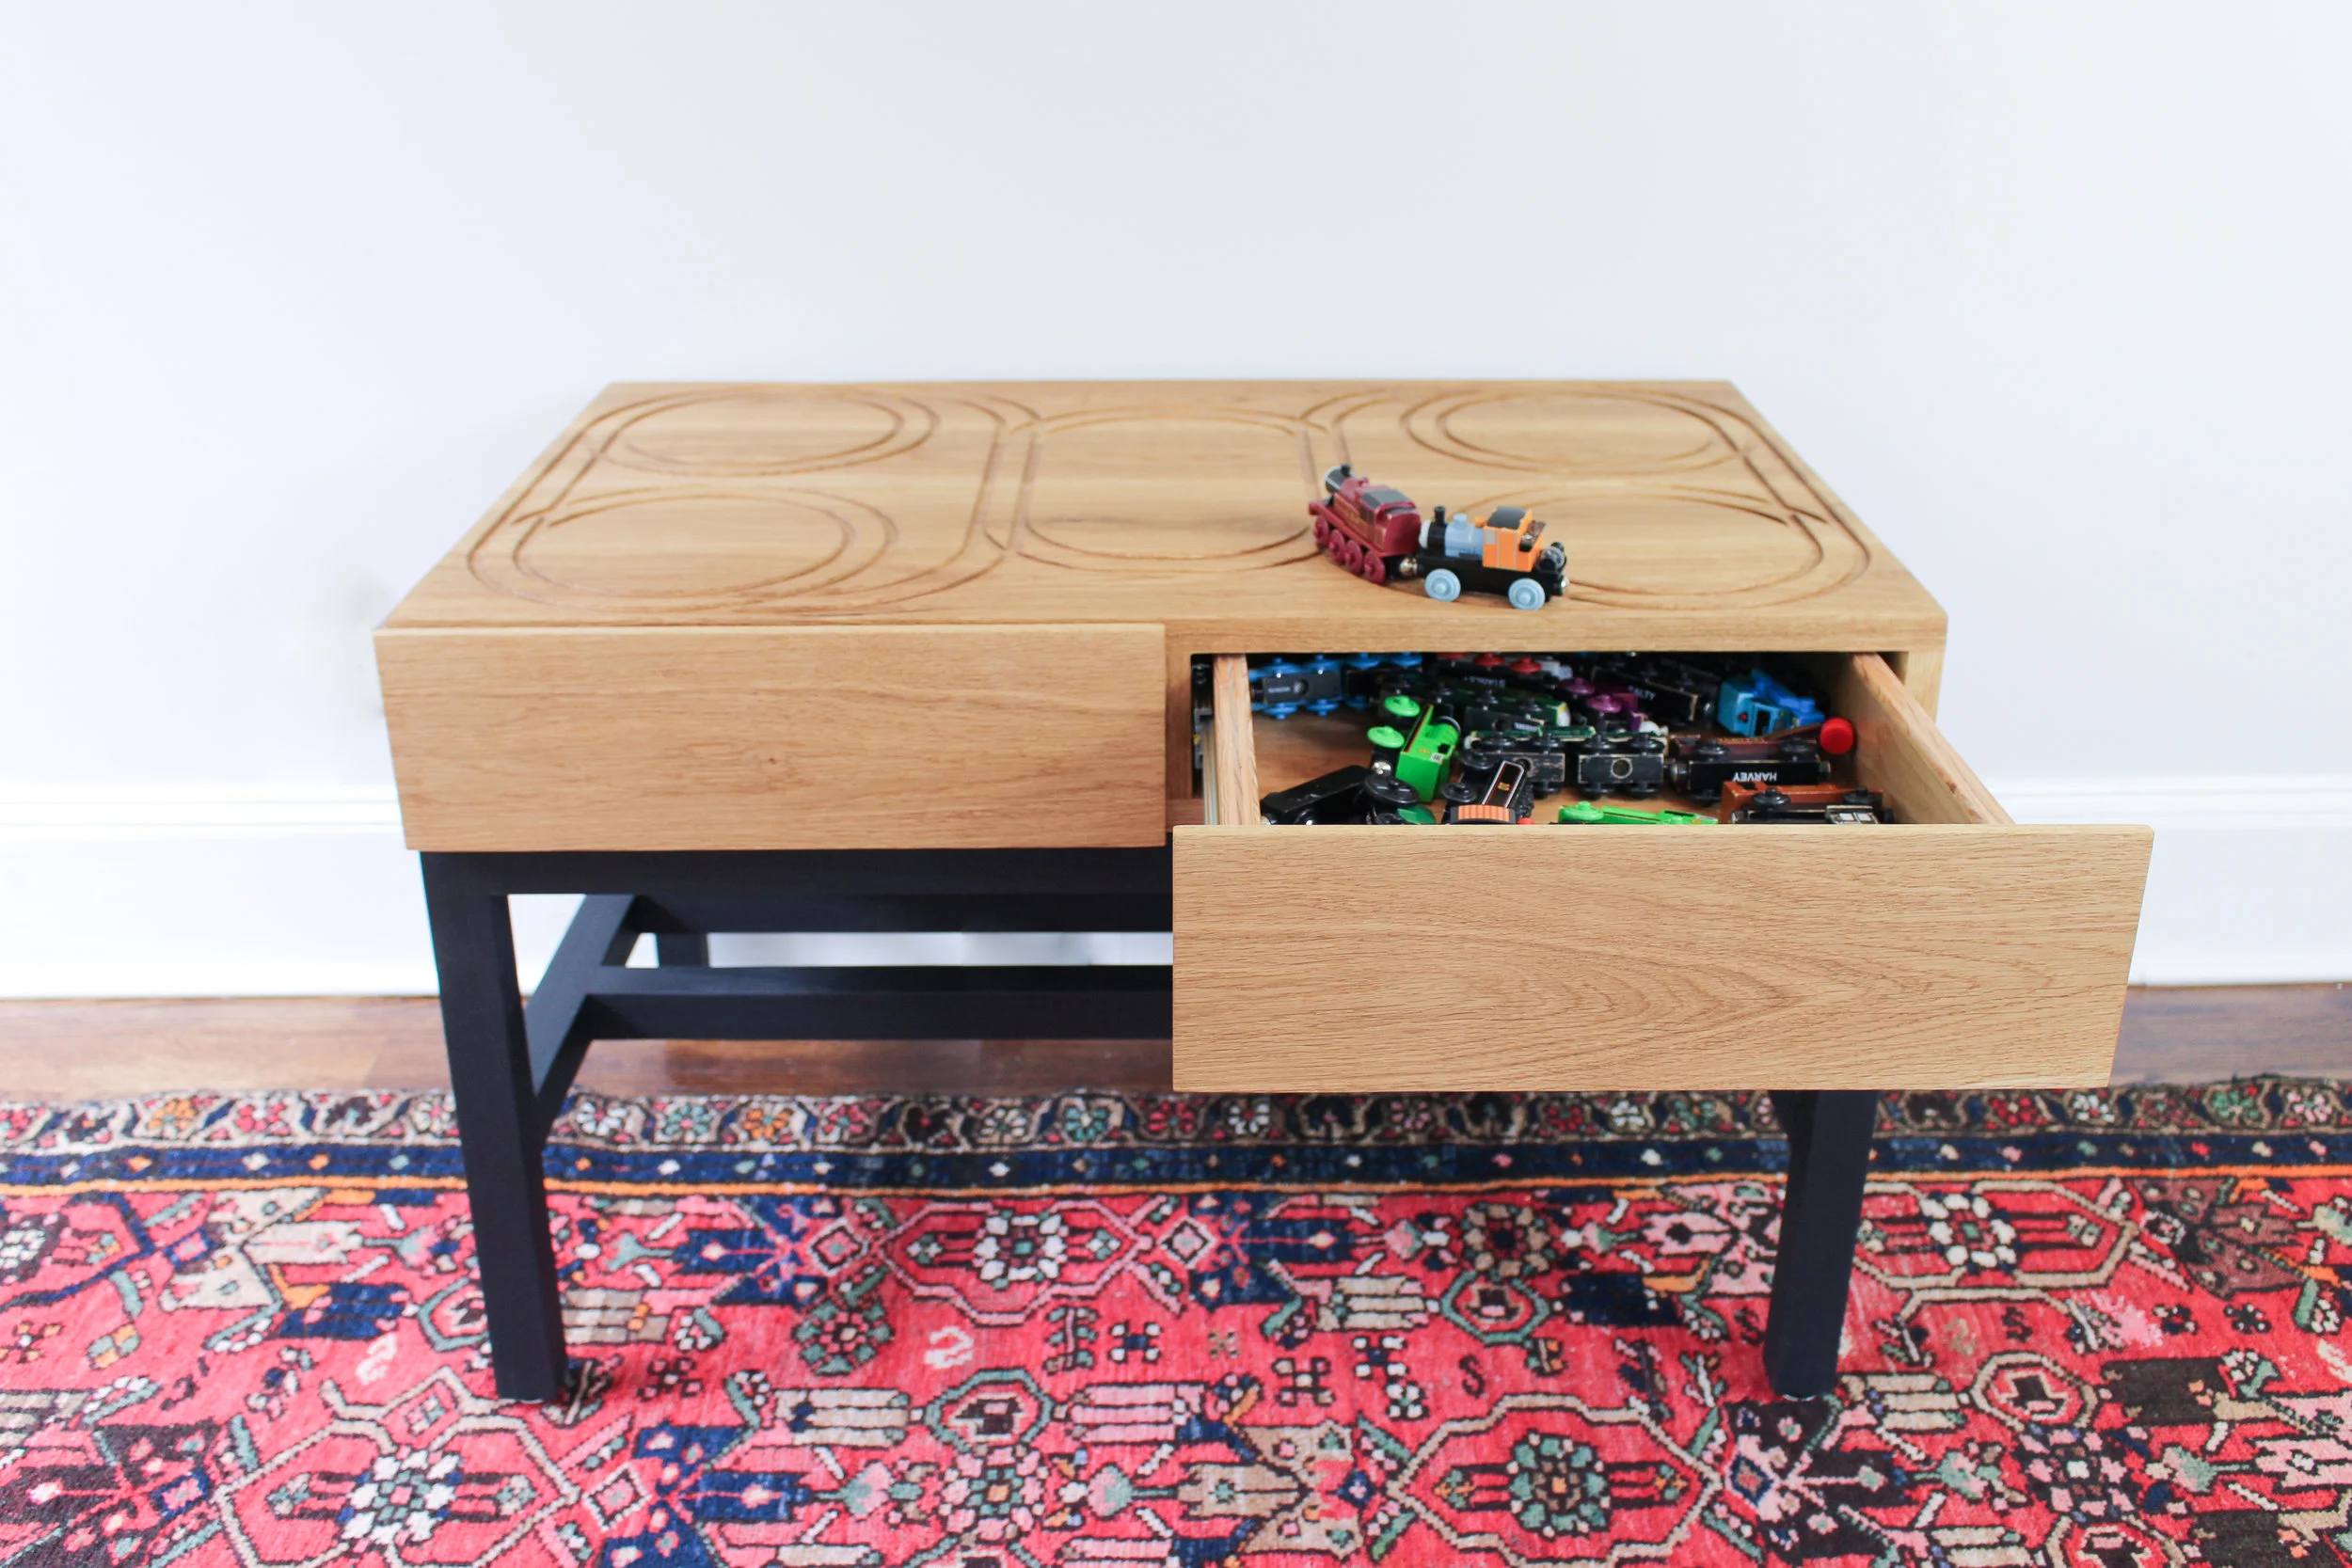
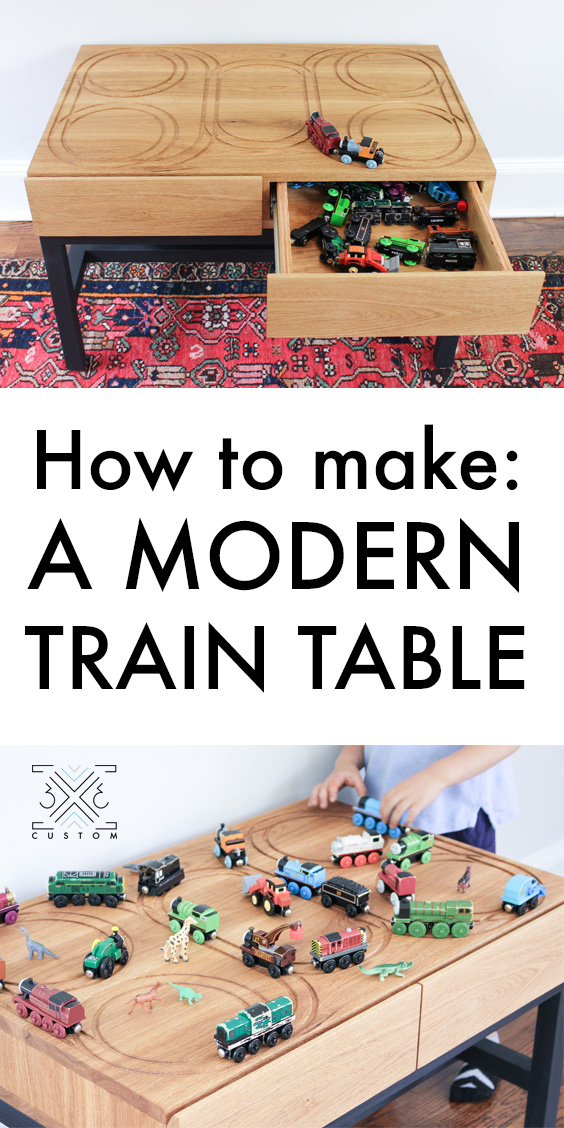
Modern Train Table

My kids playroom is filled with big ugly plastic toys and I'm sick of it, I'm taking the playroom back! This train table is the first project in a new endeavor to make a playroom that I actually want to hang out in.
A big thank you to MLCS Woodworking who sponsored this build. MLCS is a great source for routers, router bits and other woodworking accessories. I particularly loved using their Fast Joint system. It's a jig that's used on the router table to make really quick unique joints! Check out their website and the full build video below!
Links below are affiliate links, clicking on them helps me keep this site going :)
Also down below are free plans, printable template for the tracks and the SVG file if you have a CNC.
Enjoy!
Tools From MLCS Woodworking
Other Tools I Used
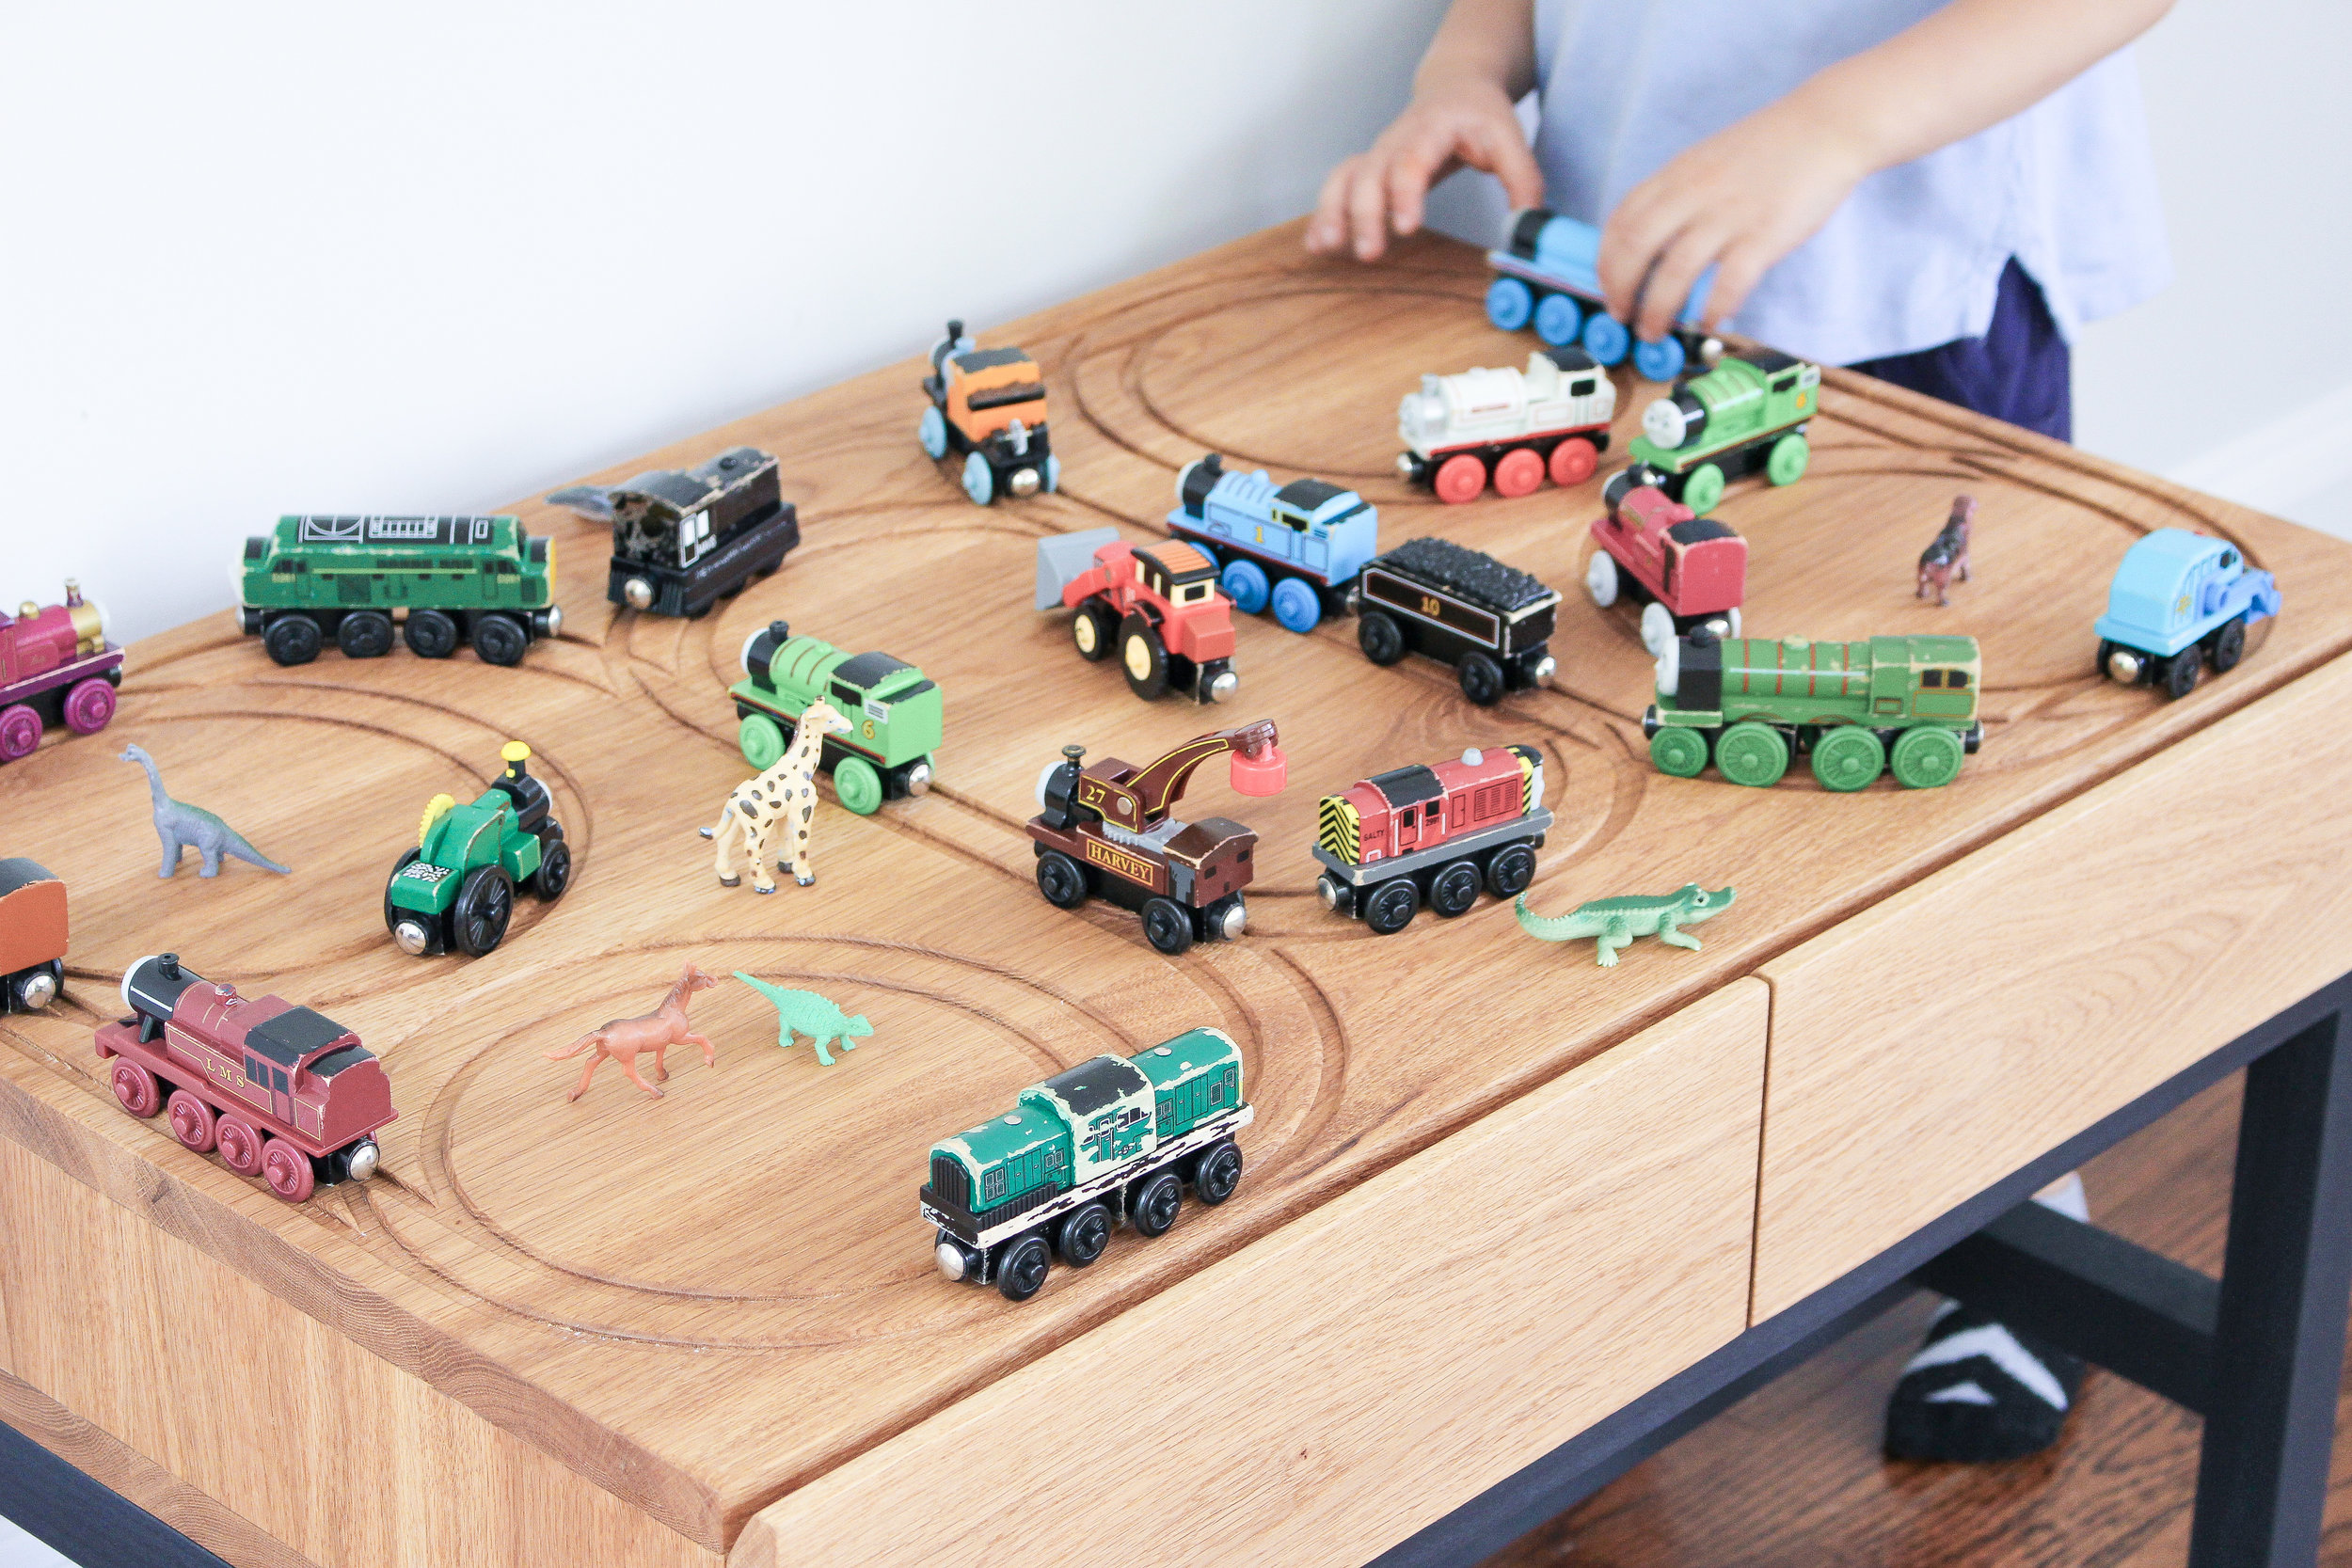
Final Table dimensions are 33-1/2" wide by 22" long by 20" High.
It's a fairly small table, it would be perfect for small spaces. I made it 20" high because my kids happen to be on the tall side and I wont be using it as a coffee table. But standard play table or coffee table height is 16"-18". Just something to think about.
I also milled all my own lumber for this. Not a necessary step. The plans I drew up are based off dimensional lumber you can buy at Home Depot. I used White Oak for the top and Poplar for the base, but any other materials could be used!
Another thing to note is that I chose to use splines to join the main box. I did this because I like to make my life difficult and try new things... I think there are easier ways to join the box, dowels, screws, pocket holes just to name a few...
Printable Template for the tracks - Make sure to set all margins to "0" by selecting Custom Settings in Paper Size.
SVG File for tracks - I used a 1/4" bit and set it cut 1/8" deep
GCode for CNC - Toolpath Zero is set to the Center (I have a Shapeoko XXL)
Let's get started!
After milling up my lumber I glued up the boards that were going to create the main box. I used a dowel jig for the 2 top and bottom panels and it made the glue up go super smooth. The boards stayed pretty flat and level with minimal effort. Then I glued up another smaller panel that was going to be the sides of the box and middle divider.

After the panels dried I cut the smaller one into 3 pieces to create the sides and middle divider of the box. In total, I had 5 Pieces now. Top, Bottom, 2 sides, 1 divider.

I originally planned on freehand routing the tracks using a template that I created but I wasn't too confident in my freehand routing skills. I considered making a circle jig to make the process easier but I decided to use my CNC. I used a 1/4" bit and went to a max depth of 1/8".
If you are using the printable template make sure to adjust the margin settings to "0". This will ensure the tracks are the correct size.
When creating the SVG file for the template I was so focused on the diameter of the 4 smaller outer circles and whether or not the trains will go around them smoothly that I overlooked the middle oval. The turns on the oval were just a bit too tight for the train to pass smoothly so I took a stab at some freehand routing. It wasn't so bad! (I will fix this on the downloadable SVG file.)

Now, this was probably the most time consuming part of the whole project. Store bought tracks have a slight bevel on the edges so I tried to mimic that. It took me a while to figure out what would work.
In the end a rotary tool with a sanding attachment seemed to work out. The one in the picture below was actually too rough, it didn't make smooth lines. I'll put a link to the one that worked best for me. After creating the bevel with 60 grit discs, I then smoothed them out by hand with higher and higher paper up to 120. My shoulders were killing me after...

Then I trimmed up the top and bottom panels to their final size. (Look at how much sawdust the circular saw makes!)

I always love to experiment and challenge myself so I decided to join the box using splines. I made them from the cut offs that came off of the big panels. In retrospect, I wish I chose a different method of joinery....

To create the slots to house the splines I used a slot cutting bit from MLCS. I only did this for the 3 smaller pieces, we'll get to to the large panels in a bit...

I didn't want the slot to be visible so I made a plunge cut on the router table. To do this I made some marks on fence for where to start and stop the cut. I slowly plunged the wood into the bit so the front of the board was at the pencil line on the left, then stopped and pulled the board away when the back of the wood reached the pencil line on the right.

Now for the slots in the top and bottom panels. This is where it got a little difficult. Not really difficult, but time consuming in the set up.
Setting up the fence for the router had to be absolutely perfect. Not only did it have to be bang on square, It also had to be in the exact location on both panels so the splines would all snap into place. I was so careful about the alignment of the sides and the divider because thats what I was mounting the drawer slides too and I knew they had to be perfect for a smooth glide.
I double checked, triple checked, checked again, and a again, oh and one more time to make sure I was plunging the router in the right location.

Once I was sure the placement of the fence was correct I plunged away with the MLCS trim router and plunge base and that part was a breeze. I just took multiple passes to get to my desired depth.

Remember those splines I cut earlier? I rounded off the corners to accommodate for the curve that was left from the slot cutting bit in the router table. (Easier than using a chisel to square off the slot.)
This was my first time making splines like this, here is my thought process with the grain direction... To account for wood movement, I had to make sure the grain in the splines was running in the same direction as the whole box, but I also had to think about which direction the grain would be strongest so the the sides wouldn't break.
The spline below will expand and contract at its width, just like the box will. It will also be very strong because the grain is running up and down, it will not break lenghwise. (The splines snapped off very easily widthwise.)

I glued the splines into the slots on the bottom panel of the box then glued the sides and dividers into place. I didn't glue up the top of the box yet because I needed to install the drawer slides and there wouldn't be enough room to fit my drill.
Clamping the middle divider was a bit challenging. I ended up using the top of the table as a guide to make sure it was straight and clamped a caul along the top and bottom so there was pressure in the middle of the panel.

While the glue was drying I started working on the drawers. I ripped all the drawer pieces to 3" wide. Then cut them to length.
The sides were cut to 21" and the fronts were cut to 14-5/8. I got the measurements for the front by measuring the inside of the box opening and subtracting that by 1" to accommodate for the drawer slides.
I didn't cut the drawer backs yet. We'll get to those after the drawer assembly.

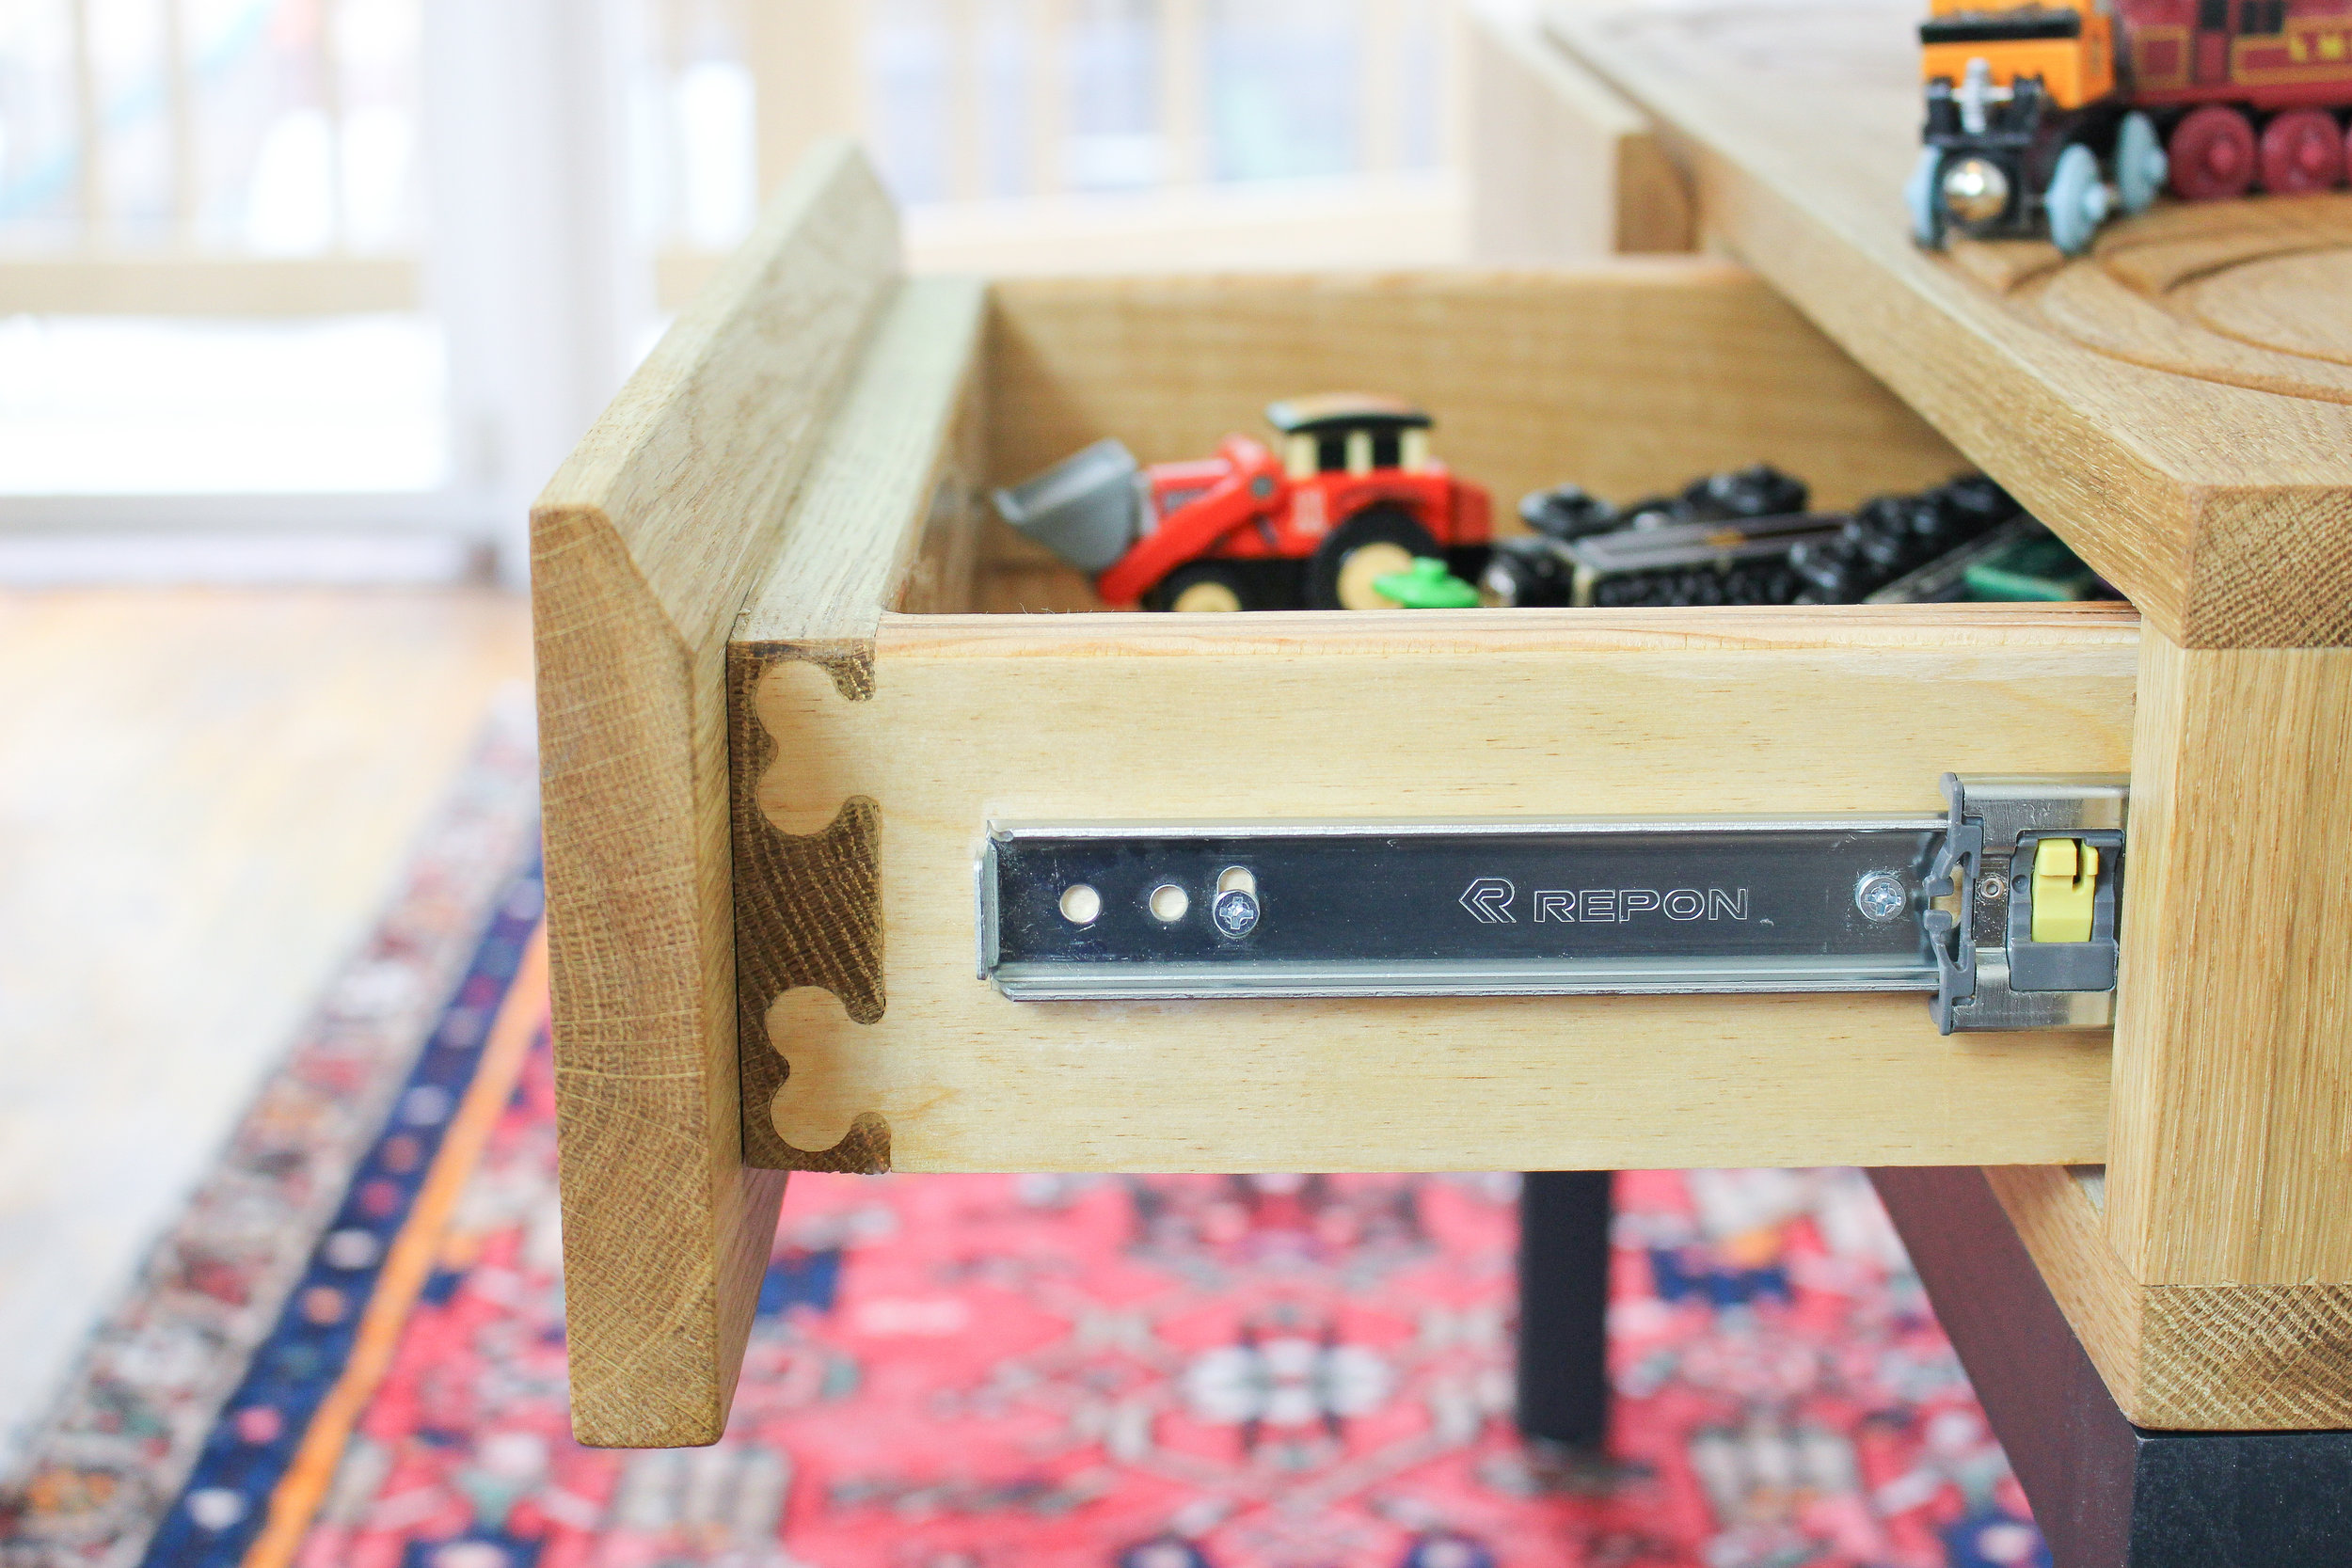
To join the front of the box I used the Fast Joint System from MLCS. This system is so cool. Everything you need to make the joint comes with the system including the router bit, guide bushing and clamps. There are a lot of templates to choose from but I chose this heart joint to keep it playful for my kids.
You have to set the height of the router bit to just above the height of the pieces you are using as the sides. And that's the last time you need to adjust the height of the bit.
The kit also comes with a set up block that helps you position the material in the right place.
Then you just have to slowly hog away at the material until the guide bushing is running along the template! The only thing to note is that you must clear all the sawdust out of the way so there is nothing blocking the guide bushing from the template.
It was super easy to use but I made two mistakes. I cut grooves in all the bottoms of the drawer pieces to house the drawer bottom, but I cut them too low. They were peeking through the joint, so I used filler to fill the little gap. When I sanded the filler down it sanded away at some of the plywood.
So in the future I wont use plywood for these joints and I will be more aware of where to cut grooves for panels.

Moving on to the drawer front, you just have to use the other side of the jig to create the mating piece of the joint. The kit even comes with these spring clamps!

Since the back of the drawer wasn't going to be seen I just used a regular dado joint. I made these by taking multiple passes at the table saw and cleaning up the cut with my router plane.

Then I cut the drawer back to a width that was just above the groove I made on the sides for the drawer bottom. This way I can glue the whole drawer together then slide the bottom into place.

Time to assemble the drawers! The joint tapped right into place, it was so satisfying.

The best part about this type of joinery is that it is perfectly square! This made me so happy.

I cut the back pieces to length, then glued them into the dados and set the drawers in clamps to dry. Once dry I glued and tapped the drawer bottom in by sliding it through the back.

Then I tacked the drawer bottom into place with my brad nailer.

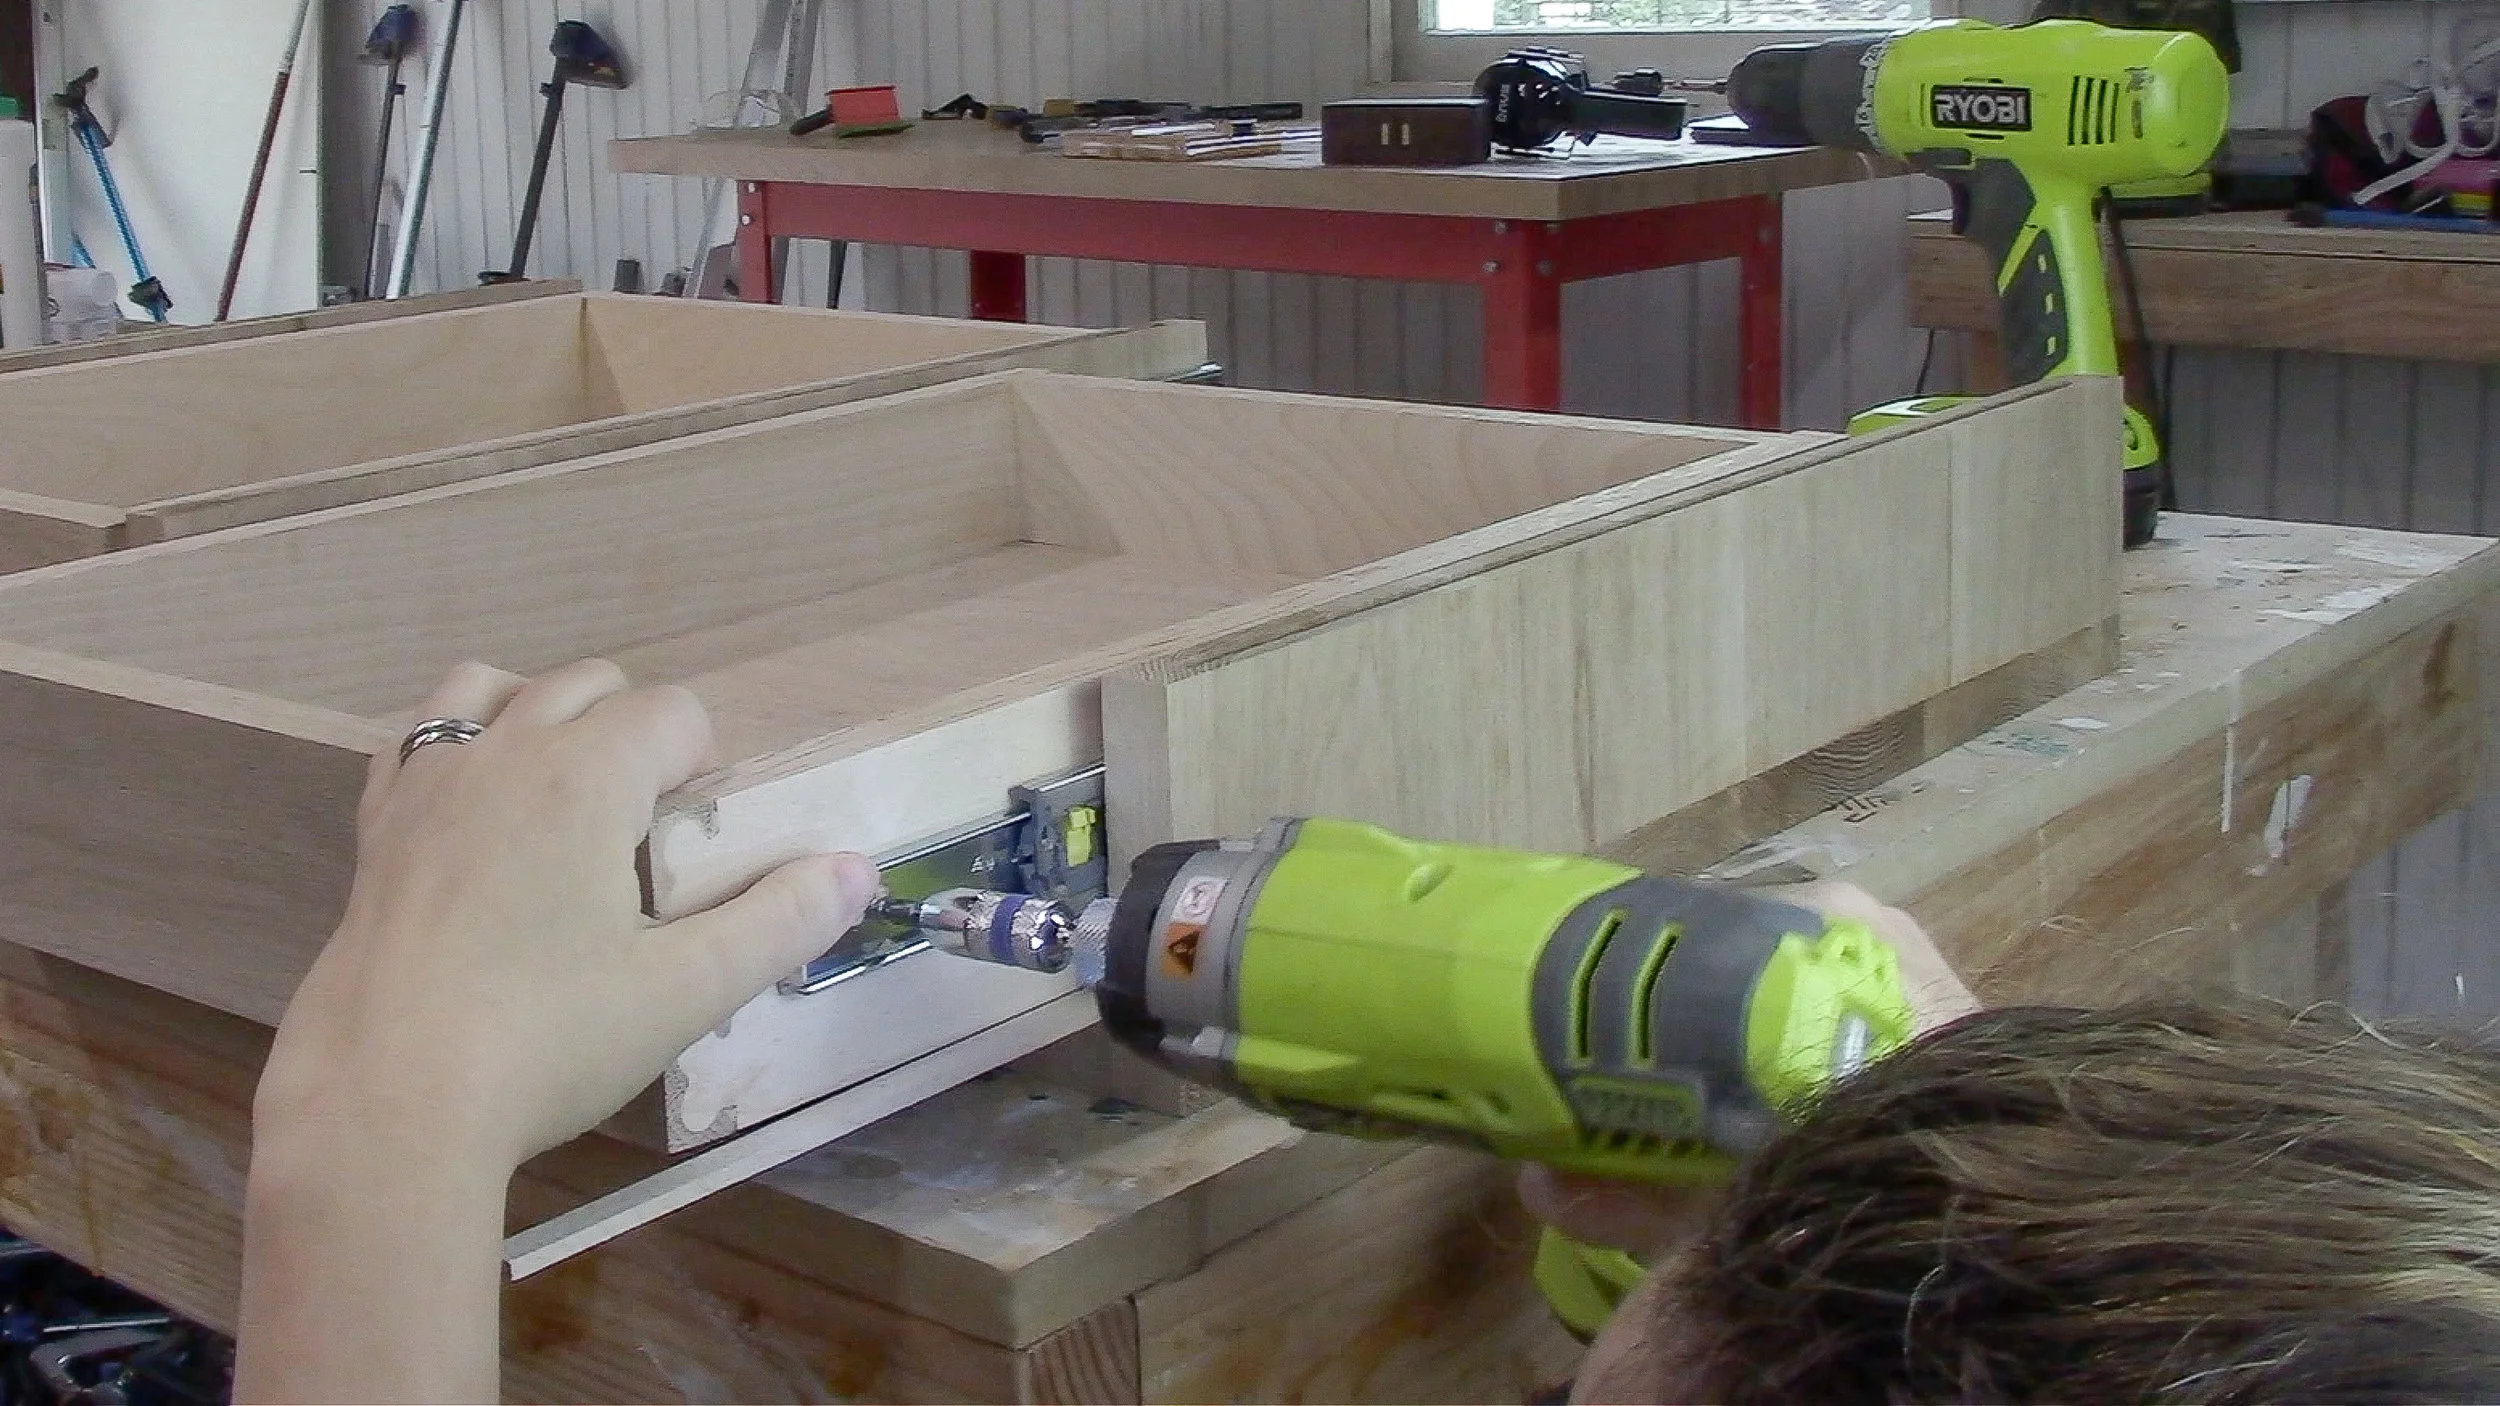
This was my first time installing drawer slides like this and it was surprisingly easy. I cut a spacer from a piece of scrap and screwed the track into the sides of the box.

Then I cut some more spacer strips and put them under the drawer so it was lifted up evenly. I pushed the drawer in so that it was completely flush with the front of the box, then used my combination square to to see where the front of the slides should end up on the front of the box.
I pulled the drawer out a bit and lined up the front of the slides with the depth I set on my combination square and screwed it into place.
It was so satisfying to see these drawers actually running smoothly!
Just a note, these slides are really inexpensive. The mechanism used for the soft close makes it a little hard to initially pull the drawer open. Higher quality slides wouldn't have this problem.
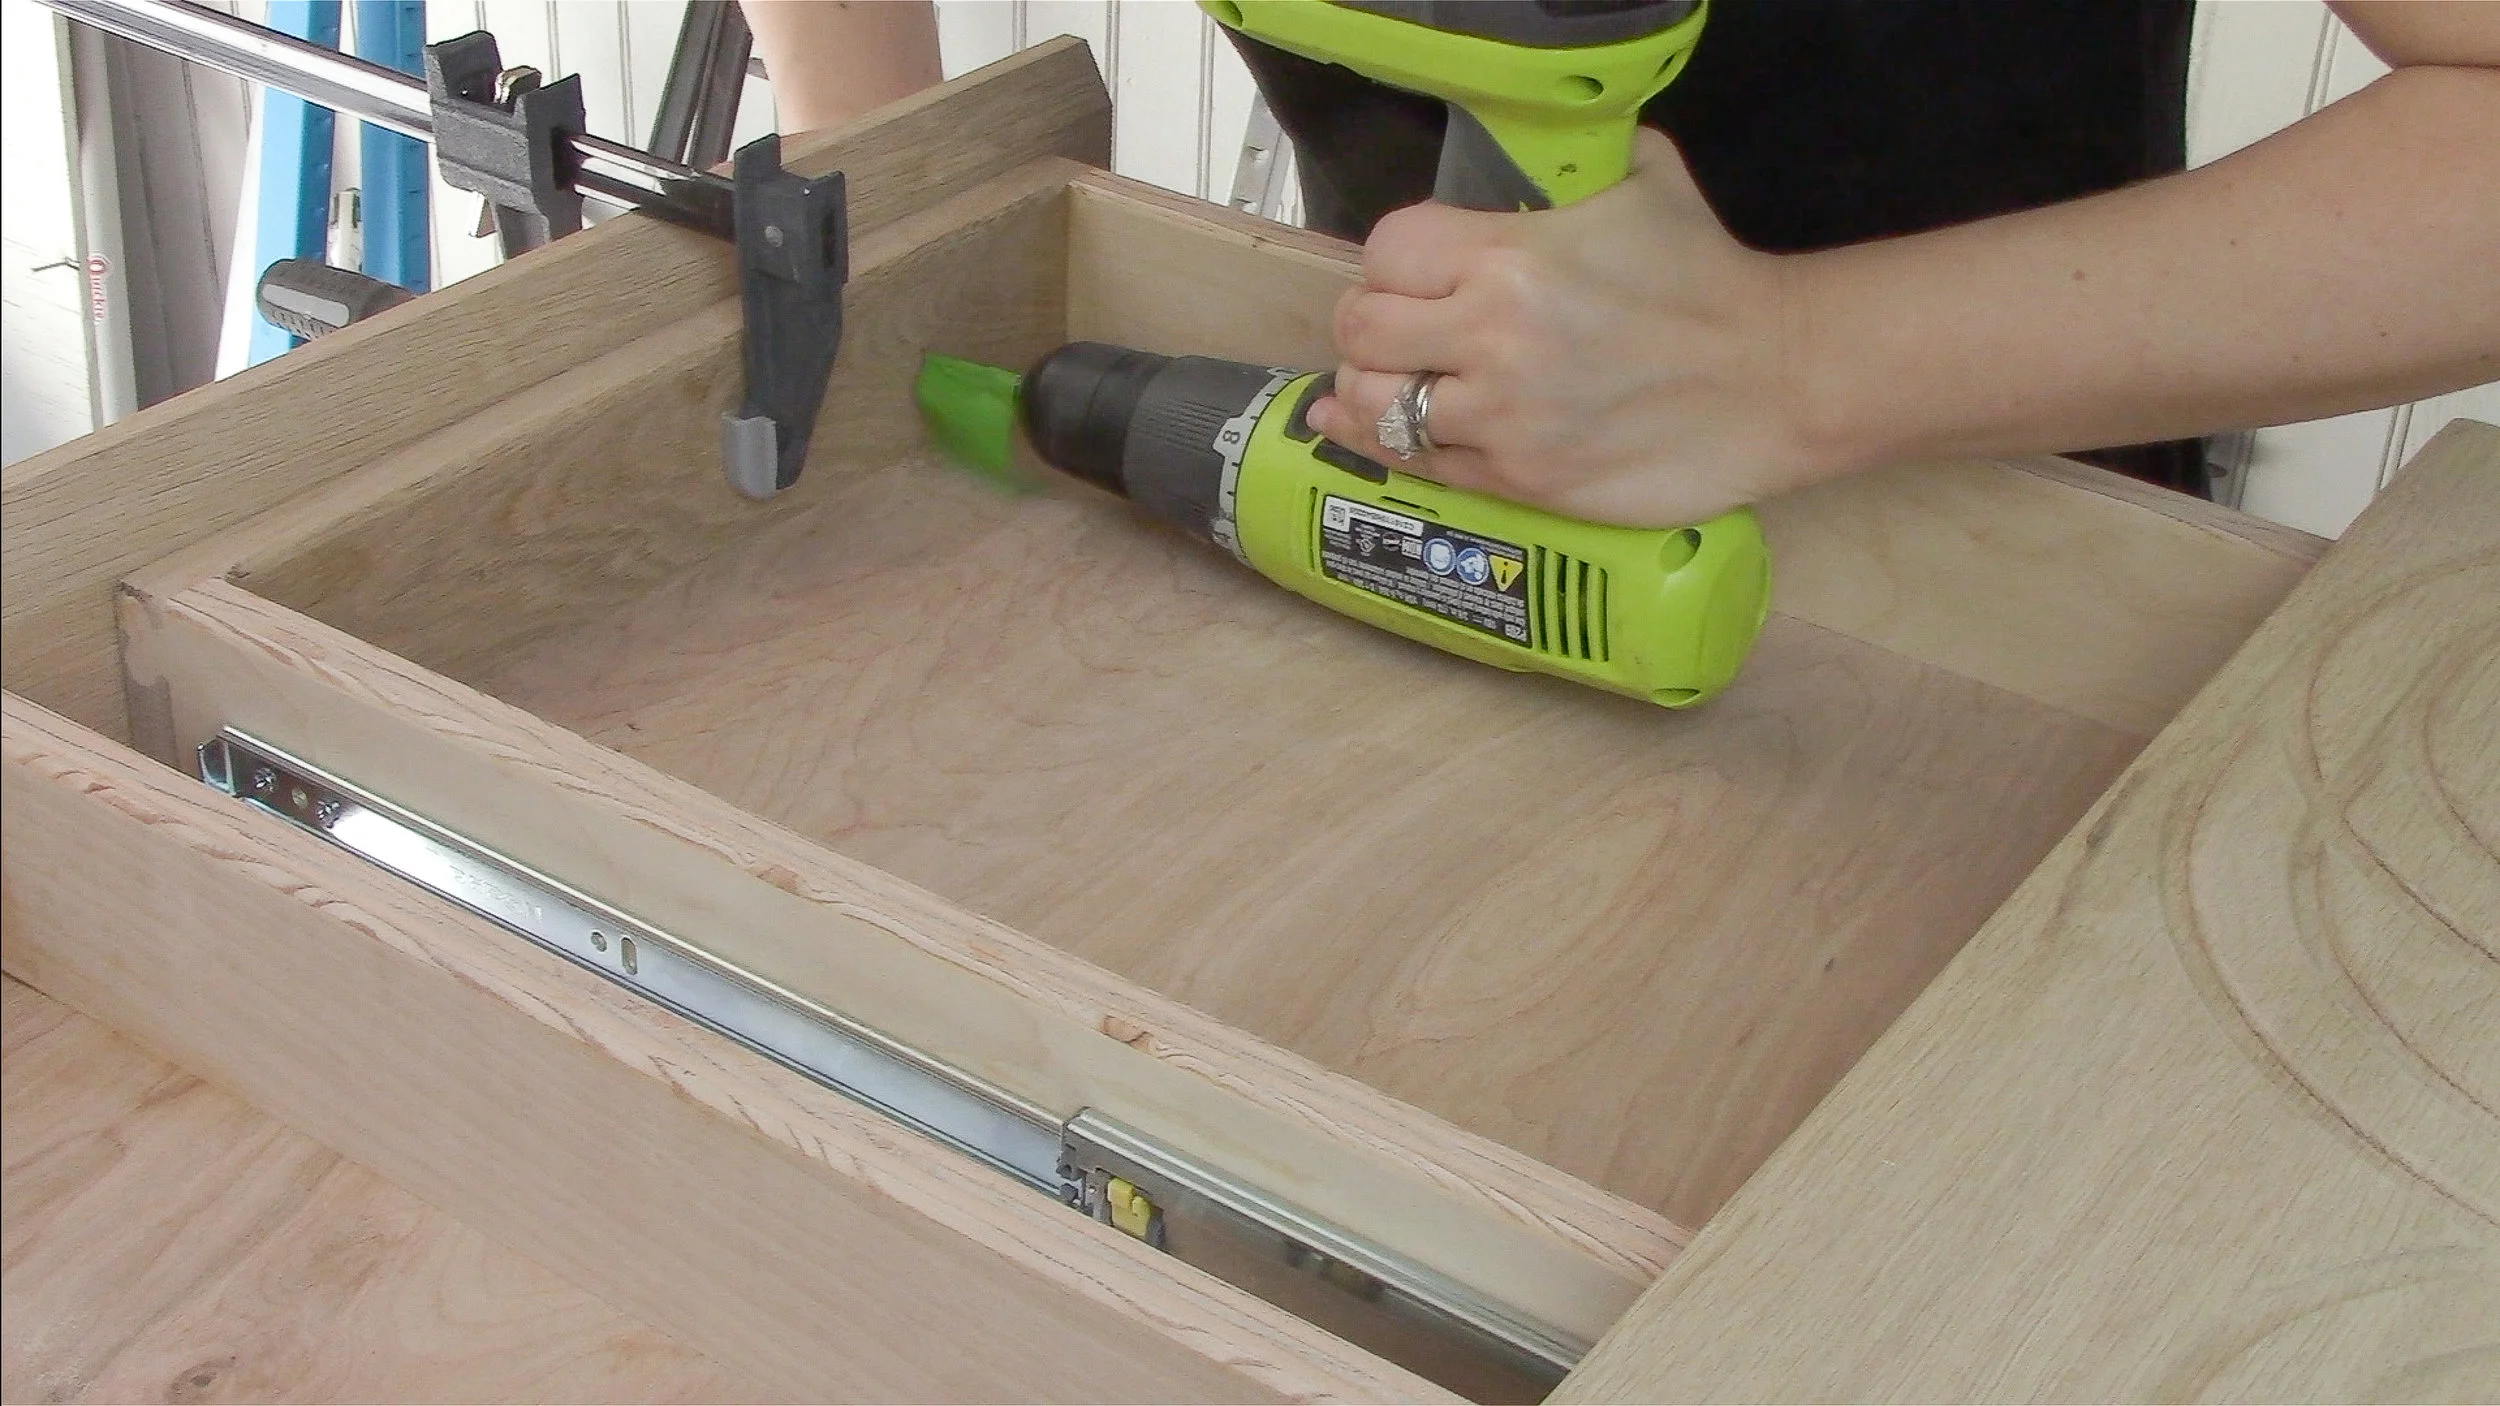
After the drawers were installed I could finally attach the top. I glued all the splines into place on the top then lowered it over the box to glue the box together. This was very satisfying when it all lined up and fell into place, all my measuring paid off!

Now that the top was finished I was able to work on the bottom base.
I milled my own poplar 2x2's for the base but you can use store bought 2x2's or cut your own from other 2x material (which is what I was originally planning on doing, but again, I like to make my life difficult apparently...)

Before assembling the base I drilled holes in the apron pieces so it would be easy to attach it to the box.
First I took a bit that was slightly larger than the screws I was using, and drilled all the way through the apron pieces. Then I used a forstner bit that was slightly larger than the washer head of the screw and set the depth stop so it wouldn't go all the way through and there would be a perfect amount of screw length sticking out the other side.
The reason for making these holes slightly larger than the actual screw is to allow for wood movement. When the box expands and contracts with seasonal movement the screw will stay tight in the box but it will be free to move around the holes drilled in the base. This prevents the wood from cracking in the future.

I used the dowel jig again to join the whole base. I really like using this jig, it's simple and effective!
This dowel jig automatically adjusts to drill in the center of any board you put it on. The only measuring you have to figure out is where on that board you want to put that center hole.
I used my combination square and set it so it was exactly half of the width of my material.
For the legs, I marked for the holes to go down the edges using my combination square set to exactly half of the width of my material.
For the aprons, I marked for the holes to go in at the end grain, again using the measurement I set on the combination square.
Then drilled away!

I used 3/8 dowels because thats what I had. I believe a general rule with joinery is to work in 1/3. This material was 1-1/2" thick so it would have been more ideal to use 1/2" dowels. Or maybe I should have used smaller dowels and used two of them.
The joint seems to be strong enough as is though.

I glued and clamped up both of the short side pieces first.
It's important to make sure the top apron is glued in the right direction, making sure the larger forstner bit holes are facing down.
It's also important to make sure all the holes for the rest of the table connections are facing the same direction. Note, in the picture below, the holes in the legs are facing the same way as the holes in the side stretcher.

I was then able to attach the two sides together by glueing on the longer aprons and longer stretchers.

And clamped it all up!

After it dried I painted it. I decided to paint it black because I wanted it to look like metal. I really want to learn how to weld because I think this table would look killer with a black metal base.

While the paint dried I worked on a the drawers a bit more. I used a roundover bit in my MLCS trim router to smooth all the edges and sanded them to 220 to get them even smoother.

I didn't want to use any hardware for the drawer fronts so I used a 30 degree chamfer bit in my router table to create a hidden pull for the drawers. This is such a cool feature that's so simple to do.

I also wanted the drawer fronts to have a continuous grain to them, so I used double sided tape to temporarily attach them in place.

I clamped the board to the drawer, then pre-drilled holes through the inside of the drawer to the drawer front and drilled some screws in as well.
I marked the center of the long drawer front and removed the screws and the board.
The purpose of drilling the holes now was for alignment after I split the board in half.

I cut the board in half at the table saw using my cross-cut sled.

I put the screw in from inside the drawer just so the tip of the screw was sticking out, then I could easily place the drawer front on the tip of the screw using the holes I drilled earlier for perfect alignment.

I clamped the board in place and finished driving the screws home!

My friends at Rubio Monocoat were nice nice enough to send me some of their finish. I love this stuff. I have used in previously on other projects and I just love how easy it is to apply. It also smells really good! This little bottle was more than enough to finish this whole box, I had a lot left over.

You just pour a little on and spread it around. (I used an old Dave & Busters card, ha!) After 10 minutes you come back and wipe off all the excess. That's it.

Getting into the tracks was a bit tricker, but it was still quick and simple.

I brought the table inside for final assembly. Because I drilled the holes in the apron already, this part was a breeze. I clamped the base in place, pre drilled into the box and locked it all down with screws.

I had one slight oversight, I didn't account for the side stretchers when drilling the holes. This was easily solved by using a right angle attachment on my drill.

Last step was to put the drawers in place and it was done!

I am so happy with how this came out! I definitely challenged myself with this one and learned a ton along the way. I hope this will be the beginning of a brand new playroom I actually want to spend time in!

