
Magnetic Wood Wall Art
I was asked to take part in a Wood Wall Art Challenge. A bunch of creators set out to make some wall art and there were only 2 rules we needed to follow.
1) Must be made out of (mostly) wood.
2) Must be square.
That's it. It's so incredible how creative people are in these kinds of challenges, I will link to all the other posts down below so you can see all the amazing art everyone else came up with!
Check out my video below! There will also be a playlist on YouTube for all the people who made videos for this challenge. Enjoy!
All links below are affiliate links, clicking on them helps me keep this site going :)
Look at all the other amazing artwork!!
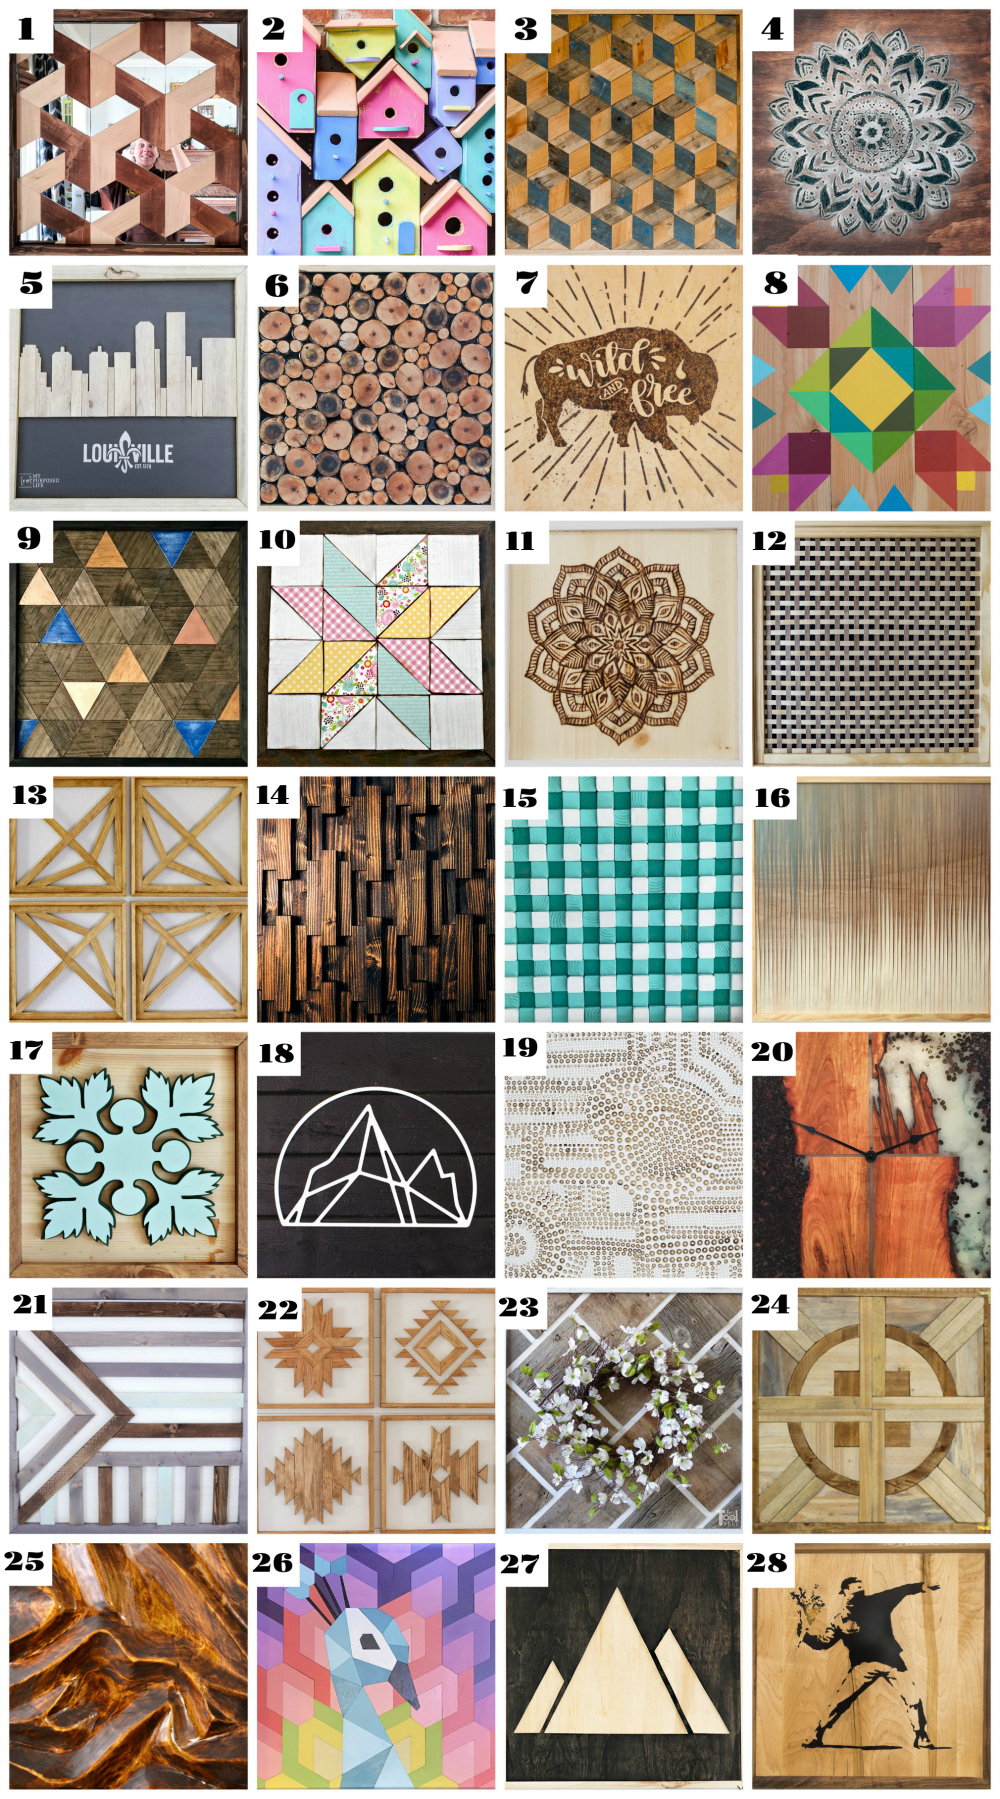
1) Reality Daydream 2) 100 Things 2 Do 3) House Becoming Home 4) Anika's DIY Life
5) My Repurposed Life 6) 3x3 Custom 7) One Project Closer 8) Merrypad 9) Chatfield Court
10) Create & Babble 11) Hazel & Gold 12) Jen Woodhouse 13) Sawdust 2 Stitches
14) Wood Work Life 15) Remodelaholic 16) Evan & Katelyn 17) Jaime Costigio
18) Pneumatic Addict 19) Bower Power 20) Lazy Guy DIY 21) My Love 2 Create
22) Addicted 2 DIY 23) Her ToolBelt 24) Shades of Blue 25) Ugly Duckling House
26) The DIY Village27) DIY Huntress 28) Mr Fix It DIY
Products I Used
I had a goal for this project to only use things I had on hand. I kept to that goal for everything except the black spray paint... oh well. I spray painted a 2x2 sheet of 1/4" plywood black to create a contrast for the background.

Then I got to cutting the logs into "cookies". I figured out the safest way to cut them was by using a jig on the bandsaw. I explain this jig in further detail in the Full Video.

Since some of the wood I was using was still green I had to dry it. I put the cookies in the oven at a low temperature, flipping them every 15 minutes or so. The correct way to do this would be to weigh the wood before putting it in the oven and then weigh them after each 15 minute session. The wood is fully dry when the wood stops losing weight and all the water is evaporated. I didn't do this. I just did it till it felt right...
Then I drilled holes to house the magnets in the back.

I used CA Glue with an accelerator spray to attach the magnets in place. I chose to use magnets behind the wood because I had a ton of magnets lying around from a conference I recently went to. If you want to make the cookies magnetic, you can also just glue metal pieces to the back of them and magnets would stick to the front. Maybe some cut up bar stock would work.

While my daughter sanded the cookies, I got to working on the frame. Again, trying to use what I had on hand, I cut up some maple from my Ambrosia Maple Entry Way Table build.

Then using my Cross-Cut sled, I cut the miters on each end.

I originally planned on making a rabbet on the frames to house the plywood backing but something went wrong with my measurements. it happens... So instead I cut up some pine scrap to use as a support for the plywood. I mitered each end and then drilled some pocket holes.

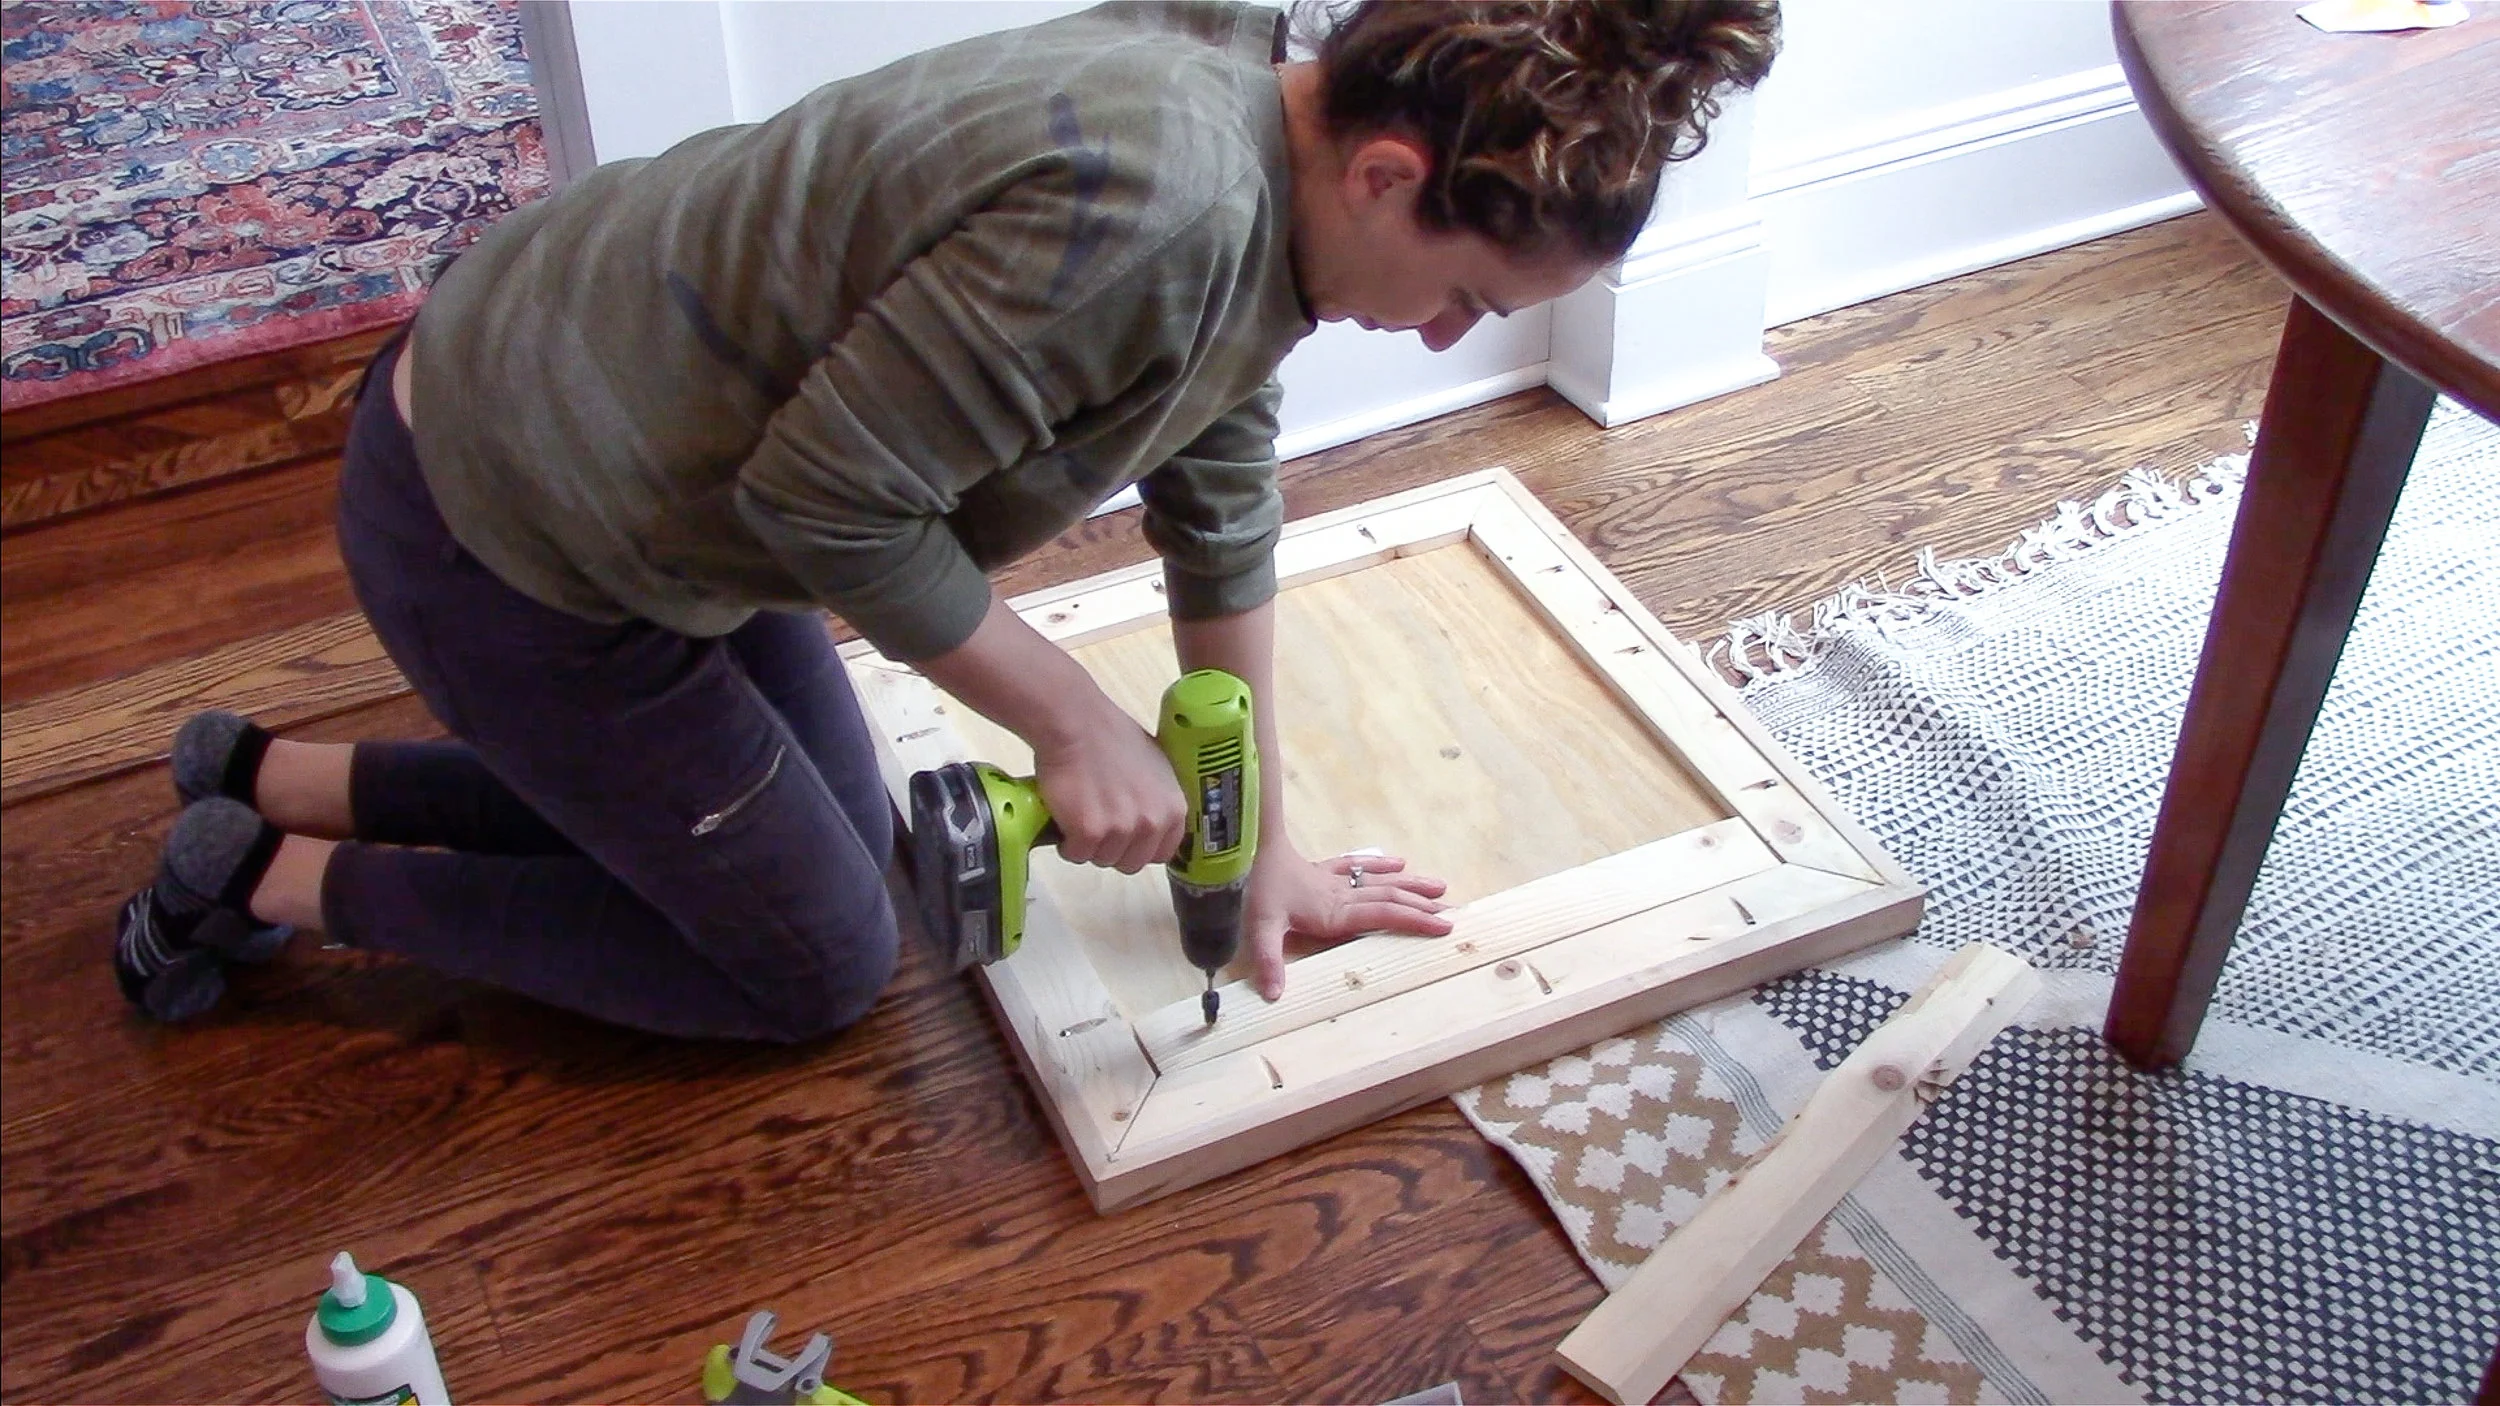
Then attached the pine supports to the maple frame using pocket screws.

Now It was time to glue it up! I placed the plywood backer in without glue, just to ensure the glue up of the frame was going to be square. Then used a frame band clamp to keep it nice and tight while the glue dried. I love using these frame clamps...

After the frame dried, I sanded everything and then glued down the plywood backer.

I clamped it down and used my brad nailer to hold it in place so I can continue working. I also used some more CA Glue around all the edges just to make sure there were no cracks since I was going to pour epoxy.

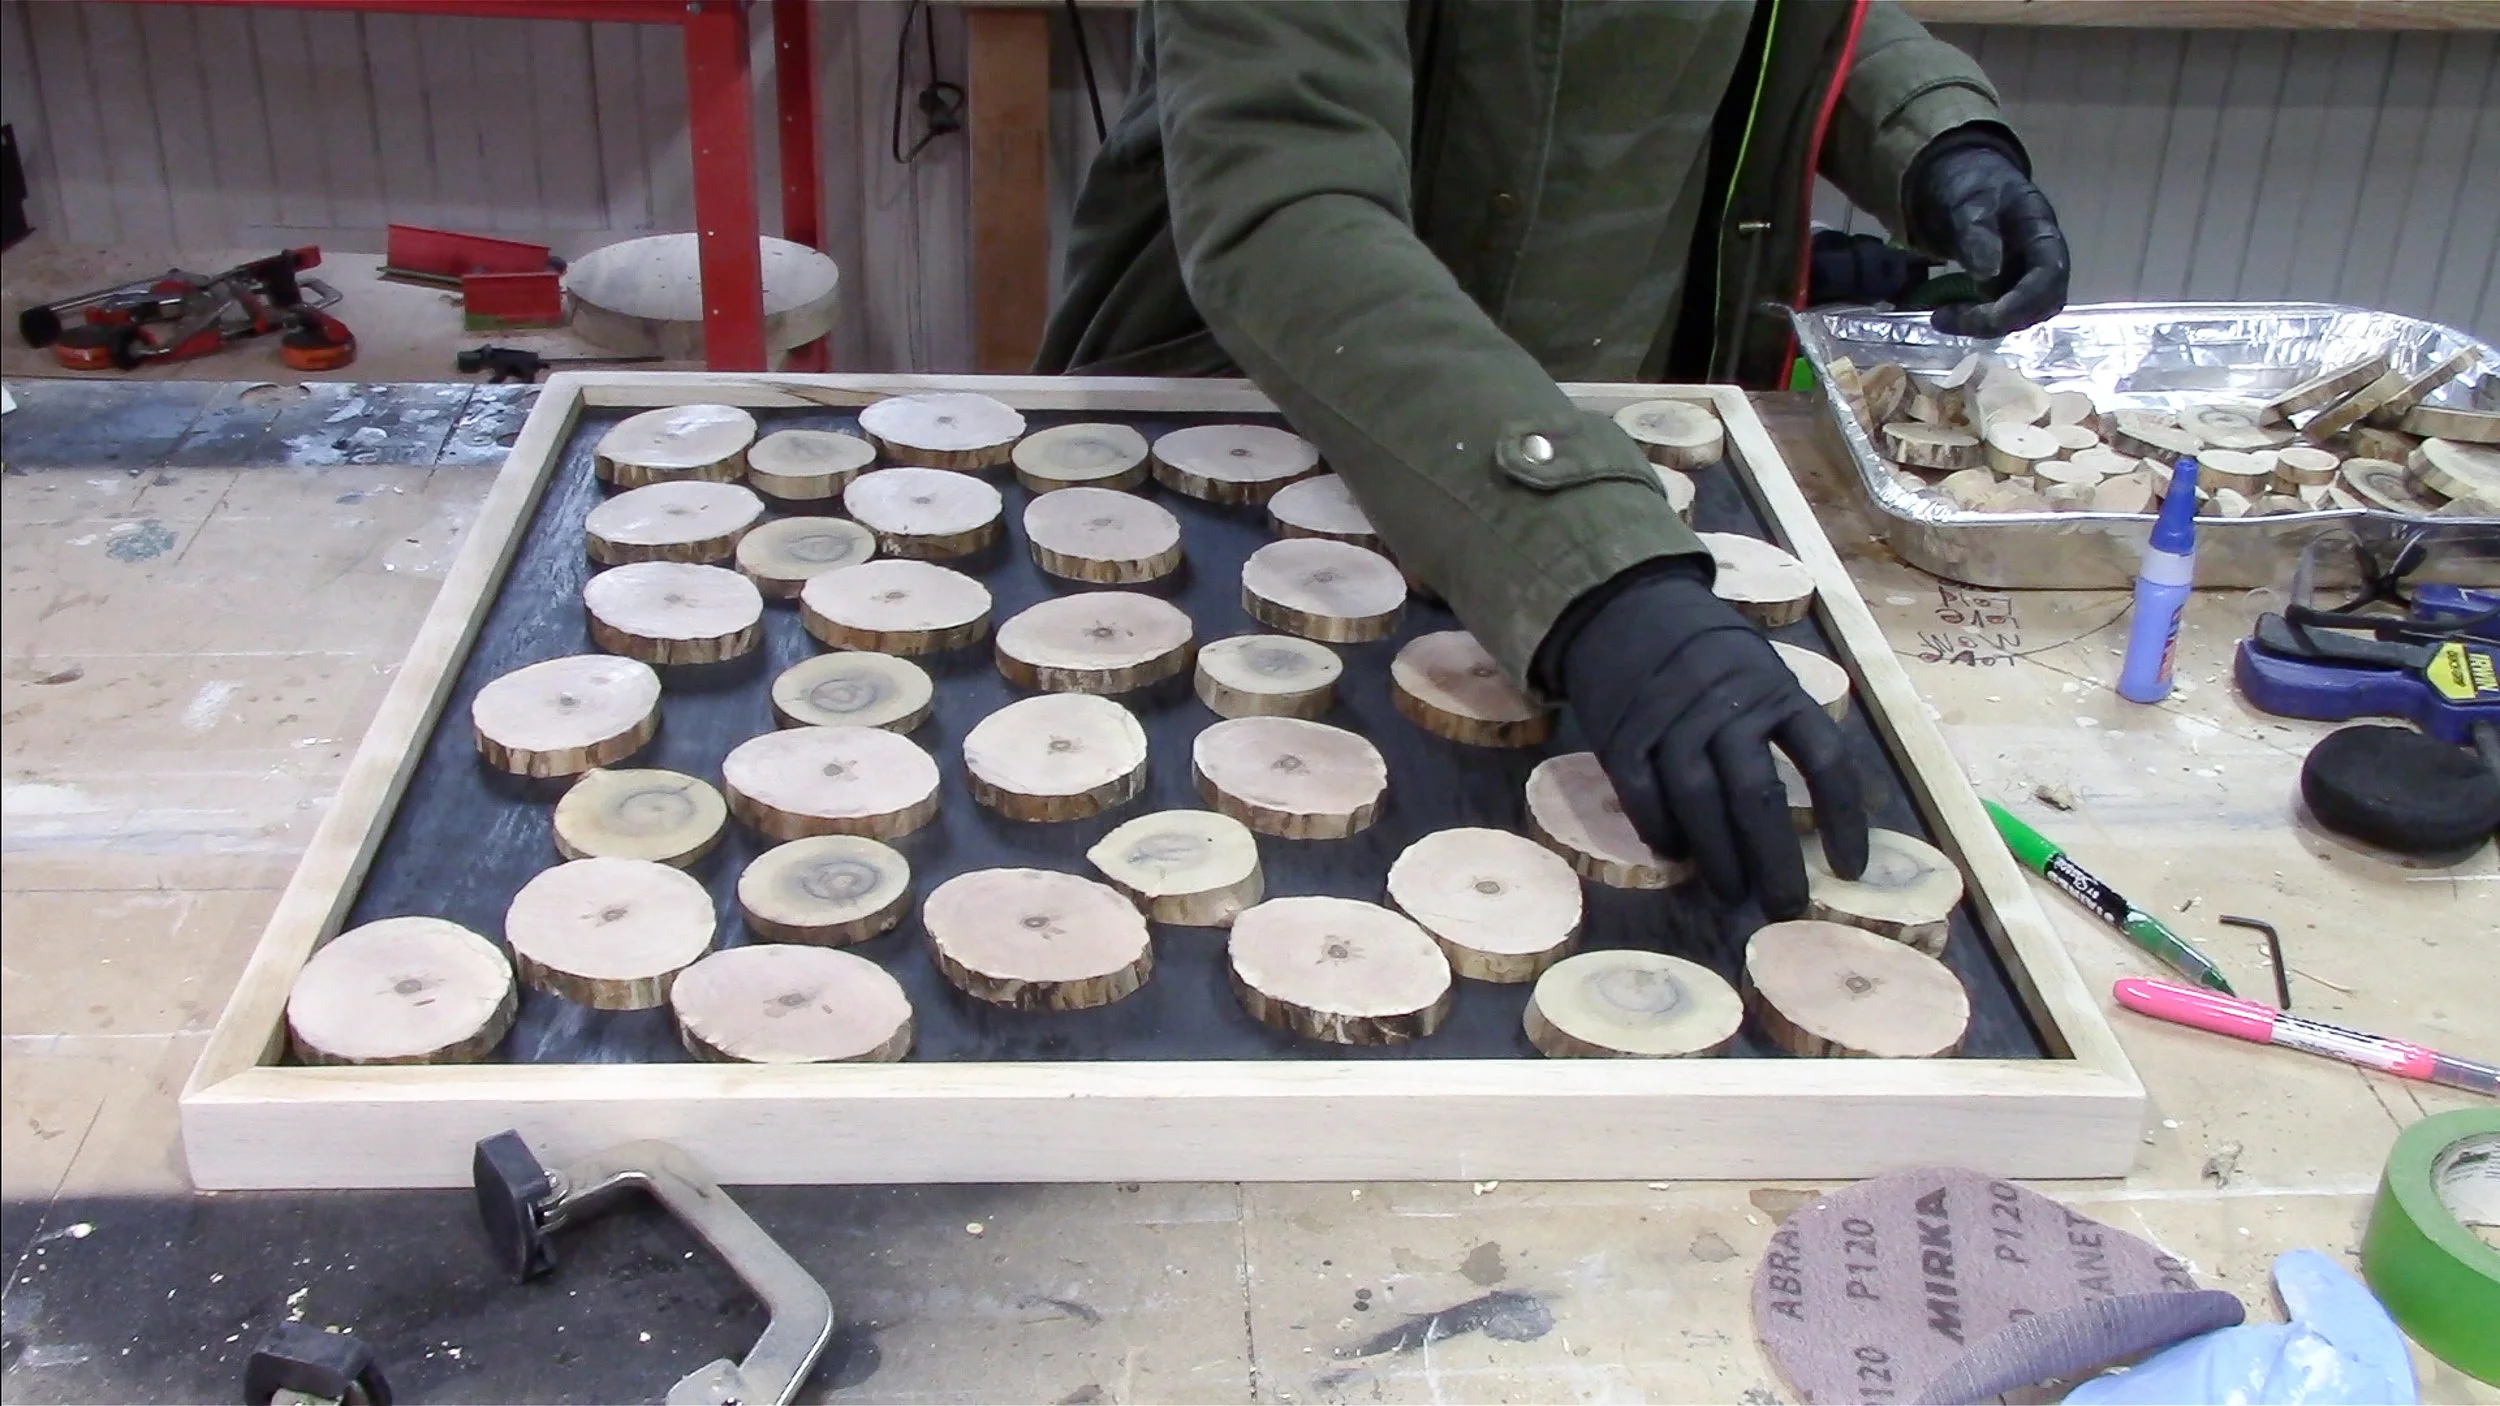
I wanted the cookies to look as random as possible so I tried not to put any thought into placing them. I started with the larger ones and moved down to the small ones.
In order to prepare them for the epoxy pour I used CA glue again to temporarily hold them in place. The CA Glue dries super quick (especially with the accelerator spray) but it is not a permanent bond. This was a bit tedious but it was necessary for the epoxy pour. If I didn't glue them down they would have floated up when I poured the epoxy.
Aaaaaaaand finally the epoxy pour! I have to be honest here. I think I liked this better before I poured the epoxy. The epoxy made the wood really dark. I thought the cookies were maple, so I was expecting a lighter finish to contrast with the black background. Turns out they weren't maple! I'm still happy I decided to experiment.

Since I wasn't loving the epoxy finish on the wood, I sanded all the cookies that I was able to and finished them with shellac. This was a much nicer, more natural finish to me.

I decided to hang it on the wall using a french cleat which is super strong and sturdy. I figured my kids would be playing with the magnets a lot so I wanted to make sure it was secured to the wall really well. (If I would have planned this well I would have made one of those pine supports a cleat to hang on. Oh well.)
To create the french cleat I took 2 scrap pieces of pine 1xsomethings and ripped a 45 degree angle down one edge of each of them on the table saw.
I screwed one cleat onto my board.
And screwed the second one onto the wall, making sure it was level and in the spot I wanted it.

Last step is to just hang it u!

This isn't really my typical project but it was super fun to figure out. I Iove that it's going to be a nice textural background to my kids beautiful artwork.
