
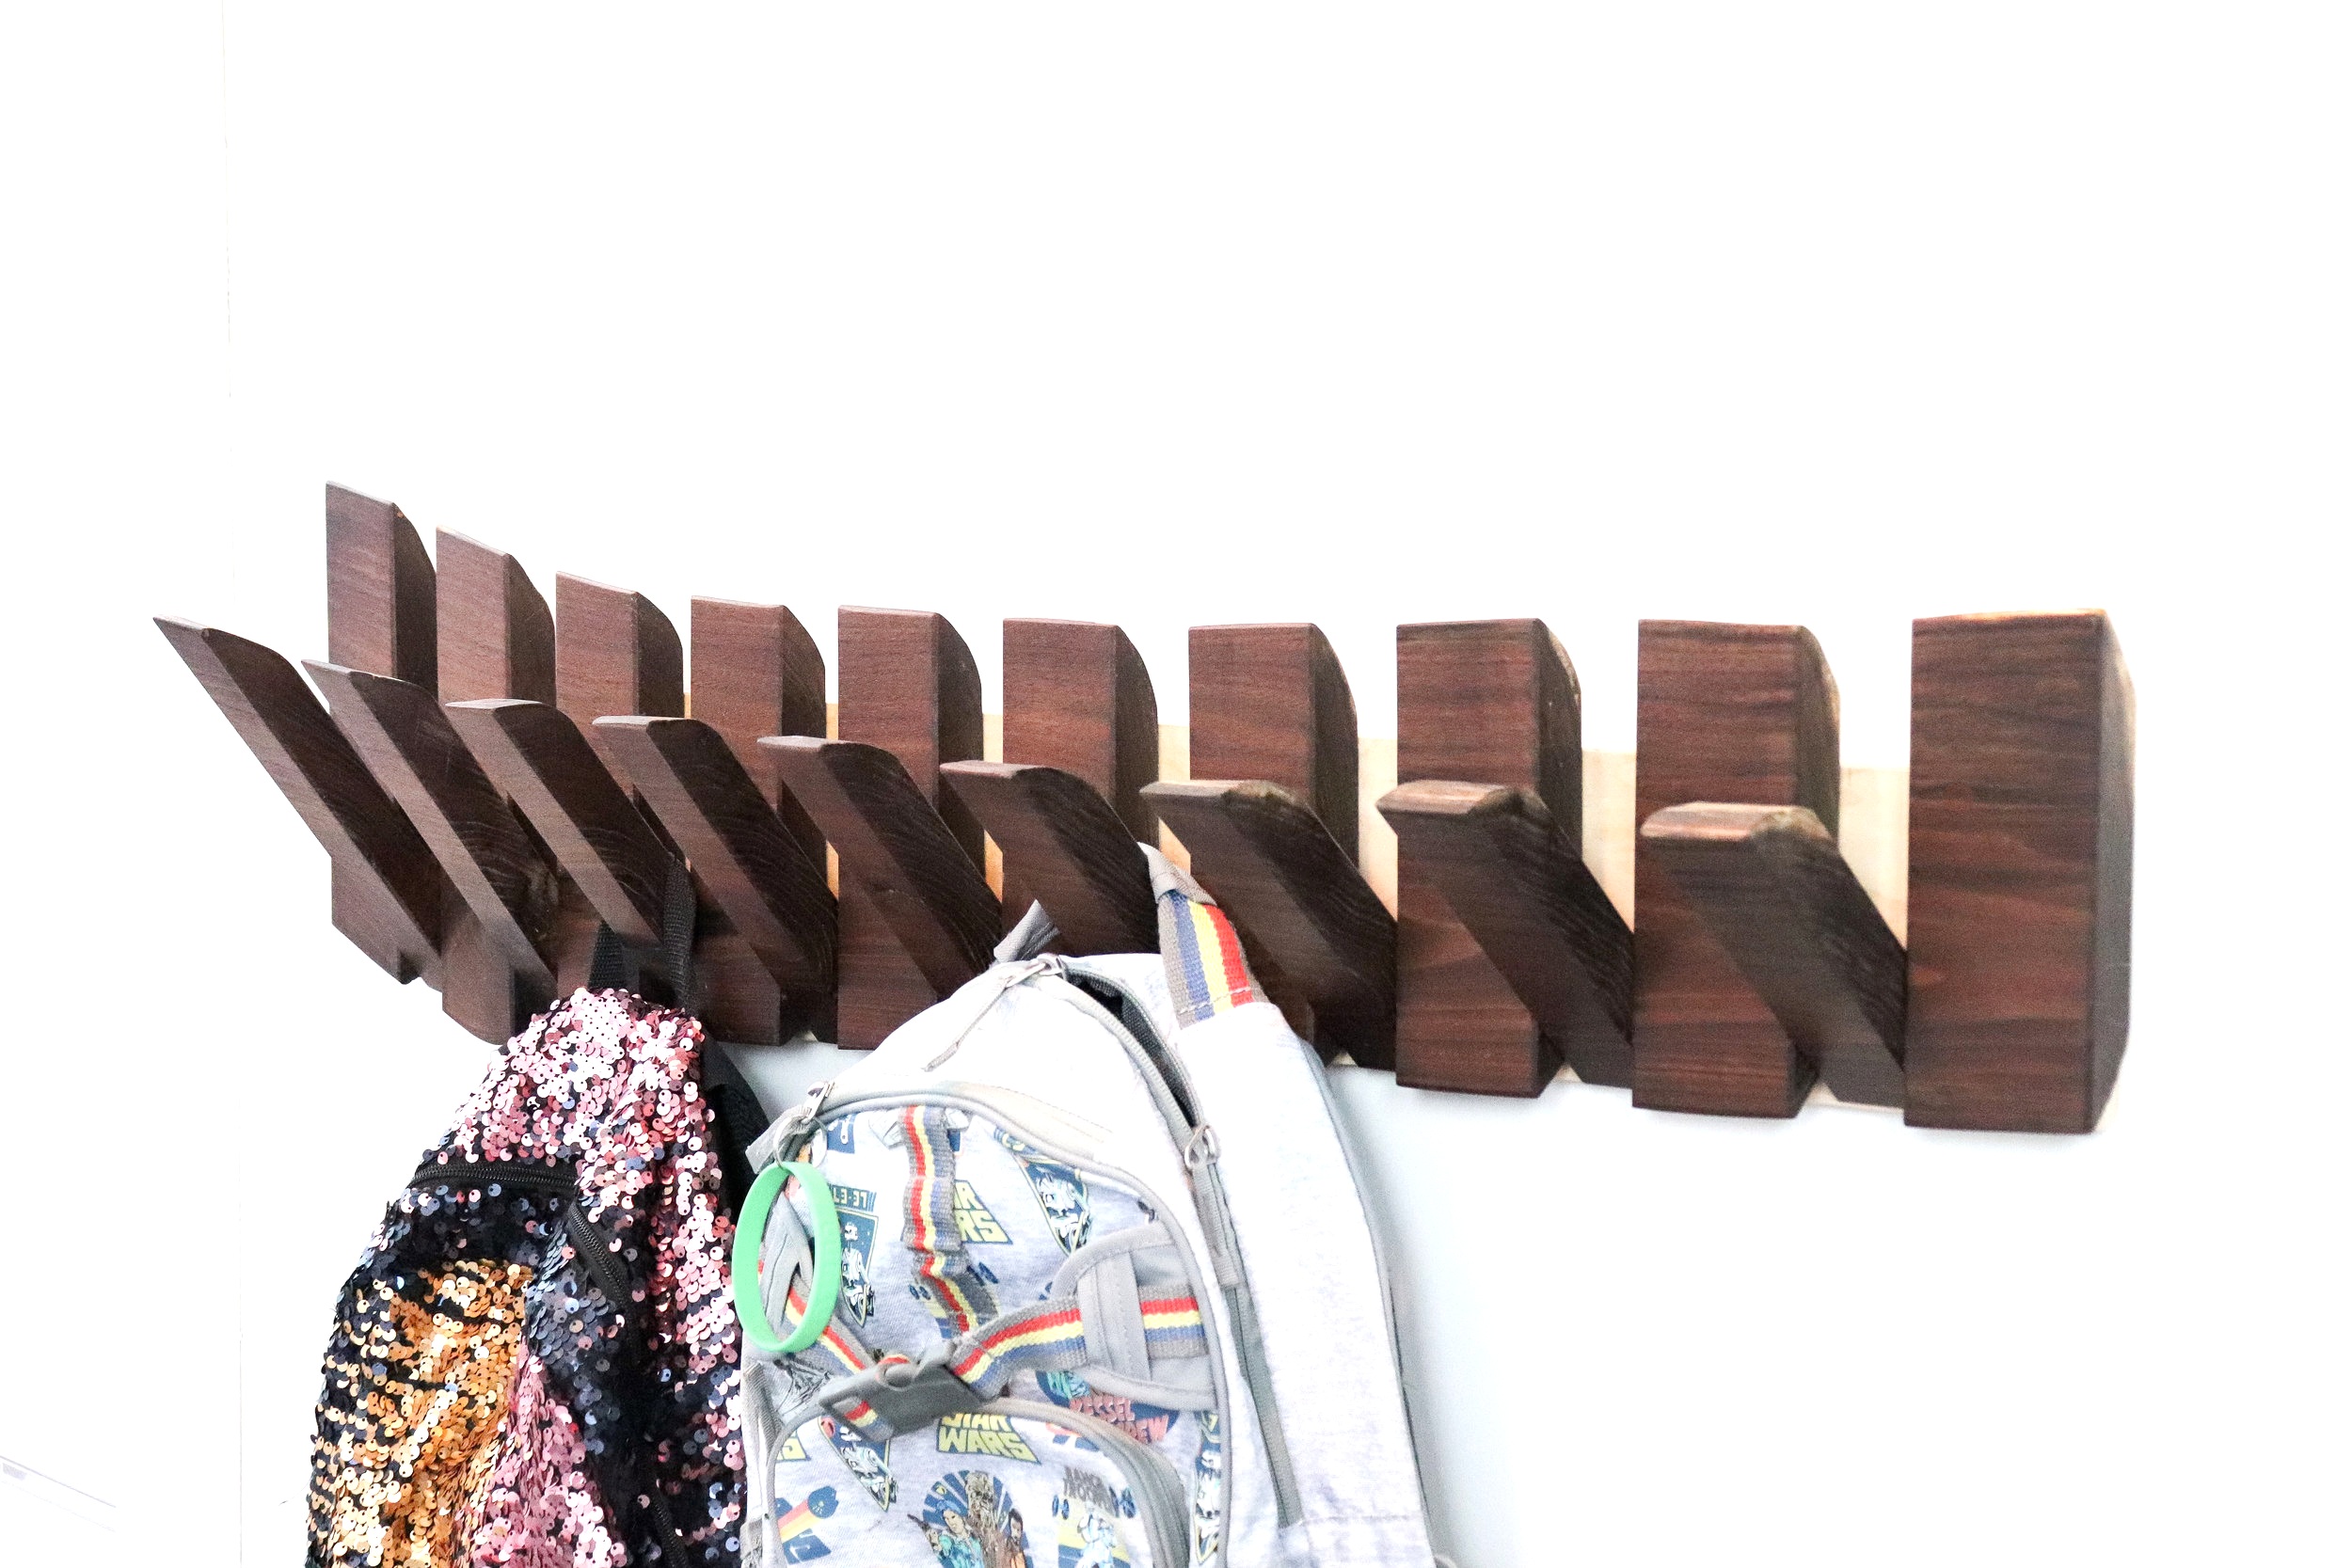
Live Edge Coat Rack
My kids never had a designated spot for their coats and backpacks, so I decided to build these coat racks with lots of storage so we could be a bit more organized!
Lots of challenges with this build but I think it was all worth it in the end.
Check out the full build video below!
Links below are affiliate links, clicking on them helps me keep this site going at no extra cost to you :)
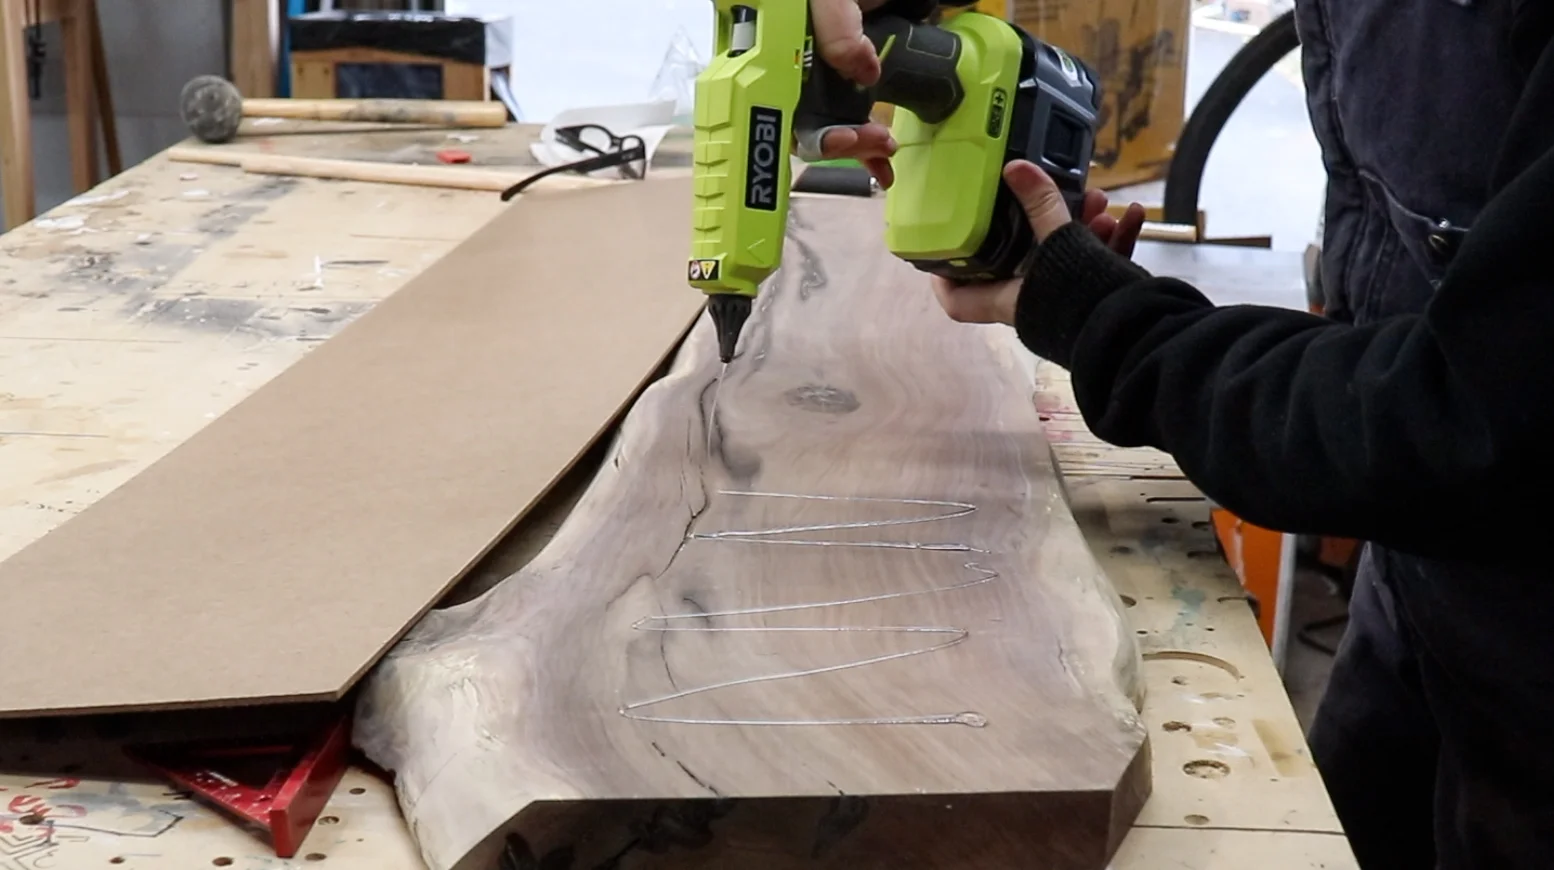
To start I broke down and cleaned up a live edge walnut slab I had lying around in my shop for over a year…
I experimented with different ways to clean up the edges, the draw knife was fun but it took a really long time.

So I whipped out my angle grinder and put on a flap disc and it made really quick work of cleaning up the edges.
But this method was crazy messy! I should have done this outside…

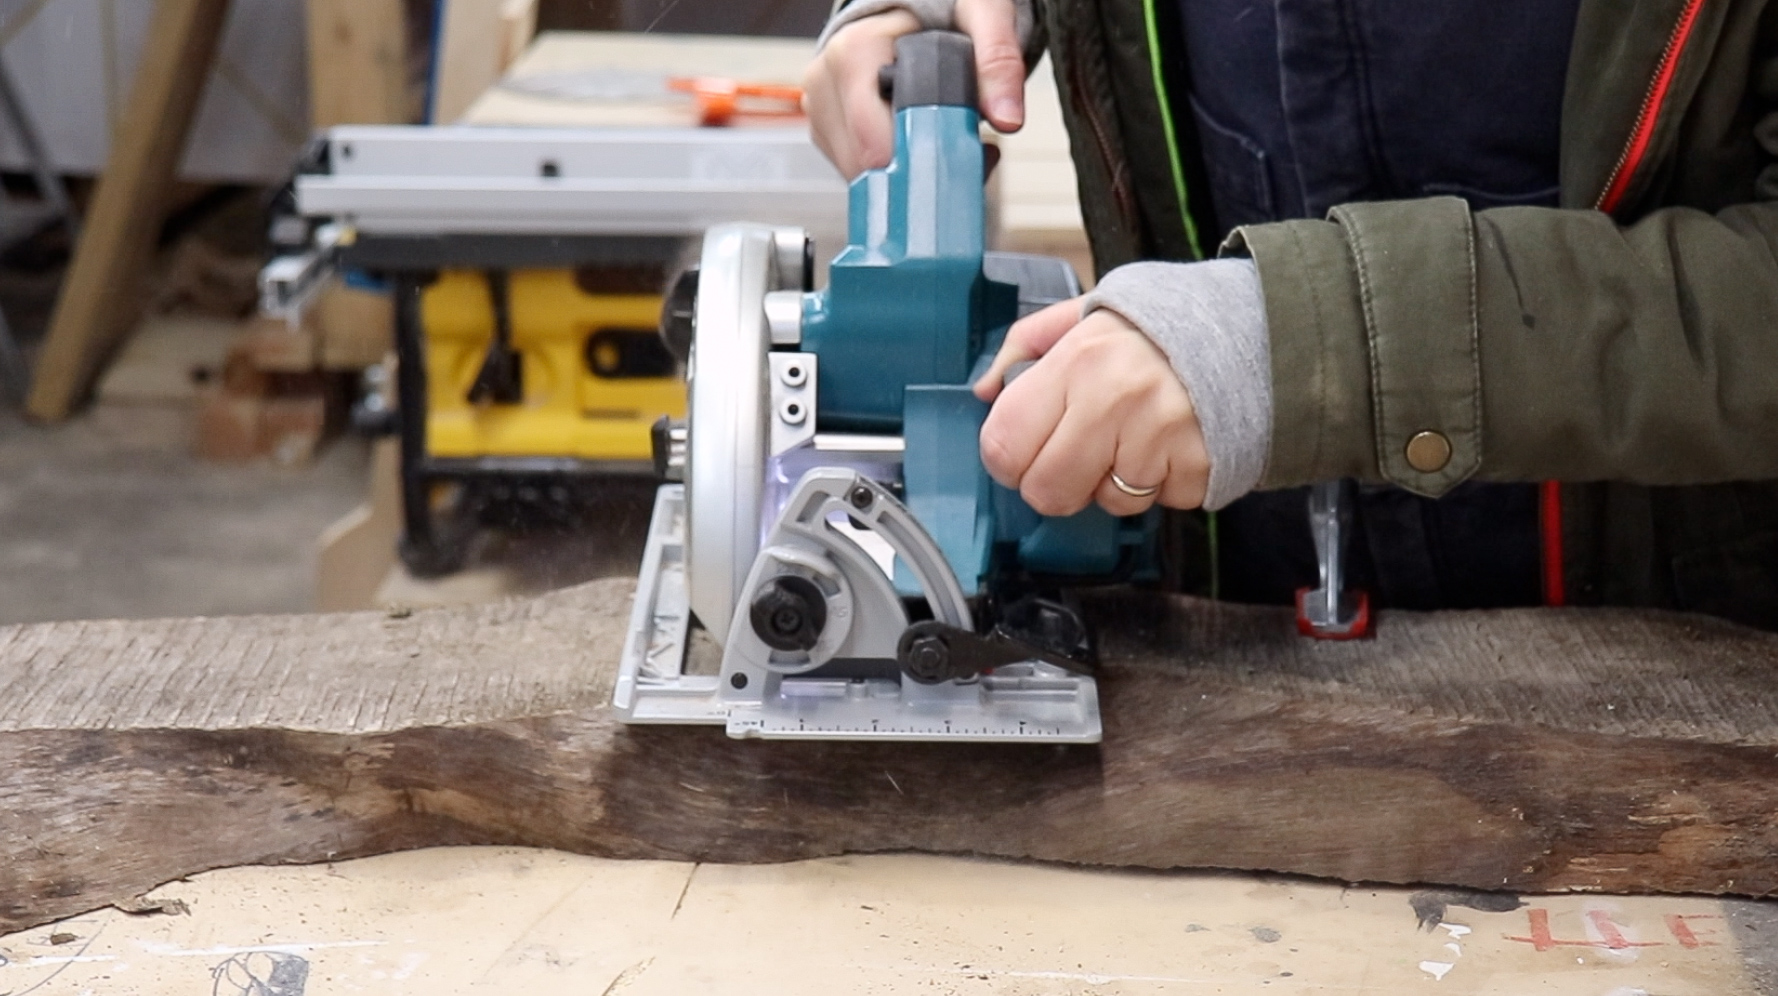
I lined up a 36” long 3/8” dowel to mark out where I wanted to cut the boards.

The boards need to be cut into strips to create the hooks, but there is no straight square edge to reference the cuts from.
So I hot glued a piece of hard board onto the back of the slabs, this way there would be a straight edge to reference from when cutting at the table saw.
You can see in the picture below how the hard board is lined up against the fence of my cross cut sled so I could easily make a square cut.

The slats of the coat rack are two diffrent widths. The pieces that stay permanently attached to the wall are 2-1/2” wide and the hooks that pull down are 1-1/2” wide.
In order to make these cuts, I set up a stop block that was 2-1/2” away from the blade, then made another stop that was 1” thick to cut the 1-1/2” hook pieces.

Then I just sliced the board up!
I would alternate from the 2-1/2” stop to the 1” spacer until the board was all cut up.

In order for the hooks to seat nicely against the wall, I clamped the 1-1/2” hook pieces to my miter gauge set at a 45 degree angle and cut off the ends.

Now, here is the part that really confused me….
It took me a while to figure out how to get the correct pivot point for the pieces, here’s what worked for me.
First I stacked the small hook piece on the larger stationary piece so that their backs and bottoms were flush with each other. Then I made a mark on the stationary piece along the 45 degree cut of the hook piece.
Then I shifted the hook piece so the 45 degree angle was flush against the back of the larger stationary piece and the bottom tip of the hook piece was lined up with the first mark I made. Then I made another line so that it created a “V” shape.

I made a mark at the center of the slat piece, then on that line I marked the center of the “V” shape to find the perfect pivot point.

Because I was working with the not square live edge slab, the pivot point was at a different level for a lot of the pieces.
So I had to individually mark out the pivot points… this was a bit of a pain…

Wherever there was a drastic curve on the slab, the stationary pieces had to be marked accordingly with two separate hole locations on either side of the piece.

Since the edges of all the pieces were varied, I couldn’t set up a jig to drill repeated hole locations.
I used a fence so the holes would be lined up in the middle of all the pieces though, and drilled through holes through the smaller hook pieces.
When drilling the holes in the larger stationary pieces, I had to be mindful to note where where to drill since some of them were not level with each other. For those pieces, I set the depth stop on my drill and only drilled about 1” though the piece.

Now, I did my best to line up the holes, but it wasn’t perfect…
So I temporarily put 3/8” dowels in all the holes to hold them in place while I flattened everything out.

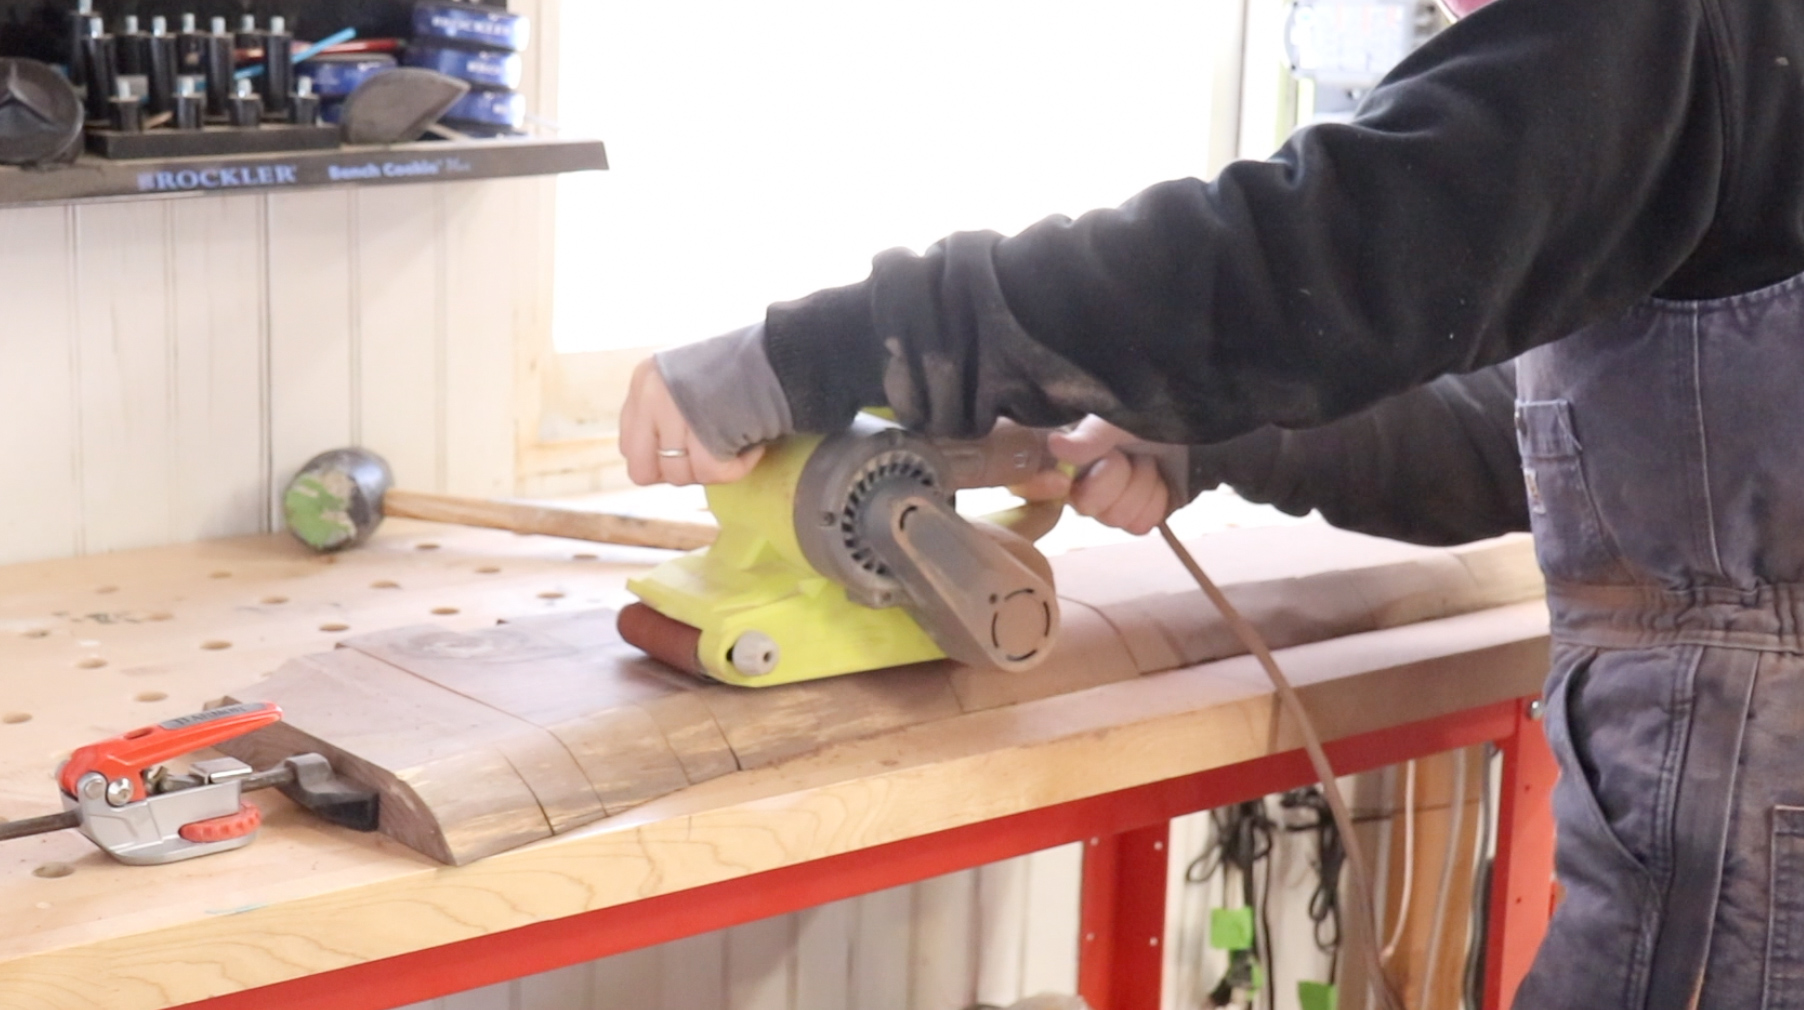
I started the process of leveling everything with a belt sander, but quickly switched over to my handplanes.
Using the handplanes was actually much quicker and way less messy!
Before removing the 3/8” dowels, I tested each piece to see if the pivot point was in a good spot. most of them were perfect, but a couple of them were catching and rubbing on the back corner.
So I sanded down the back corner of those pieces then they were moving really smoothly.
Now they are ready to be assembled.

Using tape as a stop block at the miter saw, I cut up the 3/8” oak dowel to size.

I put some paste wax on the dowel pieces so they would go on easier then started the assembly process!

After everything was assembled, I put on a couple coats of Danish Oil.
This is a kind of finish that penetrates into the wood instead of leaving a film on top of it. Using a finish like this I don’t have to worry about the pieces rubbing against each other and taking finish off.

If you watched the YouTube video on this build, you would know I had some issues with hanging this on the wall…
So my solution was to cut out a piece of plywood in the shape of the live edge so there would be more support on the back.
I placed the coat rack on the plywood and lifted all the hangers so I could mark where to cut it. Doing it this way ensures the back of the hangers have something completely supporting them when they are lifted out.

Then I cut away on all those lines using the jigsaw.

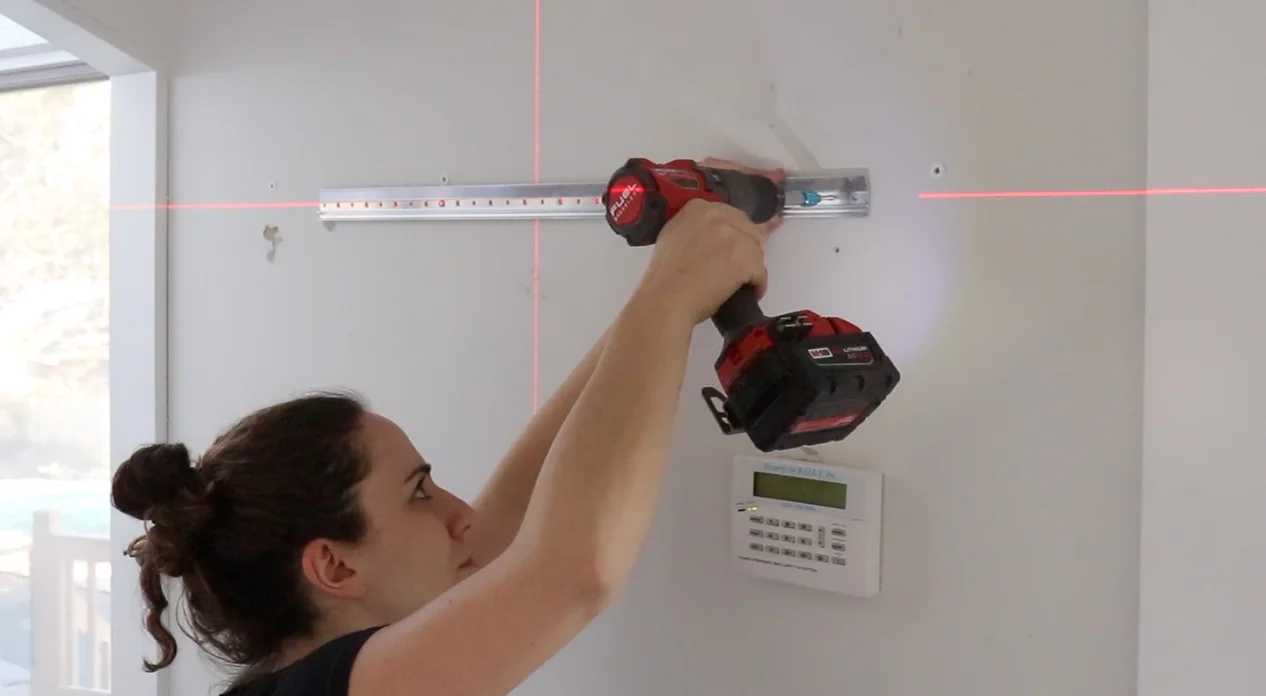
To hang it on the wall I decided to go with these french cleats since they can support up to 200 pounds.
I wanted the plywood to sit flush against the wall so I needed to route out a channel on the back that the french cleat can sit in.

After marking out where to router out that channel, I took the pieces to the router table and took multiple passes to get the correct size.
I made this channel a bit wider and longer then it needed to be for some wiggle room.

I locked the back of the french cleat into the channel using screws, making sure to only use the holes that were in line with the larger stationary pieces.

For more security, I predrilled and counter sunk a bunch of holes and attached the plywood to the coat rack using screws.

Using the Bosch Self Leveling Cross Line Laser Level I was easily able to line up the corresponding piece of the french cleat and I attached it to the wall.
Then connected the two pieces of the french cleat and its done!

Lots of challenges with this build, but I’m so happy with how it came out.
Hopefully my kids won’t leave their backpacks on the floor anymore!

I acknowledge that The Home Depot is partnering with me to participate in the ProSpective 2018 Campaign. As a part of the Program, I am receiving compensation in the form of products and services, for the purpose of promoting The Home Depot. All expressed opinions and experiences are my own words. My post complies with the Worth of Mouth Marketing Association (WOMMA) Ethics code and applicable Federal Trade Commission guidelines.