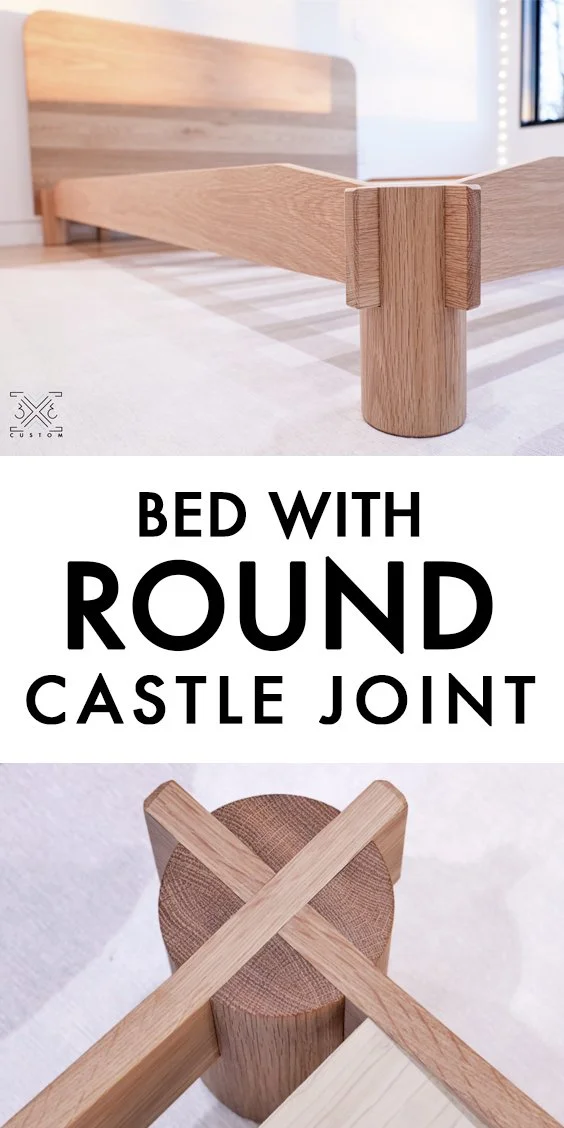
Bed with ROUND Castle Joints
Time for bed #2! This time it is for my daughter and she had a few requests.
1) Low down to the ground
2) Big round chunky legs
3) Light colored wood
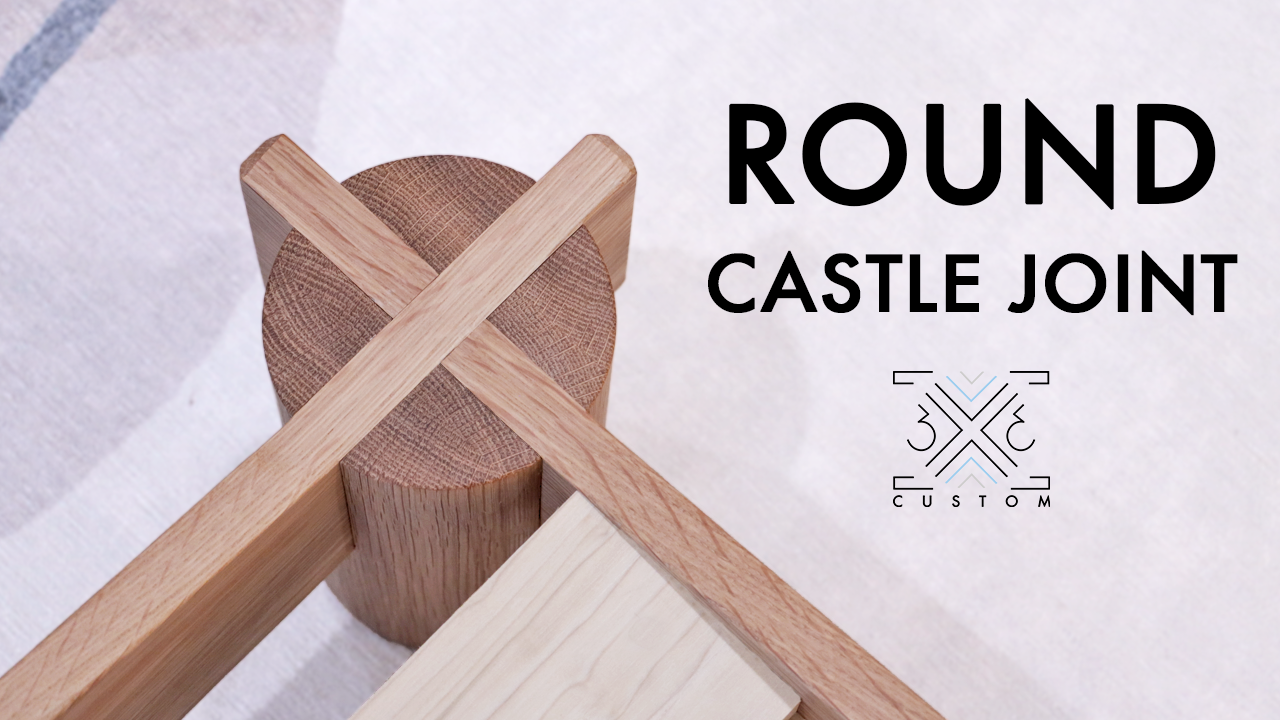
I decided to use this as an opportunity to experiment with some joinery, so this bed is assembled with Castle Joints on round legs!
Check out the full build video below to see how it all comes together!
Want to build this bed?
Find the PLANS here - ROUND CASTLE JOINT PLANS
All the wood for this bed was delivered right to my house from Woodworkers Source.

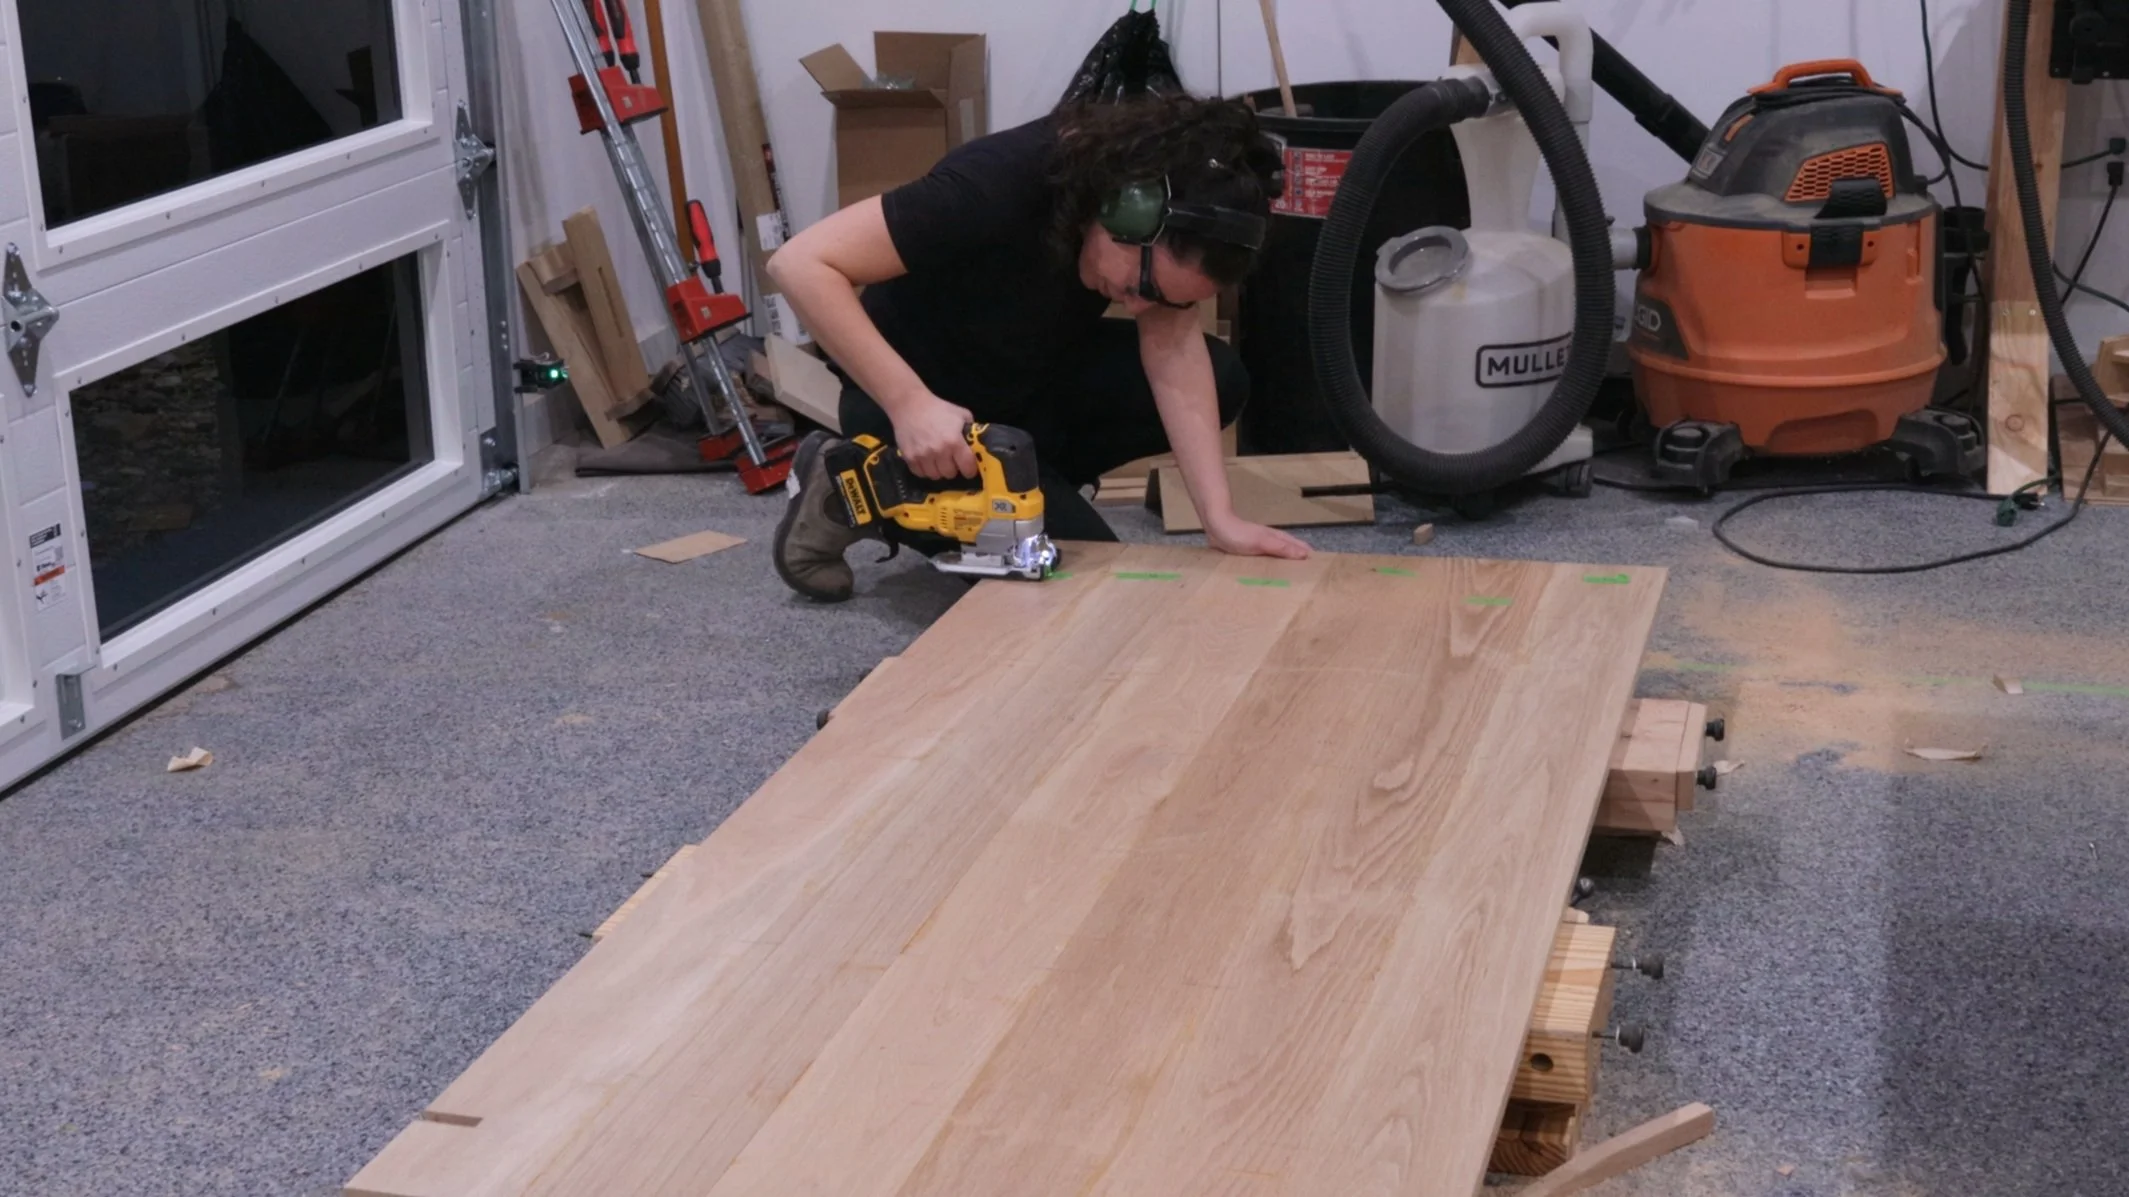
The first step is to glue up the headboard.

Then work on the round feet.
The finished dimension for the round feet is going to be 4” in diameter. So I glued up material to get blanks that were big enough and trimmed them so they were slightly larger than 4” square.

I knocked off the corners to get them closer to round, but this turned out to be a pretty dangerous cut… watch the video to see some crazy kickback!

Next, drill holes in the center of all those blanks to prepare them for turning.

I don’t have a lathe, so I made a jig for the table saw that acts as a lathe!
This is actually really fun to do. Check out the video linked above to see it in action.

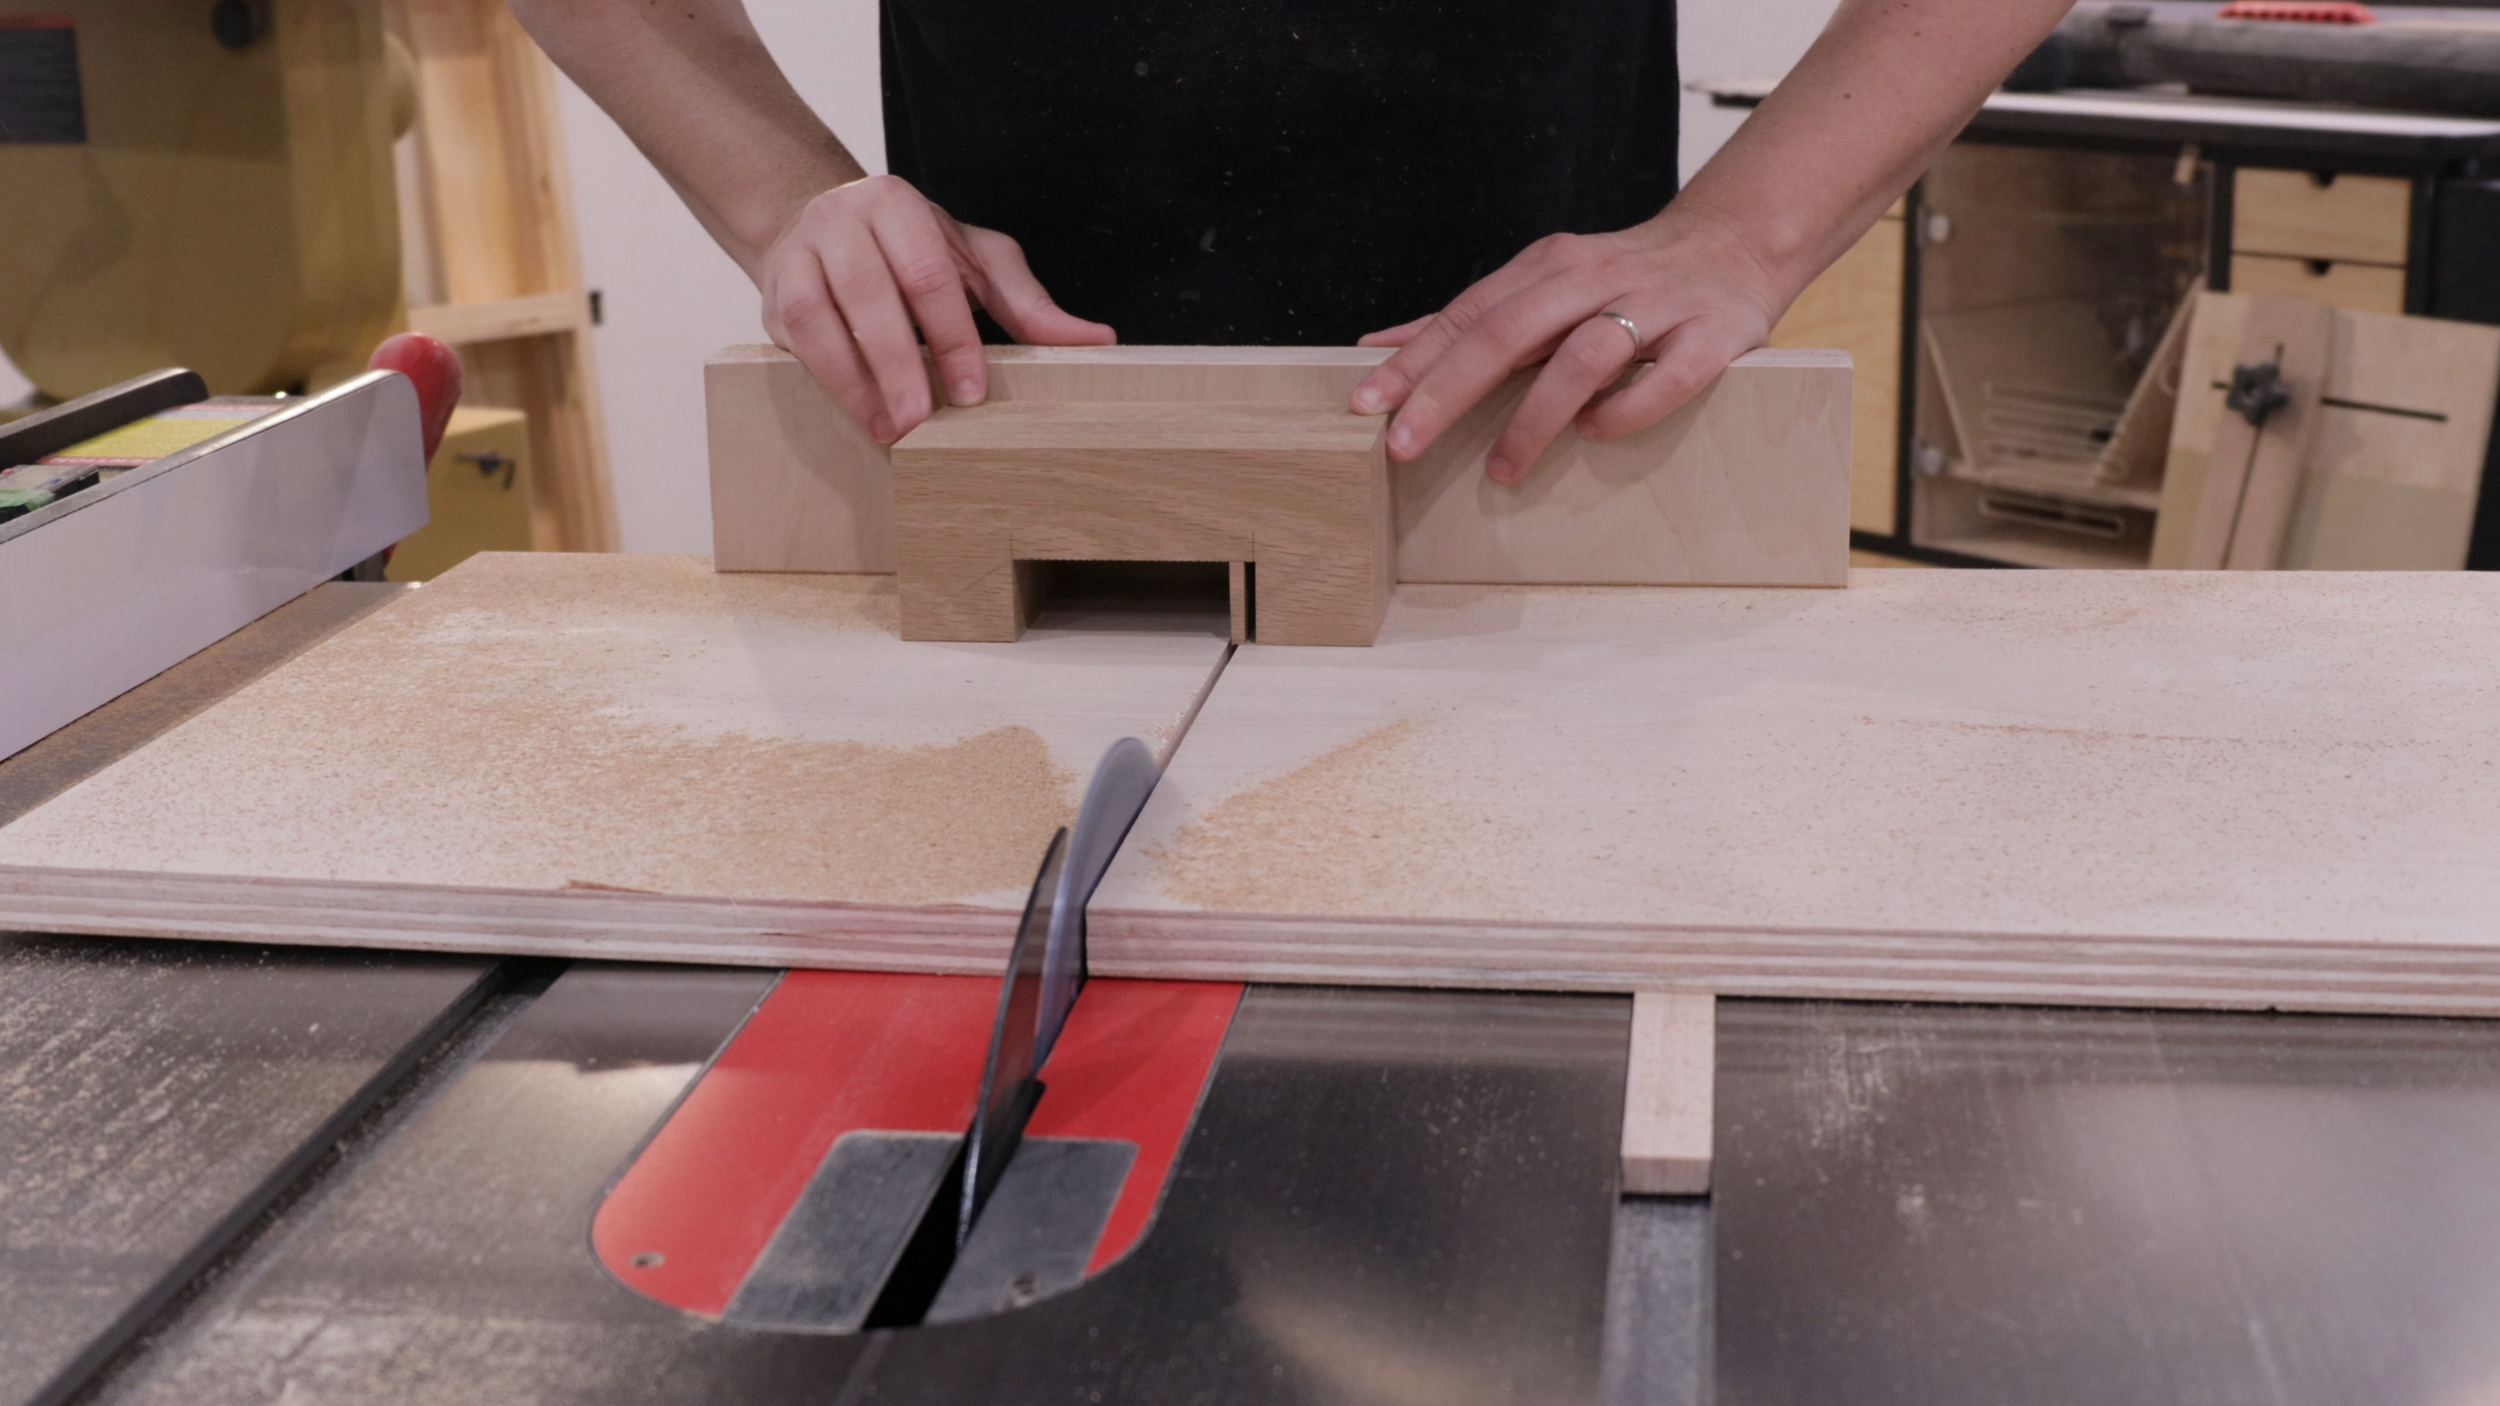
Time to cut the joinery… it’s easier to cut joinery on square stock, so I made a jig to hold the round pieces.

Then cut mortises on the ends of the rounds using a dado stack and a tenoning jig.
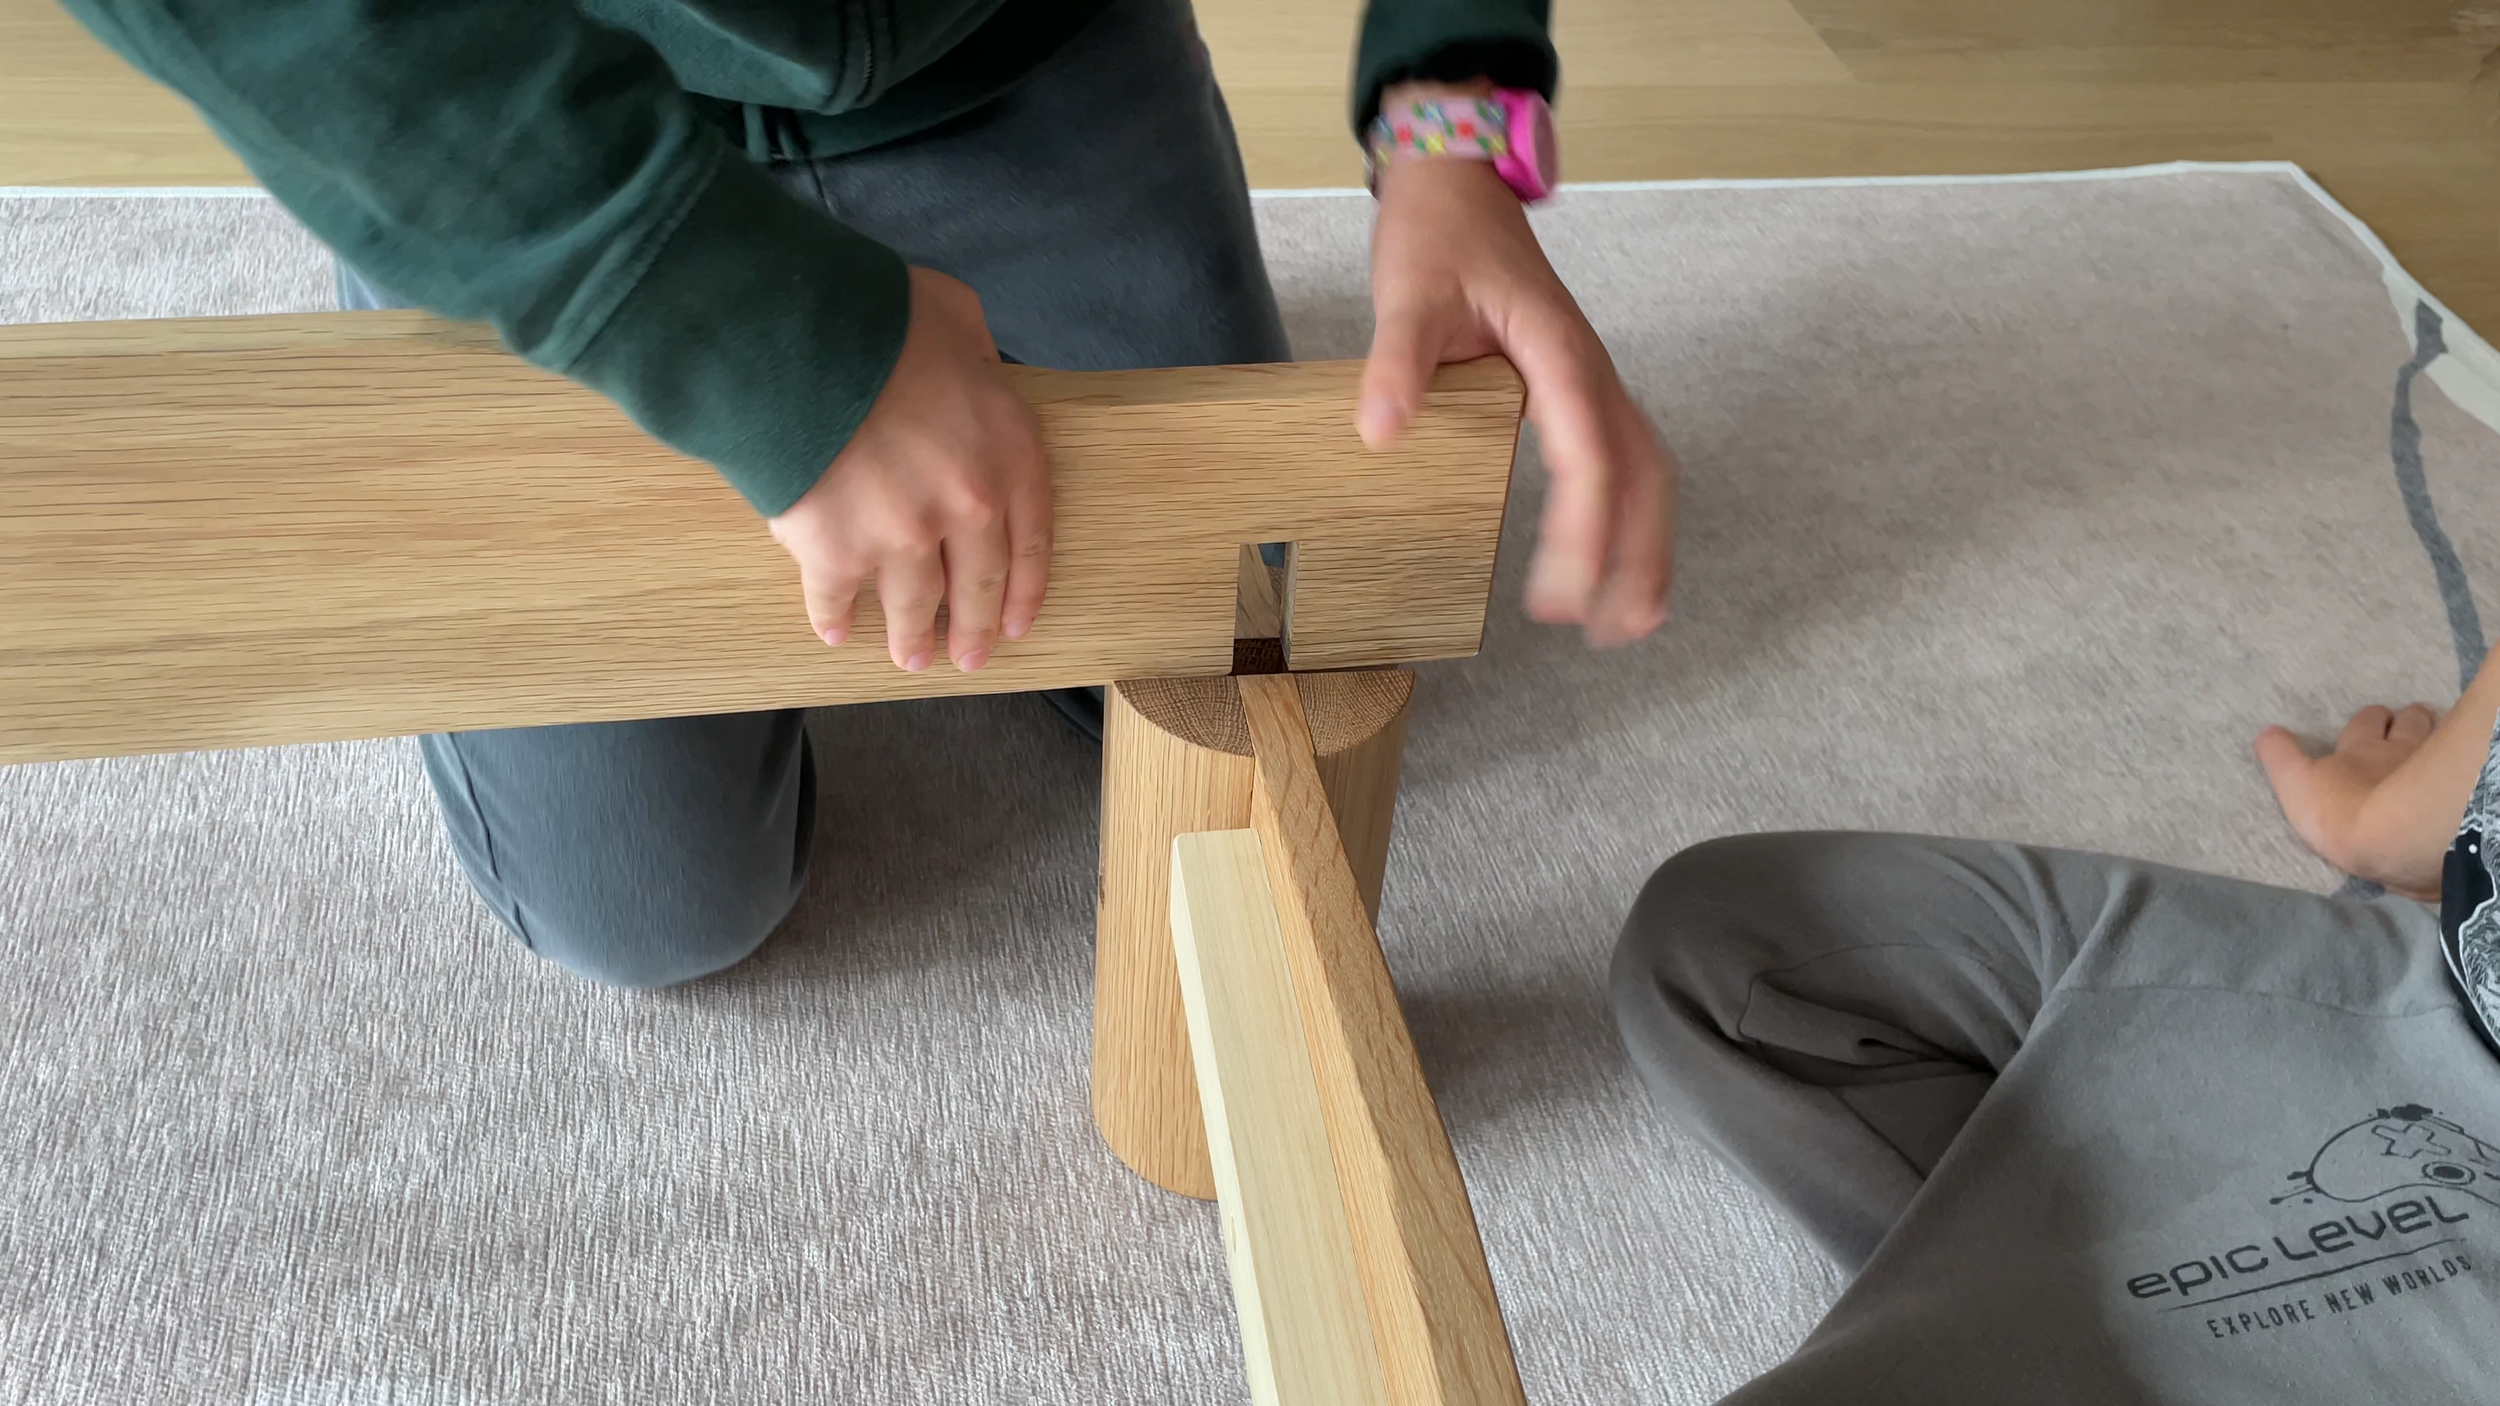
The Castle joint is like an intersecting bridle joint, so you need to make 2 open mortises that intersect with each other. The result looks like an “X” or a plus sign.

To do this, make the mortise referencing one face, then flip it a quarter turn to make another mortise on the adjacent face.

The dado stack didn’t cut deep enough though, so the joint needs to be extended.
First, rough cut the rest with a bandsaw.

Then clean up the rest with a template and a pattern bit.

Once cleaned up the feet can be released from the square jig.
Notice how the screws holding the feet in place were on an area that I knew was going to be cut away.

Next up, the cross laps on the bedrails.
Since the opening for the cross laps will be the same width as the mortises just made on the feet, I used the same template, only these need to be half the length because they intersect.

Before cutting though, the design of this bed has an angled cut on all the ends.
This angle needs to be cut before doing any joinery because the joint starts at the top of the angled cuts.

I rough cut everything with a jigsaw, then used the template to flush trim it to perfection.

Same goes with the cross laps.

Notice below as I am rough cutting in the joint on the side rails, why the angle had to be cut first.

The headboard and footboard have the same locations for the joints, so I used the footboard as a guide for rough cutting and trimming up those joints.
Doing this with matching parts will lead to better results than marking out parts individually.

After all the joinery is cut in, the parts could be cut to size.

And finished shaping. I added a 4” radius curve to the upper corners of the headboard using a template.

While the bed is assembled you can use your actual workpieces to get precise locations for all the supports.
The side rail supports go on first, using cut offs from the slats as a guide for their height.

The center rail also needs supports. These are made from blocks with a large dado cut in them.
They too are placed in location with the actual workpieces as a guide for perfect placement.
These go on the headboard and footboard, the center rail is clamped under the support slats to get the right height.

The center rail is also supported by feet. These feet are attached with screws, but through end grain… to make this end grain joint stronger, dowels are glued in through the faces of the feet.

You can see below how the screws will bite into the edge of the dowels, making this joint a lot stronger than it would have been if it was just a screw going into end grain.

The headboard needs some extra support from the back as well.
So I milled up 3 more pieces to act as upright supports and cut some domino moritises in their faces.
Some of these mortises will be used to attach these uprights to each other, others will be used to attach the uprights to the headboard.

The 3 uprights are attached with dominos and glue by 4 stretchers.

The top of this support will lock it further into place, but it will also act as a book shelf that’s behind the bed.
I drilled holes through the face in the locations where the uprights are.

Then drilled holes through the uprights and locked the pieces together with dowels.

To connect this support to the headboard, I will use buttons to allow for wood movement, which I made out of some scrap.

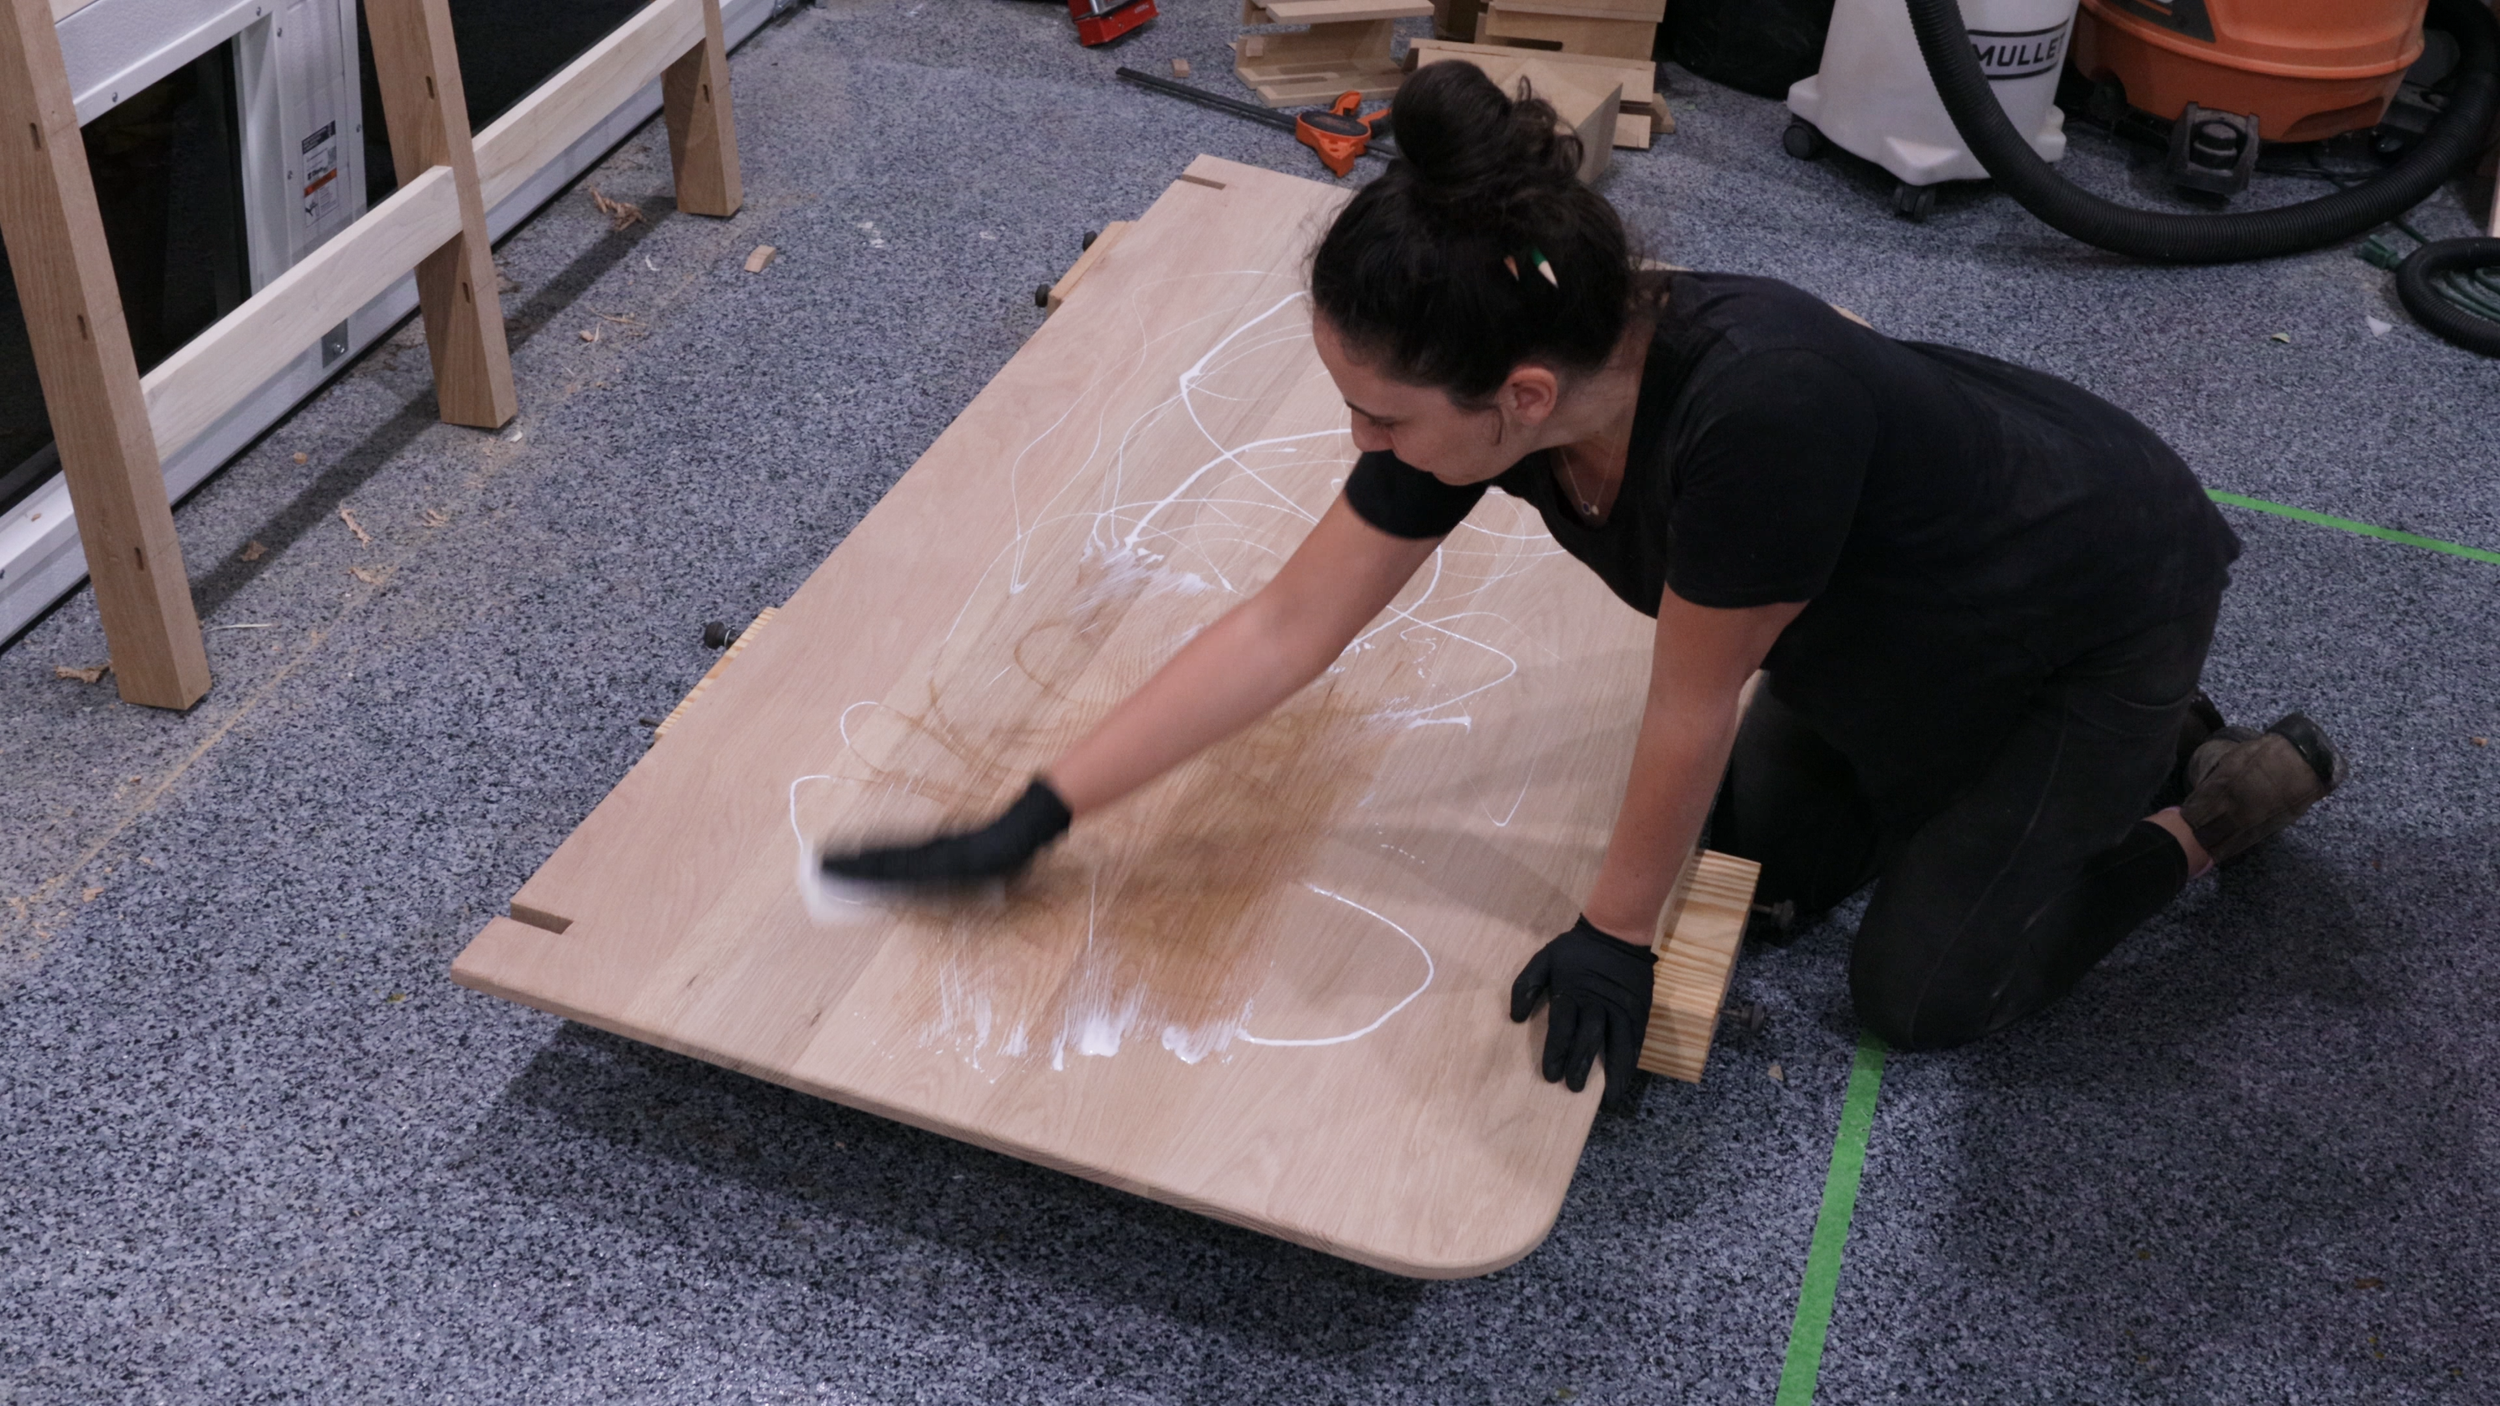
Then put on the finish! I used OSMO Polyx Oil in Raw to avoid any yellowing that a natural oil finish would do.
Time for assembly!

To make assembly easy now, and potentially in the future, I labeled all the parts.
FL stands for front left, FR stands for front right, and so on…

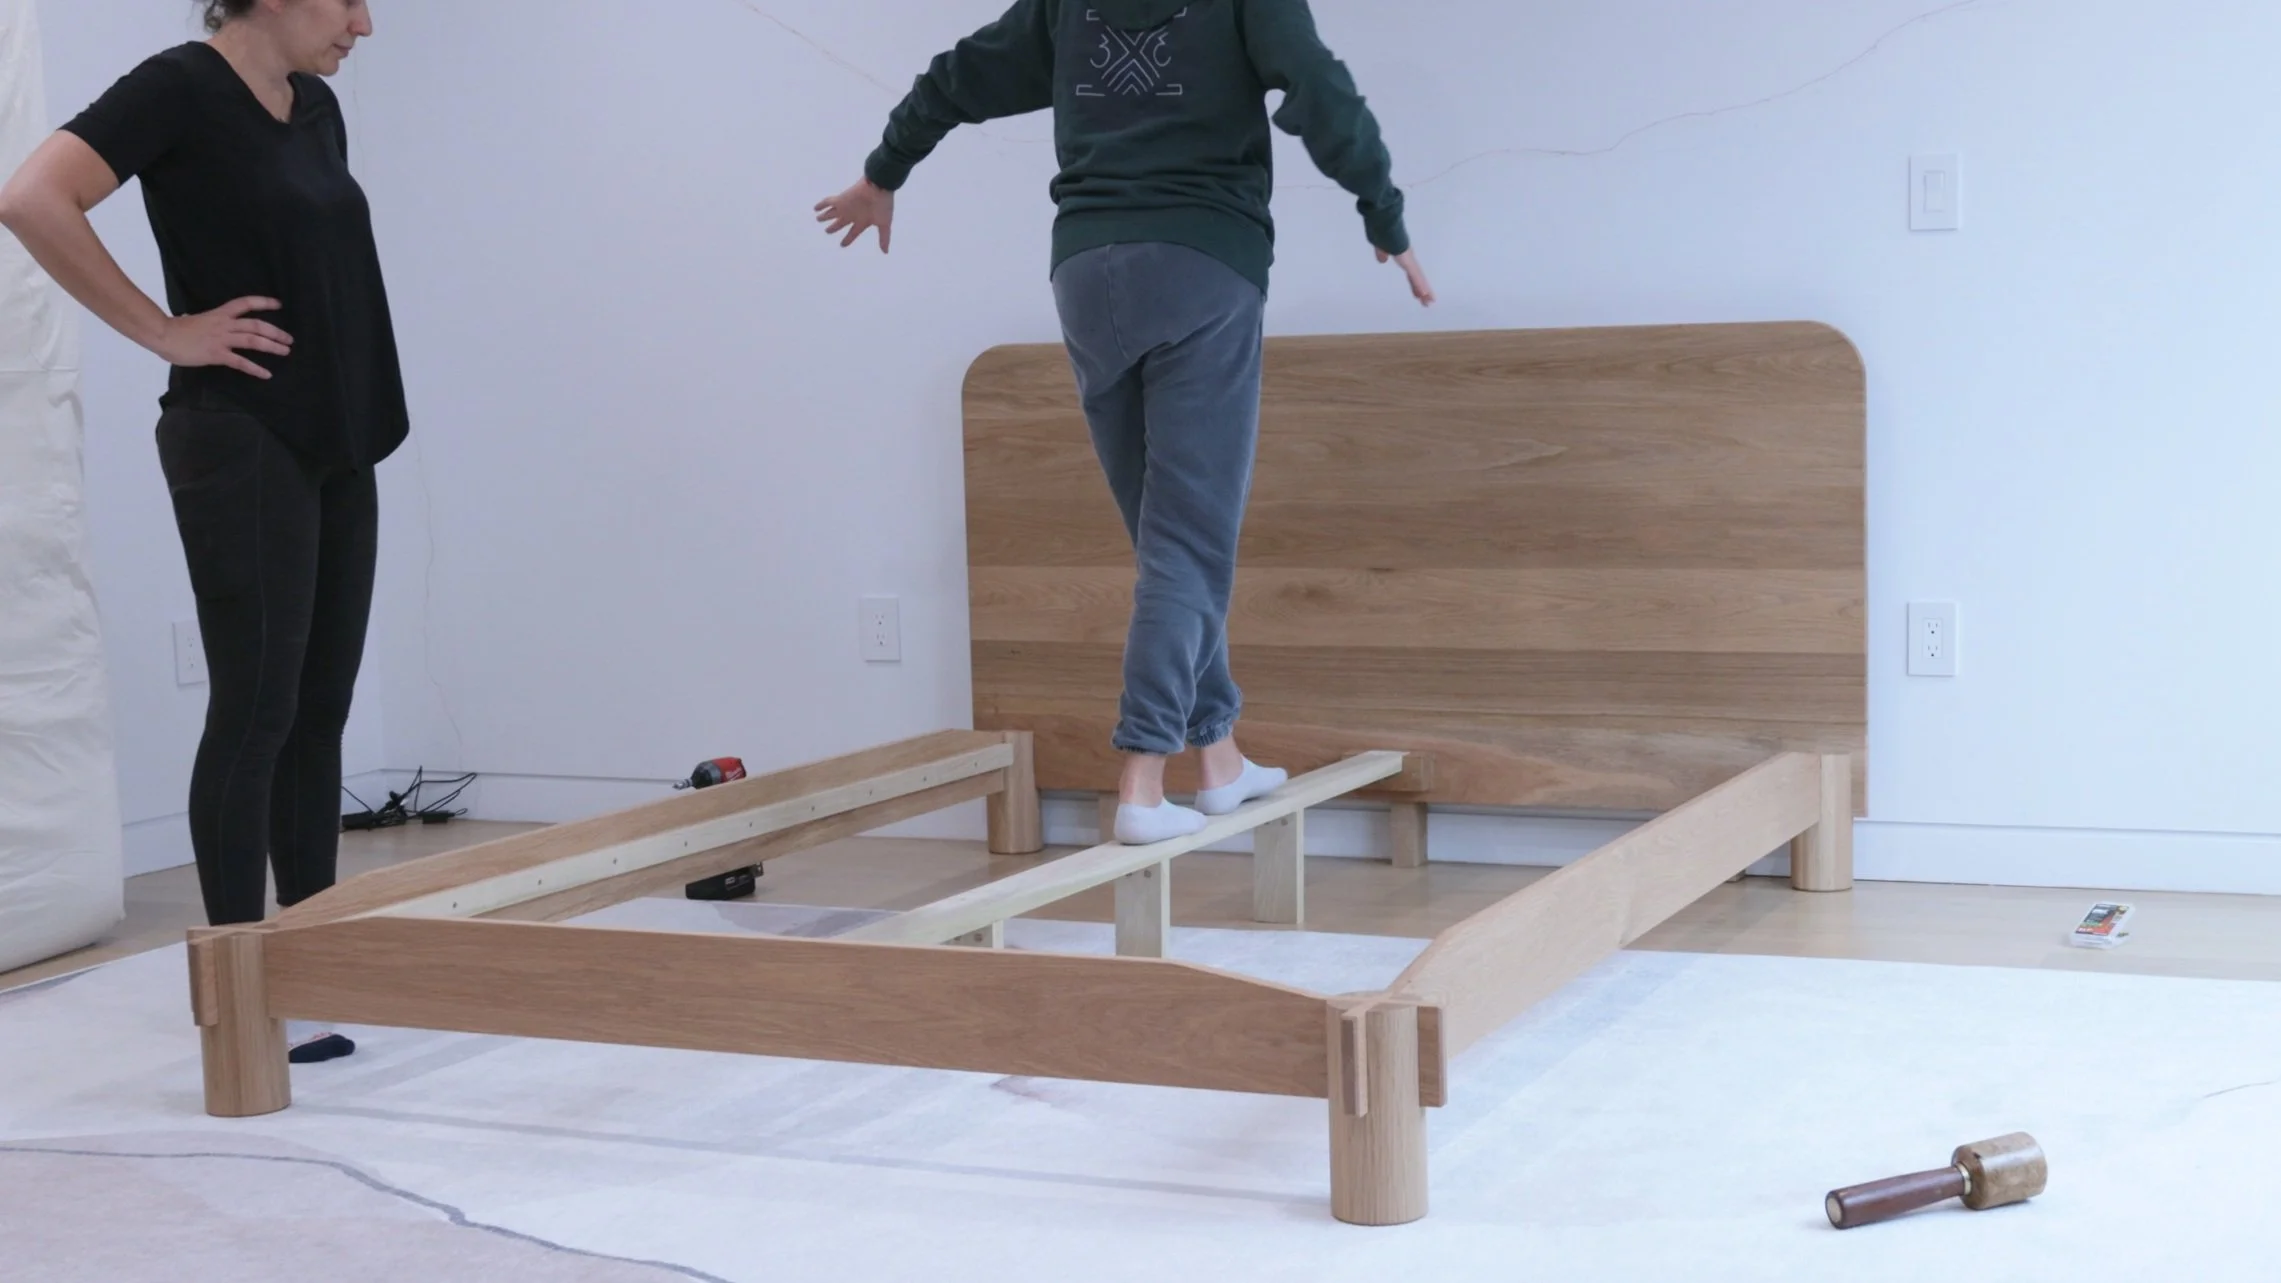
Assembling this is like a puzzle. The side rails go on first because their joints are cut on the top.
It is easy to get the correct location for these pieces by putting a scrap in place where the connecting joint will eventually go.

The footboard goes in next. The joint cut on the bottom locks the side rails in place.
So satisfying when it is a perfect fit!

The headboard goes on next, just like the footboard, the joints are cut on the bottom, so it snaps right into place.

The back support gets attached the headboard with the buttons made earlier.

Then the center rail support gets put in place on the center rail blocks and it is locked down with countersunk holes.
Countersunk holes were drilled in the support slats as well, and they got locked down to the side rail supports.
Using a spacer makes this step really easy!

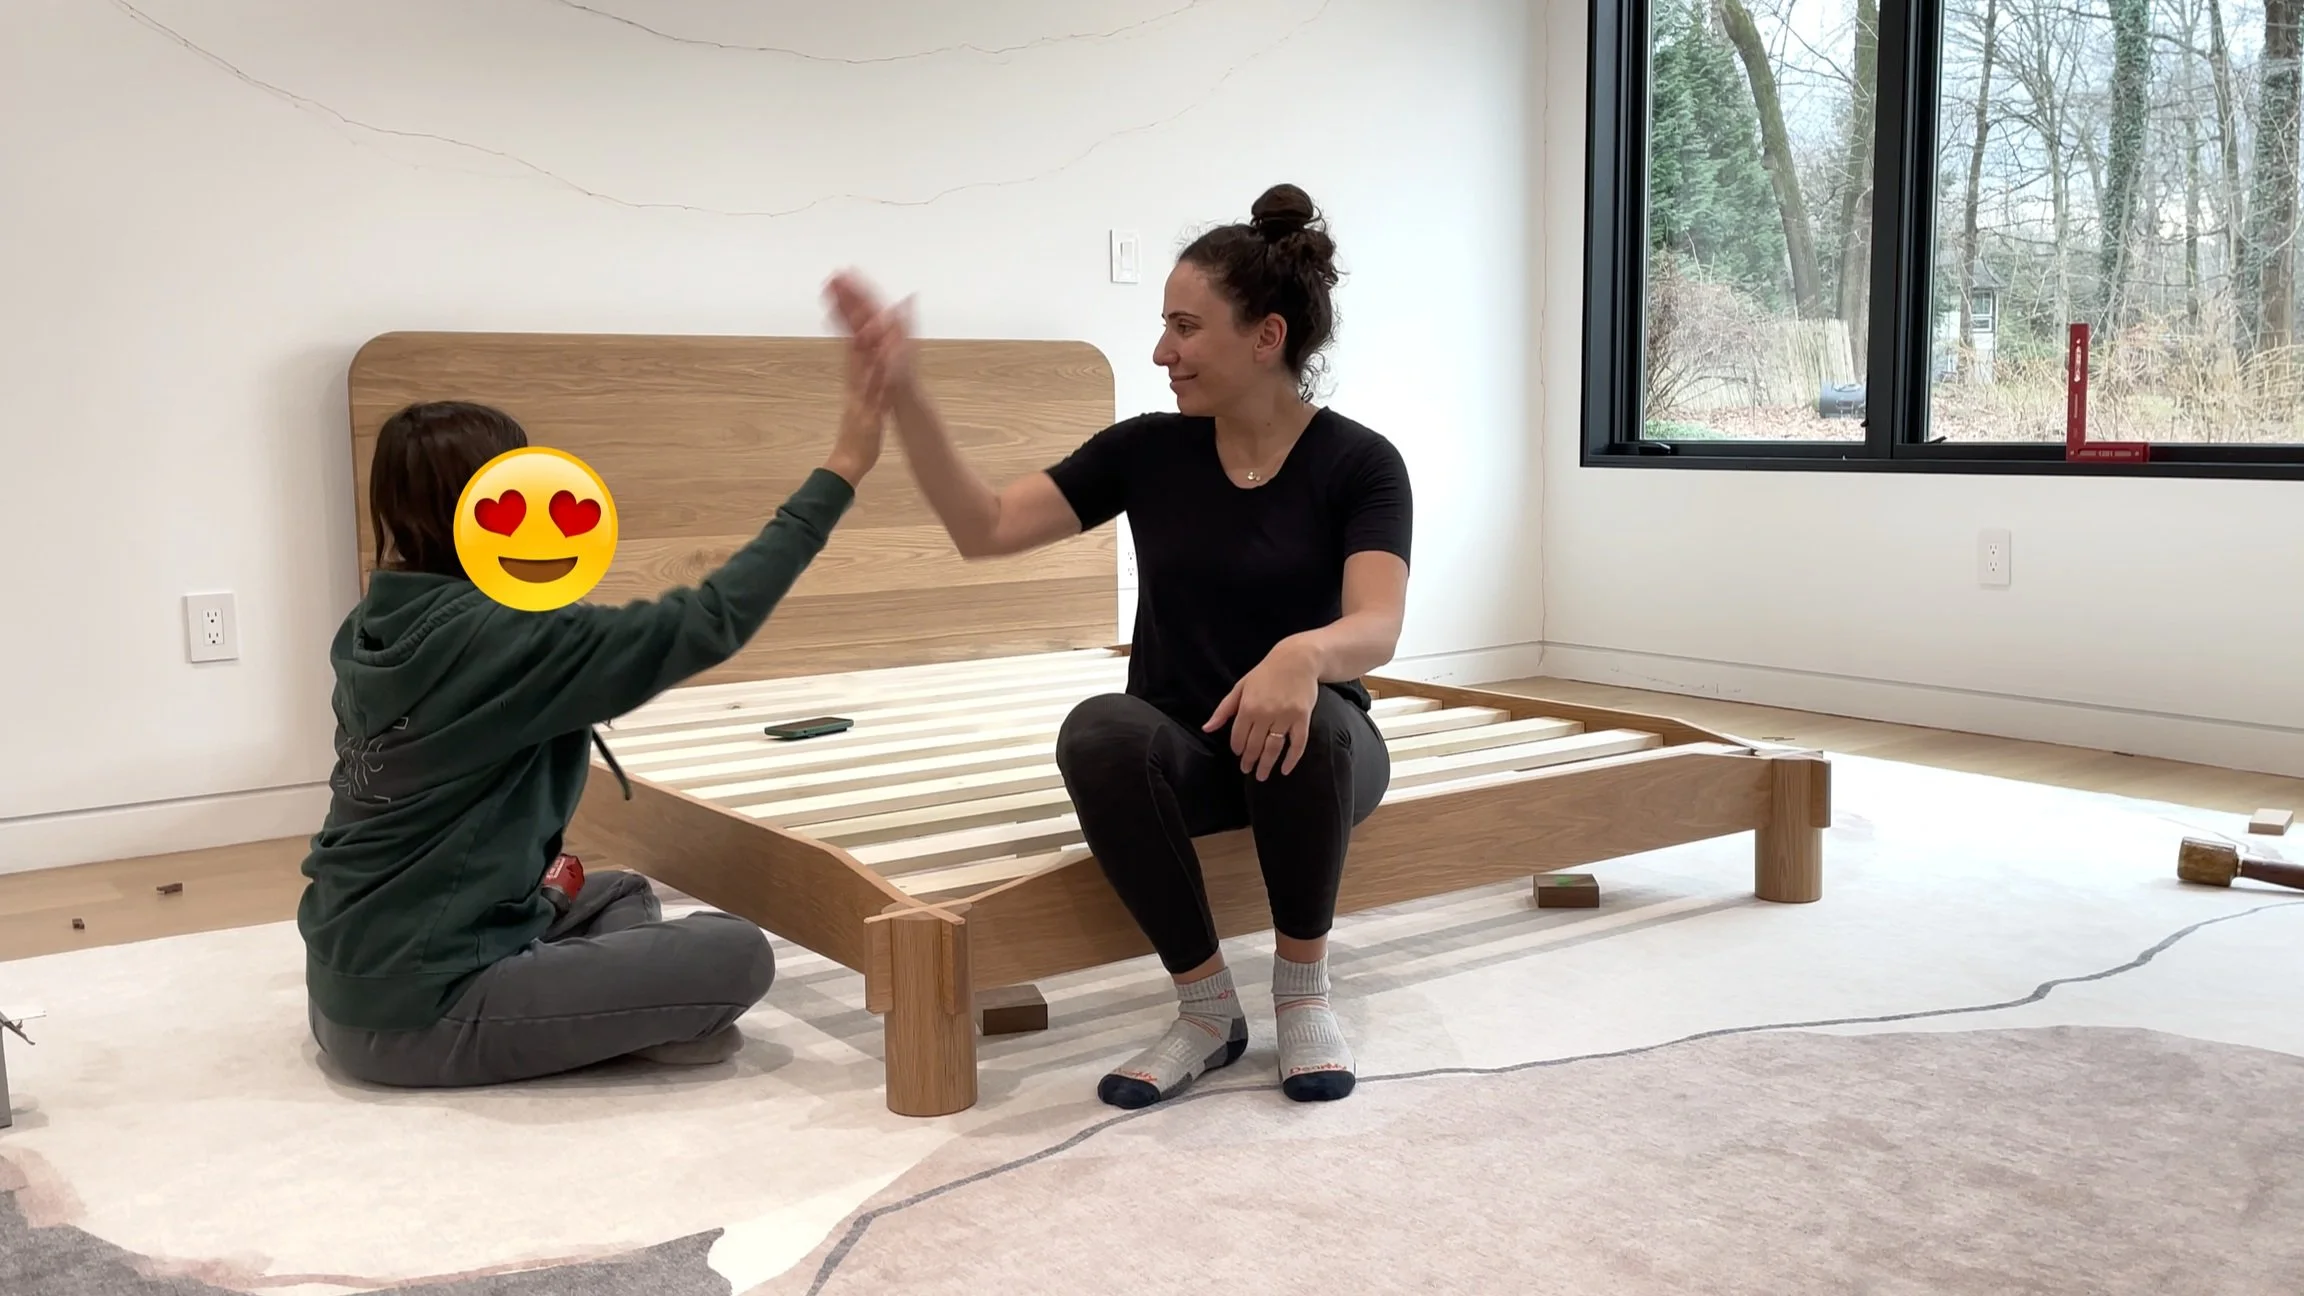
A celebratory high five and it’s done!
These round castle joints are just so cool!

My daughter is super happy with how it turned out, so I’m happy!

That angled cut, is not just aesthetic… It traps the mattress in place while leaving the corners open so it is really easy to change a fitted sheet!
So it looks cool and it’s functional!

We are both thrilled with how her room is turning out and it was really fun to work together on this project

On to the next one!