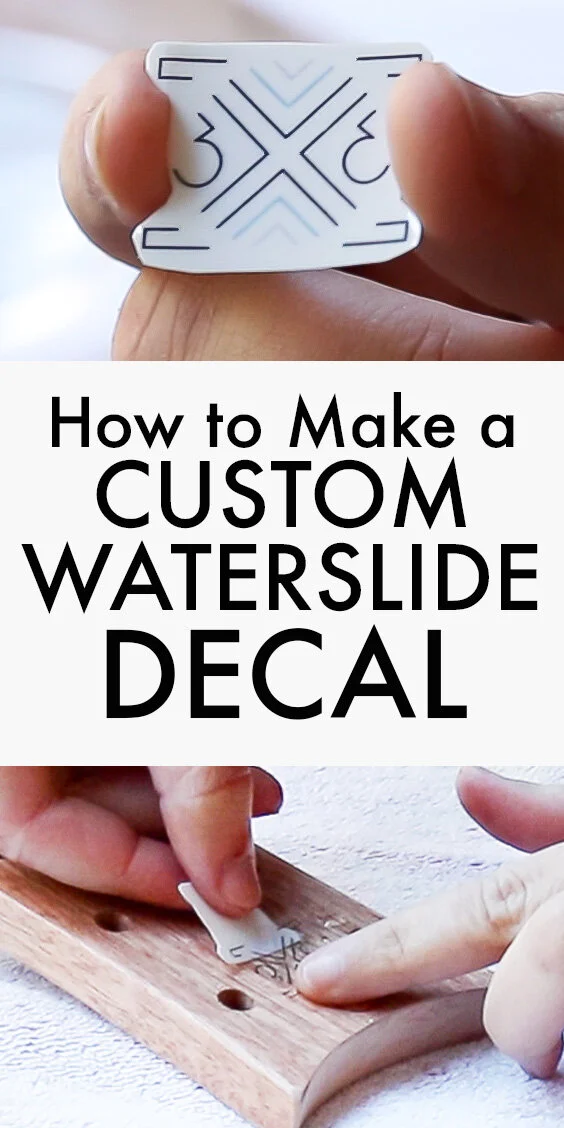
How to Make a Custom Waterslide Decal
Last week I made a guitar and a bunch of people asked me to do a tutorial on how I did the waterslide logo for the headstock… so here it is!
Check out the full video below!
Links below are affiliate links, I get a small commission if you click on them at no extra cost to you. Clicking on them really helps me continue to make more projects!
Making your own custom waterslide logo is easy, but before you get started, you just want to make sure the image is the right size…

Print out your image in multiple sizes to make sure you are happy with it before moving on to the next step.

Once you know the image is the right size, you can move on to printing it on the Decal Water Transfer Paper.
This is a special paper that is made for printing custom decals, but it only works for an inkjet printer, not a laser printer… if you have a laser printer. They sell that paper too!
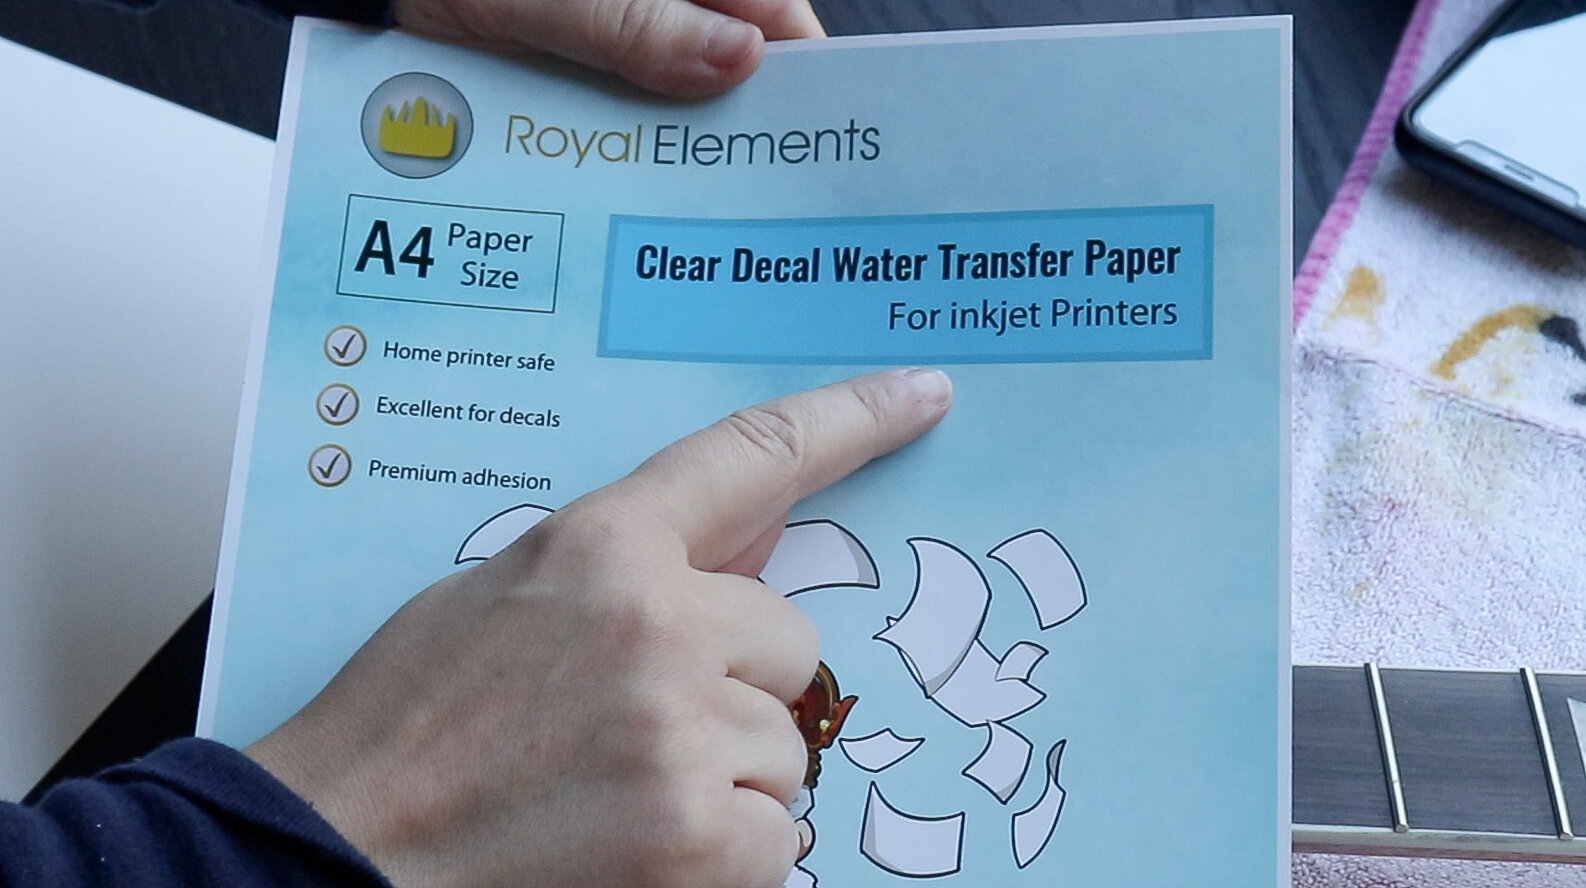
This paper is glossy, so don’t touch the ink you printed out, or it will smudge….
In order to avoid that, you need to seal the ink onto the transfer paper.
I like to use this Mod Podge Clear Acrylic Sealer.
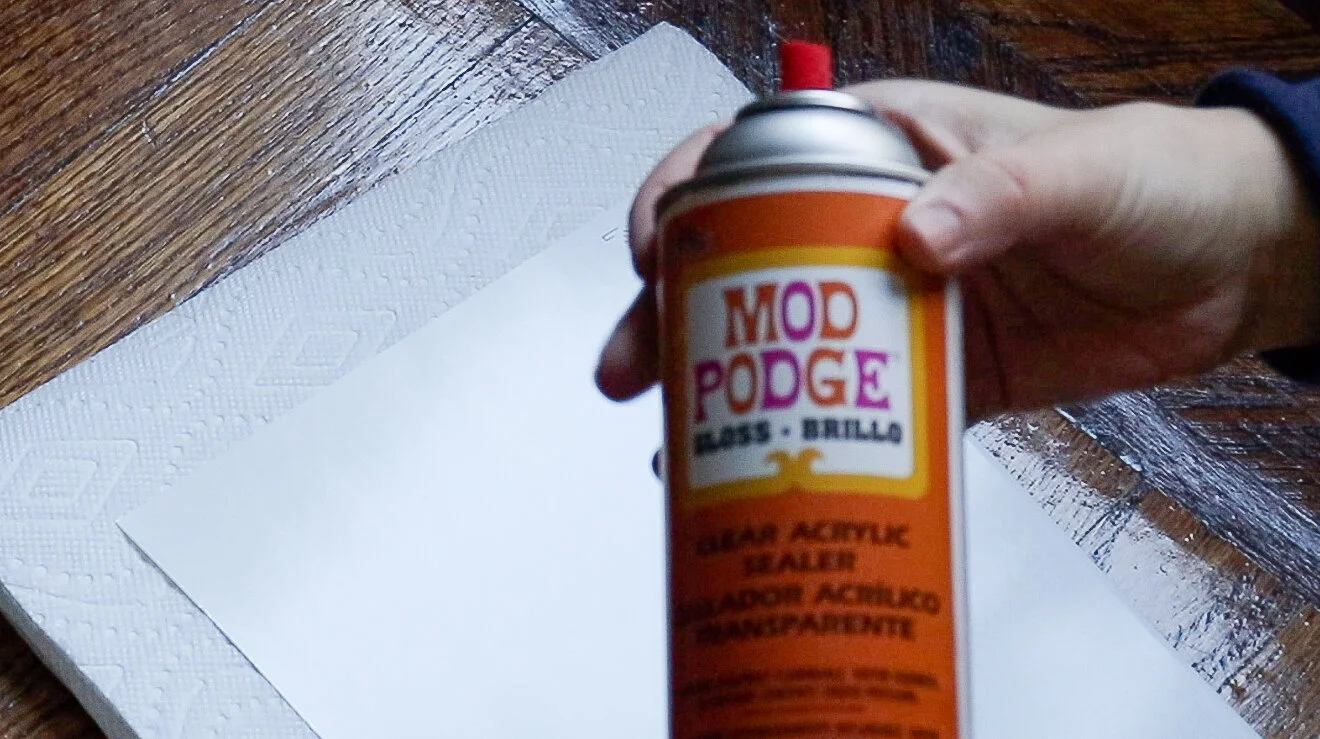
Spray 3 coats on the image, waiting one minute between each coat, then set it off to dry for an hour.
If you want to speed up the process you can also dry it for a few minutes with a hair dryer.

After it is dry, cut out your image, staying close to the lines.

You might think it makes more sense to cut the image out before sealing, but you get a better seal on the edges if you cut it out after you seal it.

Now it’s ready to be applied! (Note, your workpiece should have finish on it already….)
Put the decal in a bowl full of warm water for about a minute.
You will feel that the decal is ready to be used when the paper backing slips off easily.
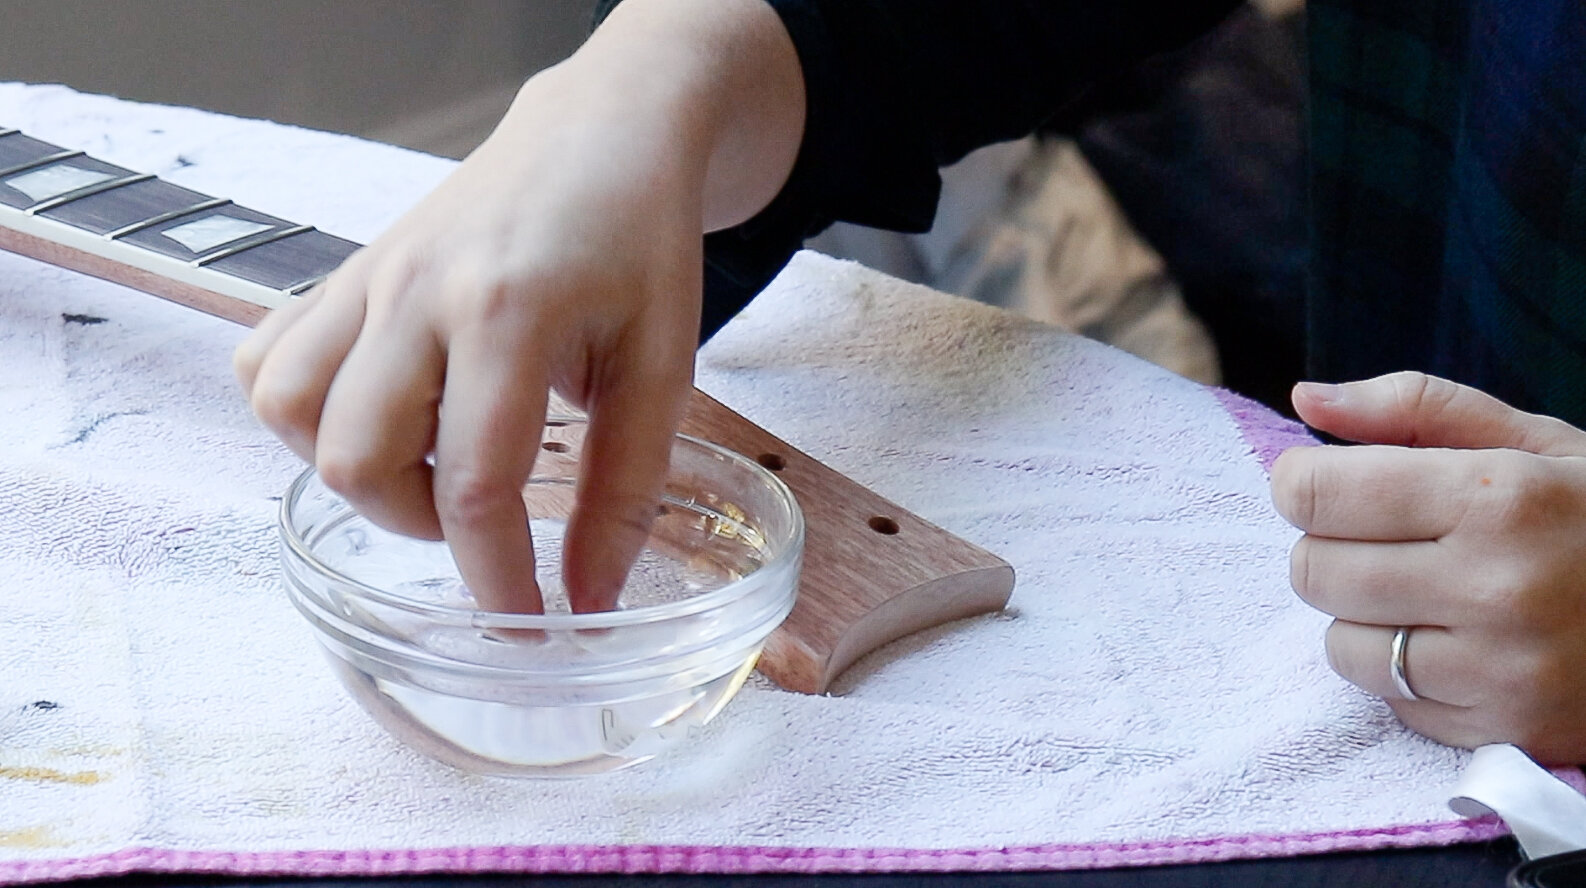
Before applying the decal, just put a few dabs of water on your finished piece of wood.
This will allow the decal to move around and you can place it exactly where you want it.

Now just slip the decal off the backing onto your workpiece!
Move it around until you happy with the location.

Then use a paper towel to soak up any of the excess water.
Make sure you brush out any potential air bubbles that may be trapped under the decal.

Use a hair dryer to make sure the decal is set and dry in it’s place.
Then all you need to do is seal it with some lacquer!

The decal will be sealed and it wont move at this point, but you can go the extra mile and make it look even better.
At this point the decal is raised a bit above the wood, you can even it all out by sanding down the lacquer that’s just on top of the decal with 1200 grit wet/dry sandpaper.
You want to focus on sanding away just the lacquer that is on top and the edges around the decal, but make sure not to go too far or you will sand the decal off….

Then you can recoat with some more lacquer, and repeat these steps until you are happy with how well the decal is blending into the wood.

Hope this was helpful! Off to go finish some more projects!