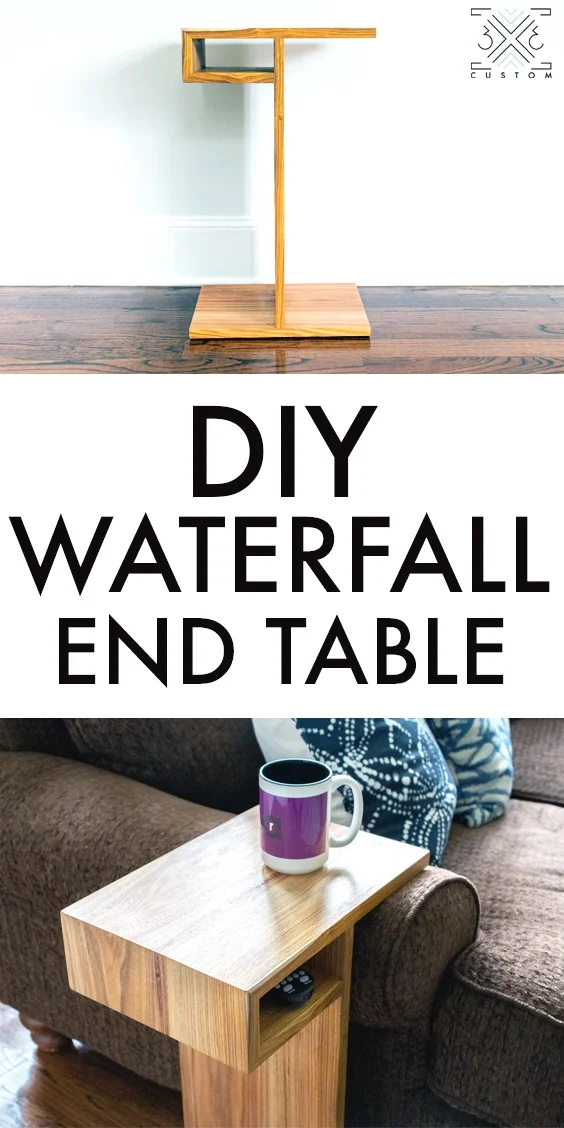
Waterfall Side Table with Storage Shelf
I have made a DIY friendly version of this table before using just a circular saw and butt joints. This is a very simple table to build, so I decided to kick it up a notch with a cool waterfall detail using a miter. The complexity comes in when reinforcing the miter. A common way to reinforce a miter joint is by using a Domino, but I don’t have one, and I know a lot you guys don’t either!
So I decided to use a hidden spline to reinforce the joint using the tools I have! It turned out to be pretty simple to do and it will make this waterfall table super strong.
Check out the full build video below!
Links below are affiliate links, clicking on them helps me keep this site going at no extra cost to you ;)
Cut List and Plans Here!
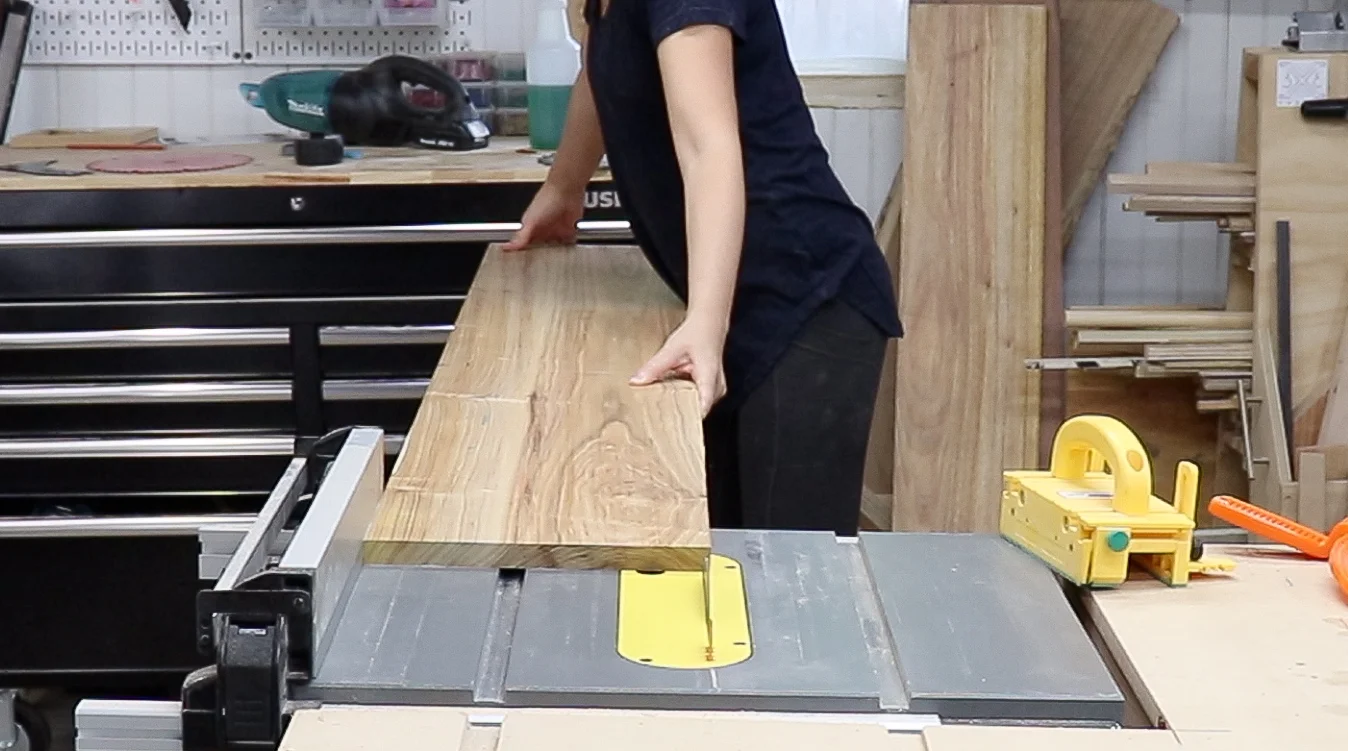
I started by preparing the board I will use for the table. I am going to use one board of Canarywood I got from Woodworkers Source.
I trimmed the board to be about 10” wide. The beauty of this table though is that it is fully customizable to fit whatever size you need or whatever width board you have!
Then I made marks on my board for where to cut the miter joints. Plans with measurements here -
Waterfall Side Table Plans
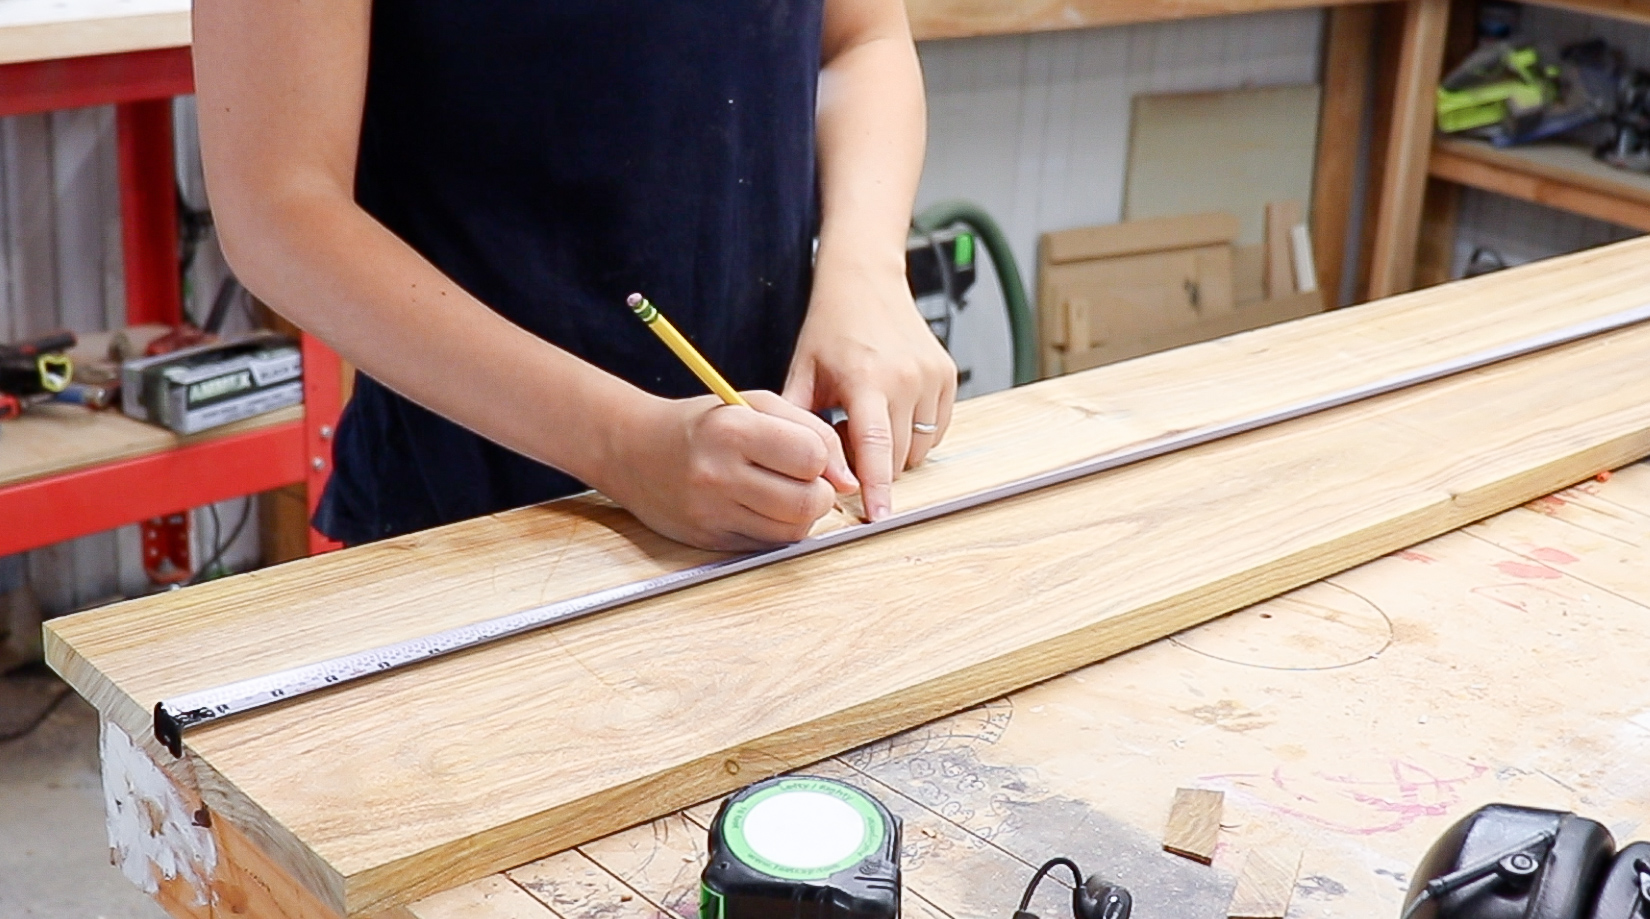
The waterfall feature for the miters will only be for the top of the table which is made up of 3 pieces. So I rough cut the board at the miter saw a little bit longer than the length of those 3 pieces.

Then I cut the miters using my cross cut sled at the table saw with the blade tilted to 45 degrees.
In order to make sure that these miters are very accurate, I used the clamps on my sled for the back of the board in conjunction with clamps on the fence of my sled to put pressure on the front of the board.
This just makes sure that the board will be cut evenly all along the cut.

To create the waterfall feature of the grain in the miters flowing into each other, you need to flip the mating board over and cut the miter on the other side.
It’s really easy to do this using the cross cut sled because you can line the board up next to the kerf on the sled.
You want to make sure to place the board like the picture below… the blade should cut right before the end of the previous cut. This will make for a great grain match because it is removing the least amount of material.
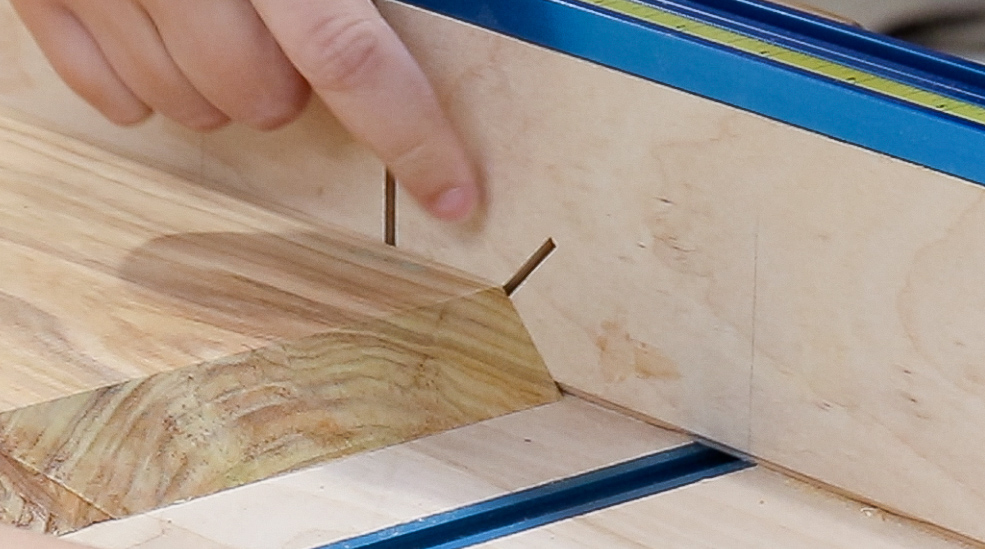
If you cut this joint correctly the cut off should be a perfect triangle.

There are 2 waterfalls in this table for the storage box, so you should be making 4 miter cuts on 3 pieces of wood to achieve that.

Moving on to the joinery!
I made a quick jig to be able to hold these mitered pieces at the correct angle at the router table.
All you need for this jig is 2 pieces of scrap plywood with the same 45 degree miter cut on one end of each piece.
The bottom piece of the jig should have the miter on the front, facing up. The top piece of the jig should have the miter cut at the bottom leaning towards the back of the jig resting on the miter of the bottom piece.
Then I made some small triangles out of scrap MDF to act as supports.

I glued together the 2 pieces of plywood with the miters cut on their ends and reinforced it with brad nails. Then glued on the MDF support triangles.
When gluing on the support triangles I made sure to leave enough space so a clamp would be able to fit on the jig and hold the workpieces down.
The last step was to glue on a support block that will hold the pieces in the correct position at the back of the cut. This support block was just a scrap with the same 45 degree miter cut on one end.
The jig is done, now it’s time to set it up at the router table!
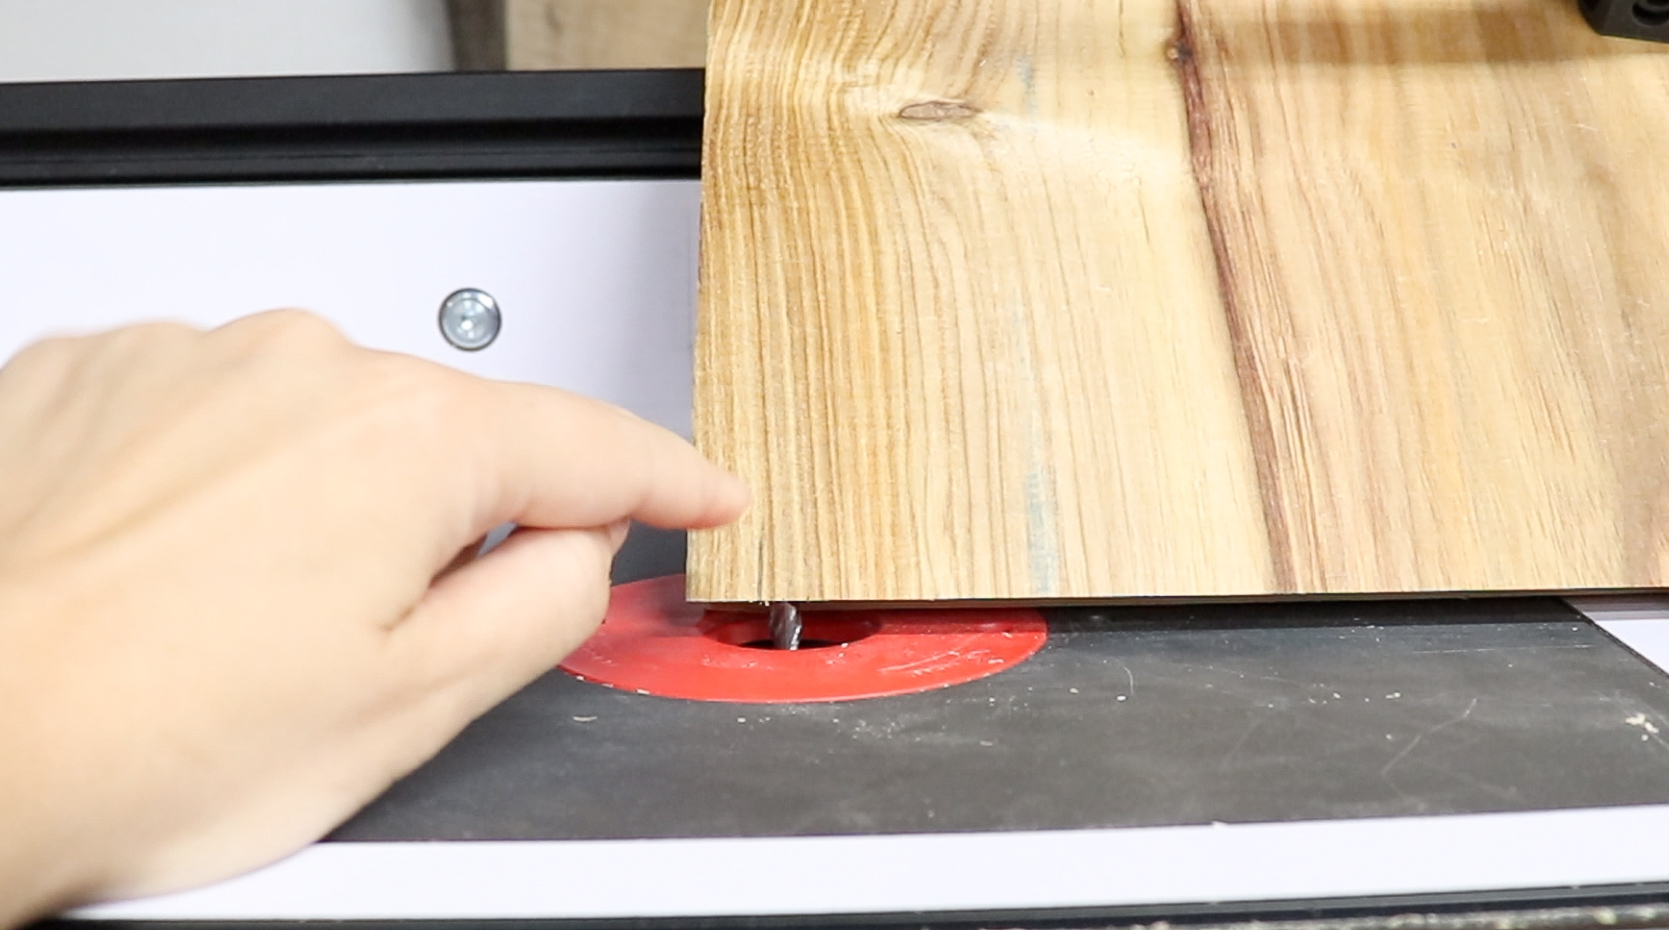
I used a 1/4” spiral bit and raised it to 1/4” high. Then I placed one of my work pieces on the jig to set the fence to the correct position.
You want the bit to cut roughly in the center of the board without going all the way through the board and also leaving enough material at the top for strength.
(I did a few test cuts with similar sized stock to make sure the bit was in the correct position.)

Now the bit is at the correct height and the fence is in the correct position, it’s time to set stop blocks for the beginning and end of the cuts. Setting up these stop blocks will make this a hidden joint.
To do this I marked about 1/2” from each end of the board, then clamped the board to the jig slightly above the bit. This way I can slide the workpiece over the bit and easily see where the bit needs to start and stop.
I moved the board all the way to the right so that the left side of the bit was lined up with the 1/2” line I made on the left side of the workpiece, then I clamped a stop to the right side of the jig on the fence. This right stop will be where I plunge into the workpiece.
Then I repeated the same process on the other side of the board.
I moved the jig so the right side of the bit was lined up with the 1/2” line I made on the right side of the workpiece, then clamped a stop to the left hand side of the jig. This will be the end of the cut.
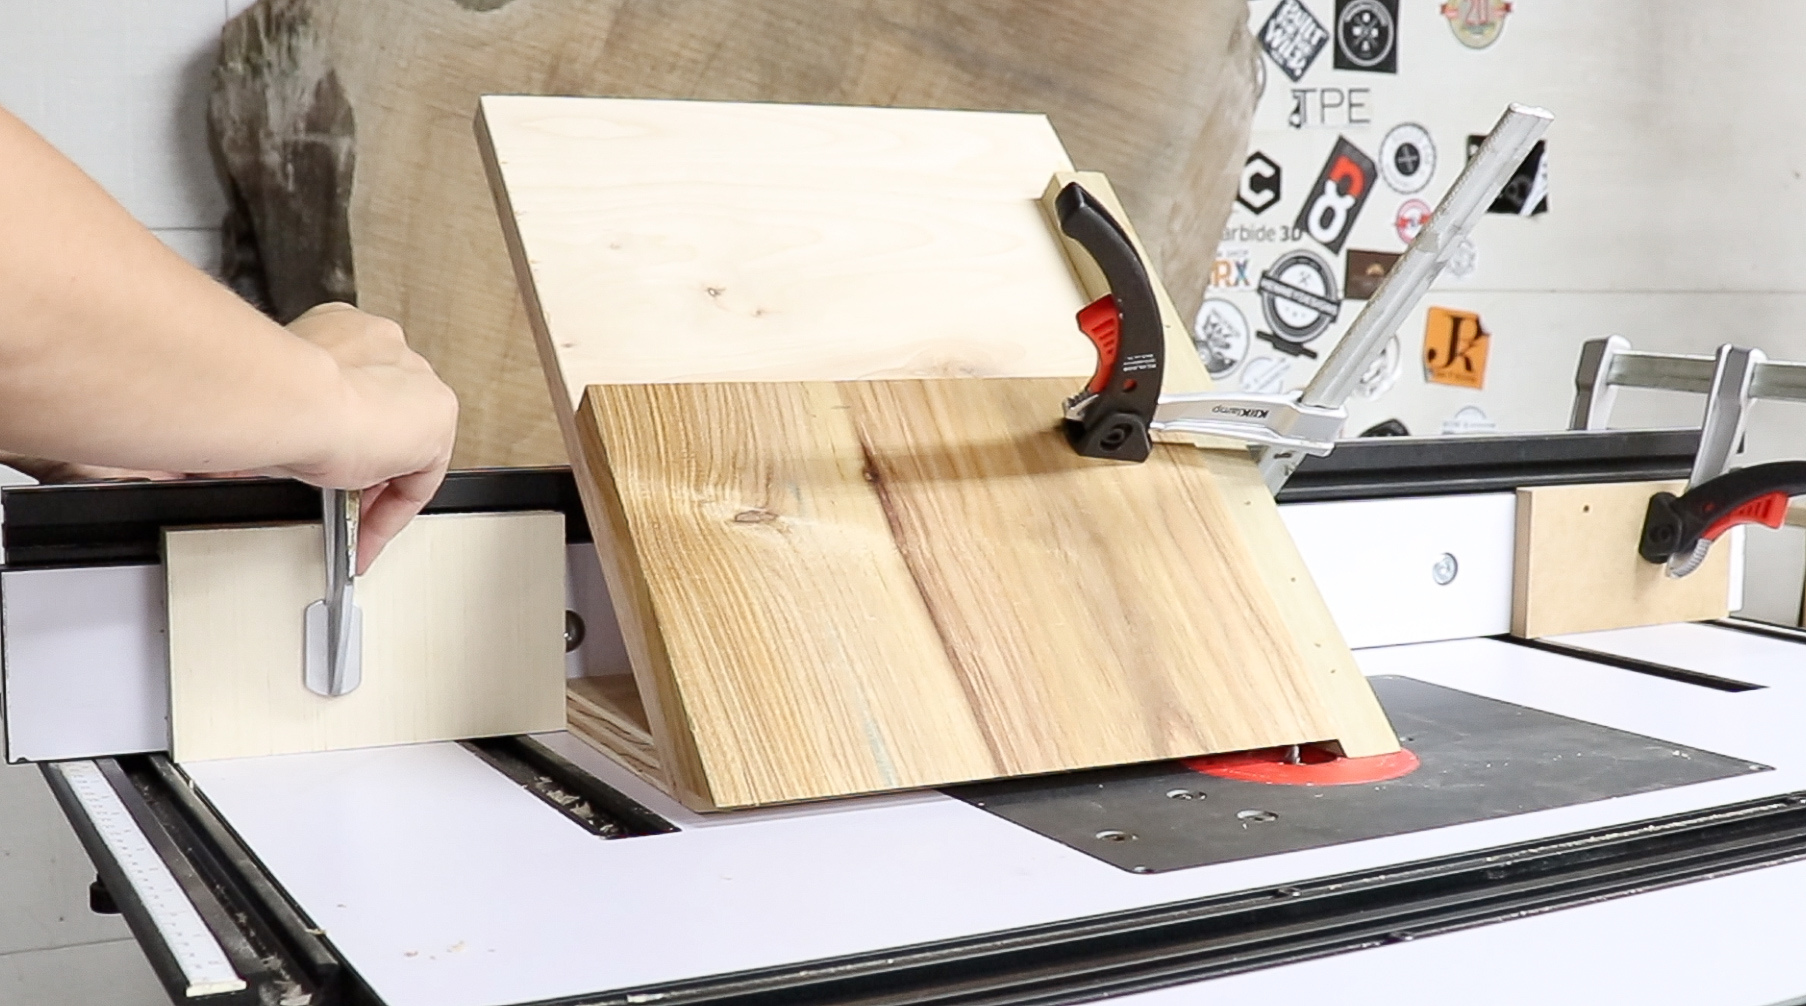
Everything is all set and it’s time to cut!
I clamped the board onto the jig and turned on the router. Then with the jig butt up against the right stop block I lowered the workpiece onto the bit and moved along the fence until I reached the stop block on the left hand side.

I repeated the same process for all 4 of the joints on all 3 pieces.
I ran into some issues when it came to cutting the middle section of the box. Because the piece was not long, it was hard to clamp it to the jig, check out the full build video to see how I worked around that.

All the slots are cut! Very easy to do! Now onto the spline….
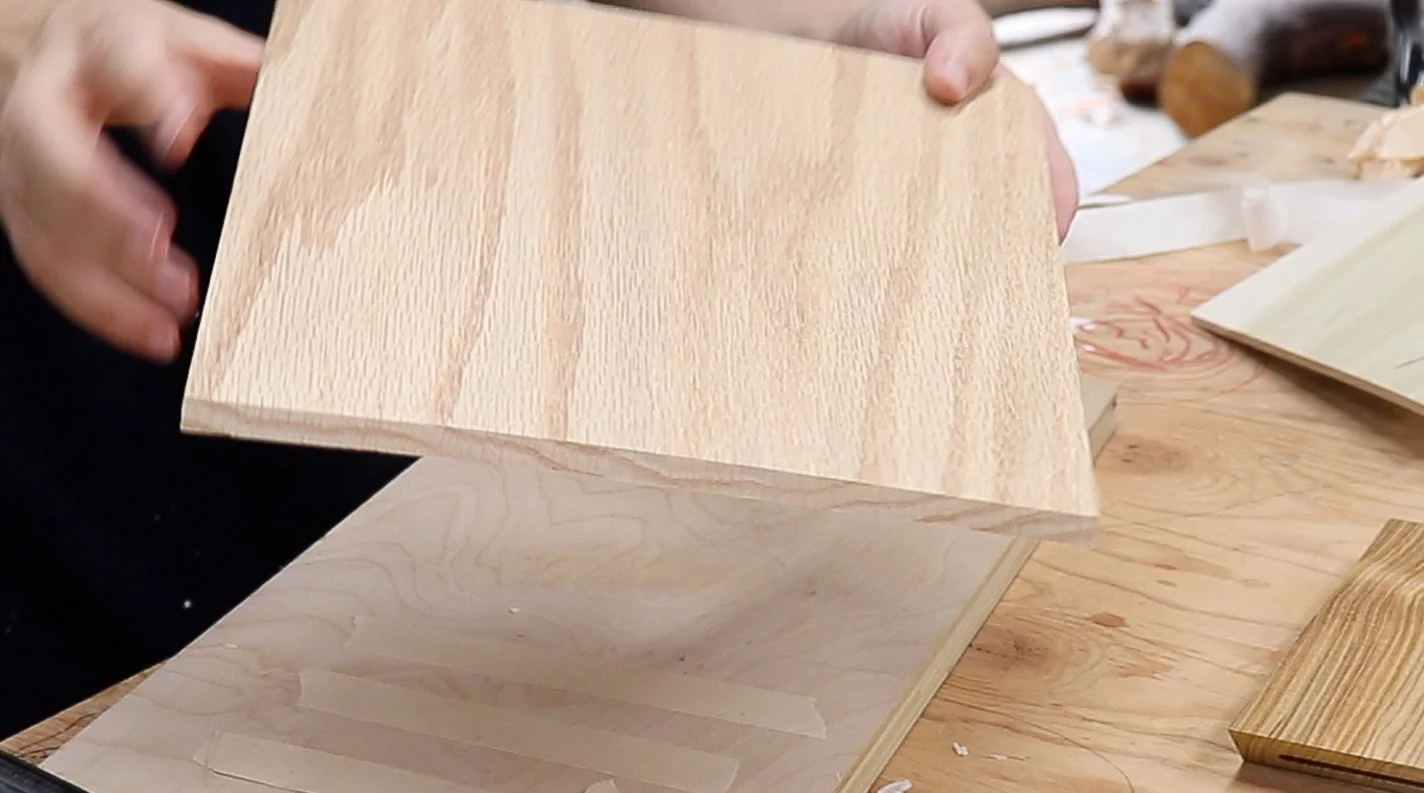
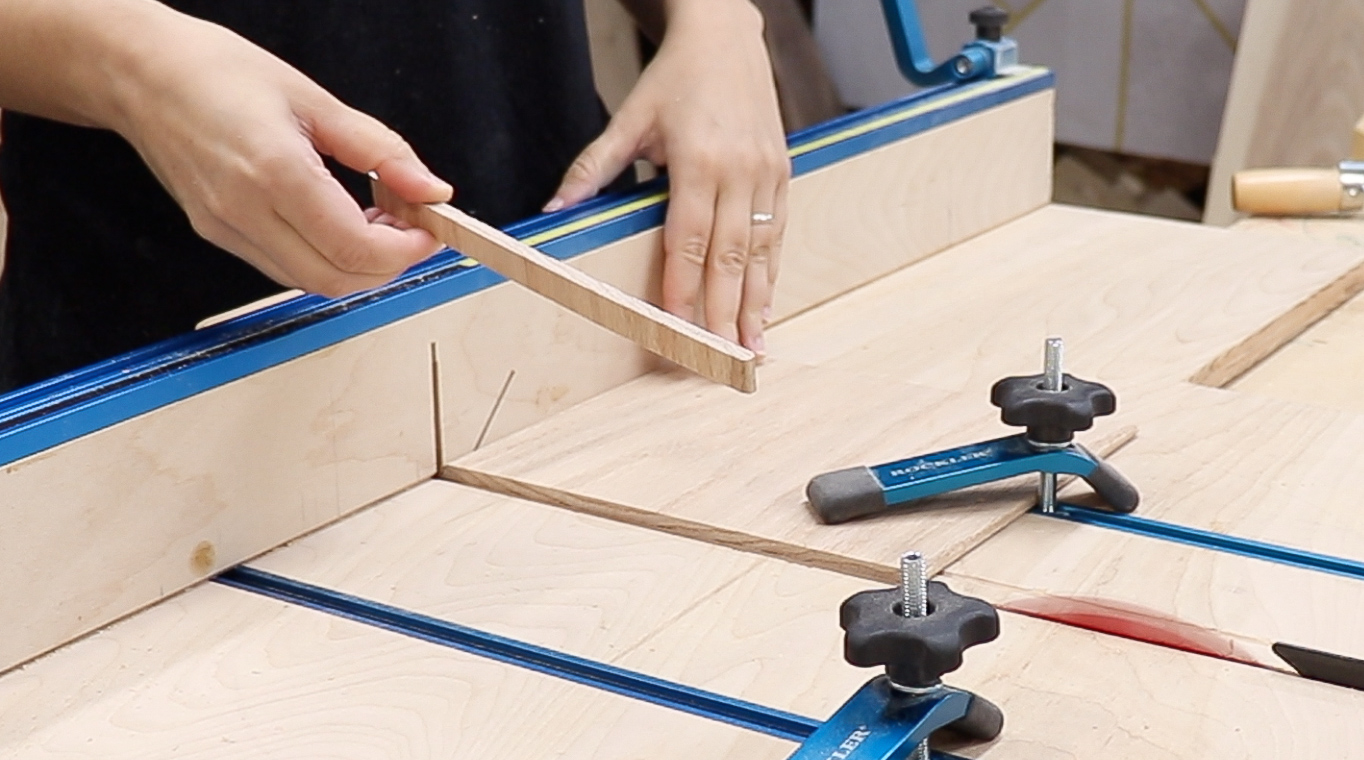
If you aren’t using plywood, you want to make sure the piece you are using for the spline has the same grain direction as the boards you are joining.
In the picture below, the grain direction for the workpiece is going up and down while the thin potential spline piece has grain going from side to side.
This will not work well because the spline would want to expand and contract with the seasons in the opposite direction as the table and it could cause the joint to crack open.

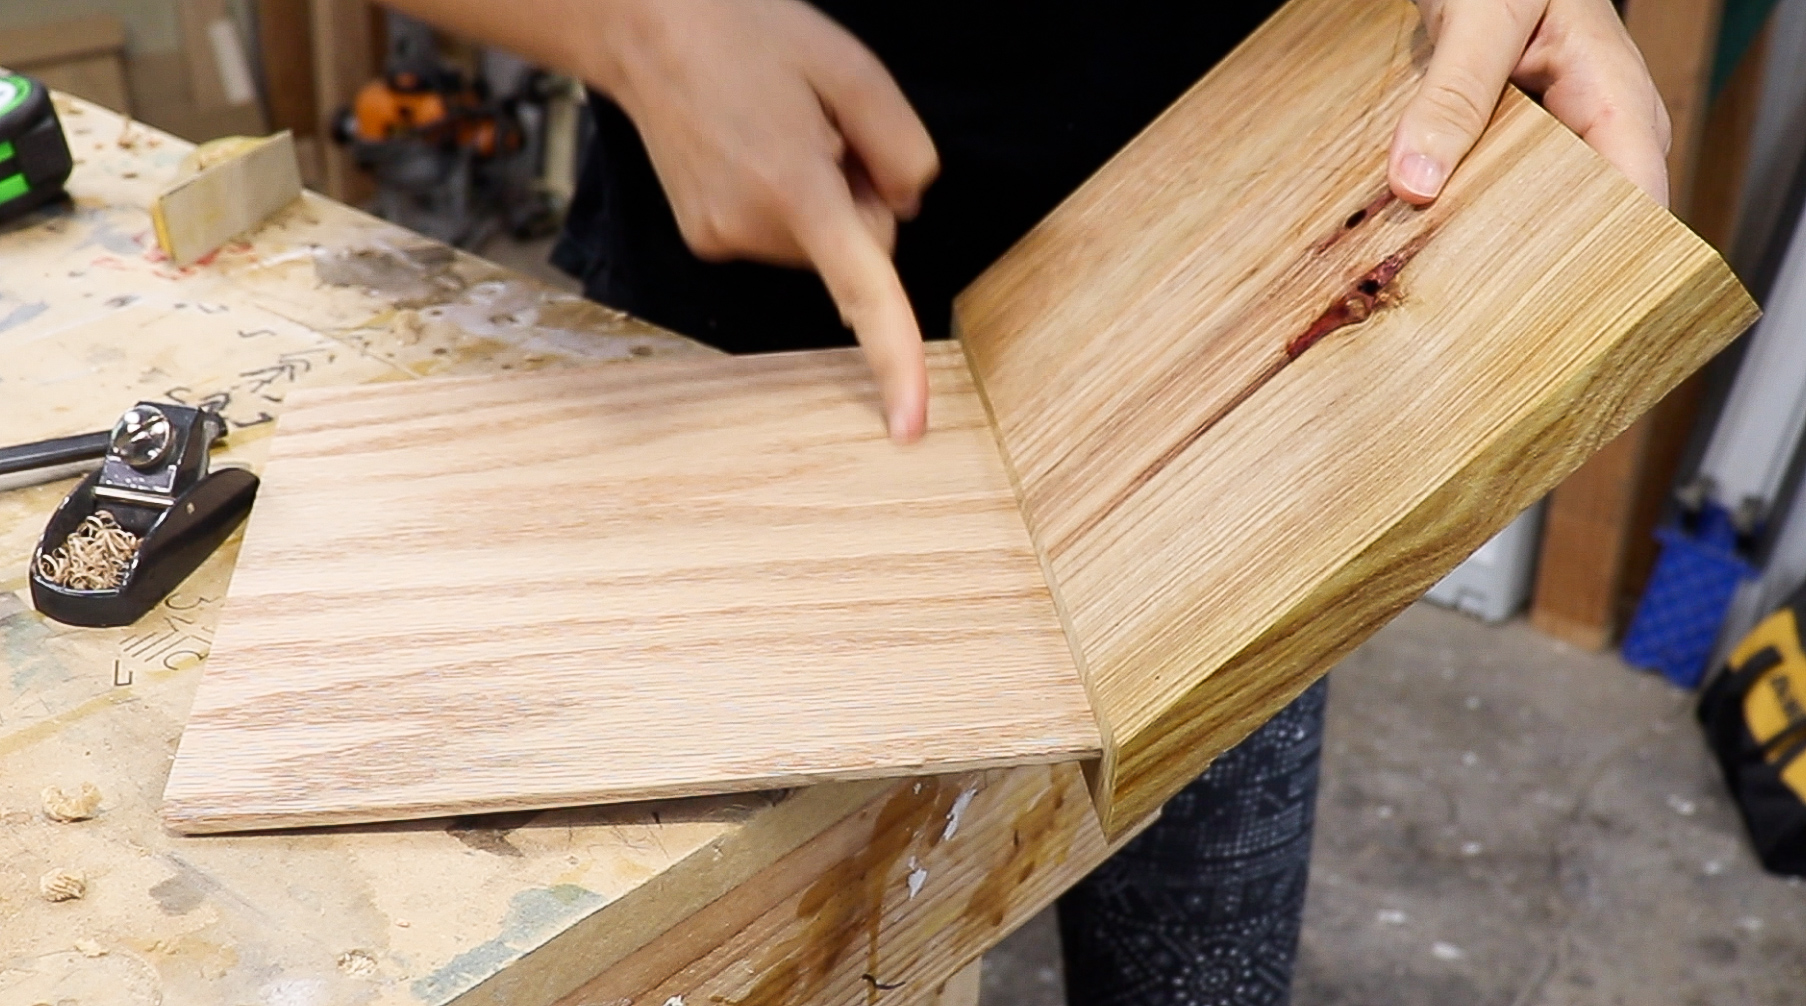
So in order to make a spline that has the same grain direction as the table, I found the widest piece of scrap I had (which happened to be oak).
I used a sled at my planer to plane it down to the correct 1/4” thickness I needed then cut it to width at the table saw.
The grooves left over from the router bit were round on the ends. I found it easier to just use a block place on the ends of the oak to round them over instead of squaring up the grooves.

The oak now fits perfectly in the groove, time to cut them to size!
(Notice how the grain in the oak is running in the same direction as the workpiece, this is what you want when you make splines like this.)
The router bit was set to 1/4” high to make the grooves, so I cut the splines to be slightly smaller than 1/2” at the cross cut sled to leave some room for glue.
I cut the other 2 pieces that will make up the base and main stand of the table, now its time for assembly!
There should be 5 pieces for the table plus the 2 splines.

I started with assembling the bottom base to the main stand of the table.
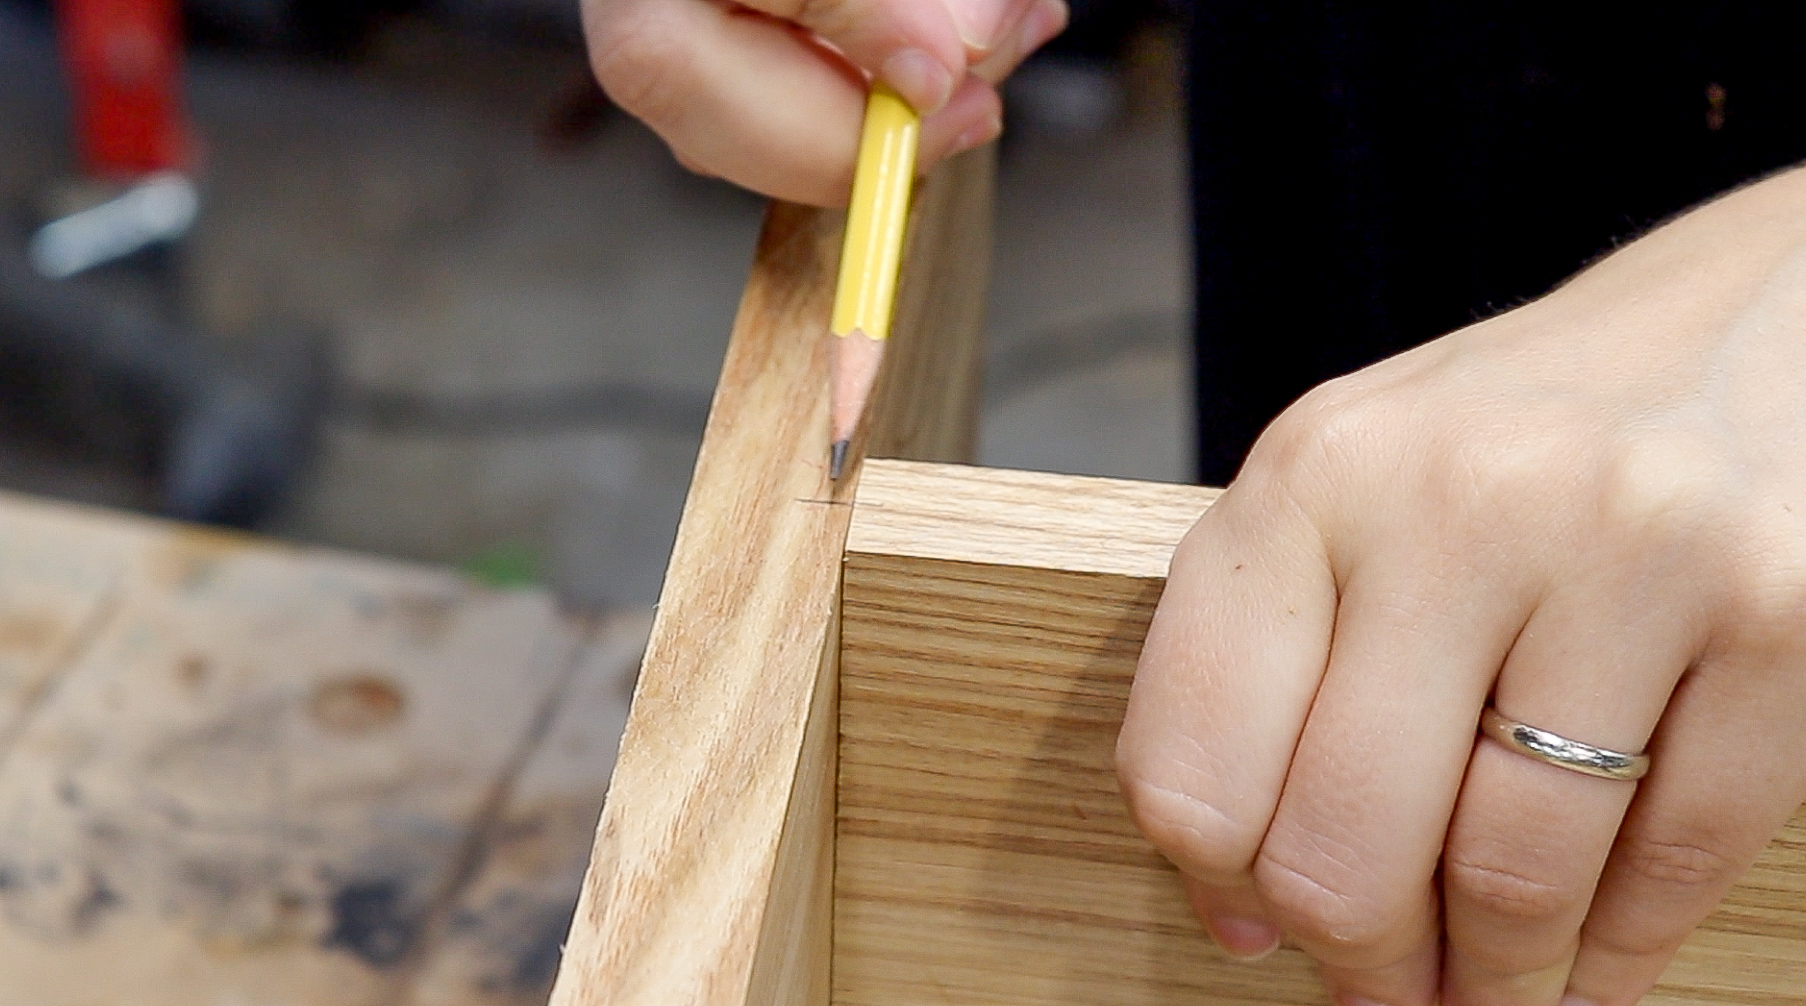
To line these pieces up correctly I marked the center on the edge of the base and also marked the center of the stand.
This way, when gluing, I can just line up those 2 lines and know they are perfectly centered.
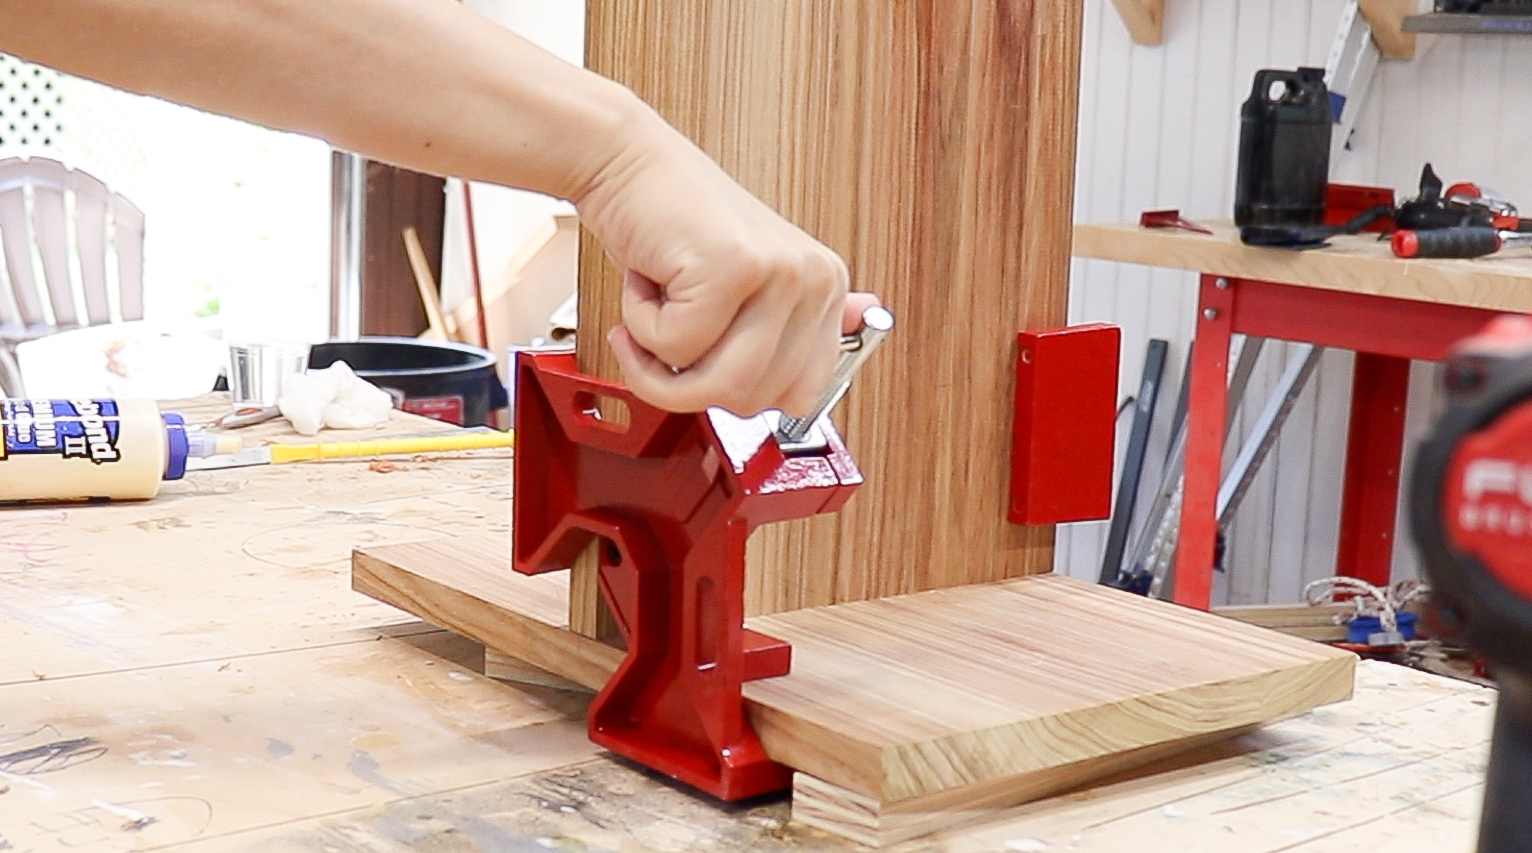
I put some glue on the bottom of the stand and clamped it on the center of the base piece using corner clamps.
Since this is just a butt joint, it needs to be reinforced.
Also since this is the bottom of the table, it will never be seen, so I can just use exposed dowels.
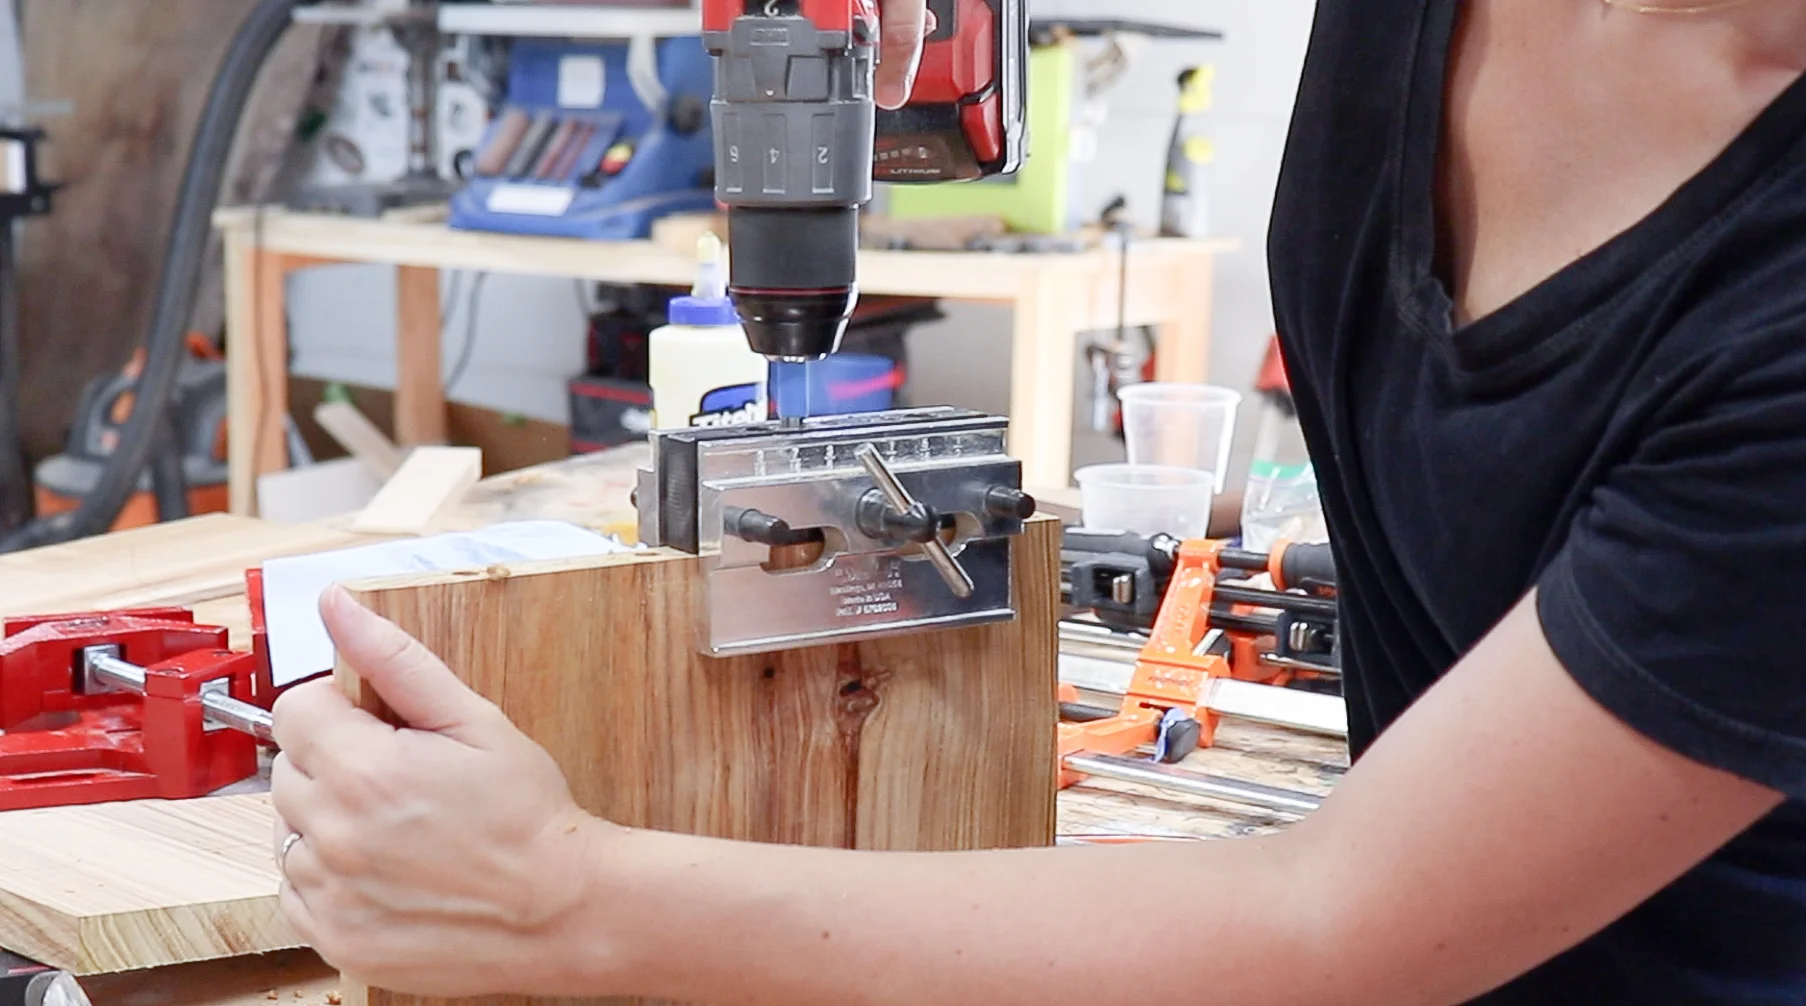
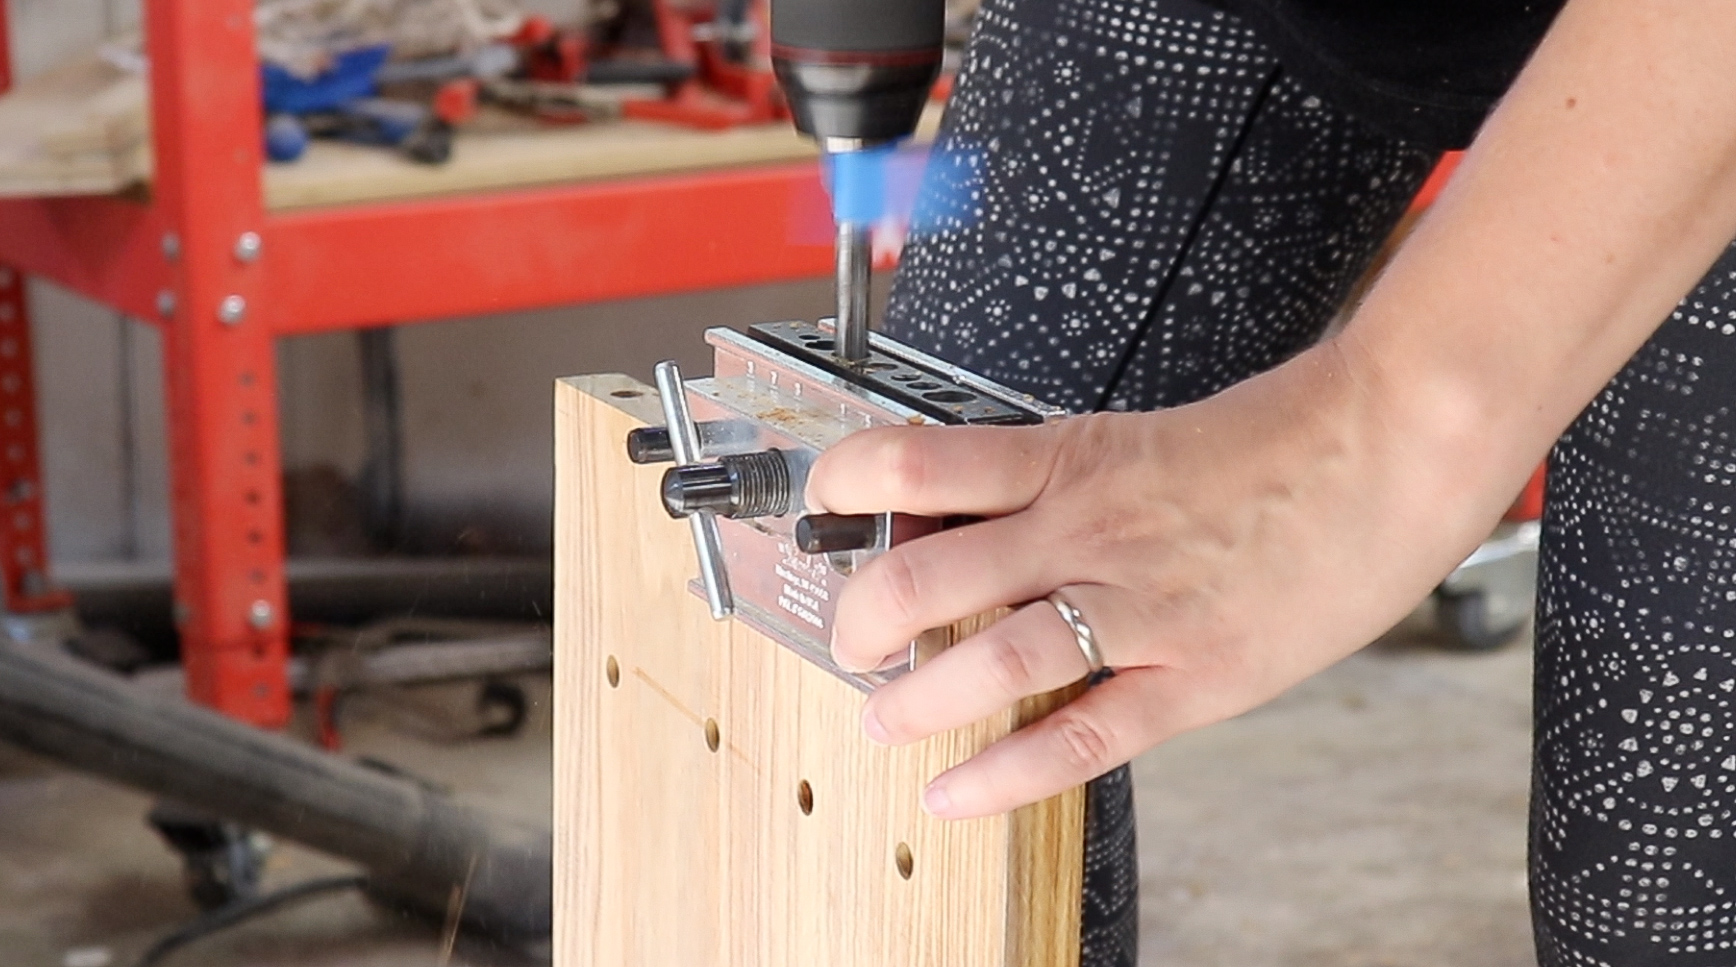
I drilled through the base into the main stand piece with a 3/8” drill bit. I used a drilling guide block to help me drill as straight as possible.

Then I put glue in the holes and and inserted some dowels.
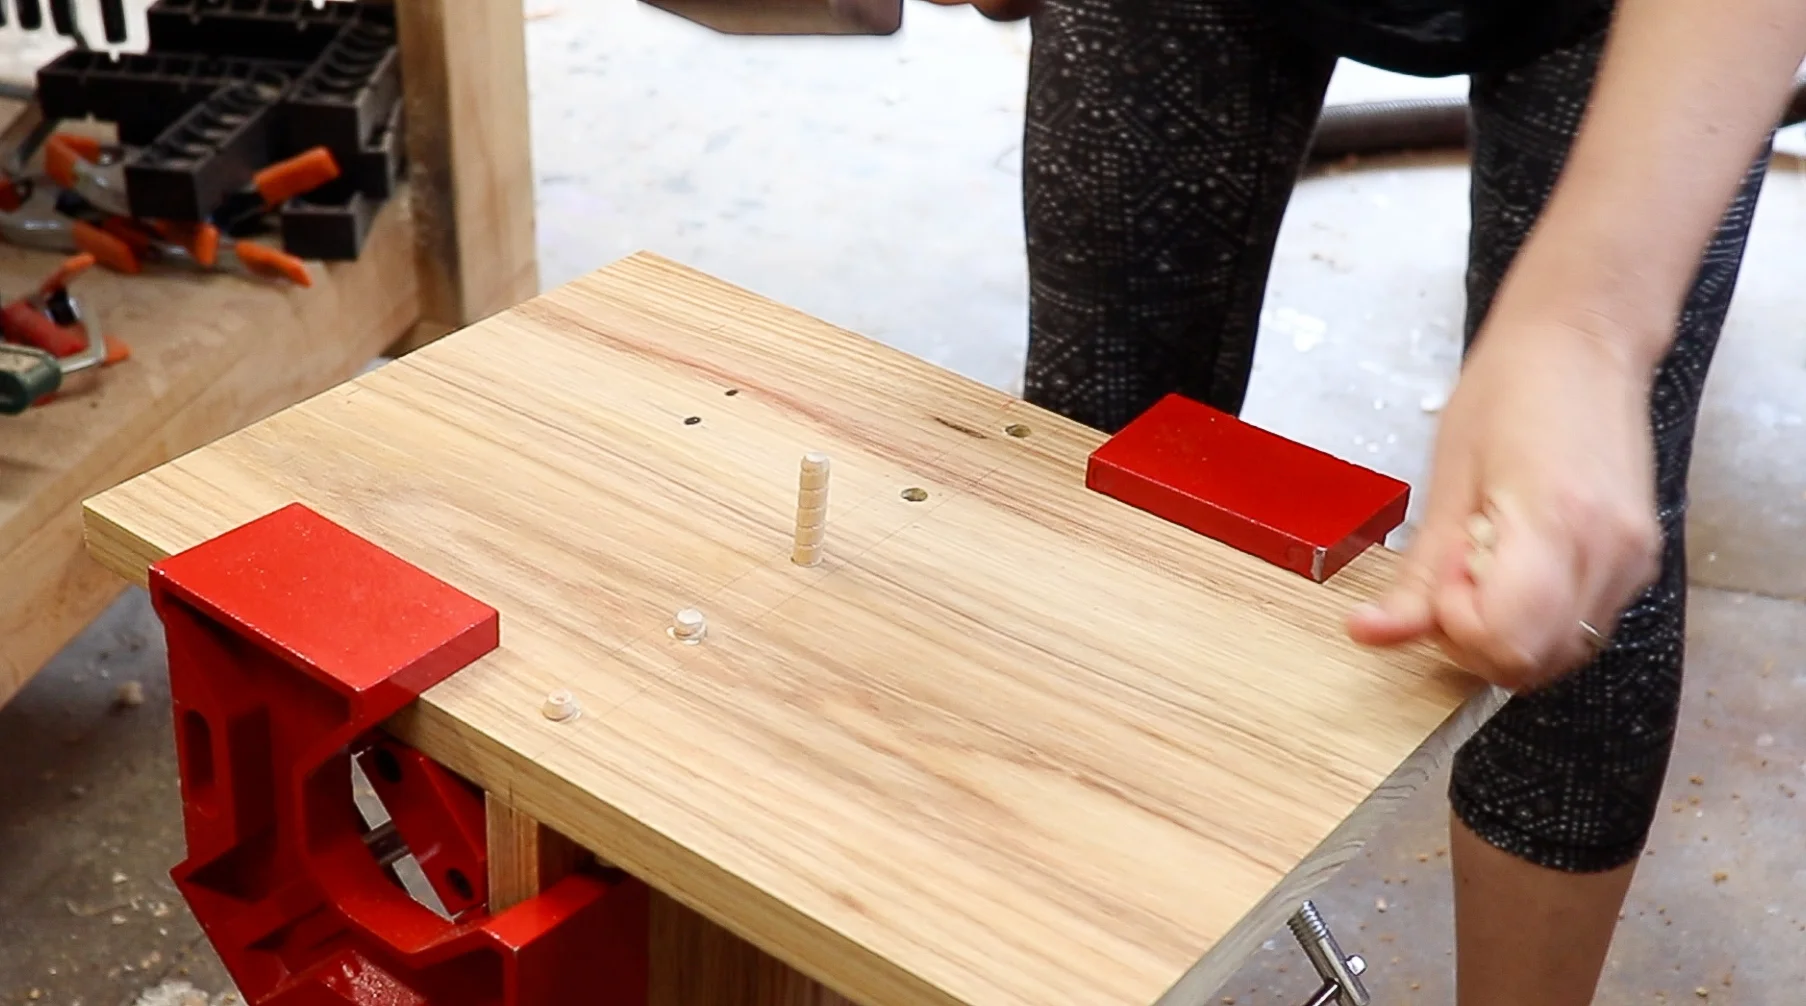
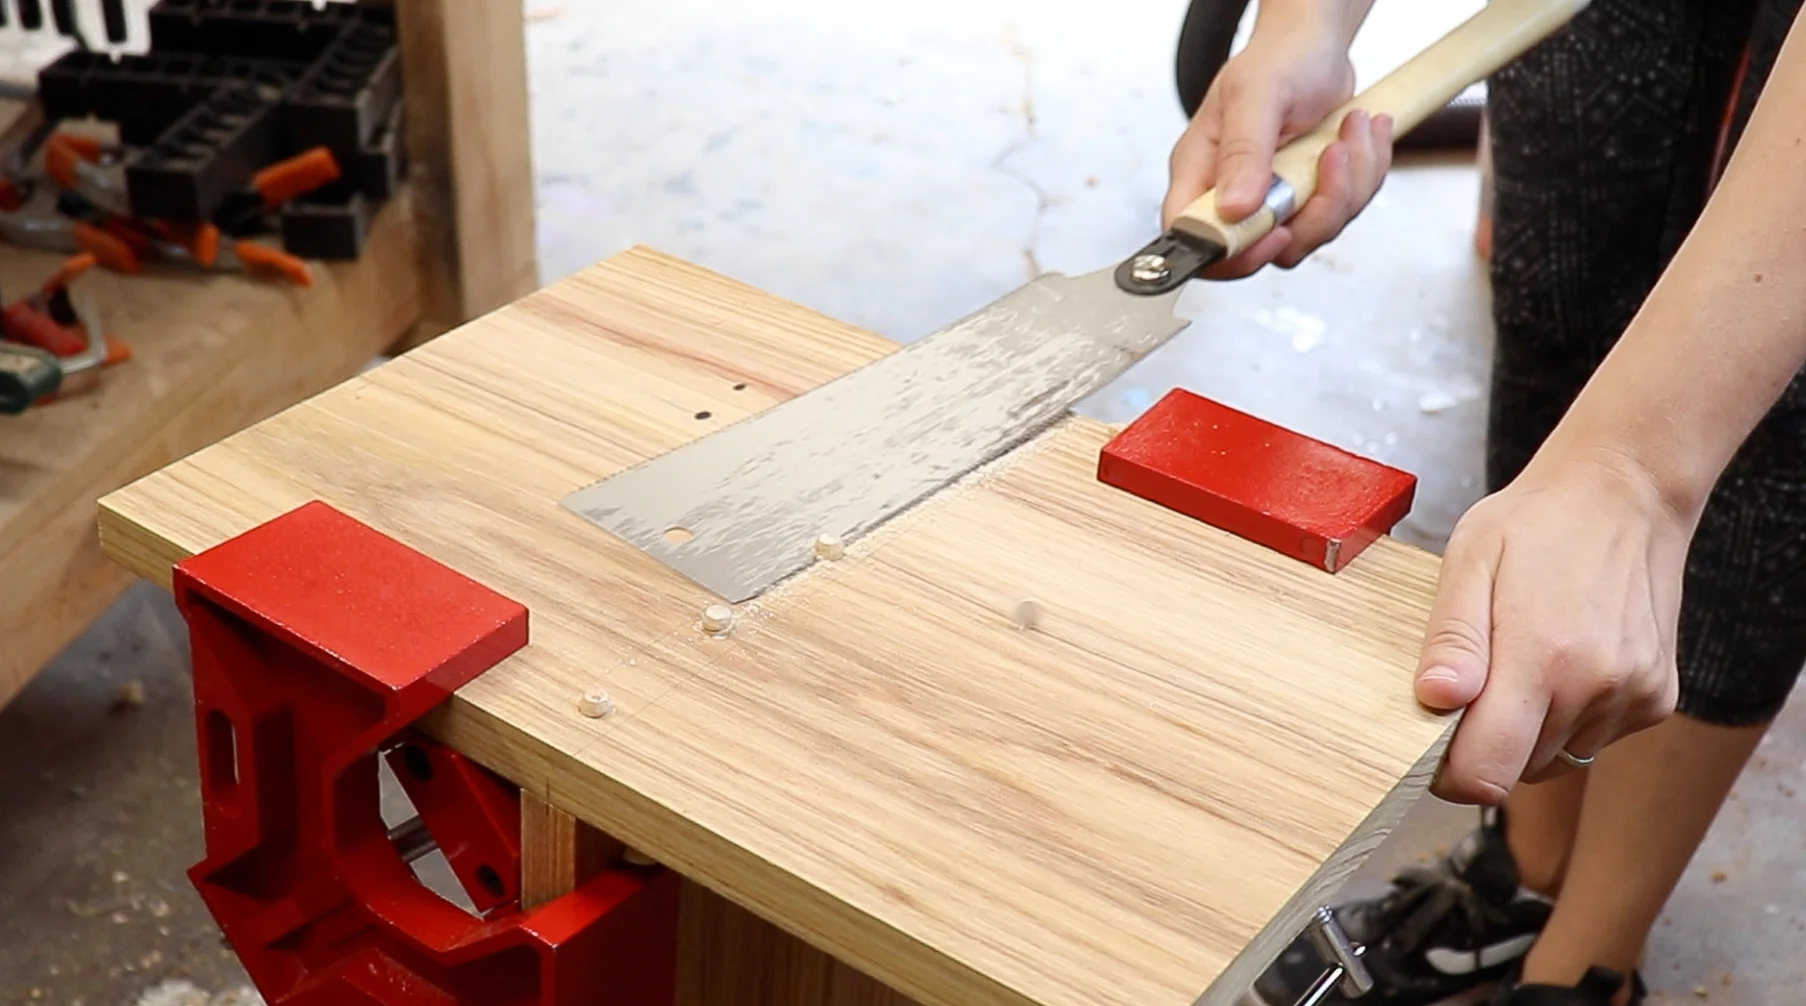
After the glue set up, I used a flush trim saw to cut the excess dowels off.
Moving on…
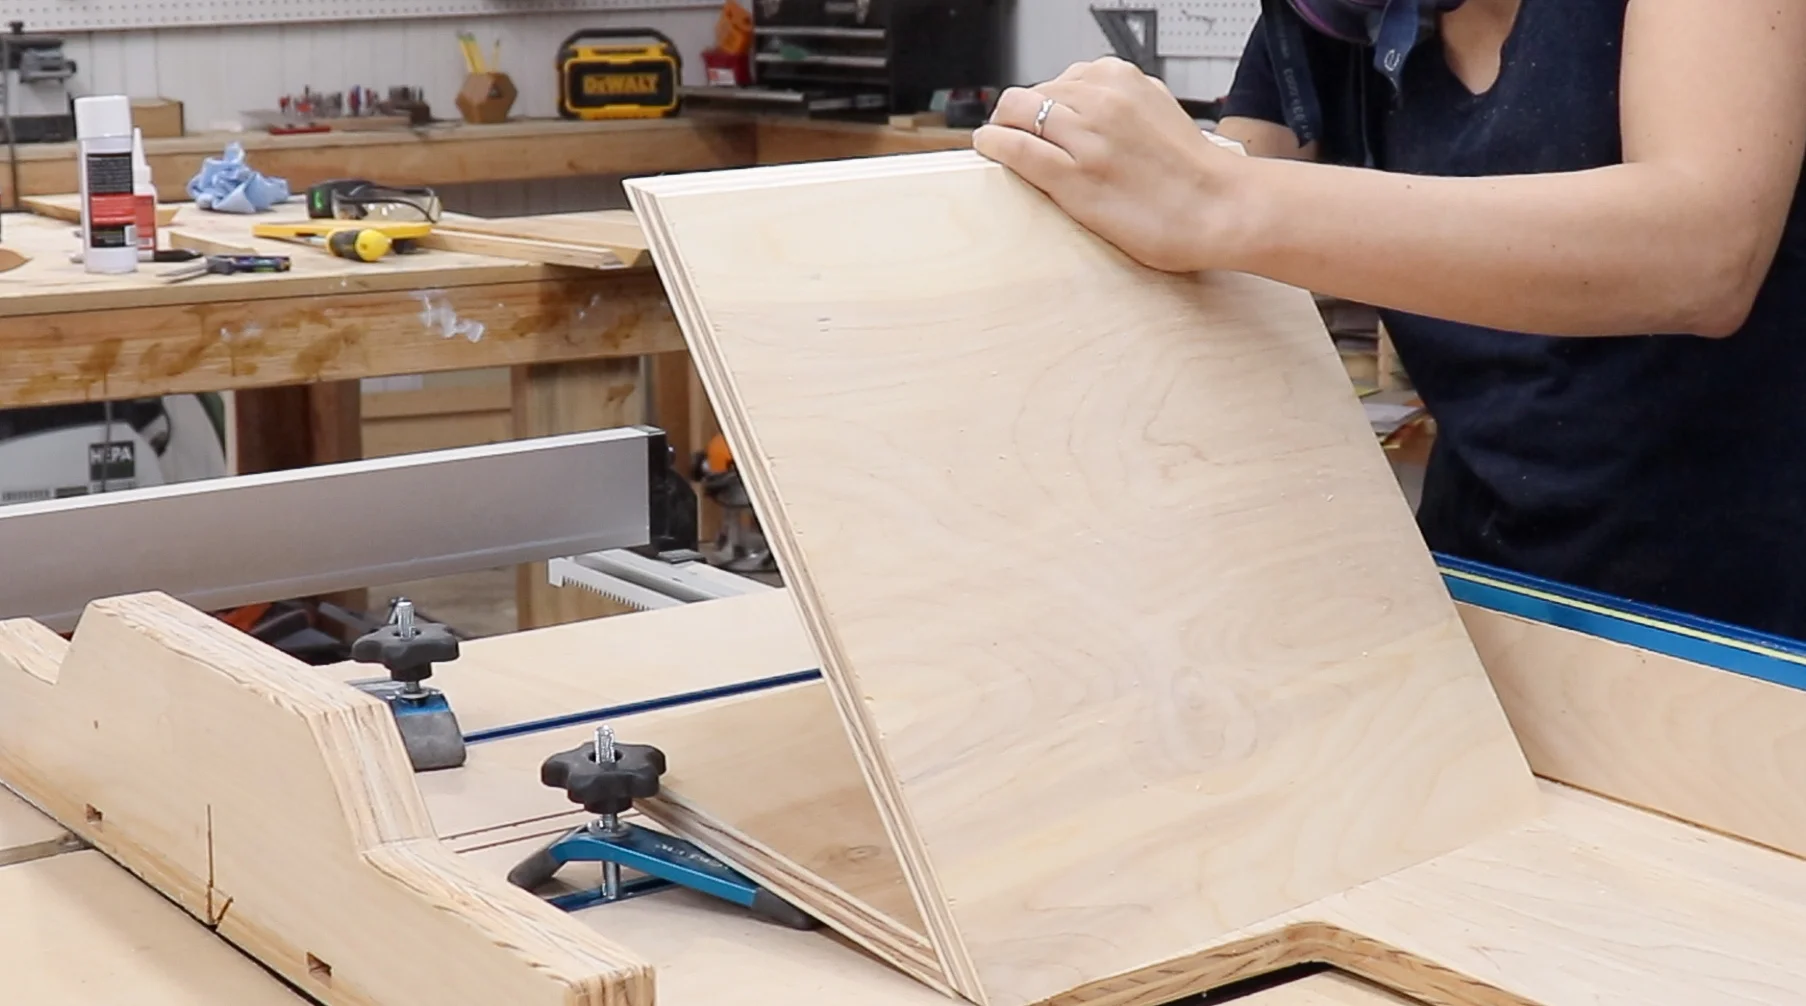
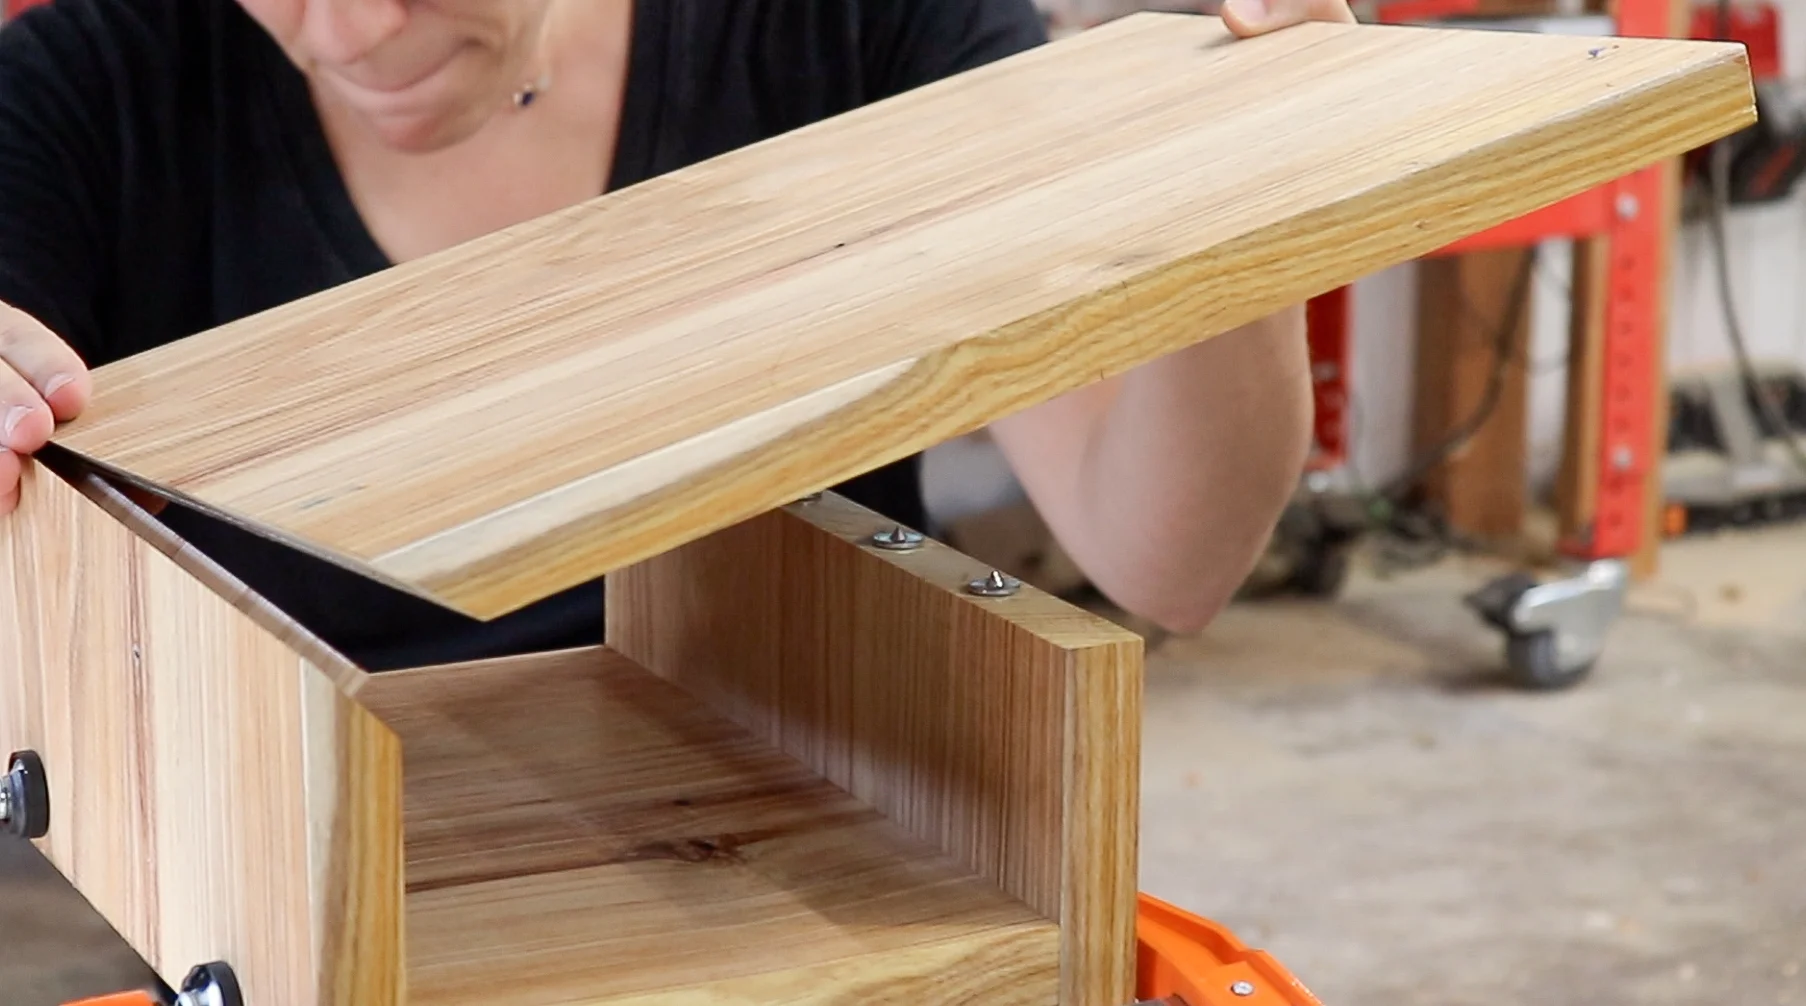
The top of the table needs to be assembled in stages.
The first glue up is the middle section of the box with the bottom section of the box.
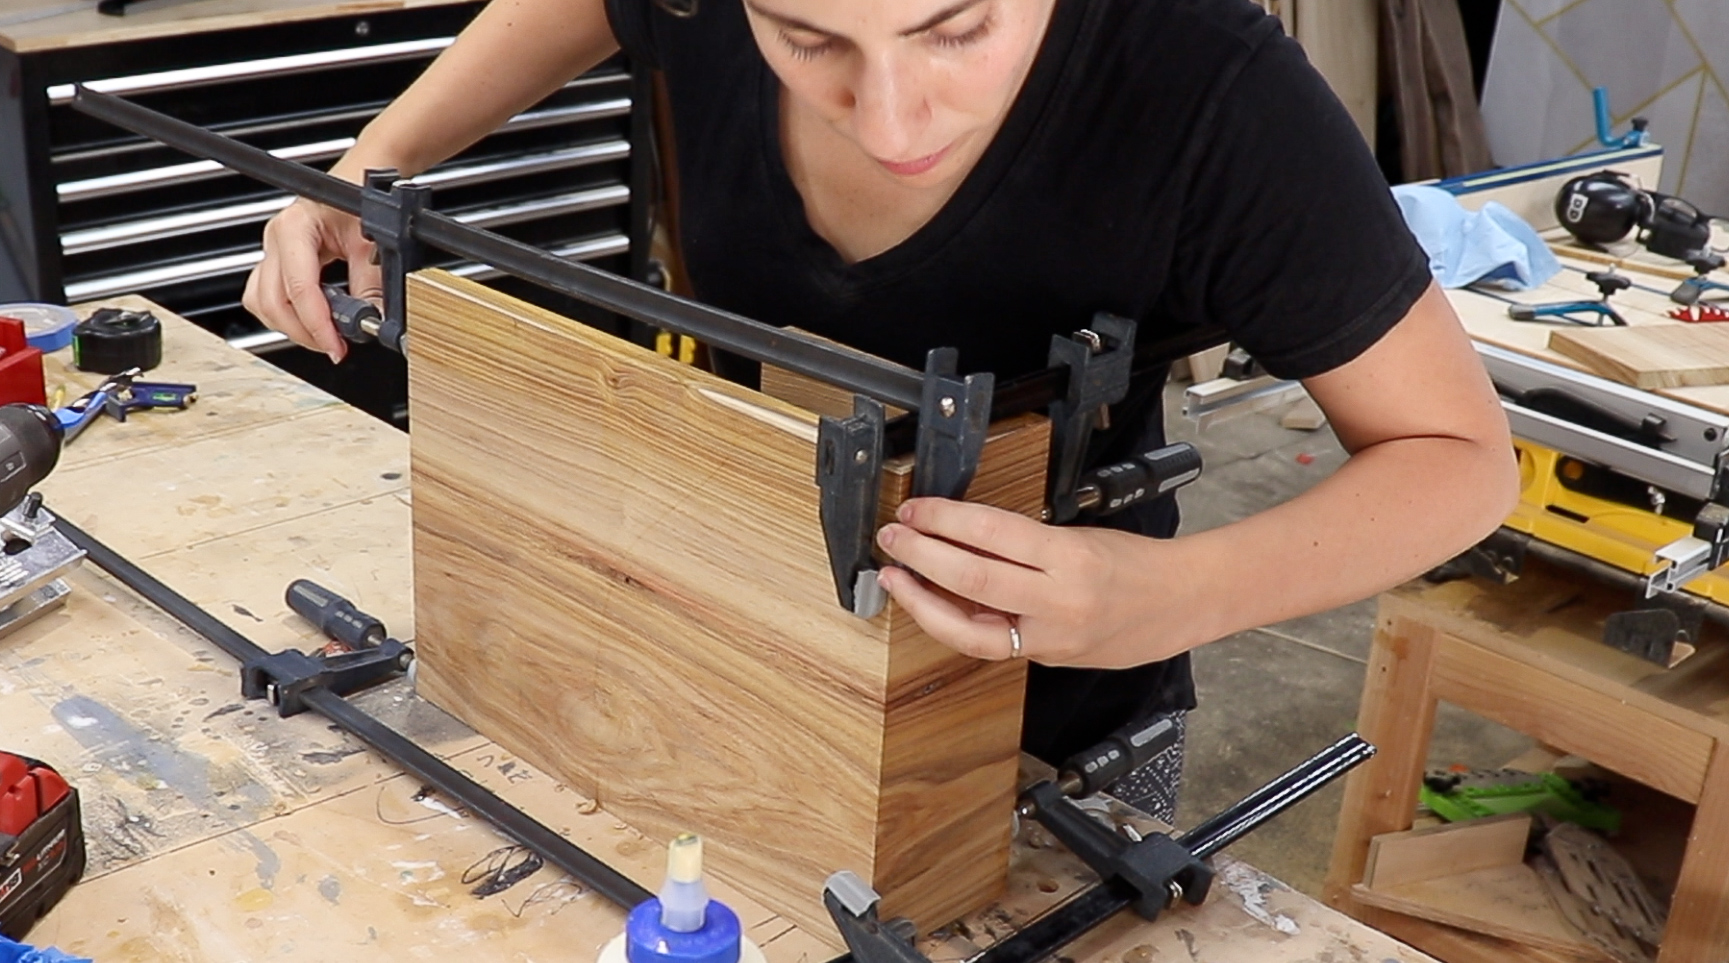
I put glue in the grooves and glued the spline into place.

Then clamped it up using a crazy combination of tape, corner clamps and regular clamps…. it worked… ha.

After that glue set up I moved onto the other joinery.
Dowels.
I used a center finding doweling jig to drill holes in the end of the bottom of the box.
I am going to use dowel points to transfer the hole locations for the matching dowels.
In order to get them placed in the right location I had to temporarily clamp the top of the table onto the side of the box.
Then I placed the dowel points in the holes I just drilled, and brought the whole clamped top of the table to the base of the table to press the points in and mark the corresponding dowel holes.
Using the drill guide again I drilled the holes in the side of the main stand for the dowels.

Then I repeated the same process for the top.
I used the self centering dowel jig in the top of the main stand piece.
Temporarily clamped the bottom box section on to the main stand piece with the dowels in place.
Placed the spline in the joint and lowered the top of the table onto the dowel points to mark out where to drill the corresponding holes on the underside of the top.
Then drilled those holes in the underside of the top of the table using the drilling guide block again.

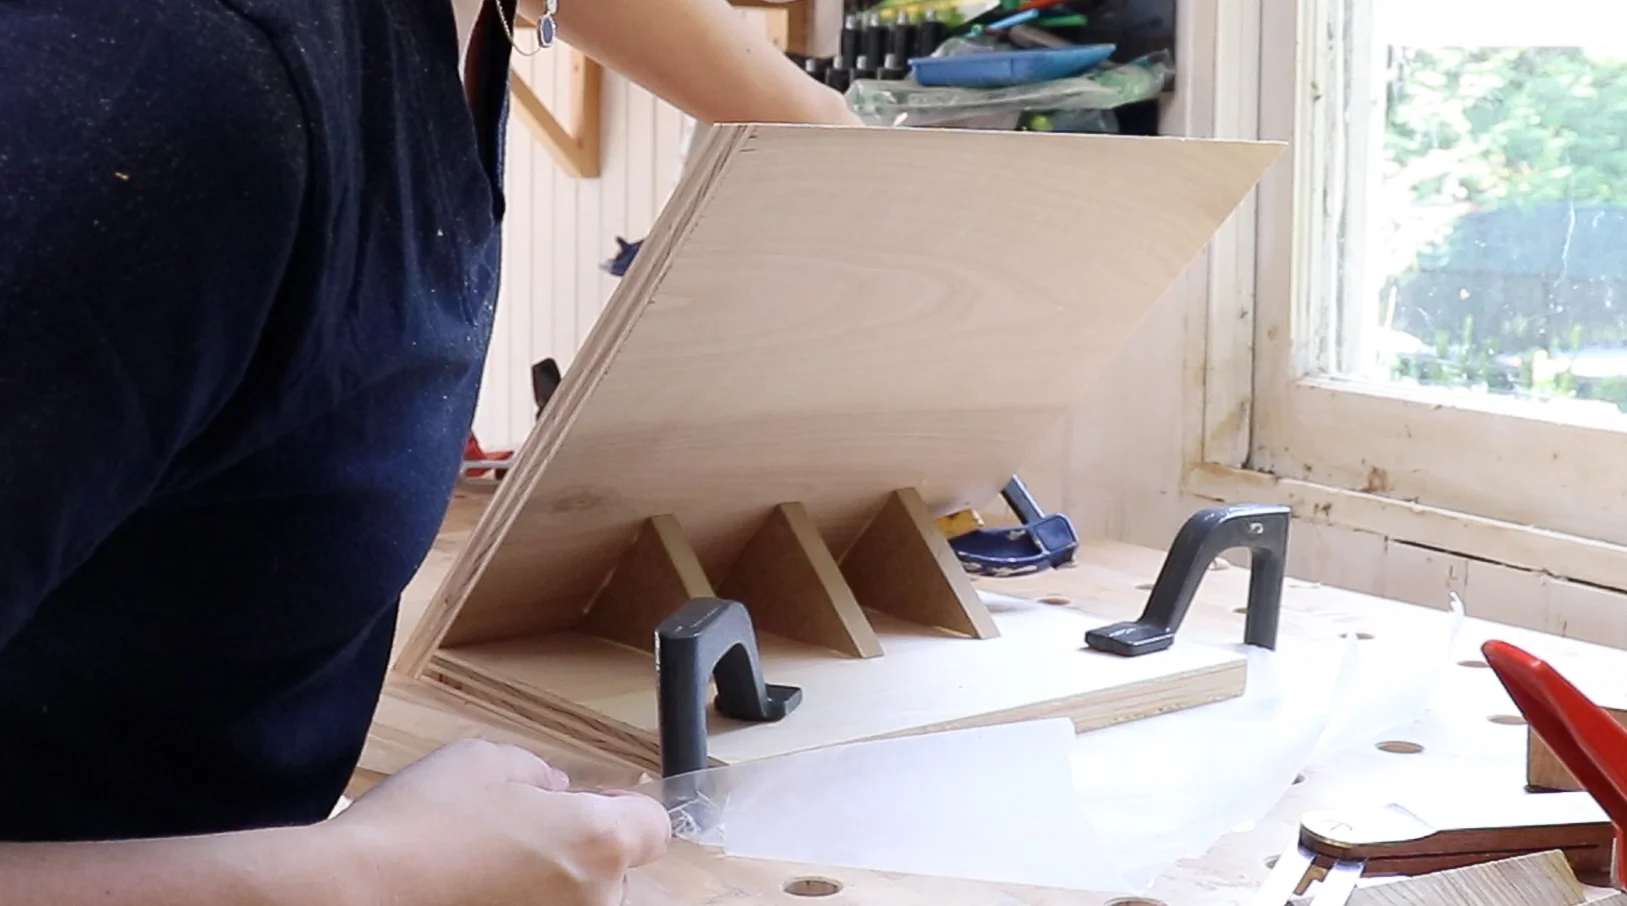
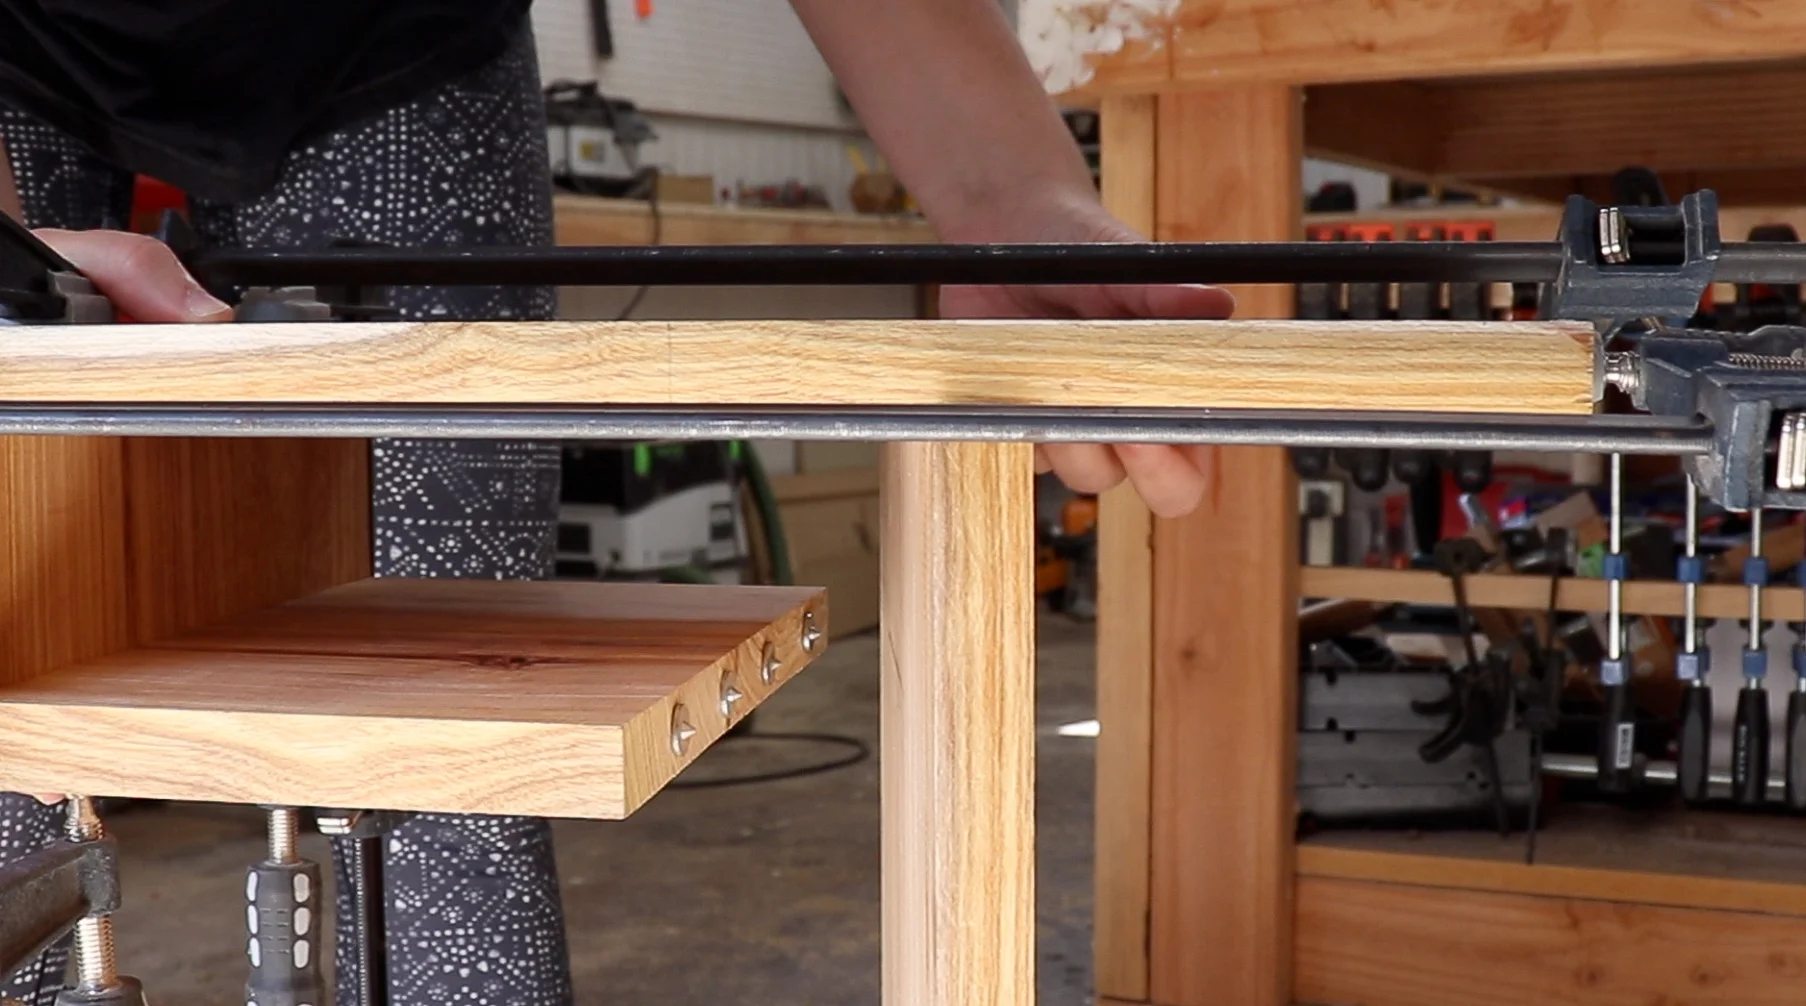
Time for assembly!
First I glued the bottom box to the main stand using dowels and clamps.
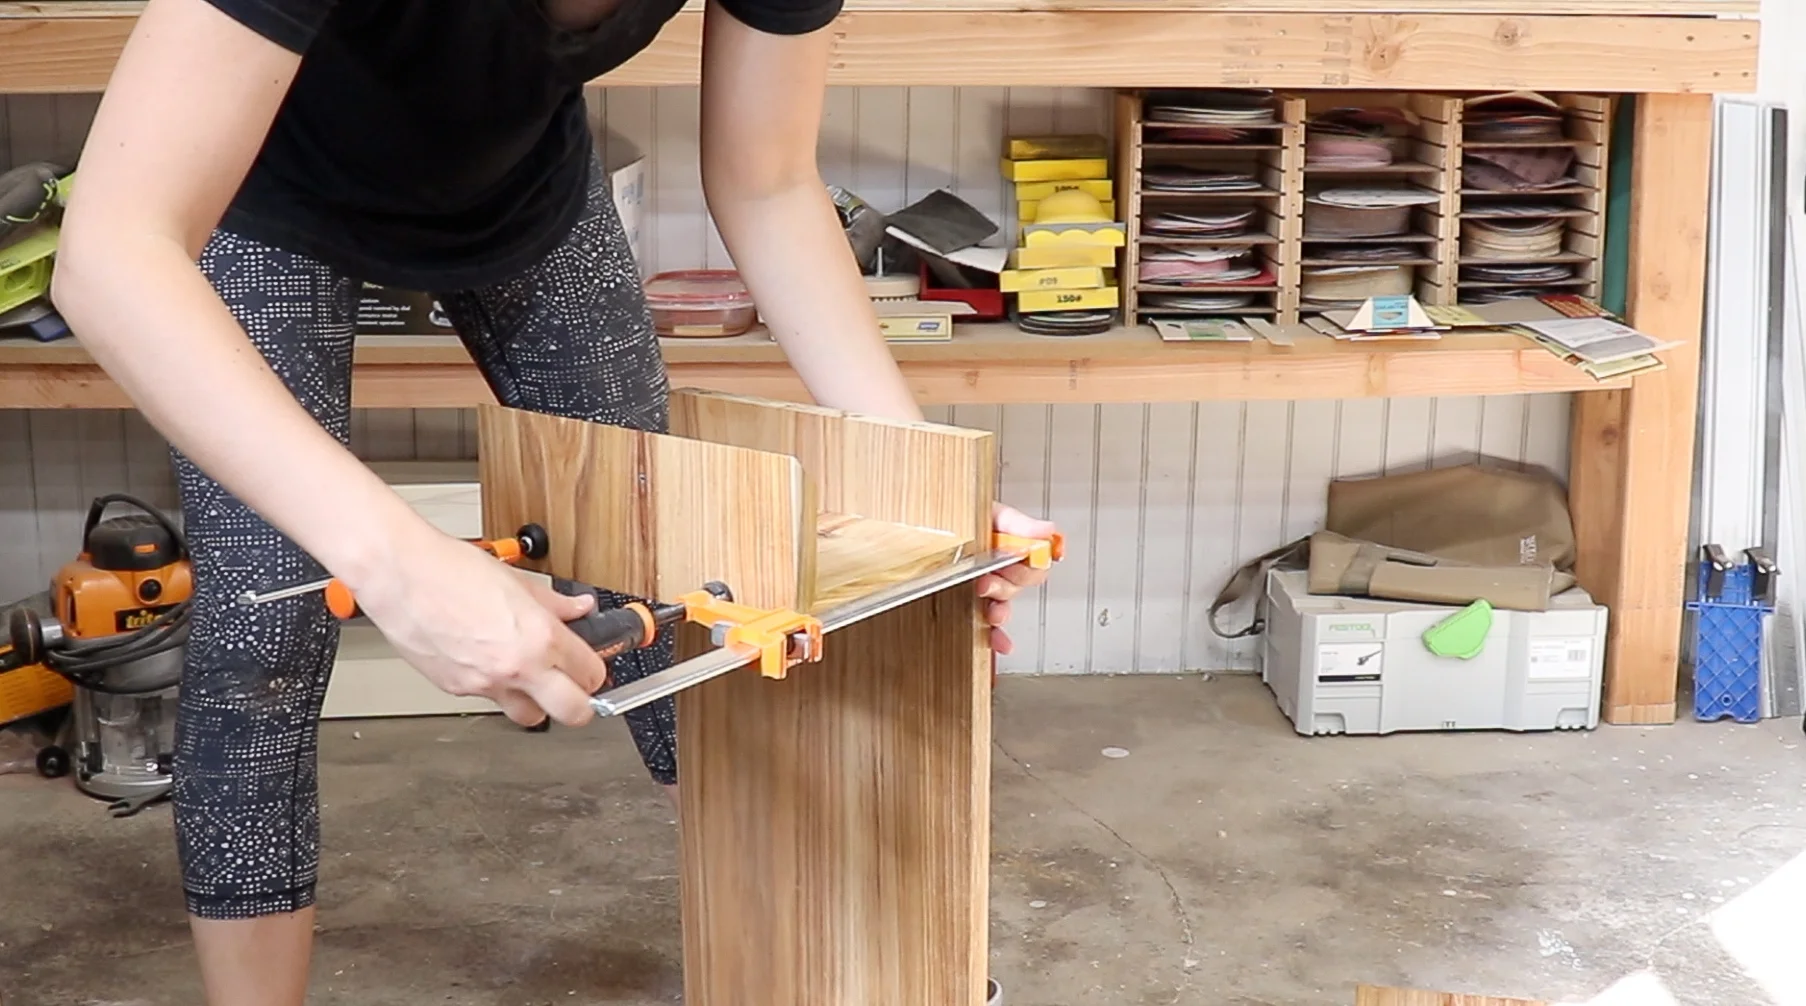
Then I glued the top spline into place.

Then placed the top of the table onto the main support piece using dowels and clamped it down.
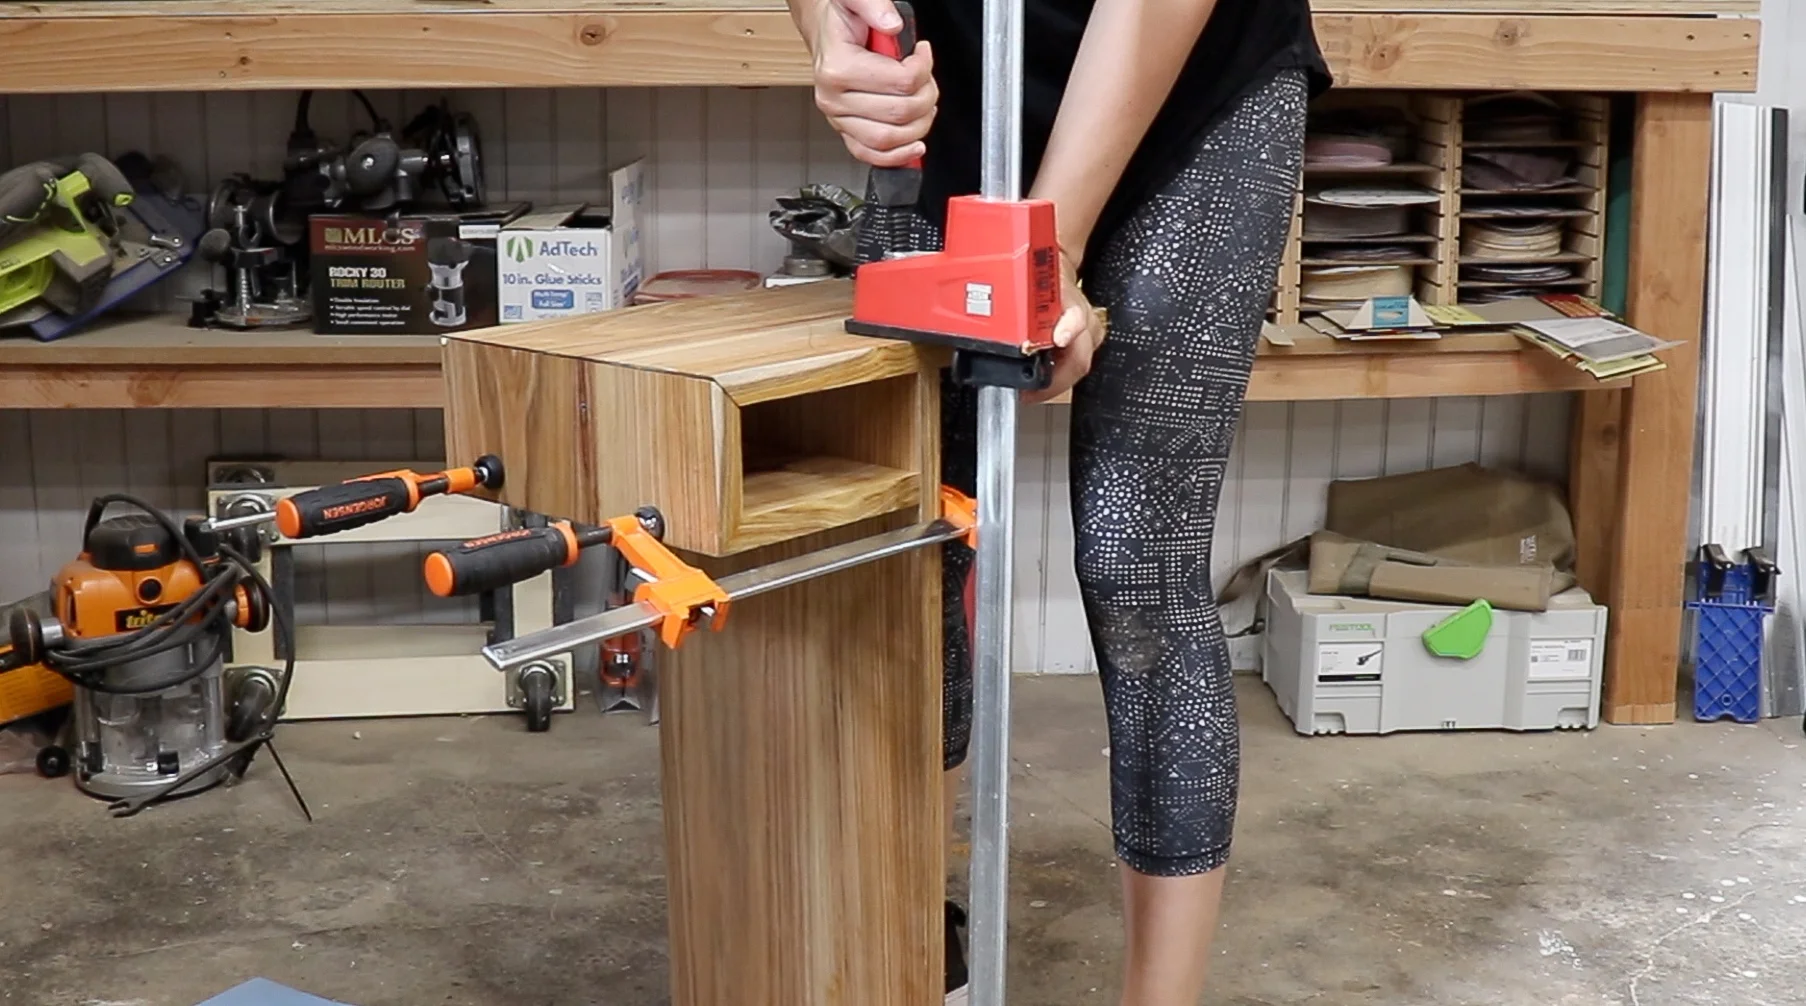
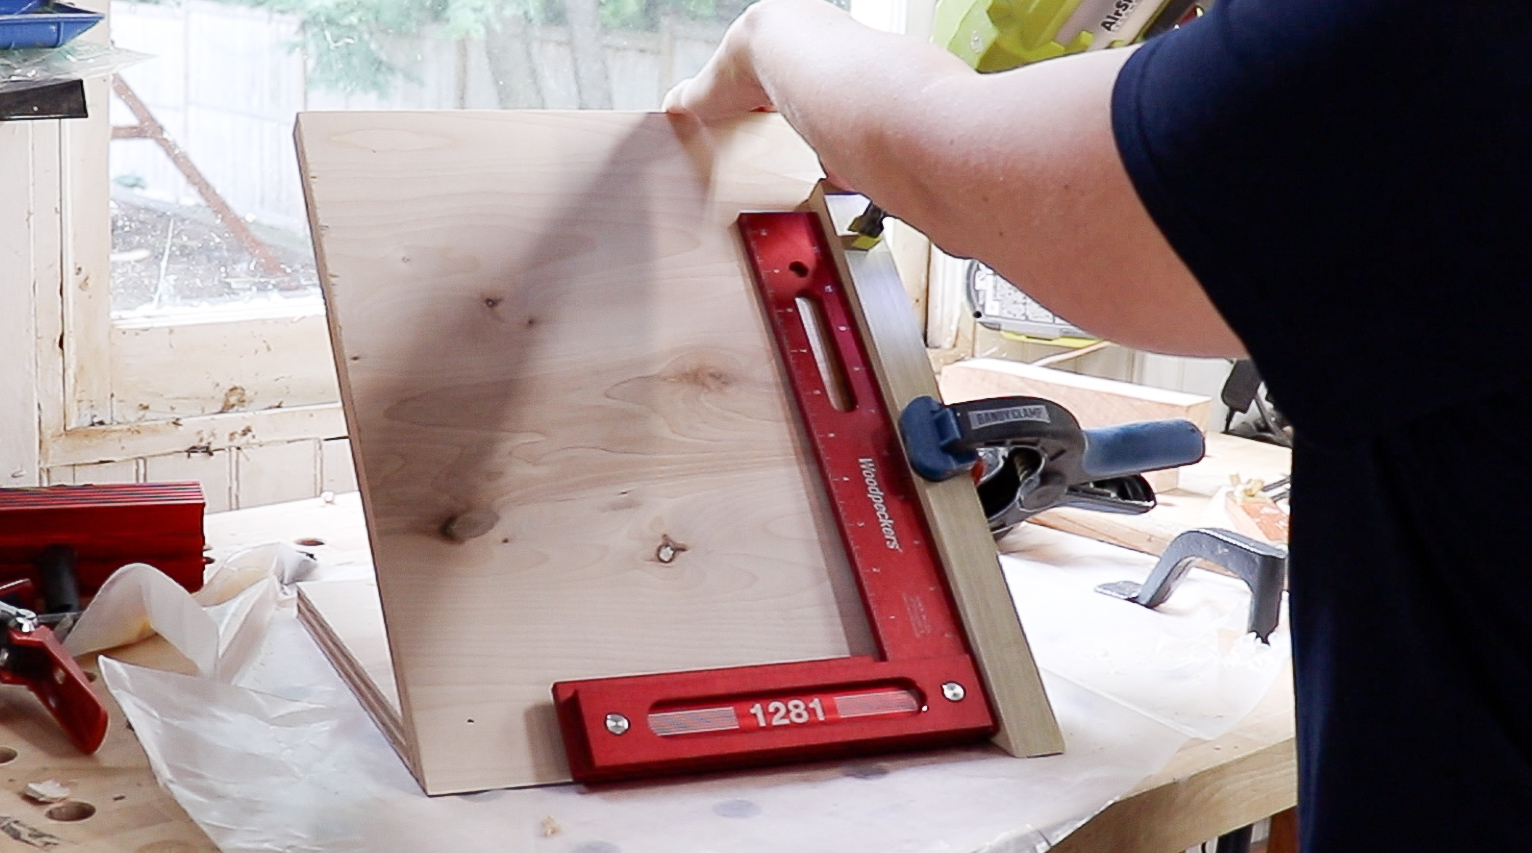
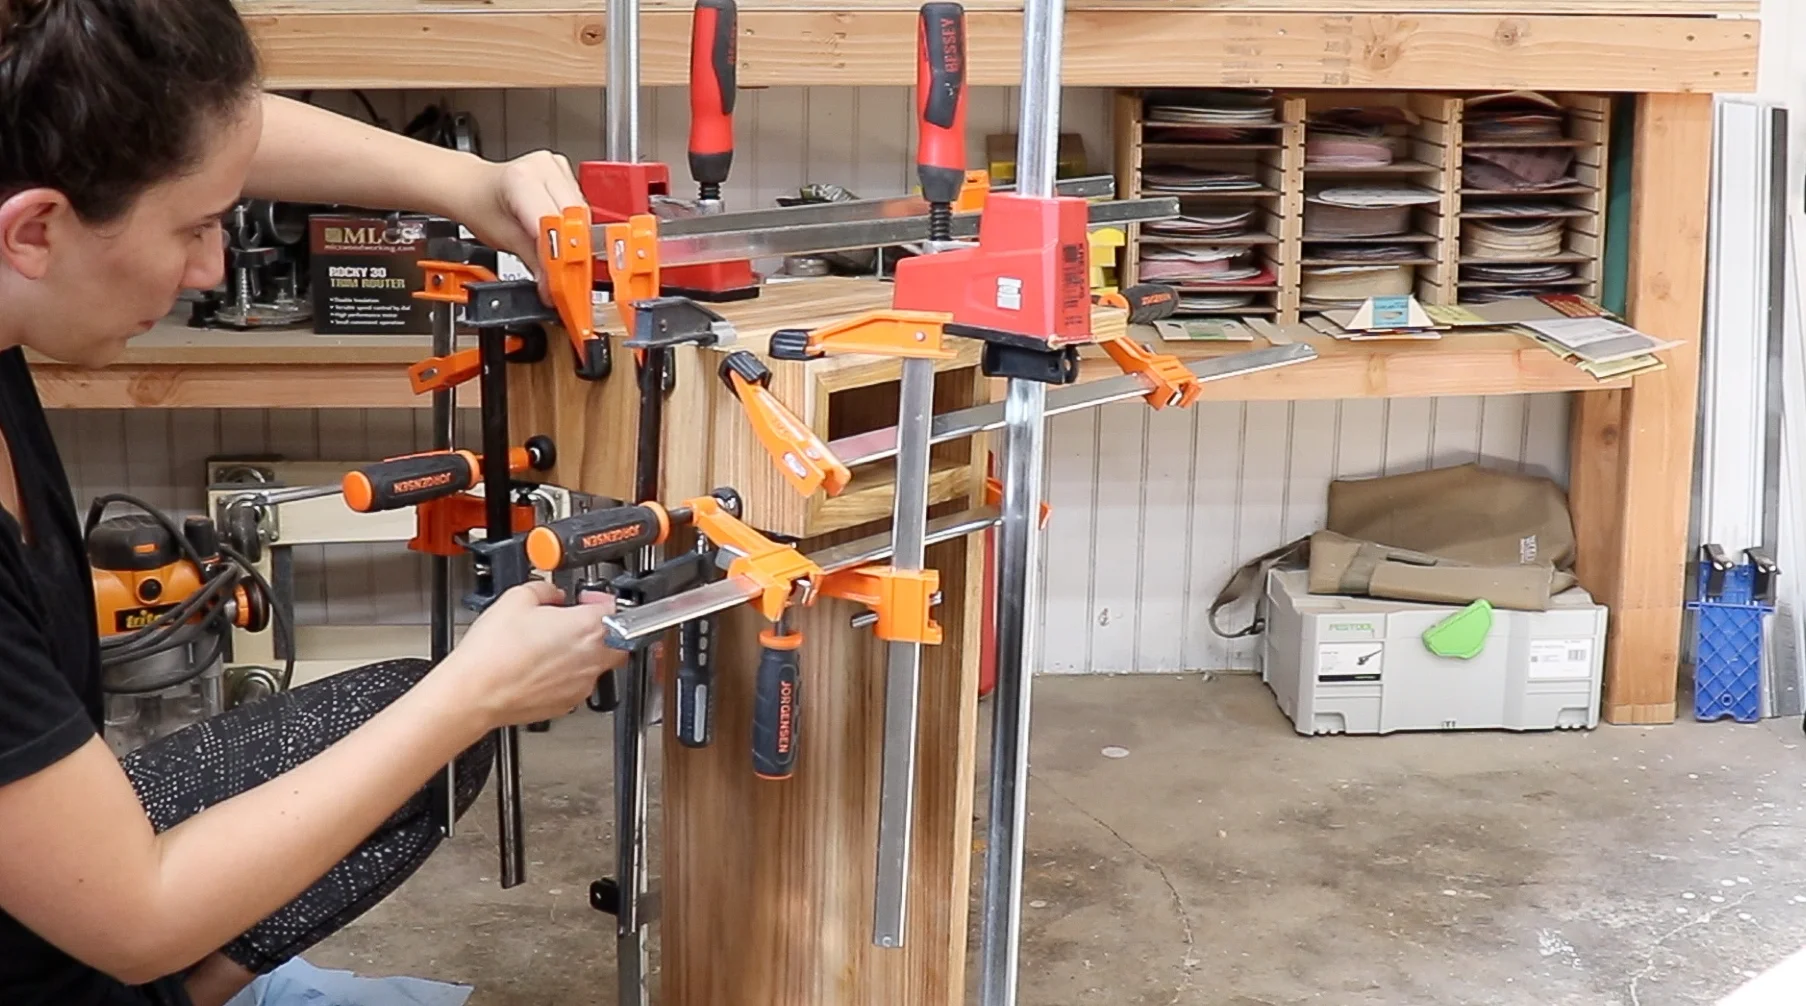
Then I had to make sure that miter was nice and clamped up using a billion clamps from every direction…
When gluing miters you want to make sure you clamp from the sides and from the top.
After the glue dried, I sanded everything flush and smooth.
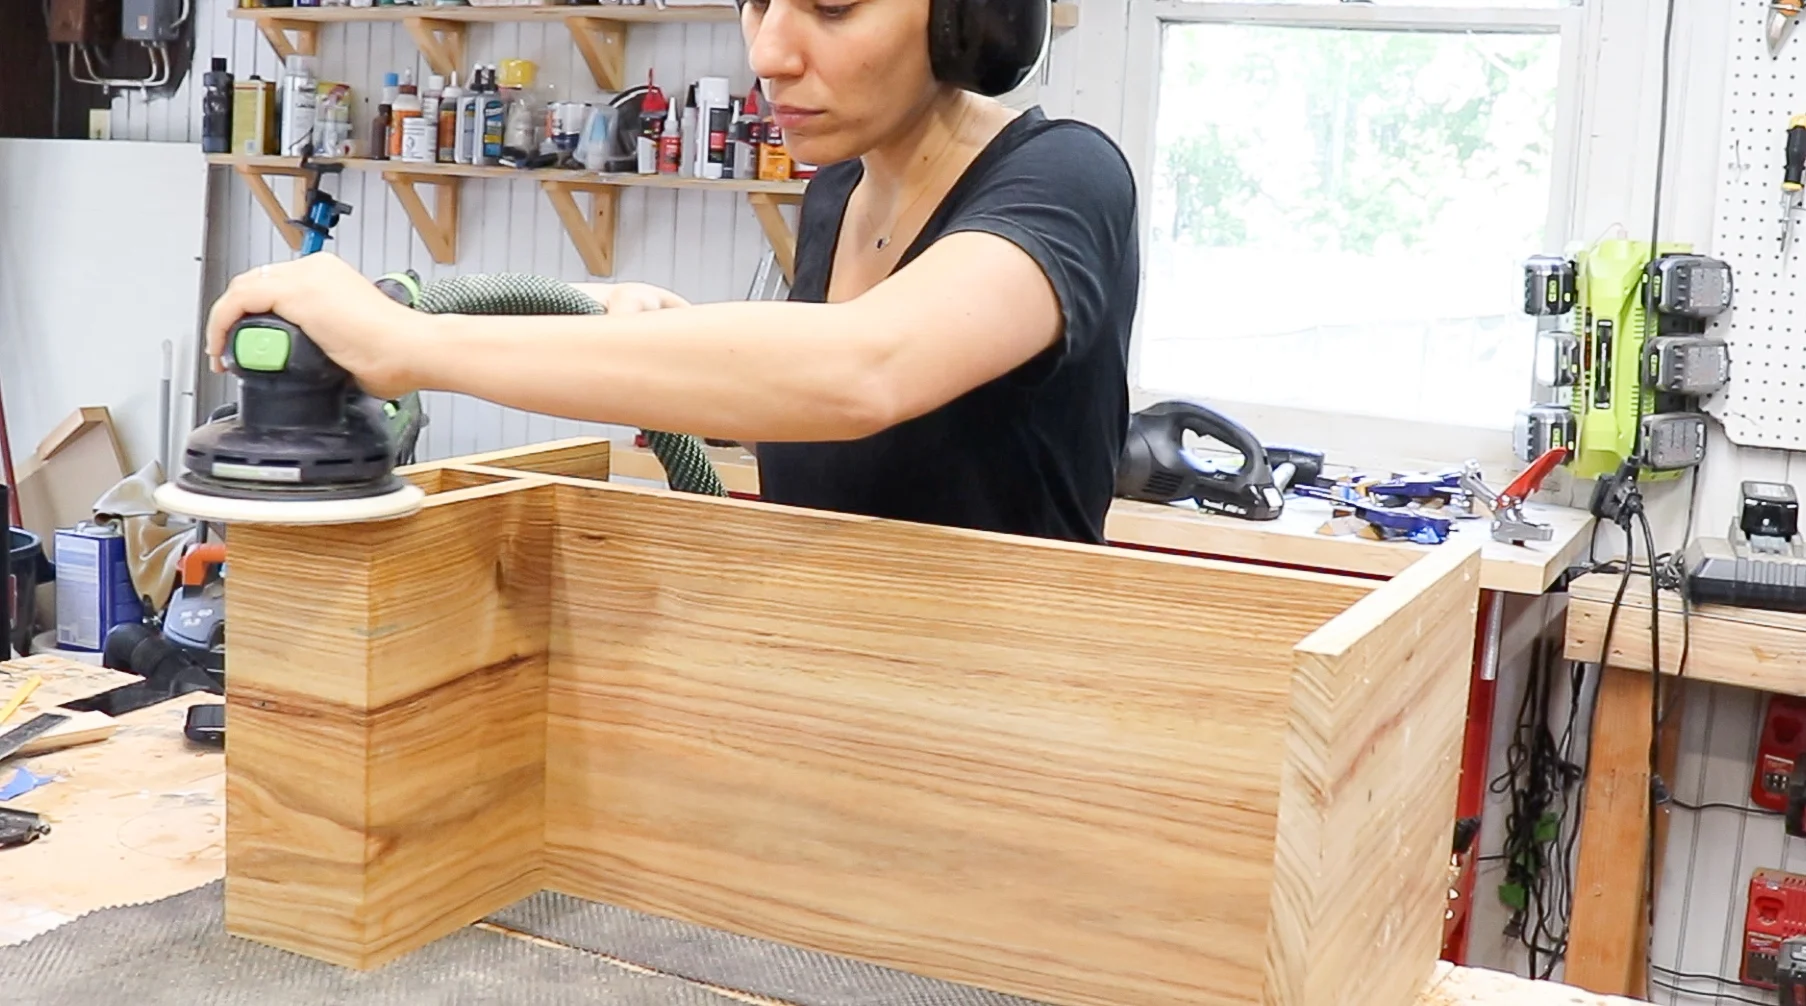
I didn’t want to mess up the miters with my power sander so I carefully hand sanded them with 220 as not to take off too much material.

Then I finished it with wipe on poly and it’s done!

I love how simple and functional this table is.
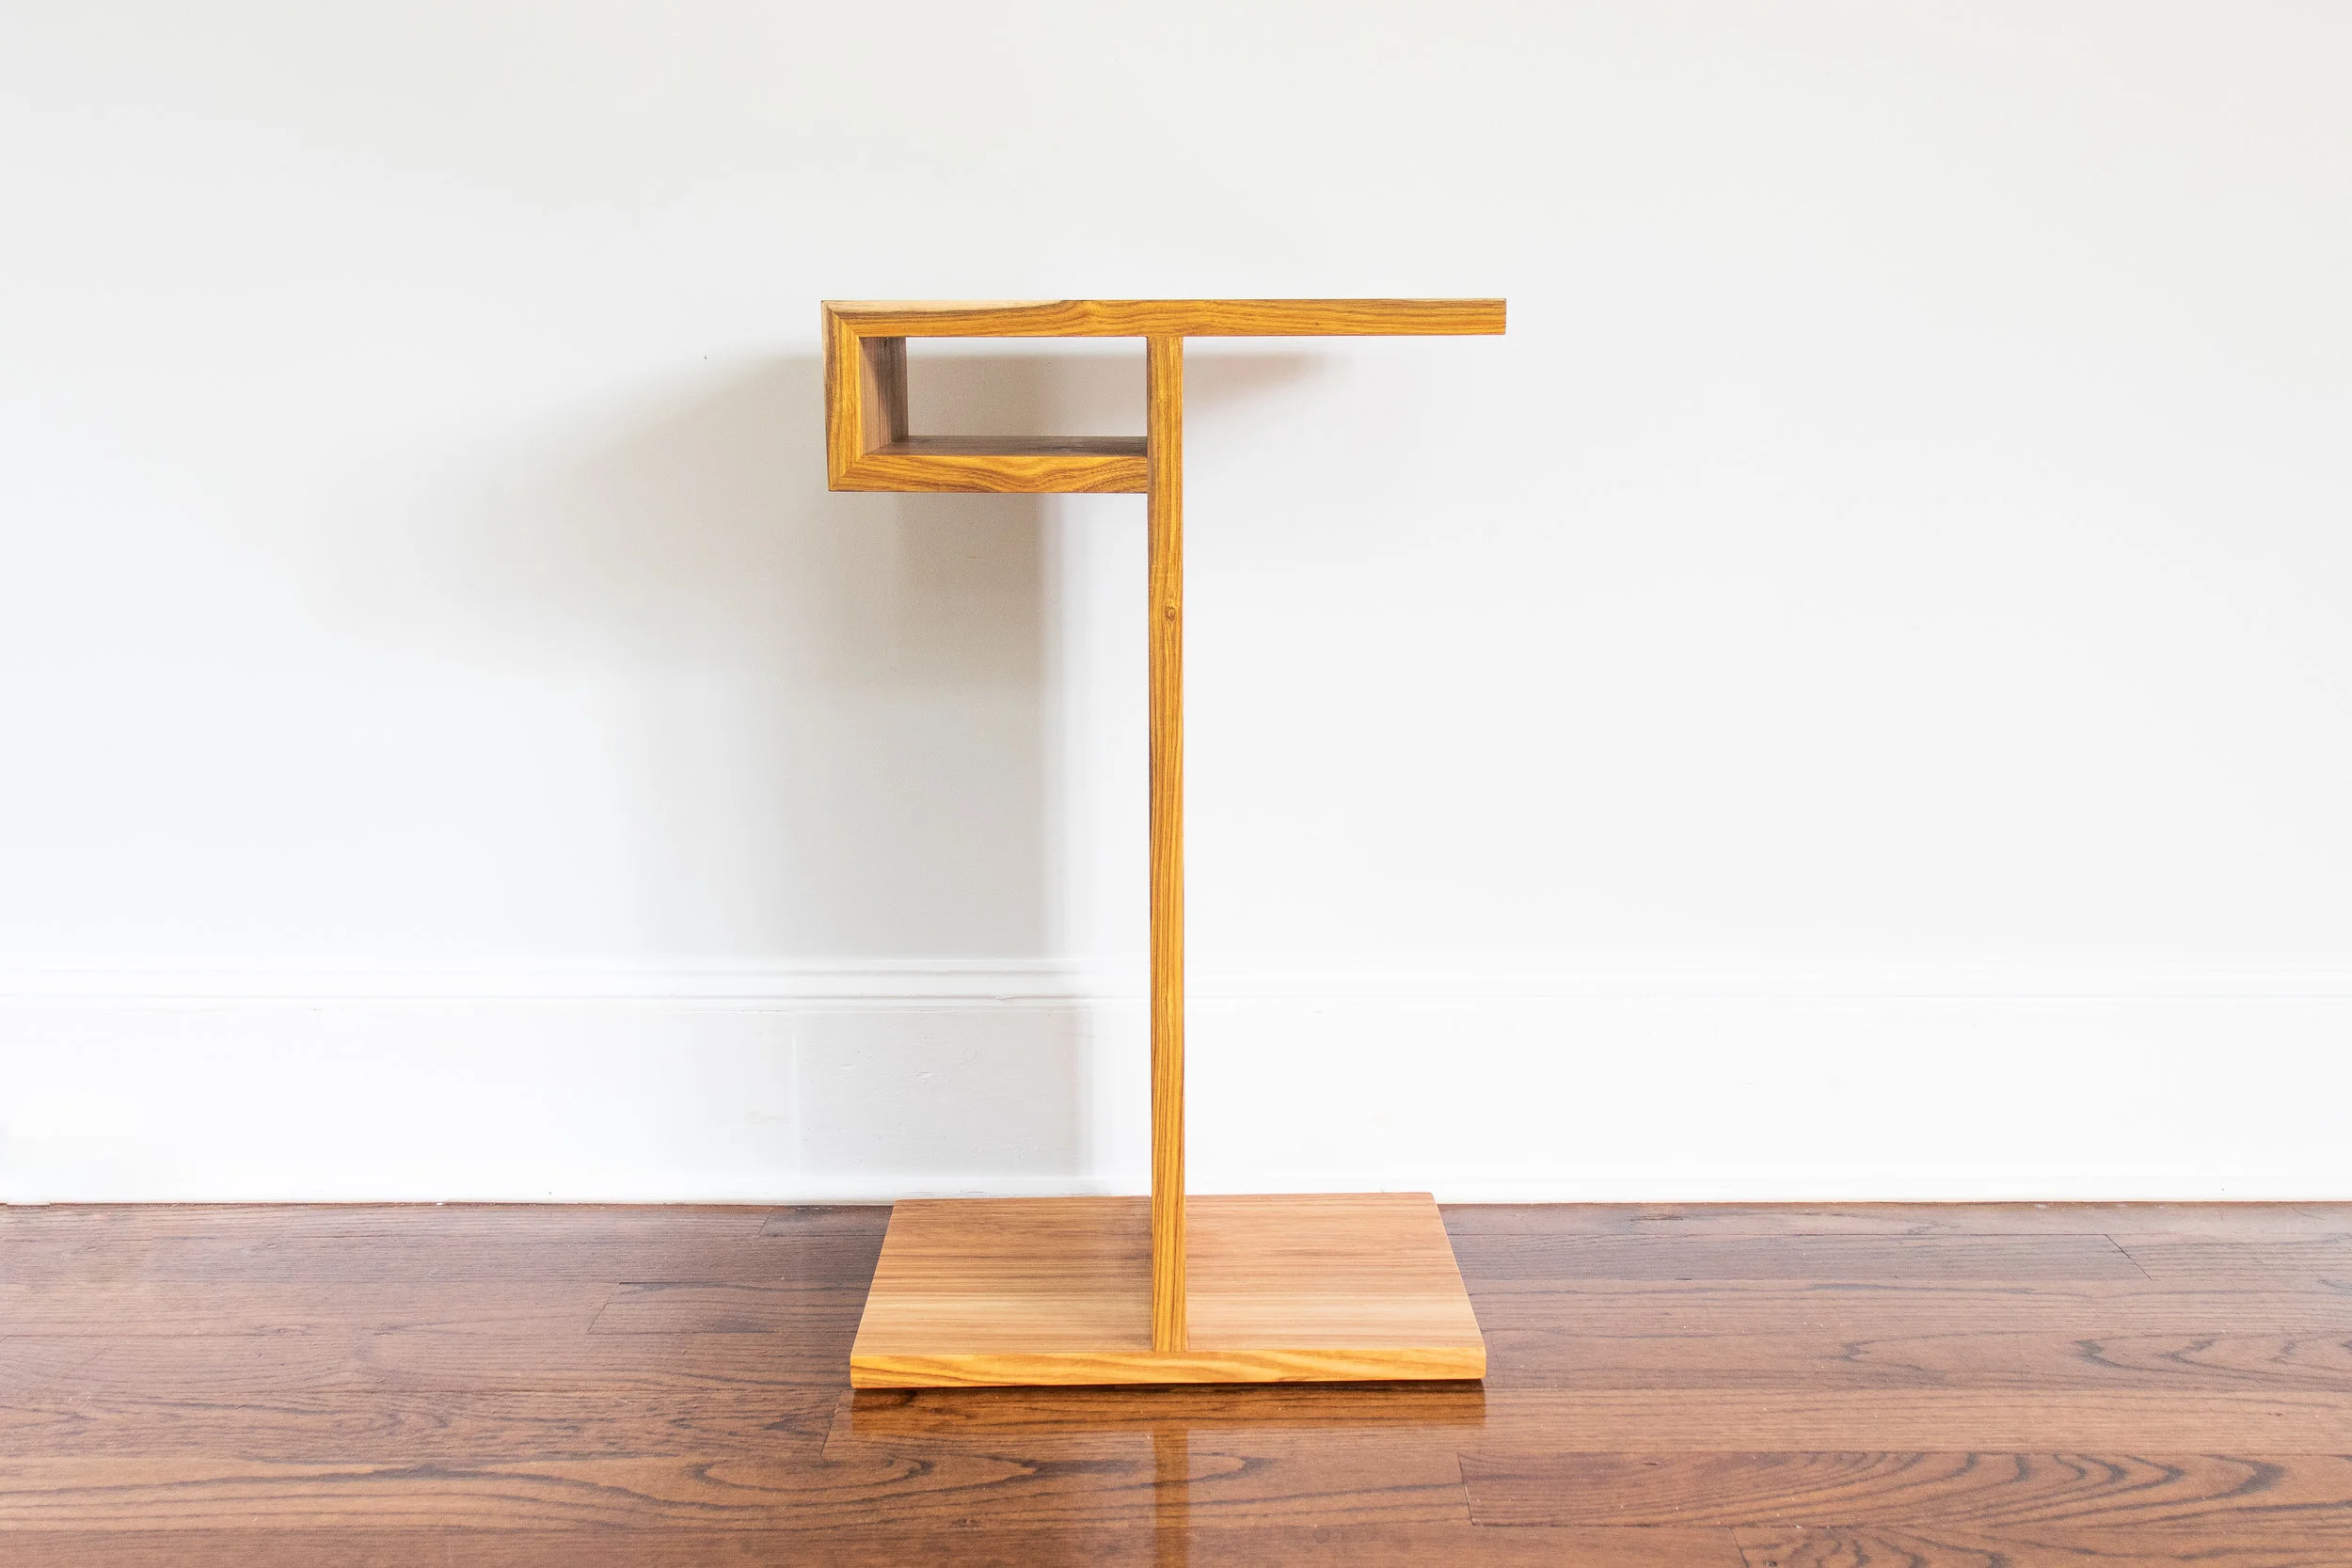
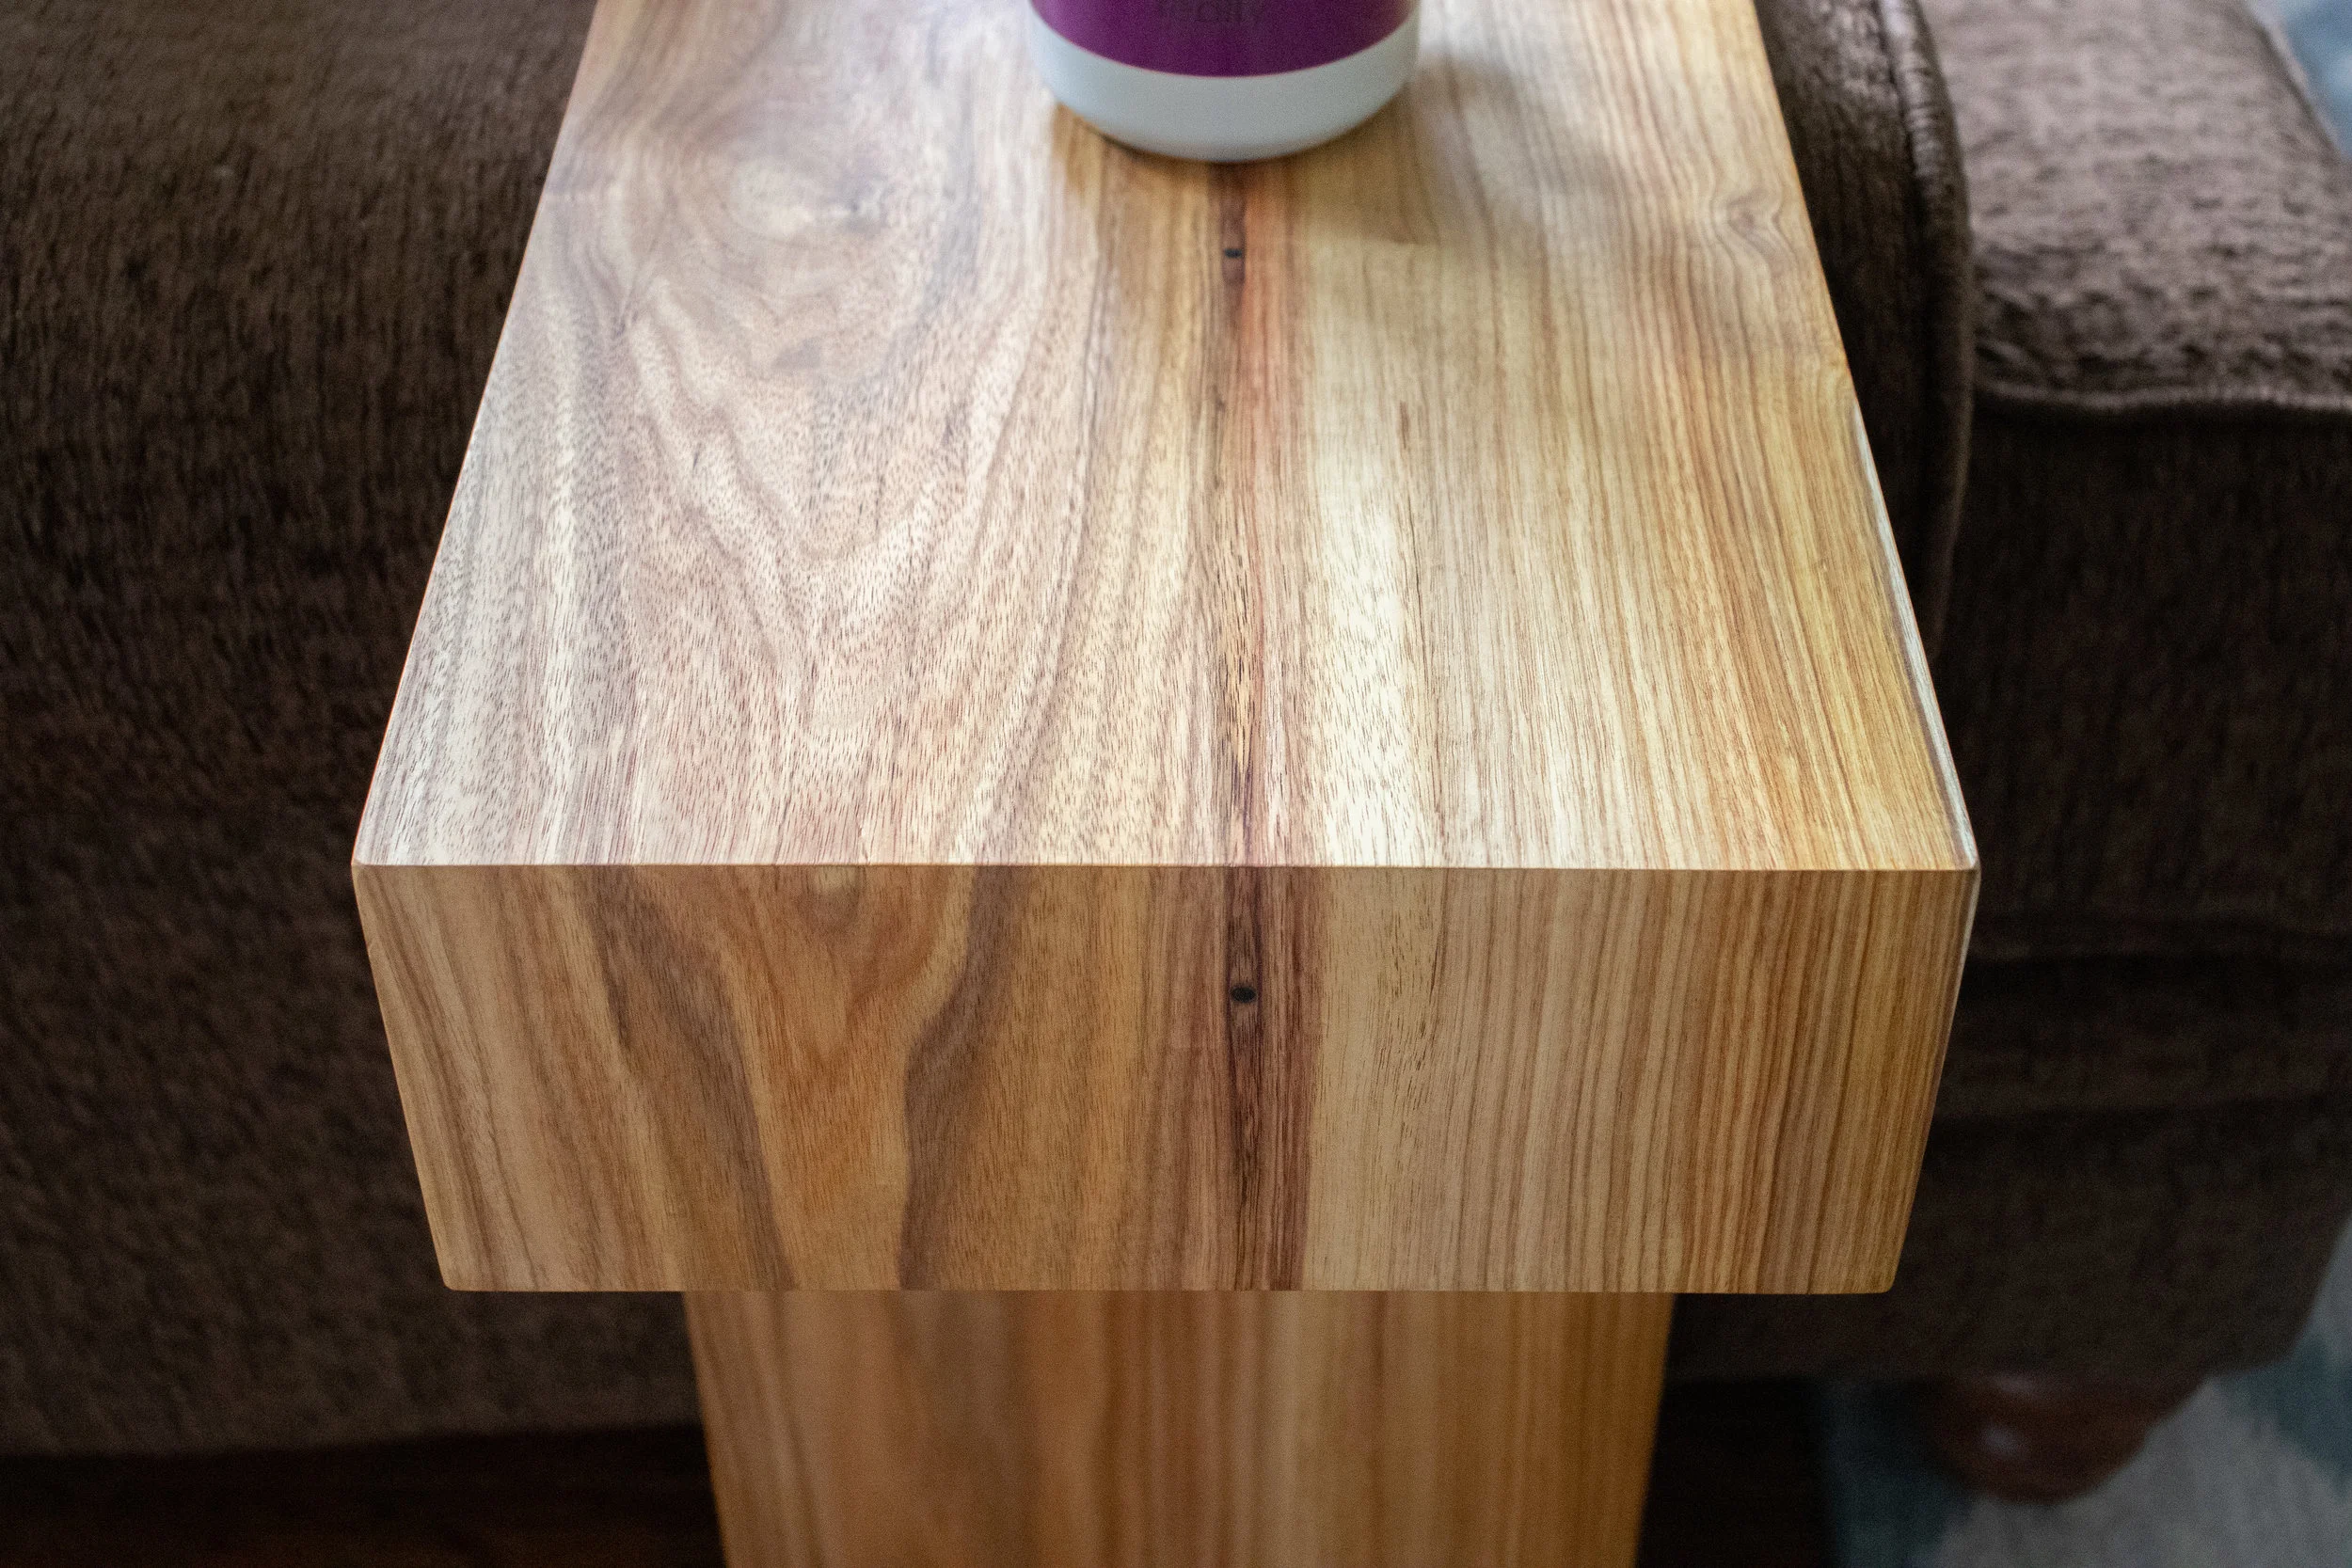
I love how the waterfall feature turned out, the grain flowing over the edge of the table is such a cool detail and those splines in there will make it super strong.
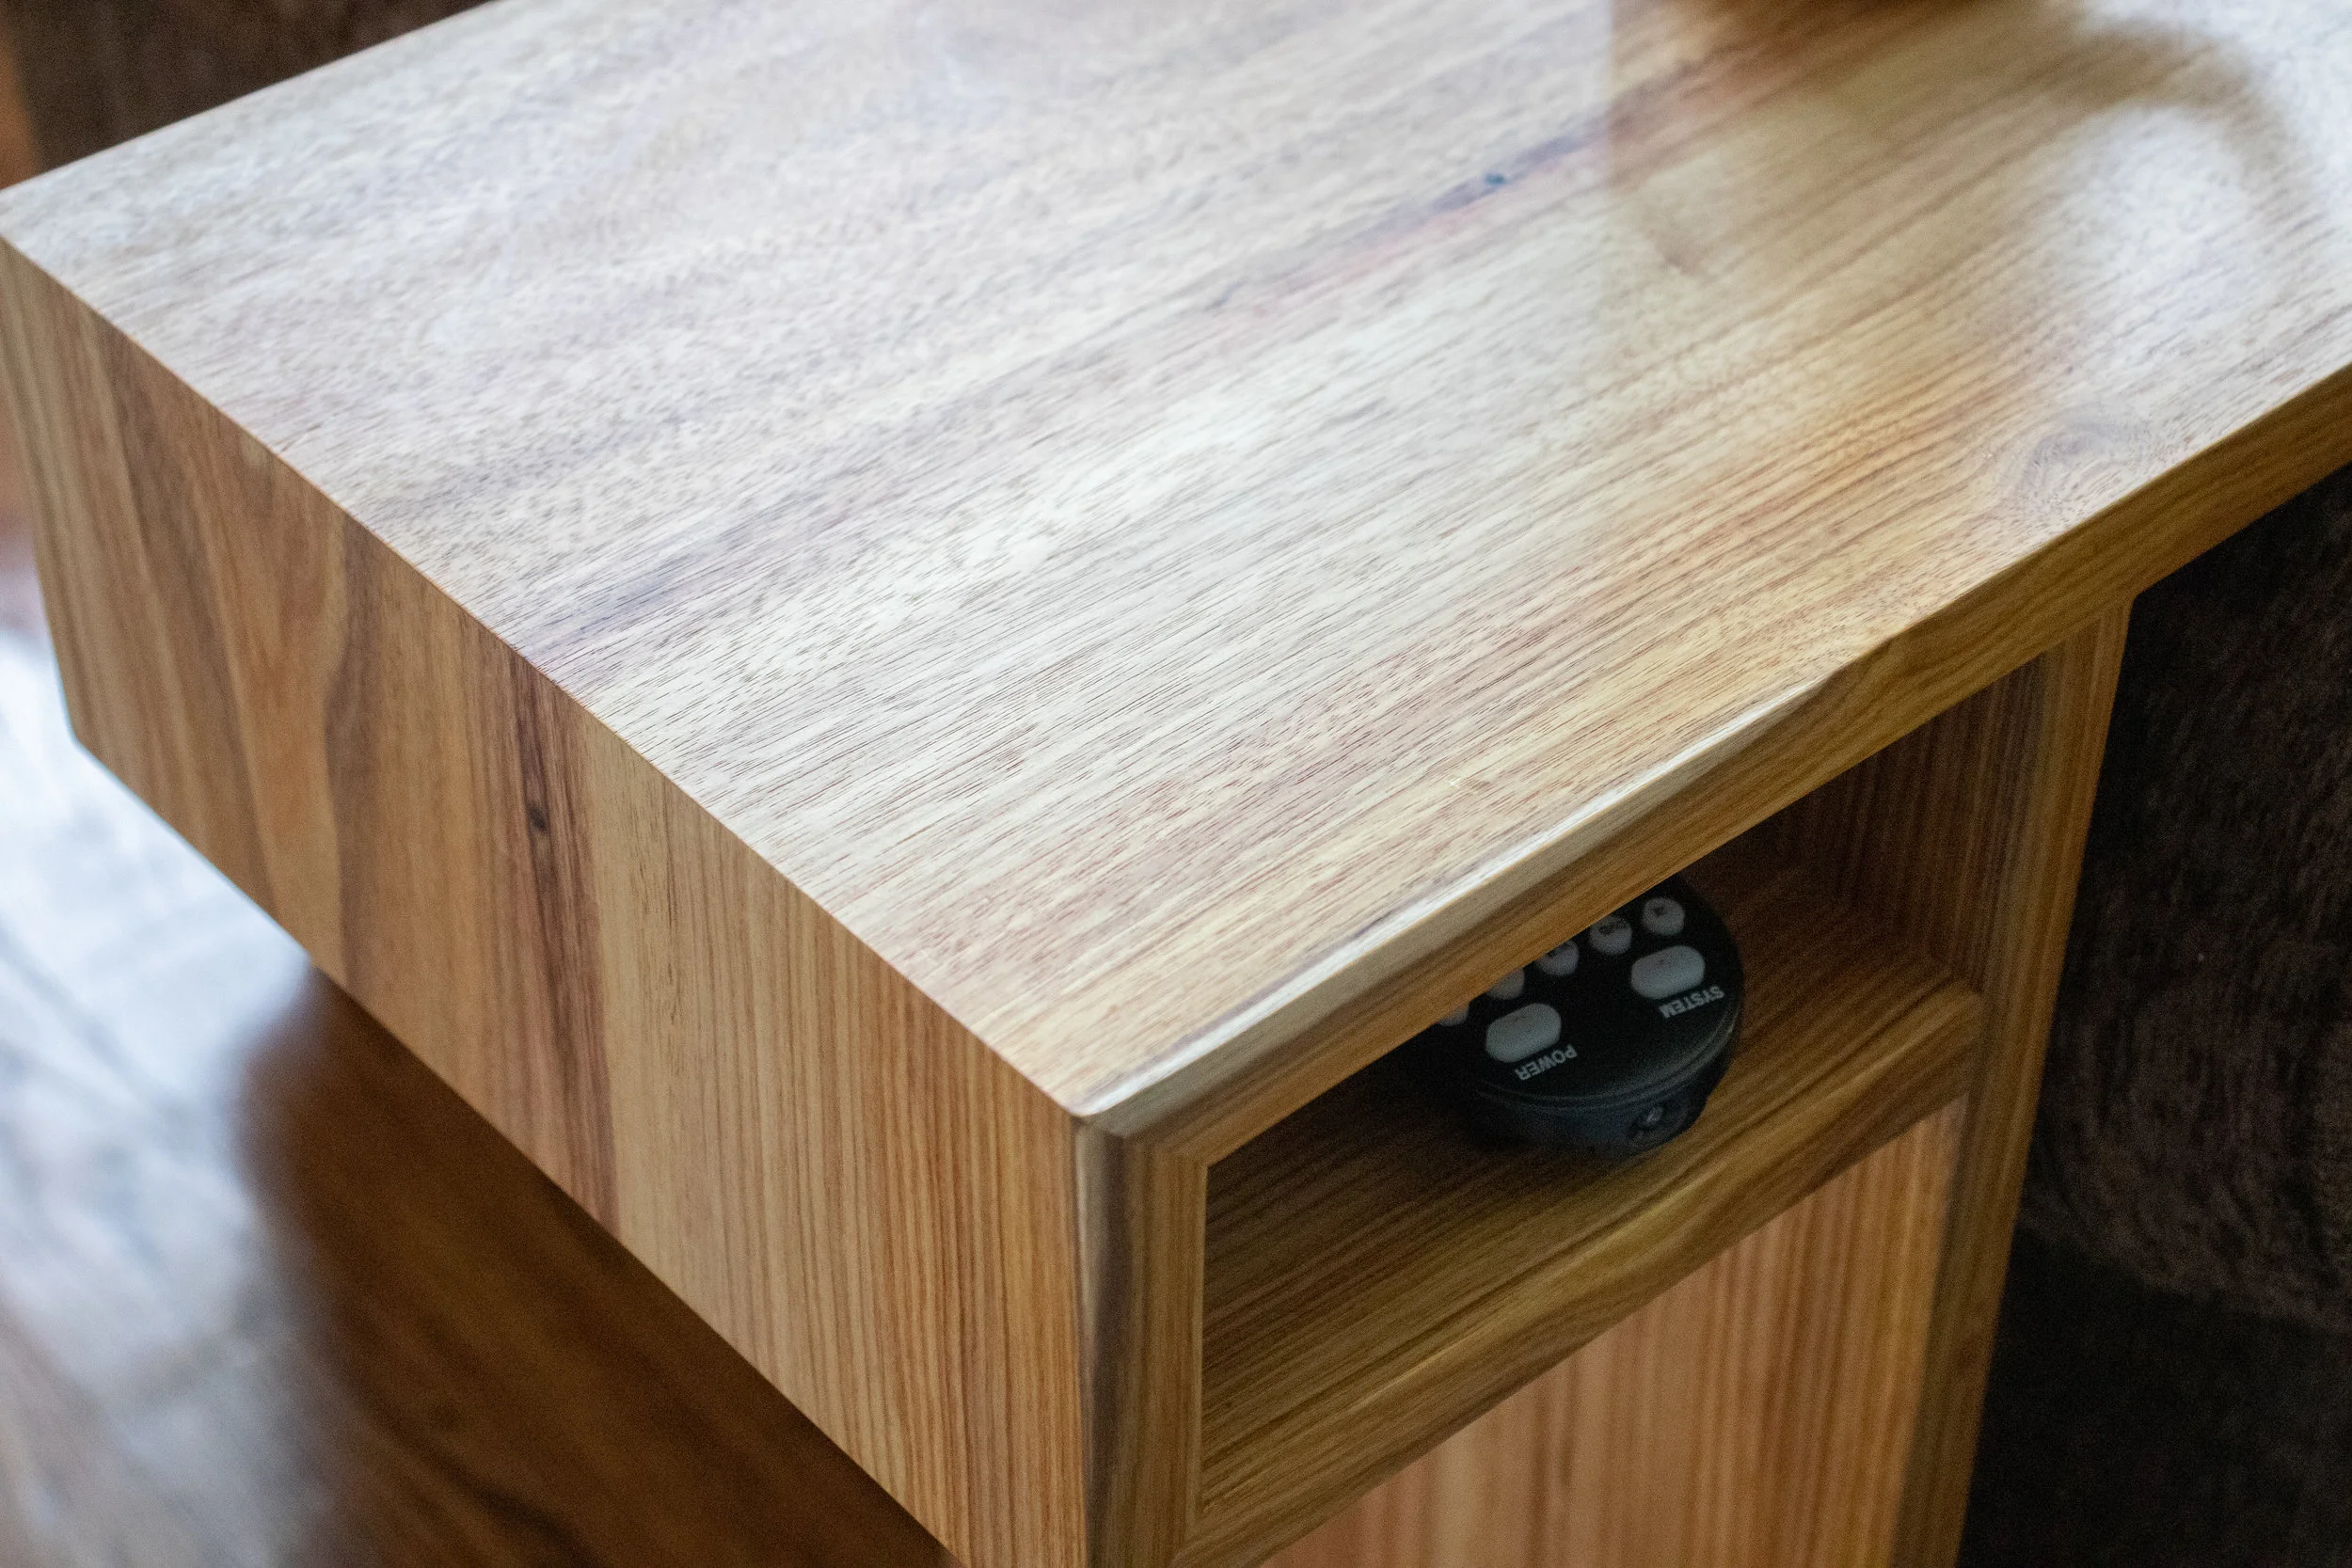
This table is the perfect height to go over the arm of my sofa so I can rest a drink and store things like changers (remote controls) within reach.
Its also great to pull up to the sofa to do some work on the laptop or have a meal in front of the TV.