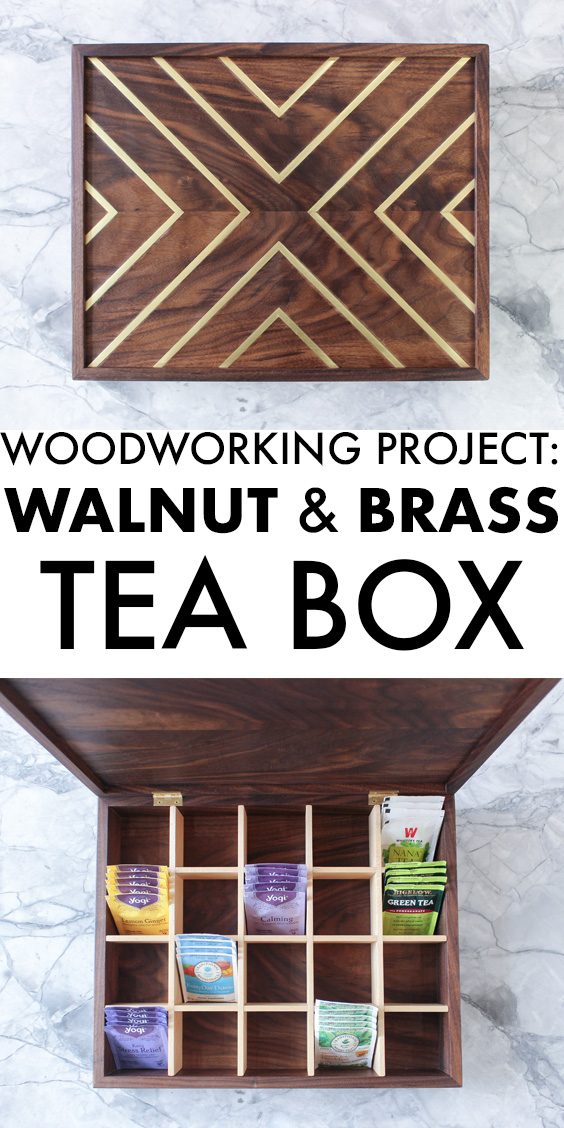
Walnut and Brass Tea Box
I feel like a spline miter box is a right of passage for a woodworker, so it's been on my list for a while, but I didn't want to make a regular ol' box... So I decided to add some special touches with a brass inlay on the top and brass splines to reinforce the miter.
If you're new to woodworking, there is actually a purposes for the splines. While miters are easy to cut and look great, they aren't that strong of a joint. The exposed end grain soaks up too much glue and they could break apart easily. It's always better to glue on an edge or face grain where the glue will basically sit on top of the wood (instead of absorb into the wood) and hold the wood strongly together. So when miters are the joint of choice they need to be reinforced somehow. There are a lot of different ways to do this, splines happen to be one of them! The glue sits on the surface area of the spline and the slot cut into the miter to create a stronger joint.
Typically these splines are made out of contrasting wood for a unique look, but I thought brass would be a really cool touch! I have never seen it done before, so I gave it a shot, and I am super happy with the results! (I put links to the brass and other sources below, they are all affilaite links)
Watch the full video below and let me know what you think!
Final dimensions of the box ended up being 15-1/2" x 12-1/2" x 3-1/2"
Each section for the tea is 2-3/4" square by 2" tall
It is on the big side. If I were to make it again, I would remove one row of compartments at both the length and width. Below are links to the tools and materials I used.
To create the two panels for the top and bottom I needed to resaw a 5/4 (1-1/4" thick) board that was 6" wide and 12" long two times. So I got a total of 4 pieces from that one piece of walnut to create the bookmatch for the top and bottom panels.
For the maple insert, I needed 3 pieces at 14-1/2" and 4 pieces at just under 12". All of them were 2" wide and 1/4" thick. I did this because the tallest 1/4" router bit I had was 1" tall so 2" was the perfect size to create the half laps.
The sides were 3-1/2" tall and were cut to length after making the maple insert so I knew exactly how long to cut them. 2 @ 15-1/2 & 2 @ 12-1/2 are the approximate measurements. The grooves I made in all the sides to house the top and bottom panels were 1/4" from the ends of the boards. Finally, I split the box so the cover was 3/4" tall.
The biggest problem I had on this build was the inlay. I didn't go deep enough when I made the grooves. So If you are planning on doing a metal inlay, route your grooves just a bit deeper than the actual metal.
Now I need to go drink some tea!