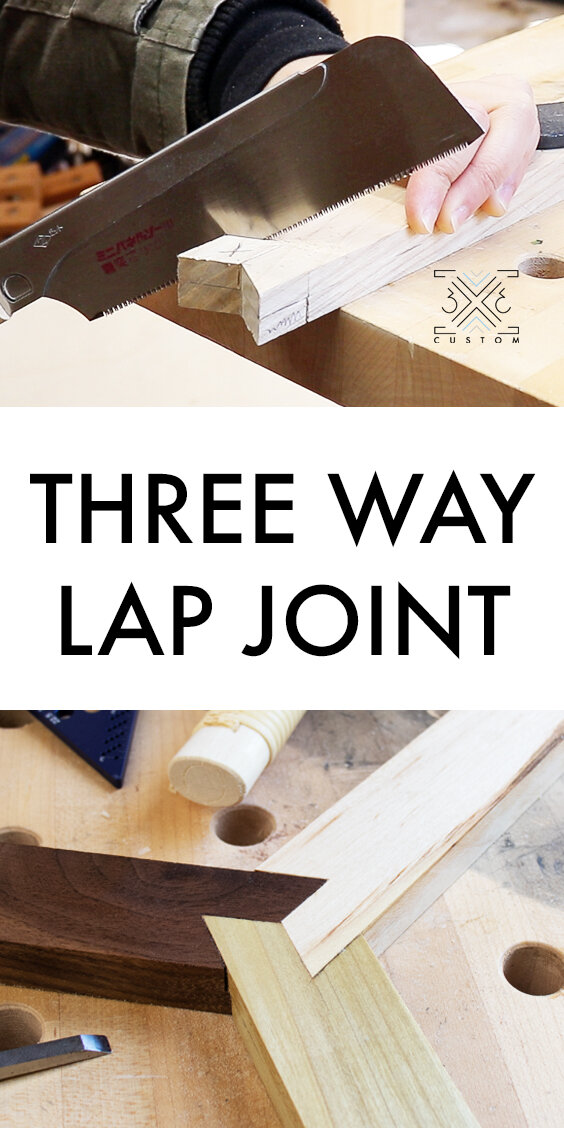
Three Piece Lap Joint
I saw a picture of this joint on Pinterest and wanted to see if I could recreate it. I experimented with a few different methods, mixing power tools and hand tools and the results were pretty surprising!
Check out the full video below!
*Links below are affiliate links, I get a small commission if you click on them at no extra cost to you! Thanks!
I started out by milling three pieces to be the same length, width and thickness.
Then marked center on both faces and both edges on all the pieces.
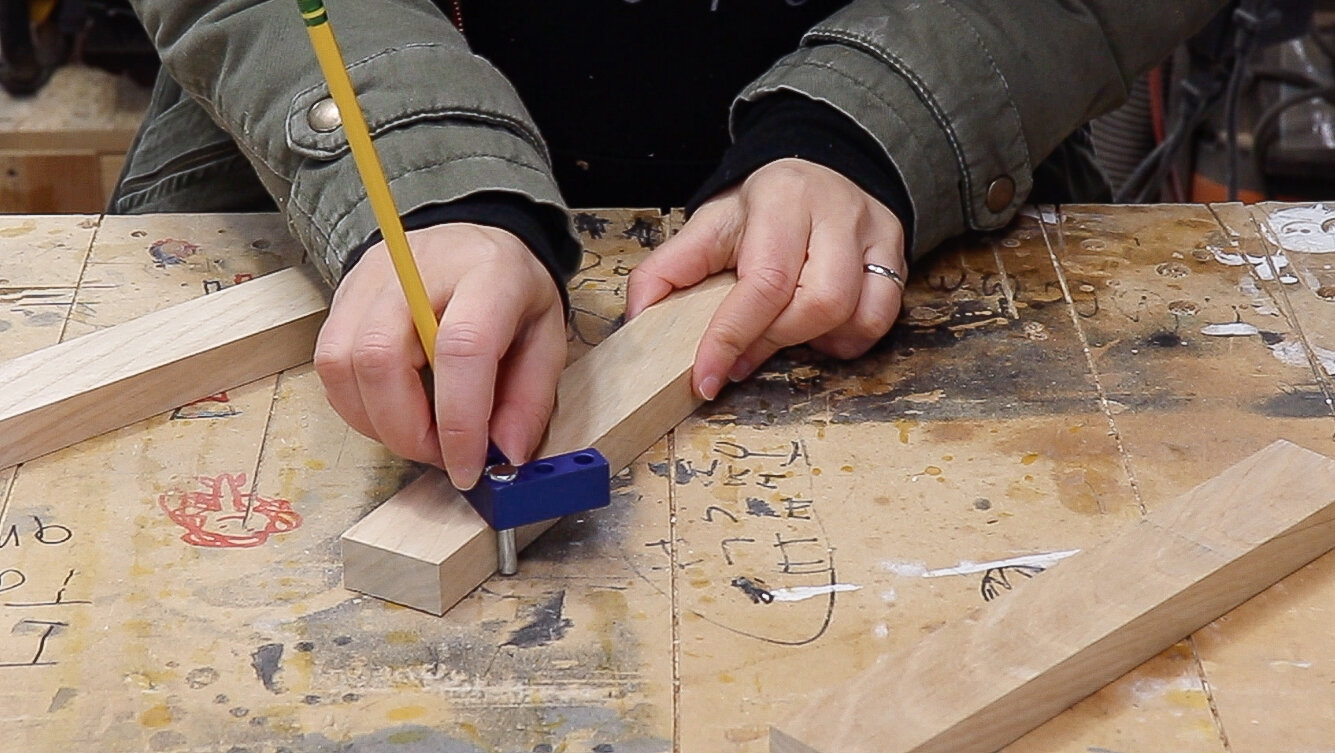
Next I marked a 60º angle from each corner to the center line.
Measured that line, (mine happened to be 7/8) then made a line at that measurement on the edge down from the end of the board and made another 60º line across the face at that measurement.
(This is fully explained in the full video - 3 Way Lap Joint)

The first step I decided to do was cut the 60º “V” shape on the end grain.
This can be done on the table saw!
I used a digital angle gauge to tilt my table saw blade to 30º
(I know it says 60º in the picture below but the smaller angle is 30º because 90-60=30)

Then I did a few test cuts to get the blade height and stop block in the correct position to cut out the “V” with the piece held on its edge.

And made the cut!
I repeated this cut on the other 2 pieces.

The next part of making the joint is to cut out the portions that create the lap joint.
I tried a few methods to do this:
First I tried hand tools only by cutting along all the markings with a Dozuki Saw.
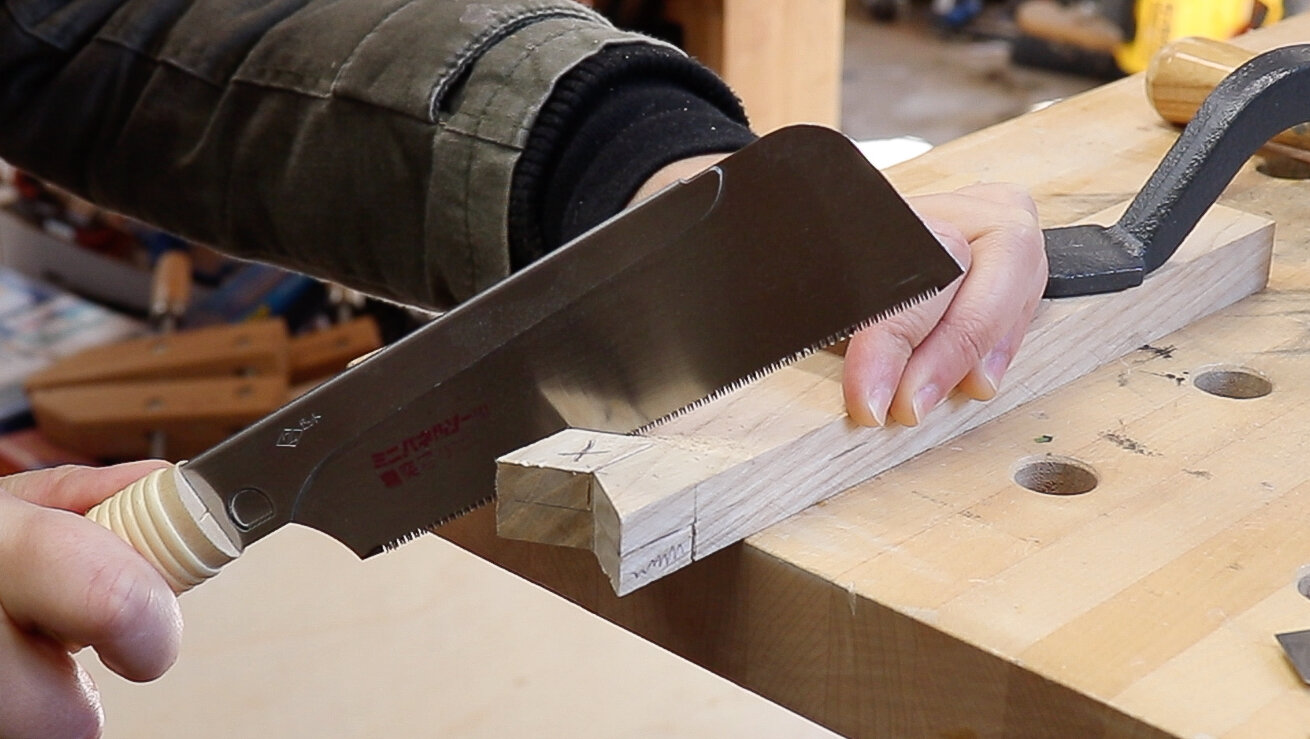
And then used a chisel to clean out all of the waste.

That was fun to do but I wanted to try out another method using power tools!
The blade on my table saw was still set up to the correct angle and height so I made one cut on a scrap piece of MDF.

Then ripped that MDF right at the tip of the point I just cut.

Then attached the 2 pieces of MDF back together.

Added some stops on the underside for repeatable cuts.

Then used a pattern bit in my trim router to clear out most of the waste.
I took multiple passes until the bit reached the halfway mark on the edge of the piece.

The pattern bit does a great job of cleaning up the bottom and edges, but it can’t get into the corners.
So before removing the template, I used a marking knife to score the wood reaching into the corner.

Then removed the waste with a chisel.

Repeated the same thing on both faces of all the pieces and the joint is done!
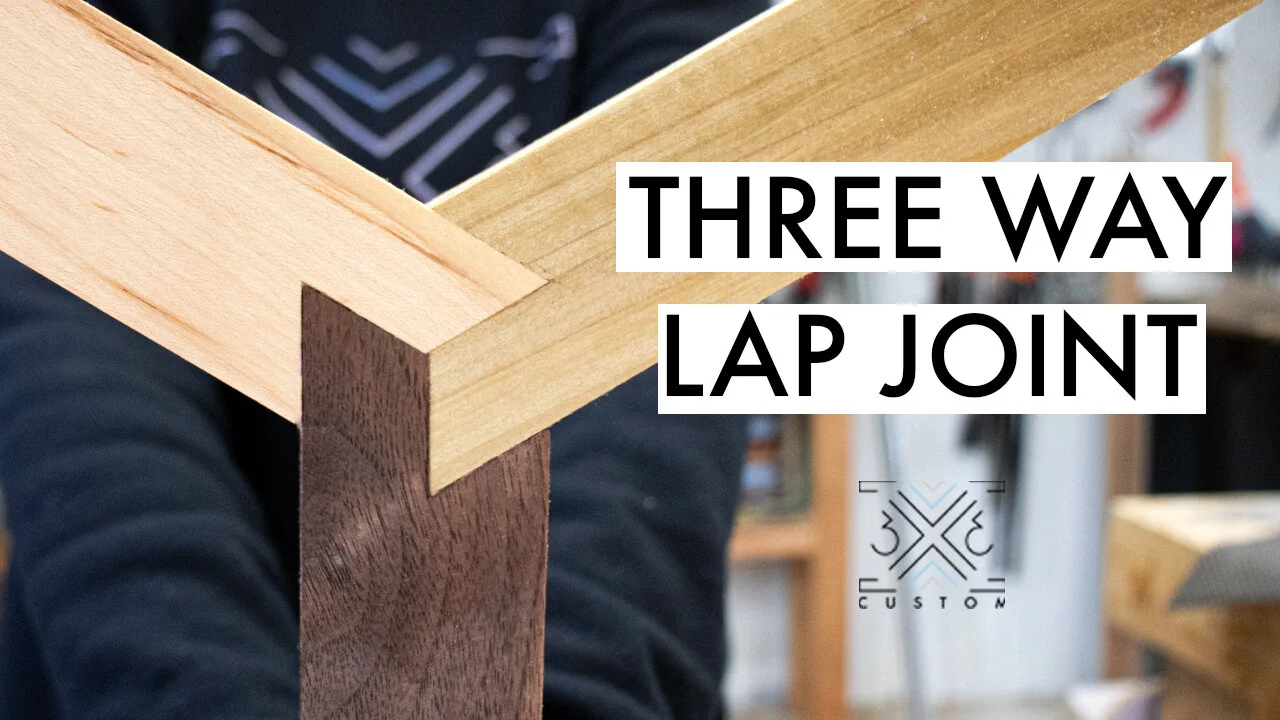
I decided to cut another set using three different wood species to show it off a bit more, and I am so thrilled with how this looks!

Since I tried a few methods to make this joint, I asked myself, which method do I prefer?
If I were batching out this joint and had a deadline, I would totally use the router with the template so that each one is as close to perfect in a short amount of time.
But sometimes woodworking is just about enjoying the process, so if time and perfection weren’t a factor, I would choose to make this joint using hand tools only.
My takeaway from this is that there is no RIGHT way, just a way that works for you!
Stay safe and healthy!